We generally don’t do back to back reveals, but consider yourself spoiled, because TODAY we’re showing you the phase 1 makeover we did in the little girls’ bathroom!! (If you missed yesterday’s playroom reveal, check it out here.) Last week, we put the pedal to the metal to focus on tying up a few project loose ends and that included putting a few finishing touches on this sweet bathroom.

That used to look like this…

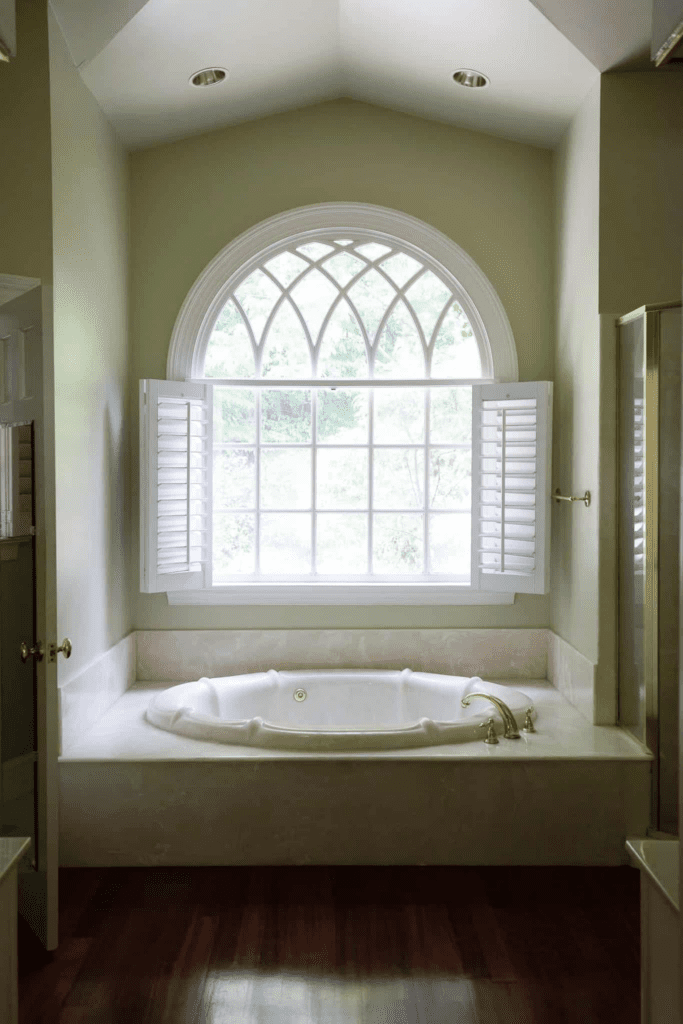
But really started off like this when we moved in last year:

Greta’s room has an en suite bathroom in her bedroom, so this bathroom (with petite countertops and toilets! so cute!) is perfect for our little girls, Faye (6) and Polly. You can see Polly, age 3, standing in front of her sink proudly in the first photo above. I should note, Polly is tall for her age but it was so fun to improve this bathroom now that is just their size and will serve them for the next few years.
The makeover was not one that we had on our radar at all this year. But during our current exterior renovation, one of the biggest project creep questions that came up was–does this mean it’s time to replace the rest of the windows?! We were planning on changing a few out every couple months over the next year, but suddenly being faced with re-facing our entire exterior–it made sense to replace the windows at the same time. (See how the budget breaks down for all of that project creep here.) The little girls’ bathroom needed a larger window to balance the exterior, which brought this phase 1 makeover as a result to make it functional again.
So with the new window in place (it’s centered on the exterior portion), we got to work with a few easy DIYs, big impact pieces.

Here’s how that angle looks now!
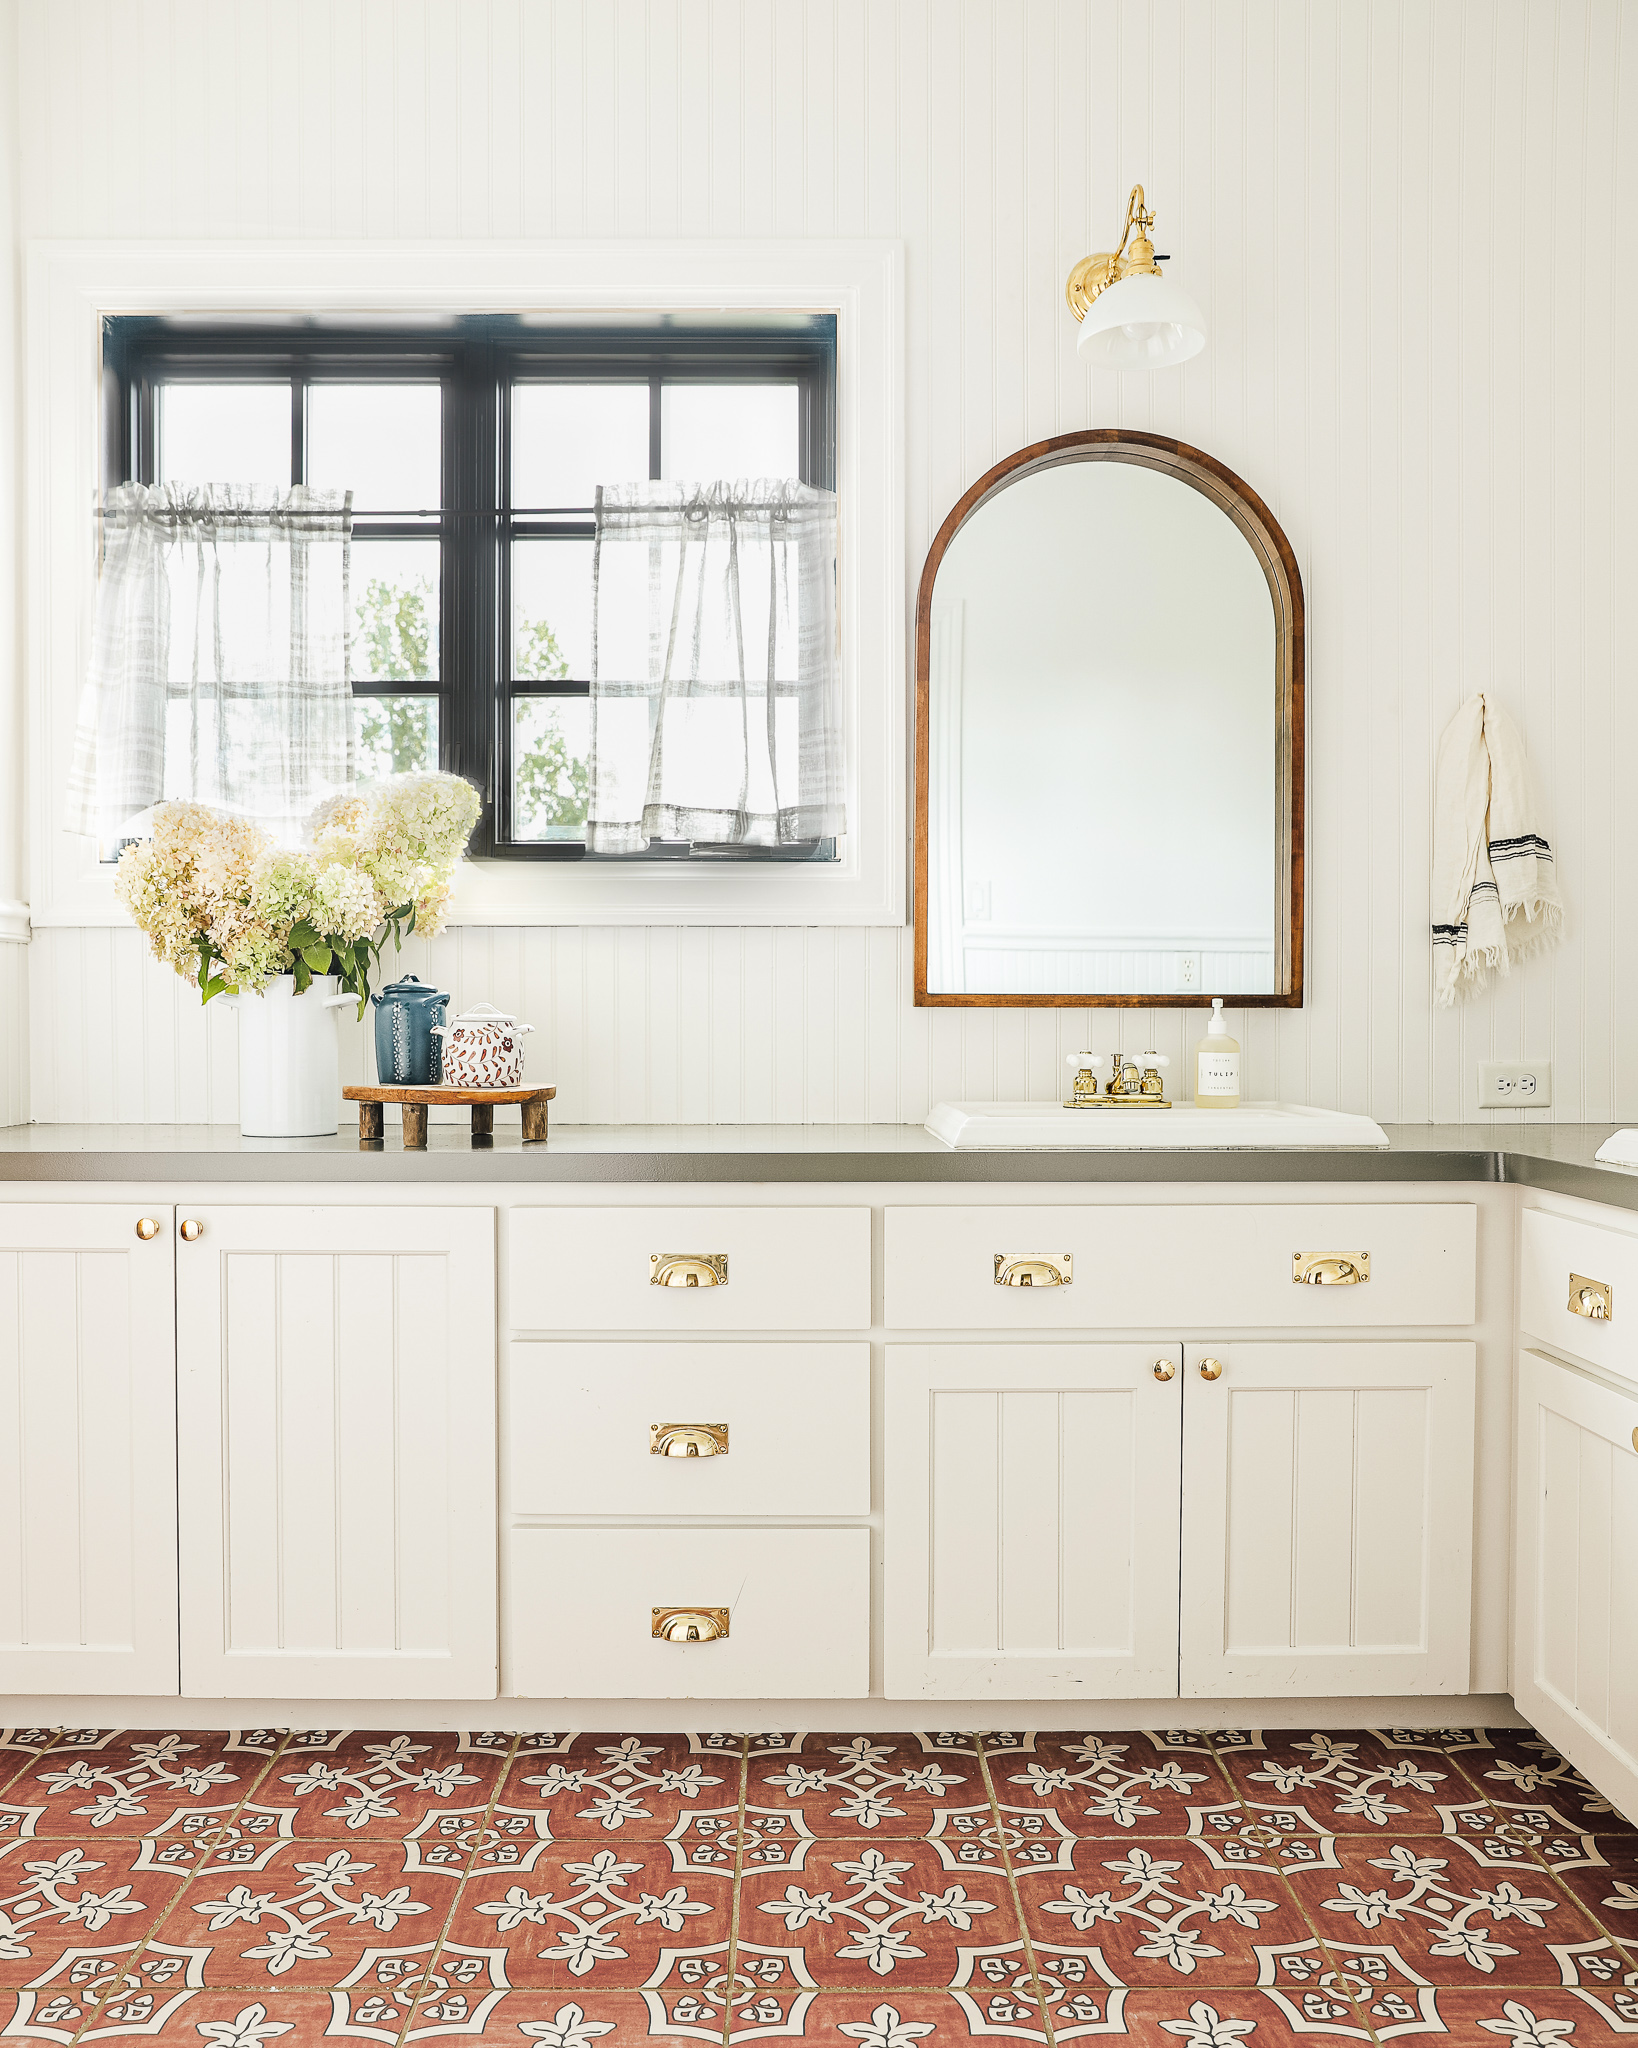
We kept the layout, cabinets, sinks and countertops (although we painted them with this $20 countertop paint in Putty!) and enhanced the room with a few new pieces including lighting, mirrors, hardware and peel and stick floors! (Every last source is linked at the bottom of the post!) We also added 4×8 sheets of white beadboard on the mirror walls from countertop to ceiling. The bathroom had some beadboard before so it was a natural accent that added so much texture and interest to the light walls.

The wood arched mirrors add so much warmth the the room but I actually ordered the wall sconces before anything! Ideally, a bathroom has two sconces on either side of a mirror, but this layout didn’t accommodate that with the window and mirror nearly touching. I’m happy to report the sconces, mixed with overhead light, provide ample lighting and look so charming while doing it.

Here’s a look in this direction:


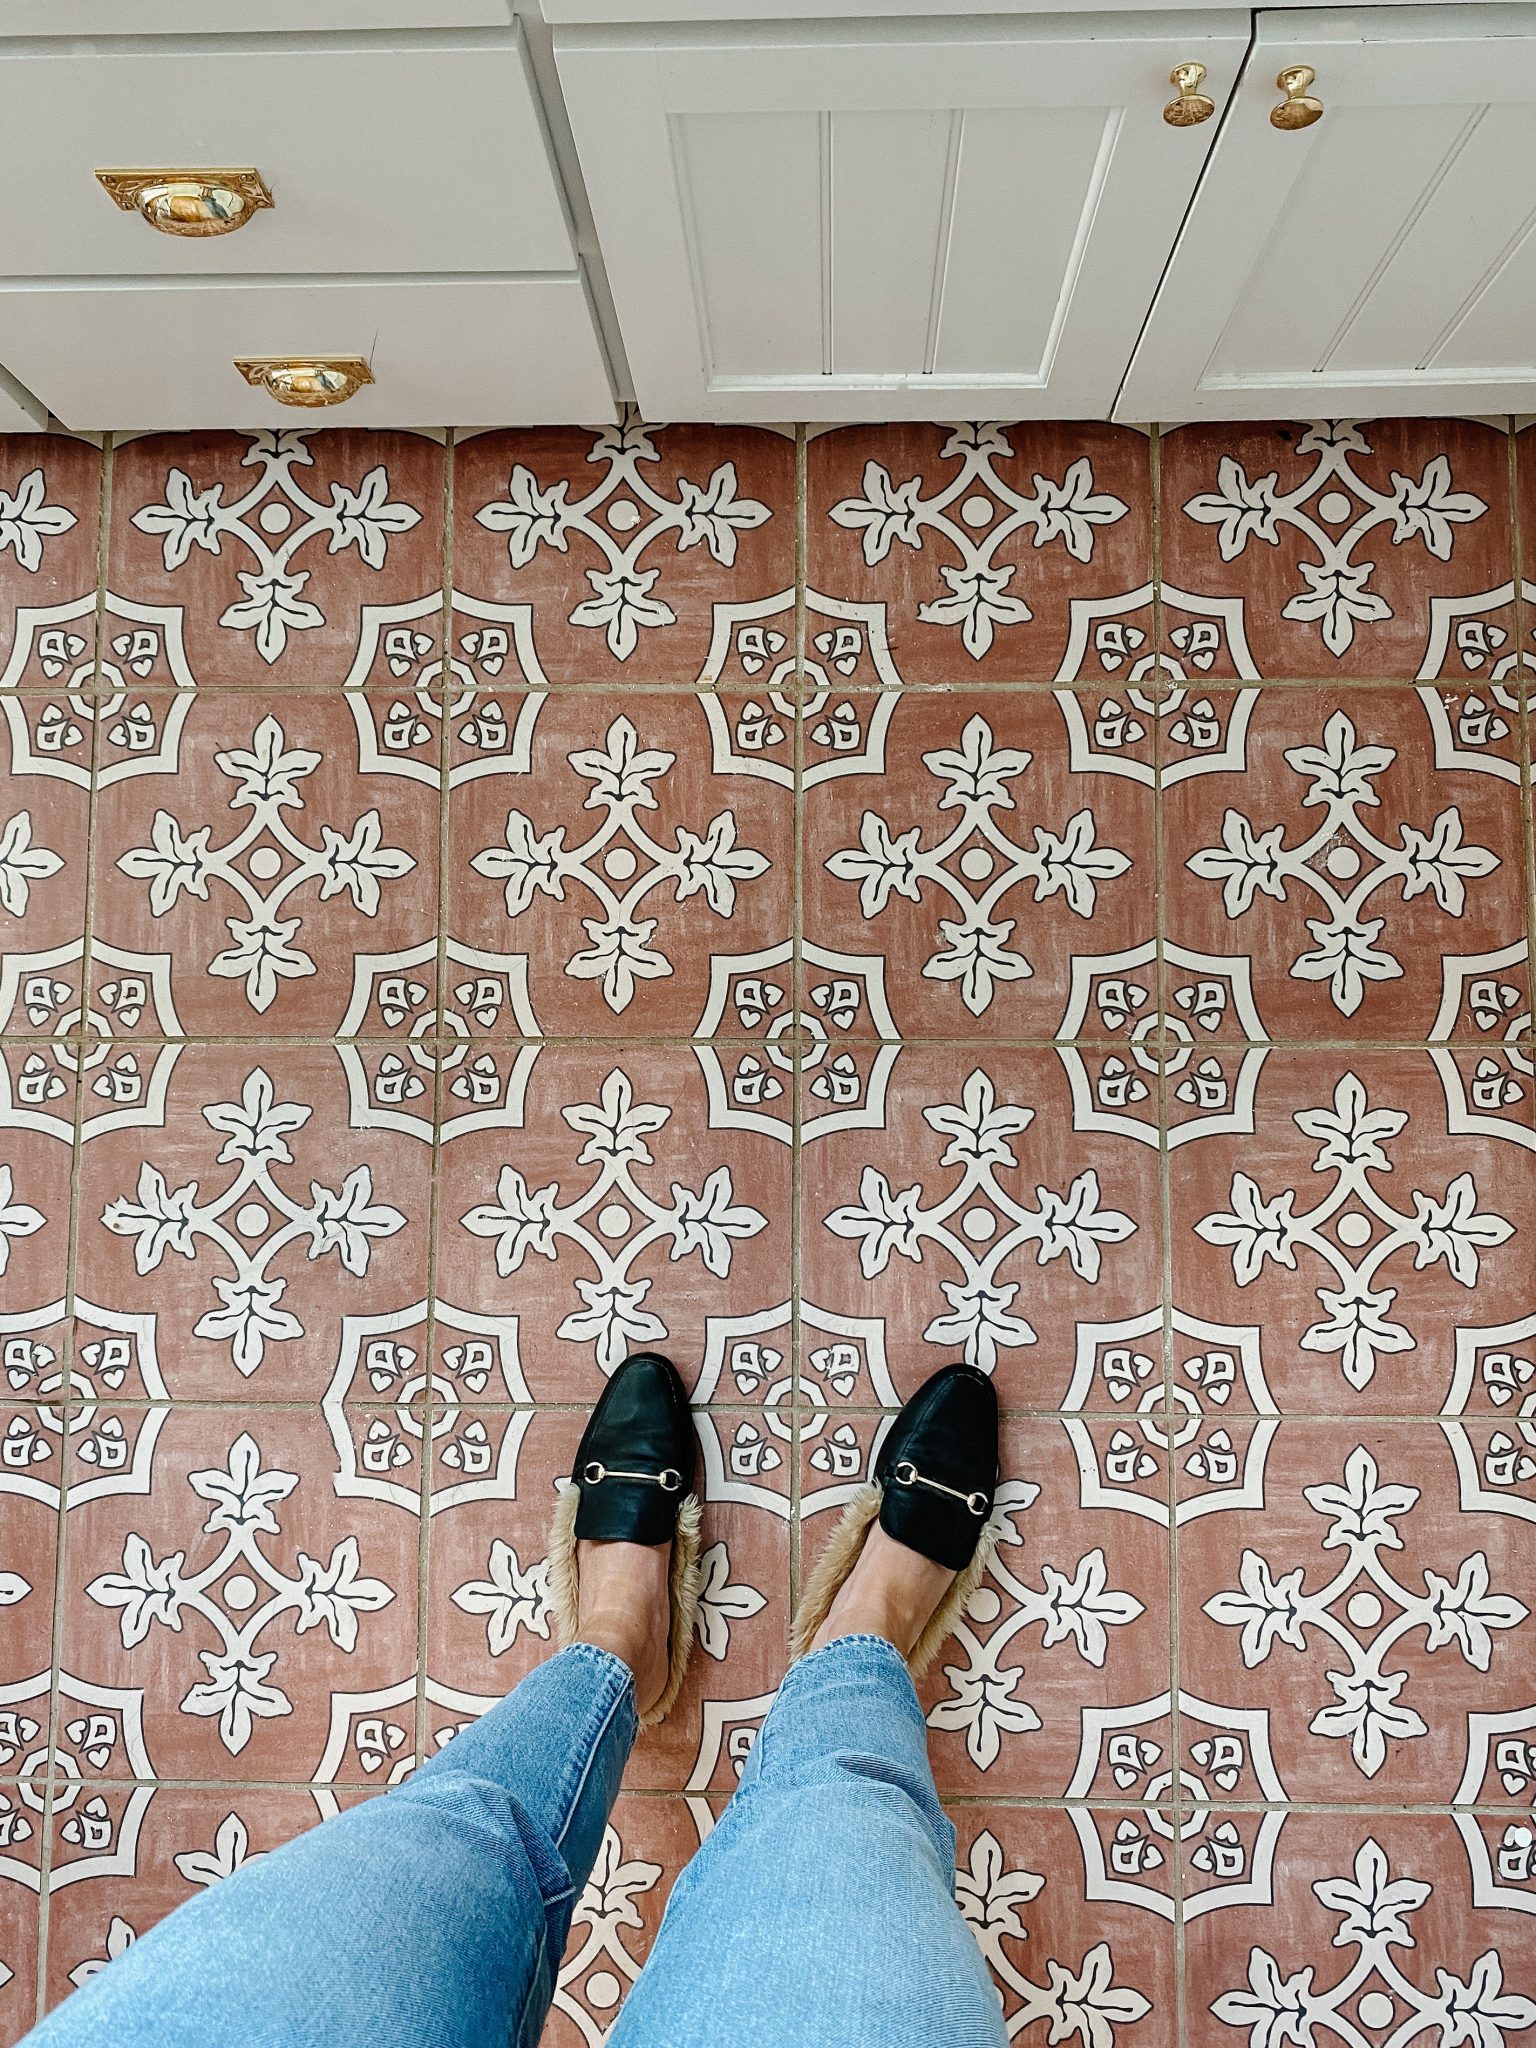
Swapping the hardware (one of my favorite tips for dressing up old cabinets!) really gave the old cabinets a new life. And the peel and stick floors (read all about those here) added a fun color to the room and after a few weeks, we have had no issues at all–will keep you posted on that front.
We put two small white hooks from Target on the side of both mirrors to hold a hand towel. Simple and efficient!

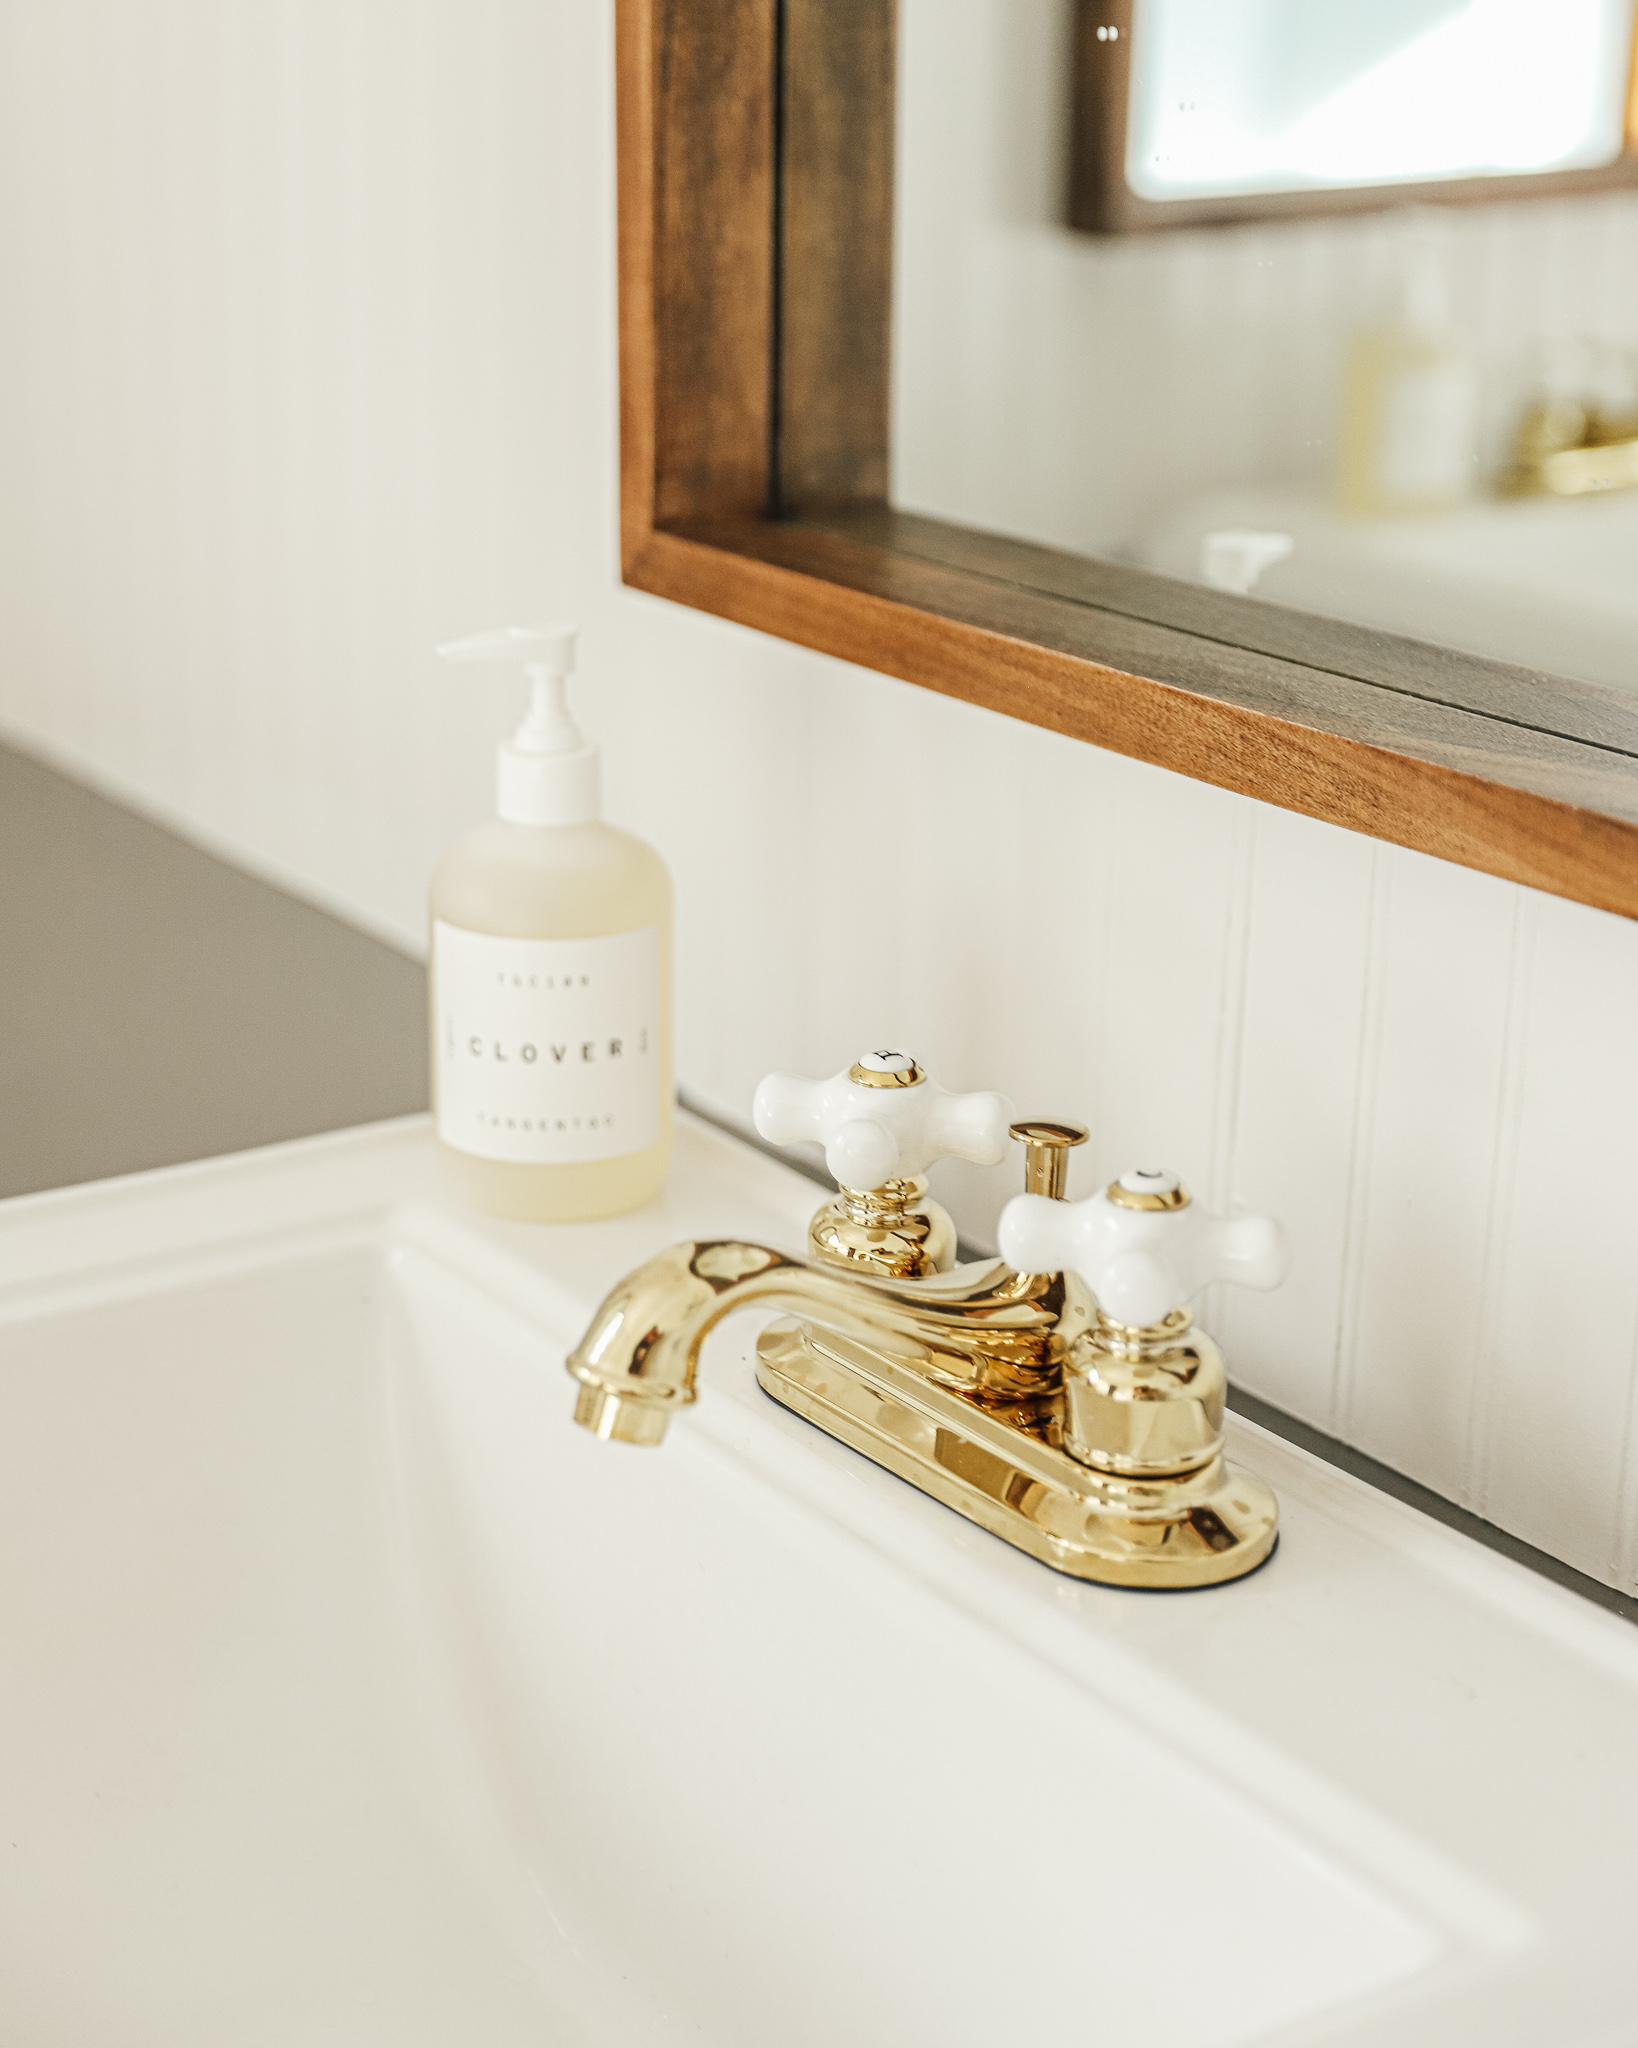
These faucets were an inexpensive swap and I LOVE the hot and cold handles. They are F-U-N to turn on, just ask Polly. Haha.


Through the vanity area of the bathroom there is a door that separates the toilet and shower/tub. Besides painting in there and adding the floor tiles adding a new hook rack, and laying a bath mat–we didn’t change anything.

It was quick and easy and high impact–all of my favorite things. Sources below!
Bathroom Sources
Wall Color: Sherwin Williams Snow Bound
Sconce
Arch Mirror
Hand towels
Faucet
Hand Soap
Cabinet Hardware
Floor Tile
Curtains
Cafe Curtain Rod
Art
Ceramic Canisters
Bath Mat
Shower Curtain (similar)
Towel Hook Rack
Corner Wicker Hamper
Wood Pedestal
Countertop Paint in Putty

Hi Julia! I just loved watching this sweet bathroom come together! Can you give an update on how the peel and stick tile is doing? I’d like to try it in our small bathroom, but we don’t have as defined grout lines, so they’d need to match up completely. Would you recommend?
So far, so good!! Would highly recommend them!
The floors are so fun! My family and I are about to relocate and move into a rental that’s great, but just not our taste. Would you recommend using the vinyl in a rental?
Link for bead board? Individual pieces Or panels?
We used the big 4×8 sheets for this!
This is lovely! It has been fun to see it come together! I also look forward to seeing how you update the space further down the road. My bedroom and living room are plagued with windows that are centered on the exterior, but quite close to the corners of the rooms inside. I have struggled with so many layouts trying to balance them and still can’t get it right. And it makes “high and wide” curtains impossible…or at least the “wide” part. I can’t wait to see how you tackle the window issue in Phase 2! But what a peaceful yet fun space to enjoy right now! Thanks for taking us along!
Julia, would you mind explaining the process of painting the countertops a bit more? I saw your link to Amazon, however, it looks like one then has to go to a paint store to get the color added. Yes? What type of paint brush did you use? How many coats? I need to redo some countertops and this would be perfect!
The instructions are REALLY easy and we honestly just followed the can. But! We actually did the exact same thing on our very first kitchen nearly a decade ago. Read about that here! You can buy it at the hardware store or Amazon and take it to the paint counter and they’ll add whatever colorant FOR FREE. I’d brush the edges and roll with a foam brush. Two coats did it for us!
I love it! Turned out so good! From the comment above I’m assuming you did not tint the counter paint? If you did, what color did you use. Thanks!
We did have it tinted to PUTTY