How we layered stain to take a wood countertop from dark cherry to a white oak look!
October 7, 2020


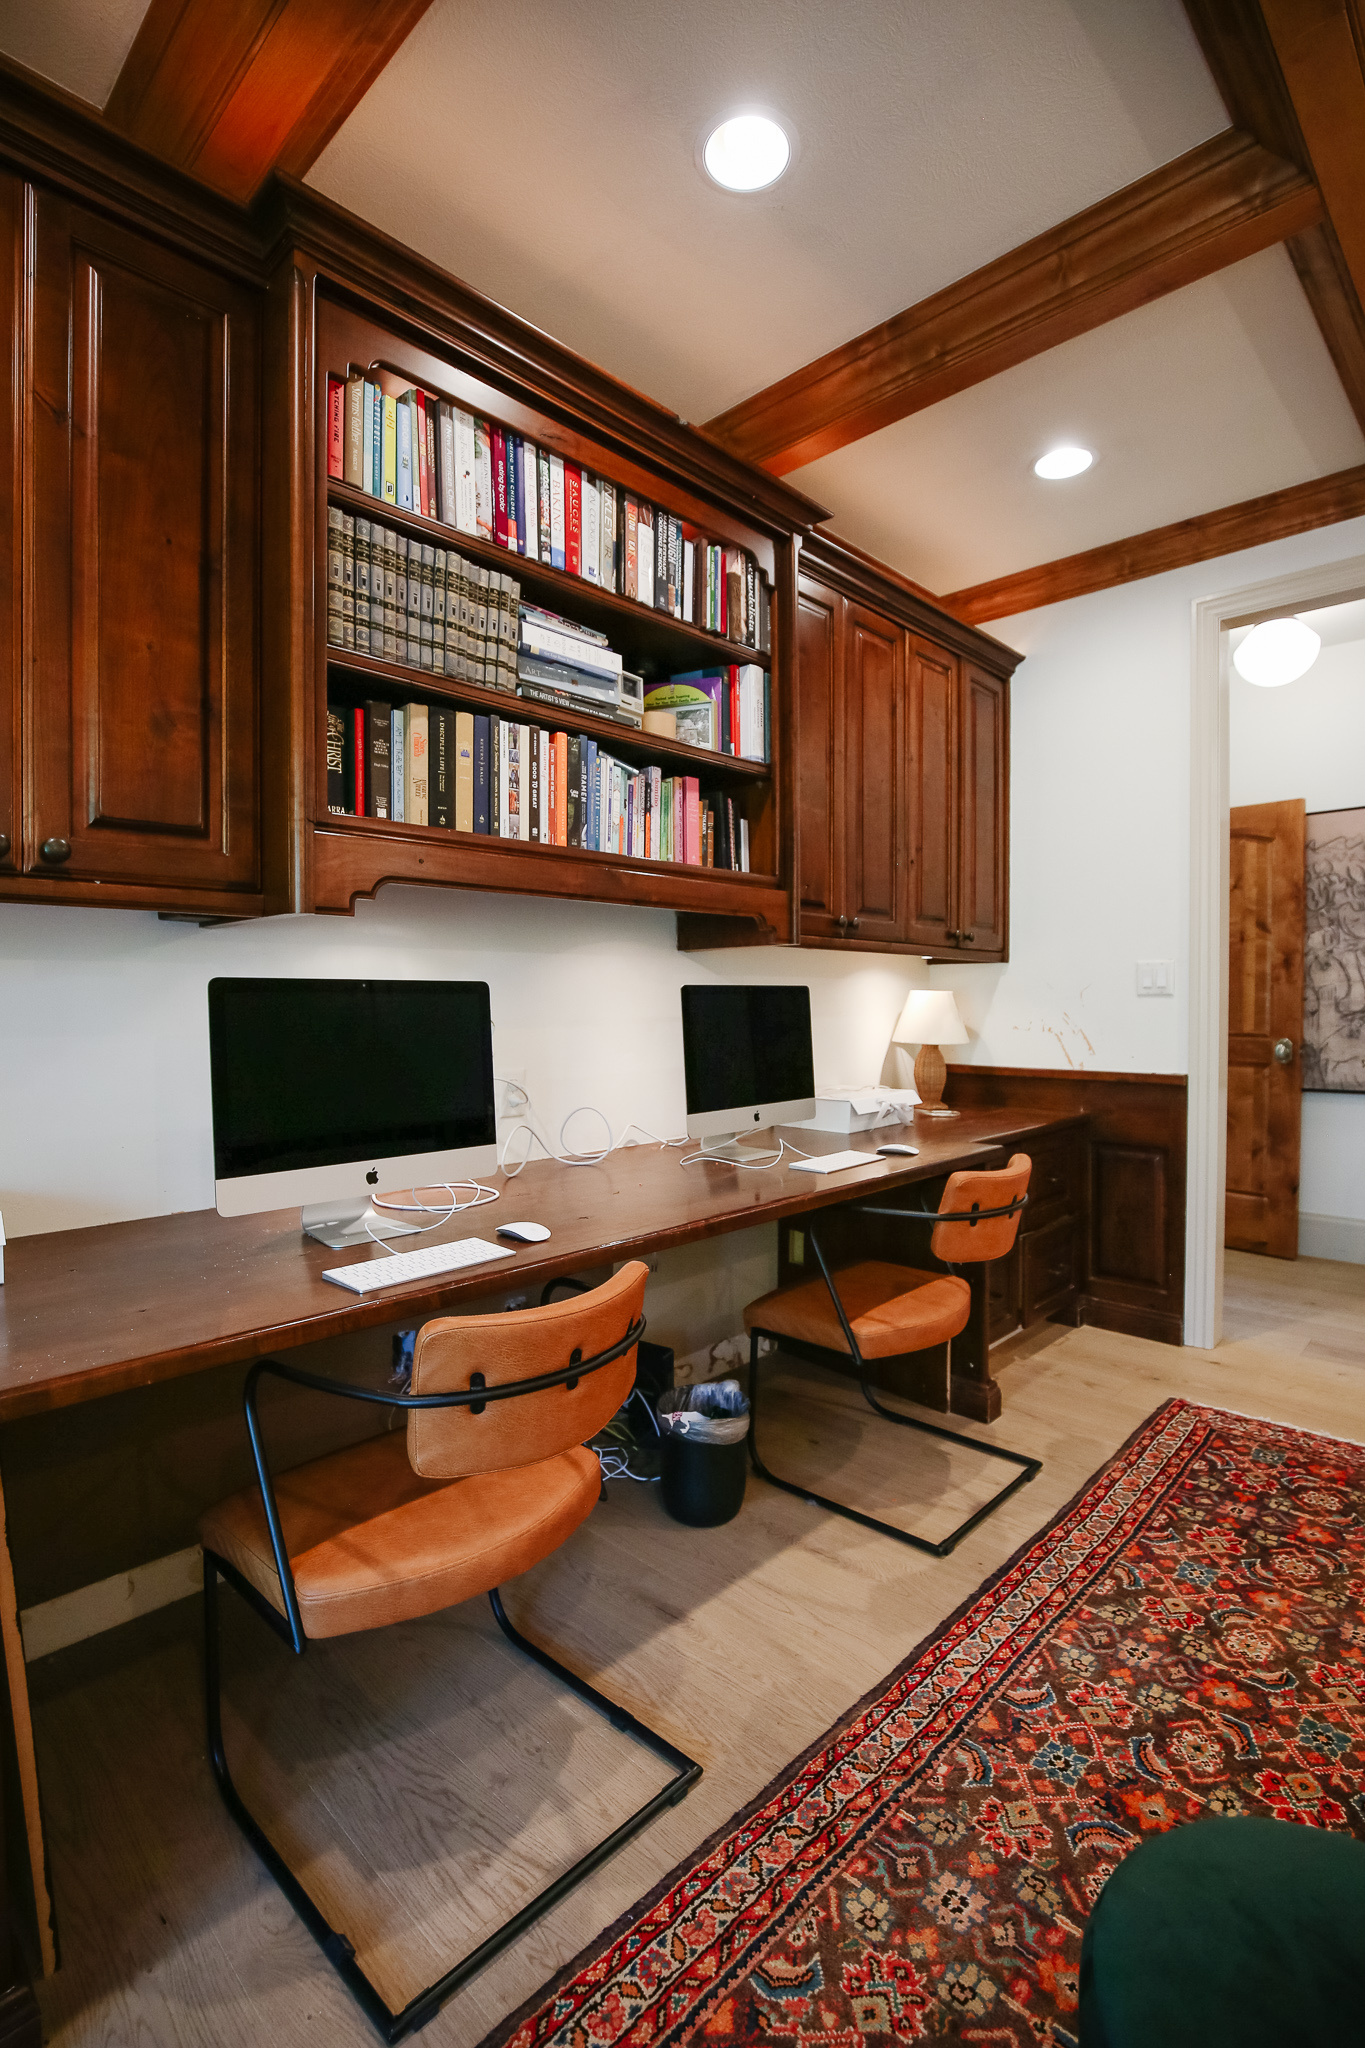
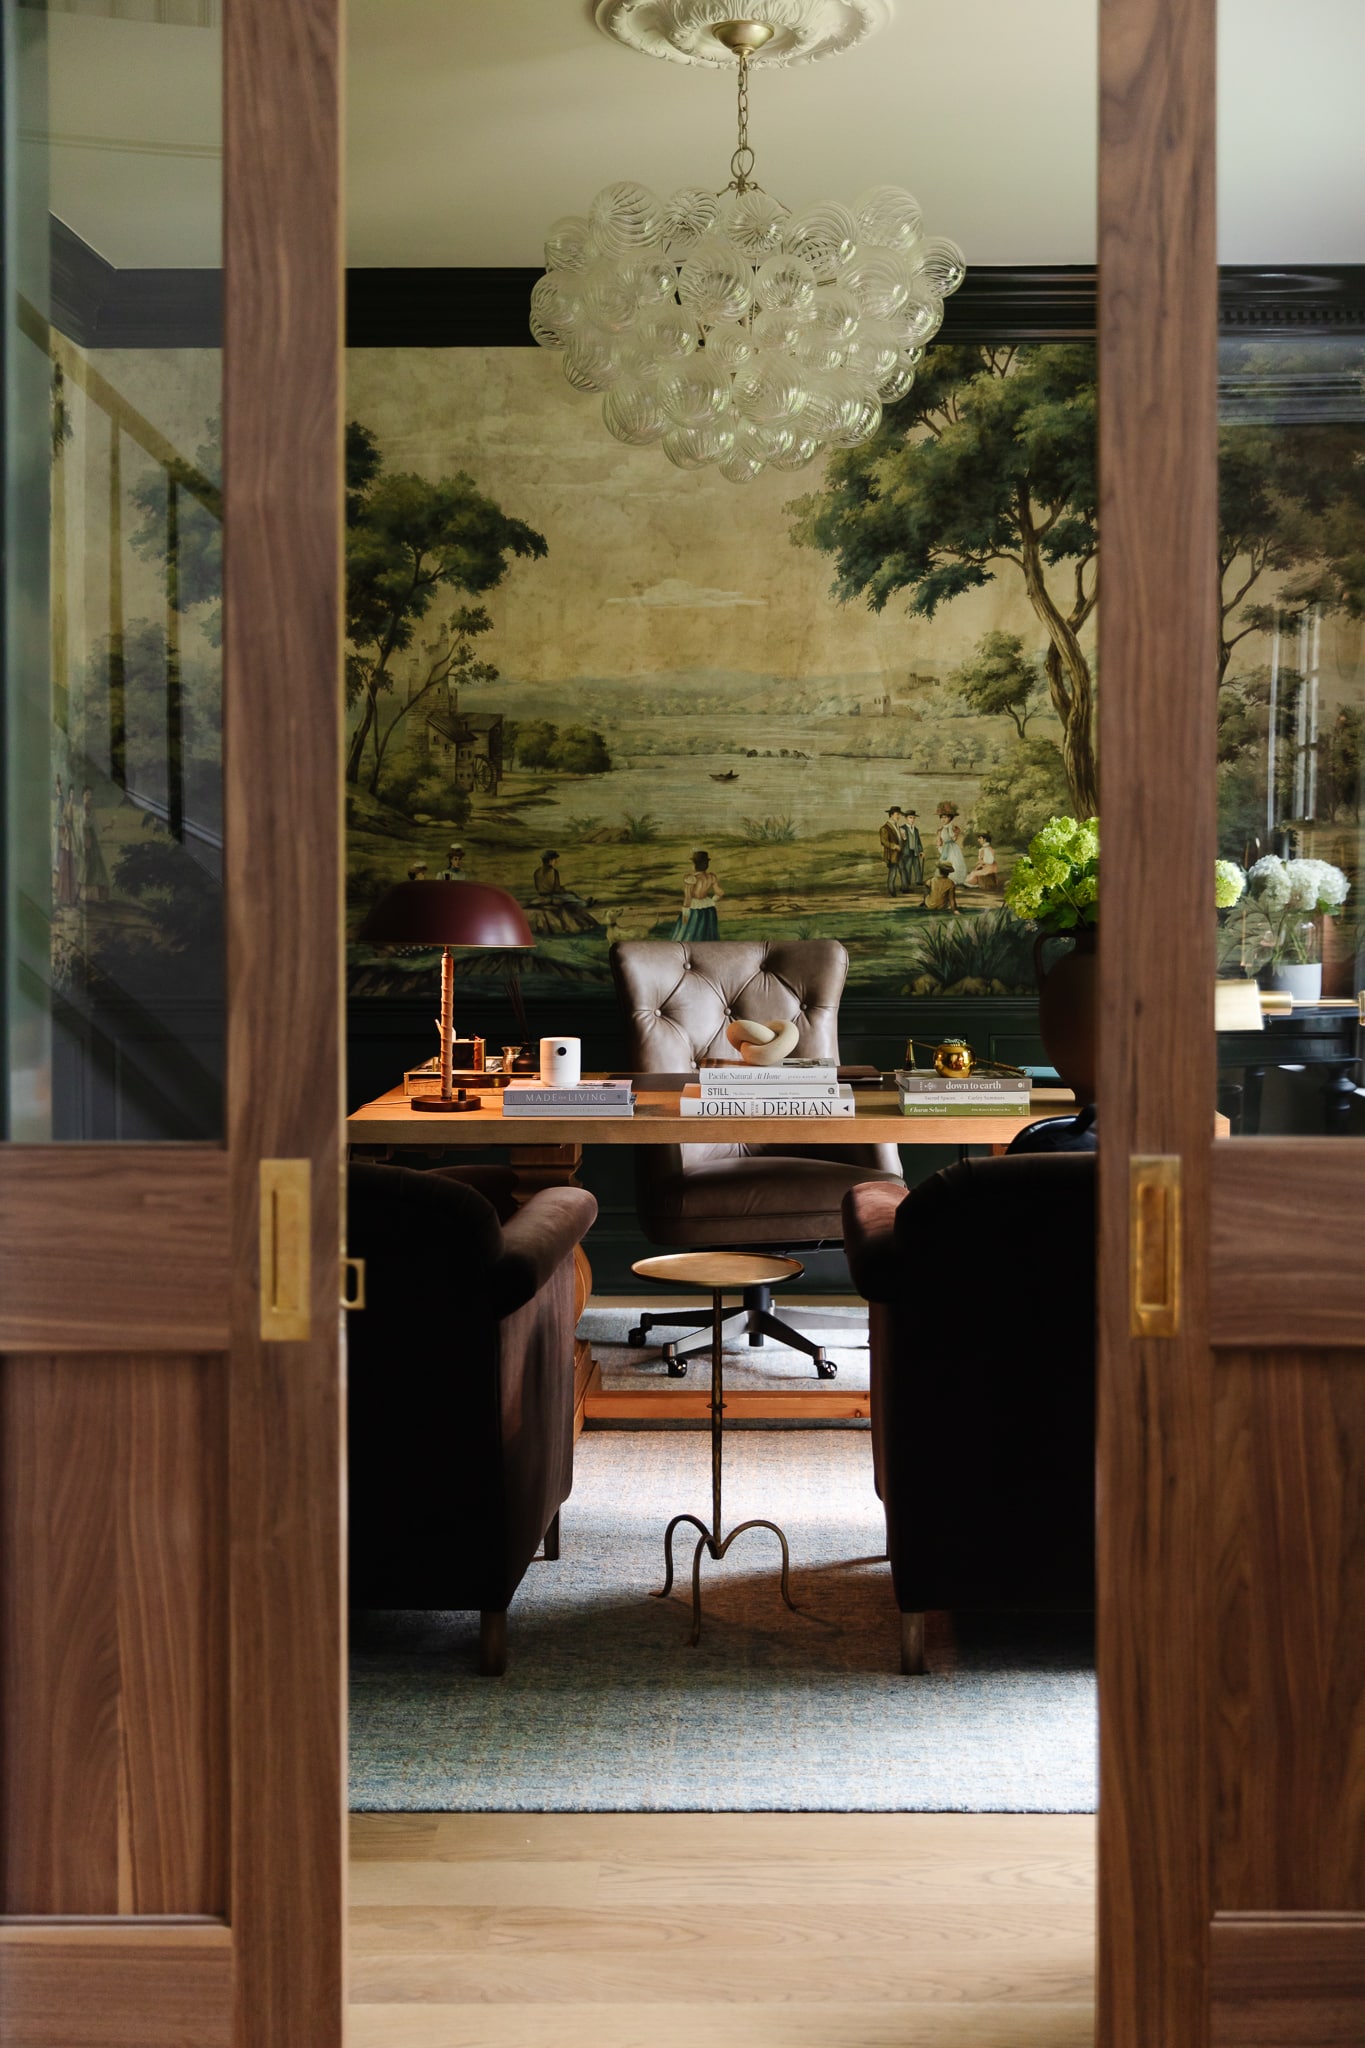
We still have a few finishing touches to put on the girls’ office (see all the plans here!), but over the last week we tackled a really fun DIY that transformed the dark cherry stained wood countertop that was there into a white oak looking one that matches our floor a little better. And today, we wanted to walk you through the process of layering stains because WHAT A RELIEF THAT PROCESS WAS!

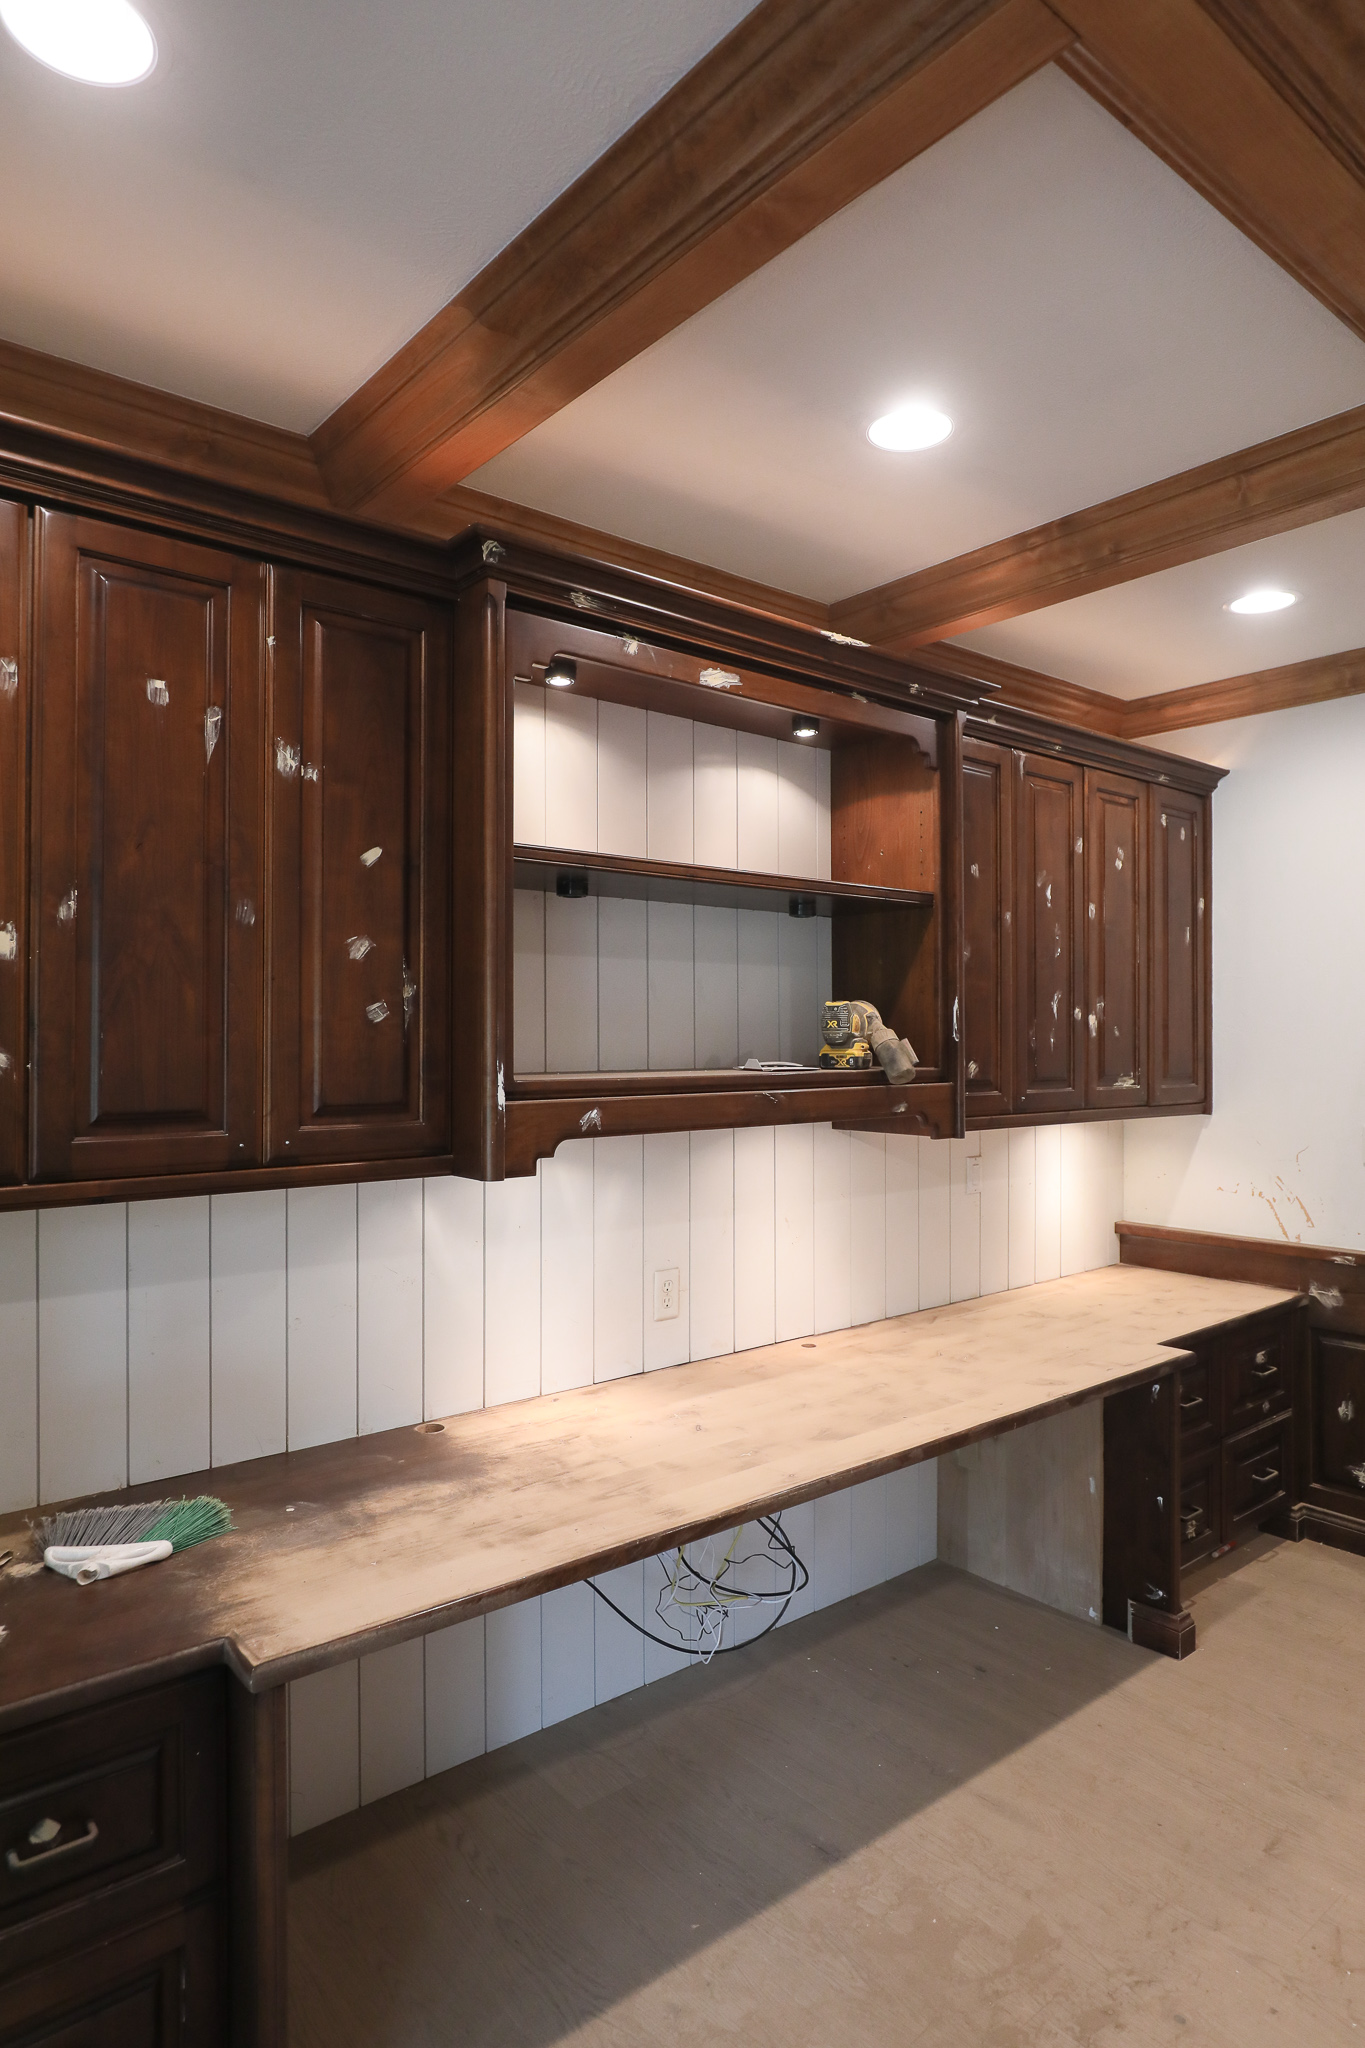
Here’s how it looked when we started. The cabinetry and desktop were all stained the same dark cherry:
One of the first things we did in the room was sand down the countertop because we really wanted to re-use it and wanted to make sure it was going to be possible. A few (okay, a lot) of passes with the palm sander showed a much lighter wood (we’re thinking it’s Douglas Fir because it’s softer) that we could DEFINITELY work with.
So we covered it and went to work on the rest of the room, painting and adding paneling (see more about that here!) and then went back to the counter.
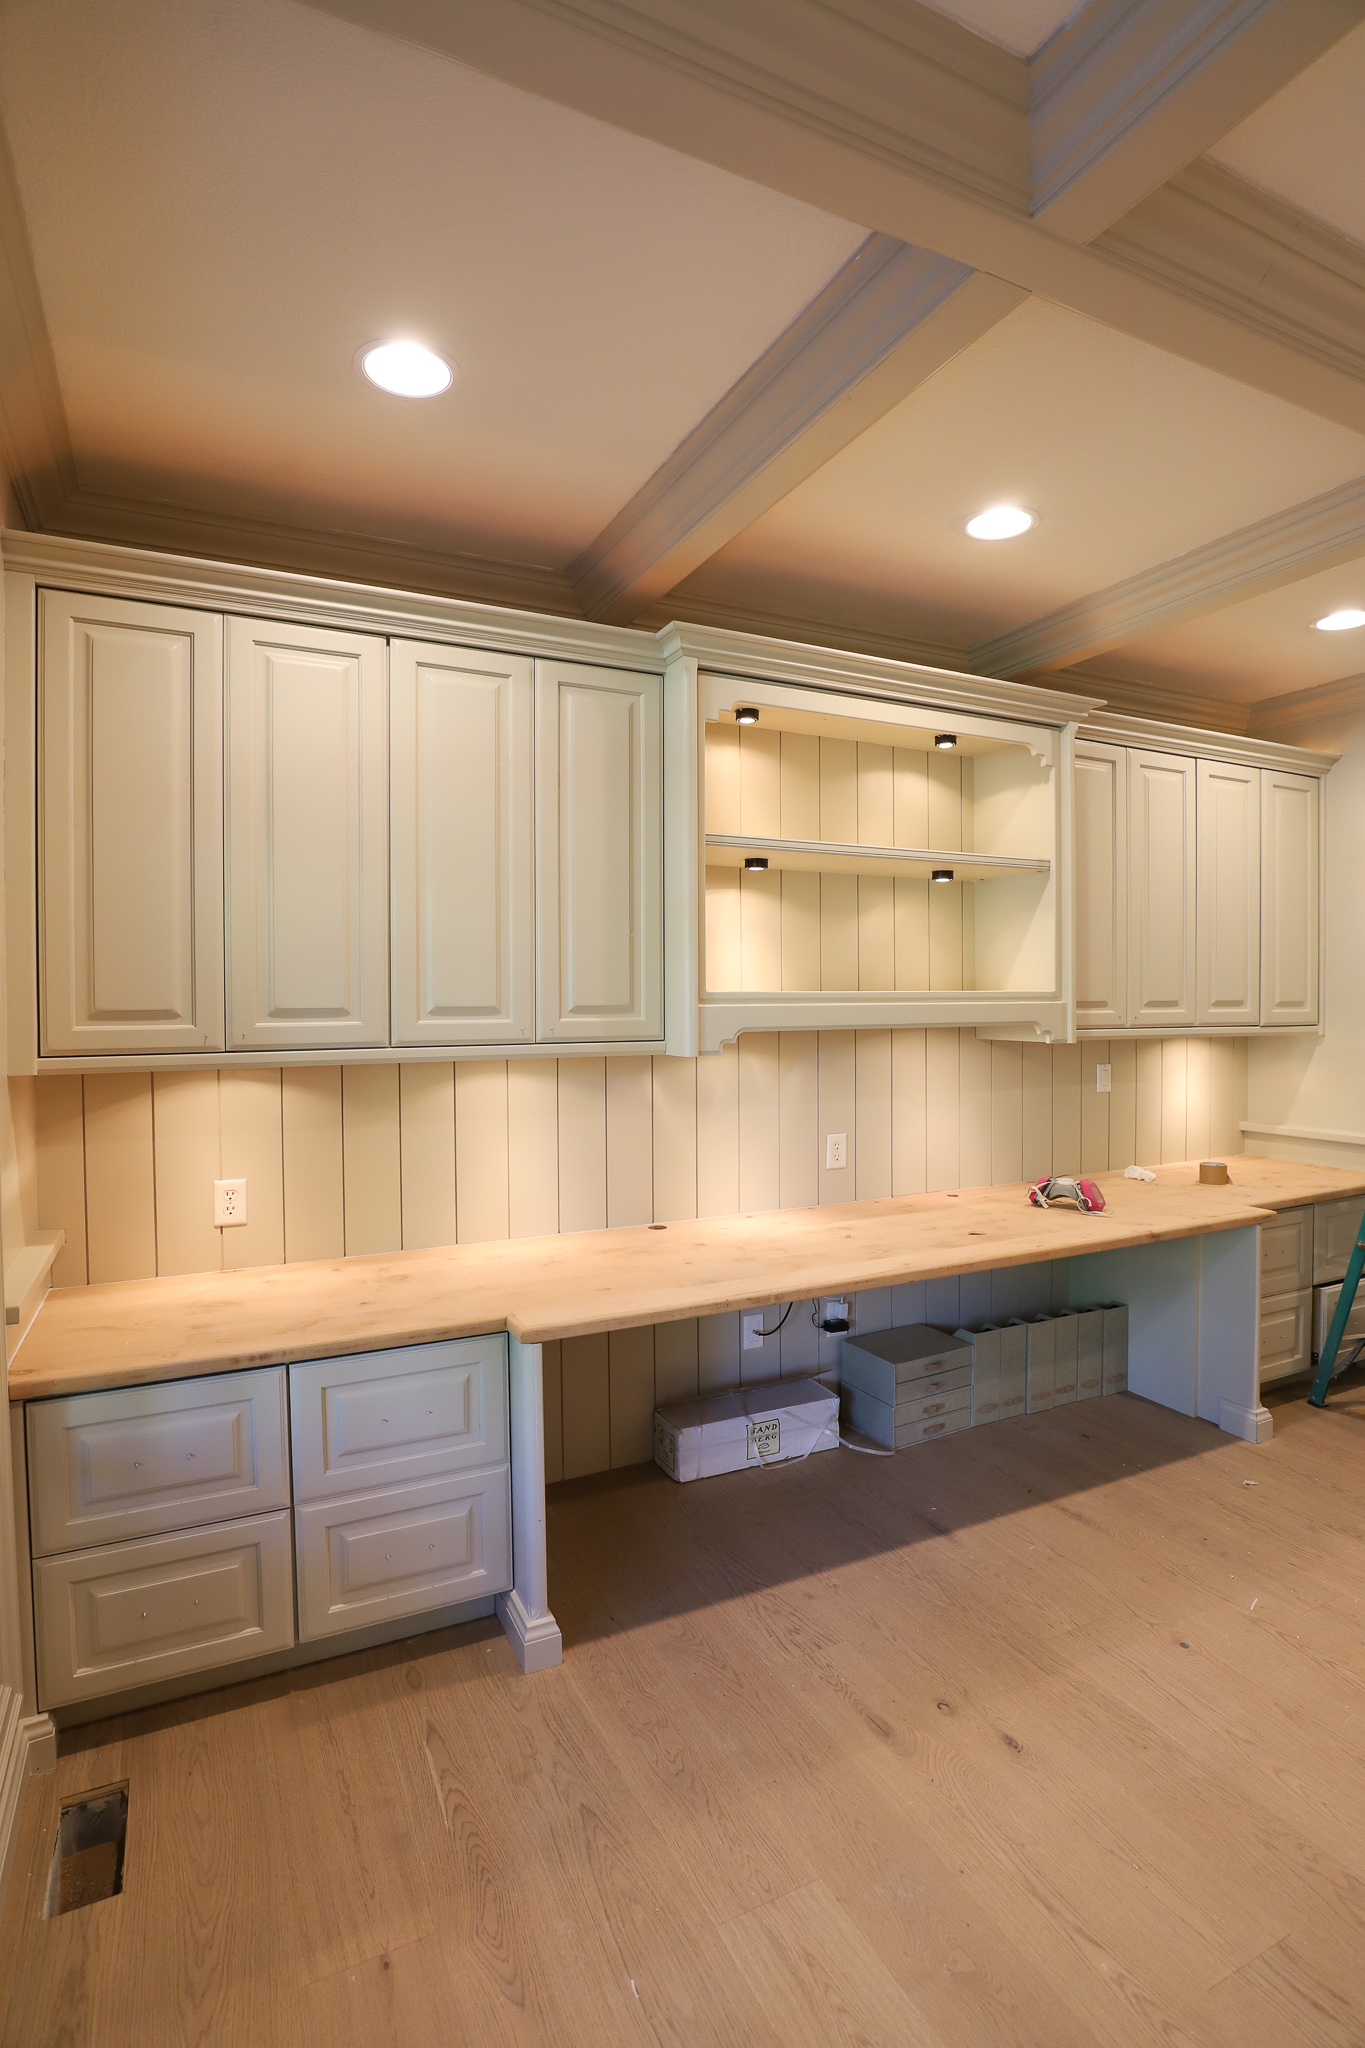
I had really gotten use to the lighter, raw counter but as you can see above, it had a yellow-ish tint to it and I wanted it to coordinate a little more with our floors. (These are our floors.)
The process took 5 steps.
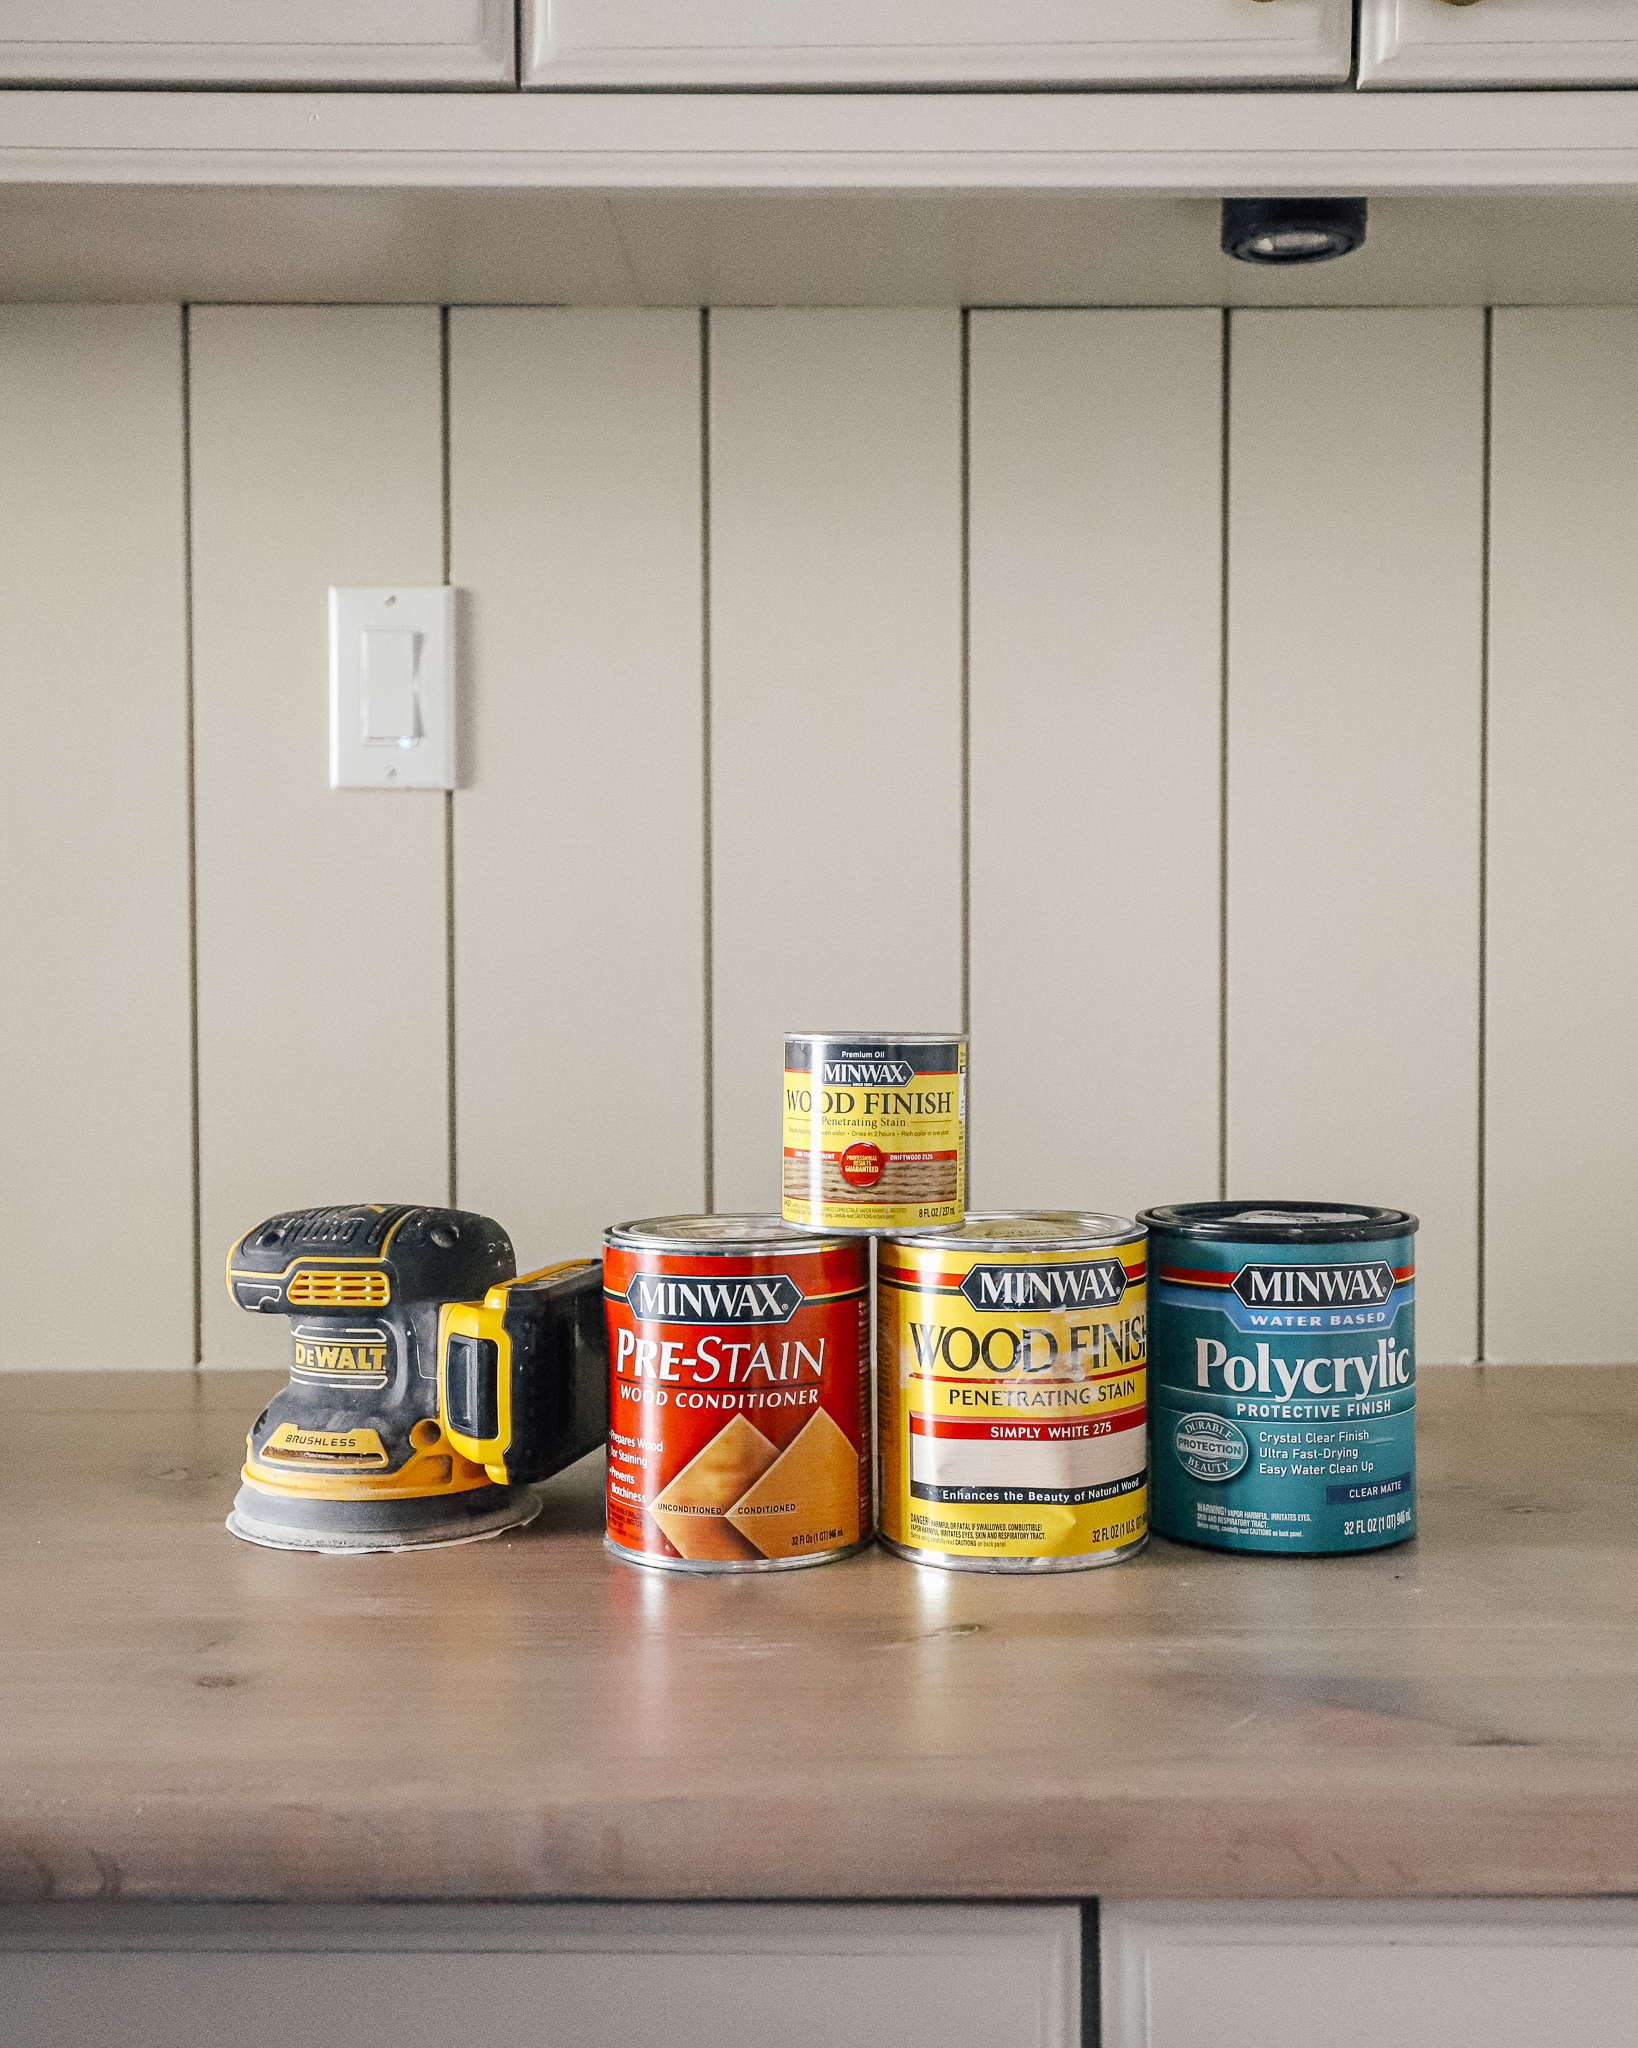
- Sand down the counter really well with an orbital sander.
- Condition the wood with a Pre-stain conditioner. This is especially important with soft woods like Fir and Pine. Otherwise, your wood can look splotchy as the stain won’t take as evenly.
- Then we layered on our first stain–Minwax Driftwood. I highly recommend using these stain pads–it goes on so easy! I panicked at this point because it looked REALLY rustic and I didn’t love it at all. But the great thing about stain is you can layer different colors to get the look you want!
- On top of the Driftwood, I layered on Simply White stain. It was EXACTLY what I wanted. It really grayed out and softened the countertops.
- Lastly, we put on two coats of water based Polycrylic sealer to protect them!
You can watch the simple process (and get a peek at the after) right here!

The girls’ office is almost finished and we’re loving the way it is looking. We hope to share the before and afters (I CAN’T BELIEVE HOW FAR WE’VE COME!) next week!!
Leave a Reply
What do you think?
Previous Post
Next Post


Semihandmade
Our wood grain Shaker cabinet fronts were designed for busy, high-traffic homes like ours. Clad with durable textured thermofoils, this line is compatible with Sektion, Akurum, Godmorgon, and Besta cabinets from IKEA. It's the perfect, practical way to add the warmth of wood to all the rooms of your home.
Collaborations
learn more

next
Loloi
We have teamed up with Loloi to create a line of rugs that are as affordable as they are beautiful. This collection houses a great mix of traditional and modern rugs, in cottage-y colorways, as well as vintage-inspired beauties that you’ll want to roll out in every room.
Collaborations
learn more

next
STUGA
We partnered with Stuga on a line of hardwood floors — The Ingrid is really livable, and the color is very neutral. It doesn’t lean warm or cool, it’s that just right in-between. We have really loved putting it everywhere in our house. It’s the best jumping-off point for design, no matter your interior style. In addition to being beautiful, Ingrid is really durable — we have three kids, and we always have a home construction project going on. Ingrid stands up to it all.
Collaborations
learn more

next


SHop all
What We're Right Now
What We're Right Now
Looking for our favorite things? A place to shop our home room by room, or just catch up on what Julia's wearing / loving right now? Browse the CLJ shop.
Loving


Portfolio


Design
Befores, afters, mood boards, plans, failures, wins. We’ve done a lot of projects, and they’re all here.
BROWSE BY CATEGORY
let's break this thing up
We have a long-standing relationship with DIY, and love rolling our sleeves up and making it happen.
Projects
Even when you don’t want to rip down a wall, you can make that space in your home better. Right now.
read more
read more
read more
02
01
03
looking for inspiration?
A reader recently asked me if I’m starting to fully embrace traditional style and whether we still consider our house to be a “modern Colonial” and why. It was a really great question and so timely — I had really just been thinking about my approach to this home and how my style has changed […]


SEARCH THE BLOG
We've been doing this since 2009 and we've posted a whopping 24145+ blog posts and counting. You might need a little help searching, huh?
looking for something?
find stuff like:
")
Can We Send You Our Love Letter?
Another way for us to stay in touch! Joining our weekly newsletter gives you access to exclusive content, never-before-seen photos, your questions answered, and our favorite DIYs. Sign up below!
Follow Along on Instagram
Welcome to our online community where we've posted home, DIY, style, renovations, and family since '09. Renovating our #cljmoderncottage in Idaho and headed for new adventures in Raleigh, NC. #cljfam #cljtransformations
@chrislovesjulia


Links
Get Around
Make yourself right at home
Portfolio
Design
Casual Friday
Projects
Lifestyle
Gift Guides
All Posts
Shop
Love where you live.
Social
RivrLinks
Links
Get Around
Make yourself right at home
Portfolio
Design
Casual Friday
Projects
Lifestyle
Gift Guides
All Posts
Shop
Love where you live.
Social
RivrLinks
Great tutorial, thanks for sharing! I’m hoping to try this on a some redwood I purchased to make floating shelves. I’m hoping it can help stain out some of the red tones :)
Sorry if this has already been answered, but wondering how many coats of each stain were applied?
Just one of each!
Hi, I am looking to redo my kitchen cabinets and wanted to know how you went from that cherry oak color to white? Did you make a post going over the process?
This is the post :)
Looks amazing! Could you do this same process to a wood table (and indoors)?
Definitely!
It looks beautiful! How do you put on the poly based sealer? I have tried this on multiple projects and I never have any luck. Currently staring at a coffee table that I used it on and you can see uneven brush strokes and sometimes bubbling. It almost looks like paint stripes. Have you had any trouble like this?
We used a stain pad.
Stain is made to penetrate the wood’s grain and seal it. There is NO way the additional coats of stain penetrated into the wood. It’s just sitting there for now. You may have gotten the look you want but NO Professional Painter would do this. Even the stains warranty has been broken. I guarantee a Patent won’t come from this.
Do you think I could try this tutorial with my front door?
Definitely!
This reads like an ad from Minwax, especially given the photo of all the Minwax products + you are showing a technique that layers multiple colors of stain = more product. I’ll be honest that I do question the motivations behind this post – is layering stain really cost effective for the average DIYer? Wouldn’t you have been better off finding a stain that matched what you were looking for in the first place?
This is NOT an ad for minwax. Hahaha. And also, we just used what we had!
It’s crazy that this looks like bare wood and the stain isn’t noticeable! I stripped a red oak bar top that had numerous coats of oil based poly in order to get it more like our white oak floor and table. I ended up using wood bleach, but this seems like a much easier option. It may inspire me to refinish the remaining 80’s looking oak-or not! Thanks for the inspiration.
Loving this space! Nicely done!
How did you strip the ceiling beams, and what wood are they?
We just primed and painted them!
Looks great! May i ask where that runner is from? I love the colors.
It’s from Annie Selke!
Do you know what type of wood your countertop is? I k ow different woods pull stains differently. We have white oak floors but the stairs are red oak. I don’t want to pull the pink hues of the red oak ????
We’re pretty sure it’s douglas fir
So Beautiful! Did you let the driftwood stain dry before you put simply white stain on?
Yes!
I’ve been trying to find the post of Faye’s bed and it doesn’t seem to be here anymore!!!???
Here it is! https://www.chrislovesjulia.com/fayes-bedroom-transformation-and-her-dream-princess-bed/
In your reveal or in another post, could you include your installation of under-cabinet & under-shelf lighting? Thank you so much! (It all looks beautiful!)
Omg! This is perfect timing! I’ve been sanding down an old desk (for what seems like weeks now bc of all the books & crannies) and I couldn’t decide on a stain. I LOVE THIS! Thank you so much for sharing. And, a question – any advice on sanding the corbel legs of the darn desk? Tips, tricks?! There are so many fine spaces it’s driving me batty as a first time refinisher ????????
I think my only advice is to find a good audio book (can I recommend Devolution?!) and go for it. Would a citrus stripper help?
Hi Staci,
I have experience with stripping wood. I like Klean Strip stripper which you can buy at Home Depot or Lowe’s. It works very well at stripping finishes. Use a brass bristle brush to get into the nooks and crannies. Also fine steel wool. When you’re done, wipe the wood down with Klean Stip Ater Wash. It will remove the residue.
Do you think we could use this process on a pine table that was not stained but has a couple coats of poly satin or gloss finish on it?? It just looks really yellow and I don’t like it at all!!!
Definitely! You’re going to want to sand or strip the sealer first!