


It has been an intense week around here. The weather hasn’t cooperated all that well, we have only had one decor item arrive (1!!), and we just realized we don’t really have three more weeks to finish this like our minds have been telling us, we have three weeks until the reveal, so just over 2 weeks to finish. There were moments of panic (like when we realized our shower is leaking into the girls’ new room!), but there were more moments of victory. Let’s talk about those, shall we?
If you are just catching up, we’re making a guest room into a shared room for our girls in just 6 weeks as part of the One Room Challenge. Check out Week 1 where we lay out the design here and Week 2 where we built the bunk beds here.
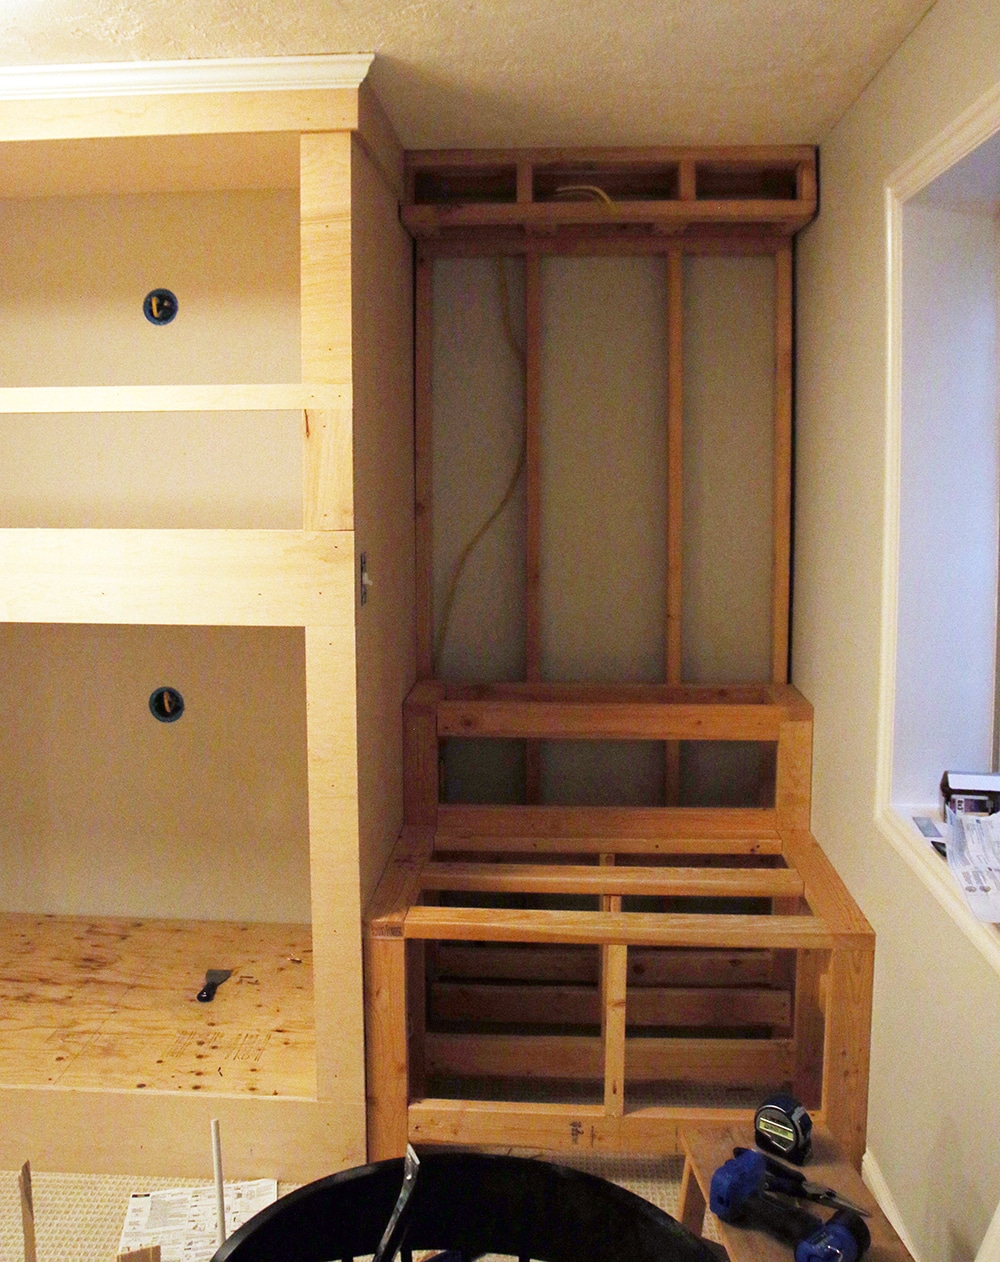
This week, Chris has been chugging along framing out the reading nook that will be to the right of the bunk beds we shared the tutorial for in last week’s ORC post. It’s only framed in right now, so you may need to squint, but I can already tell it’s going to be such a sweet spot in this room.
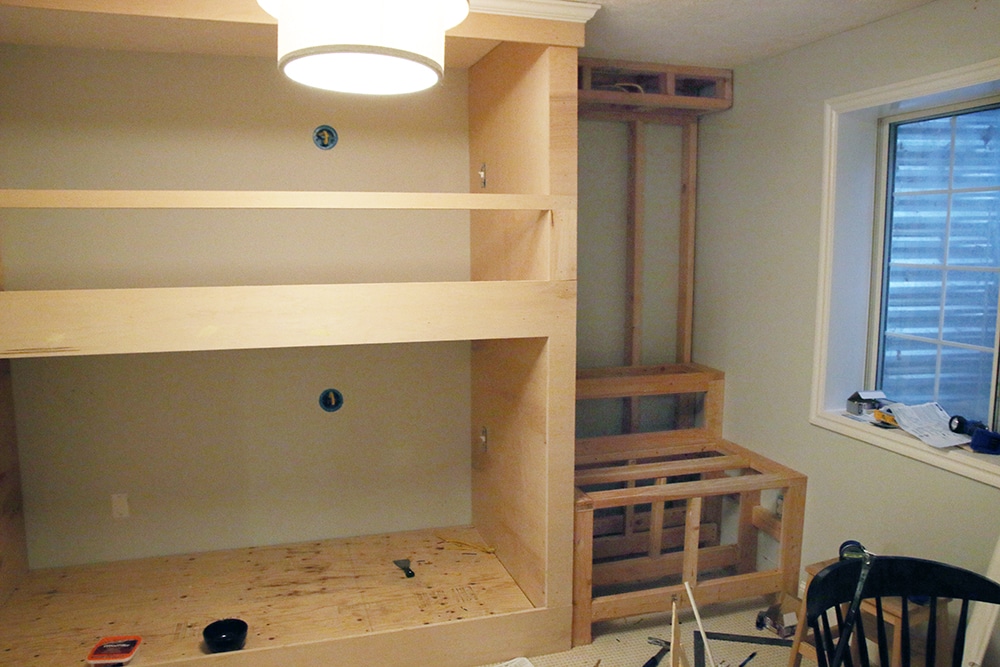
Since the nook was pretty deep (as deep as a bed), we deciding to build the back wall out with 2×4’s so it wasn’t quite as cavernous. The framed part up top will hold a pretty library sconce that will light up the corner, too.
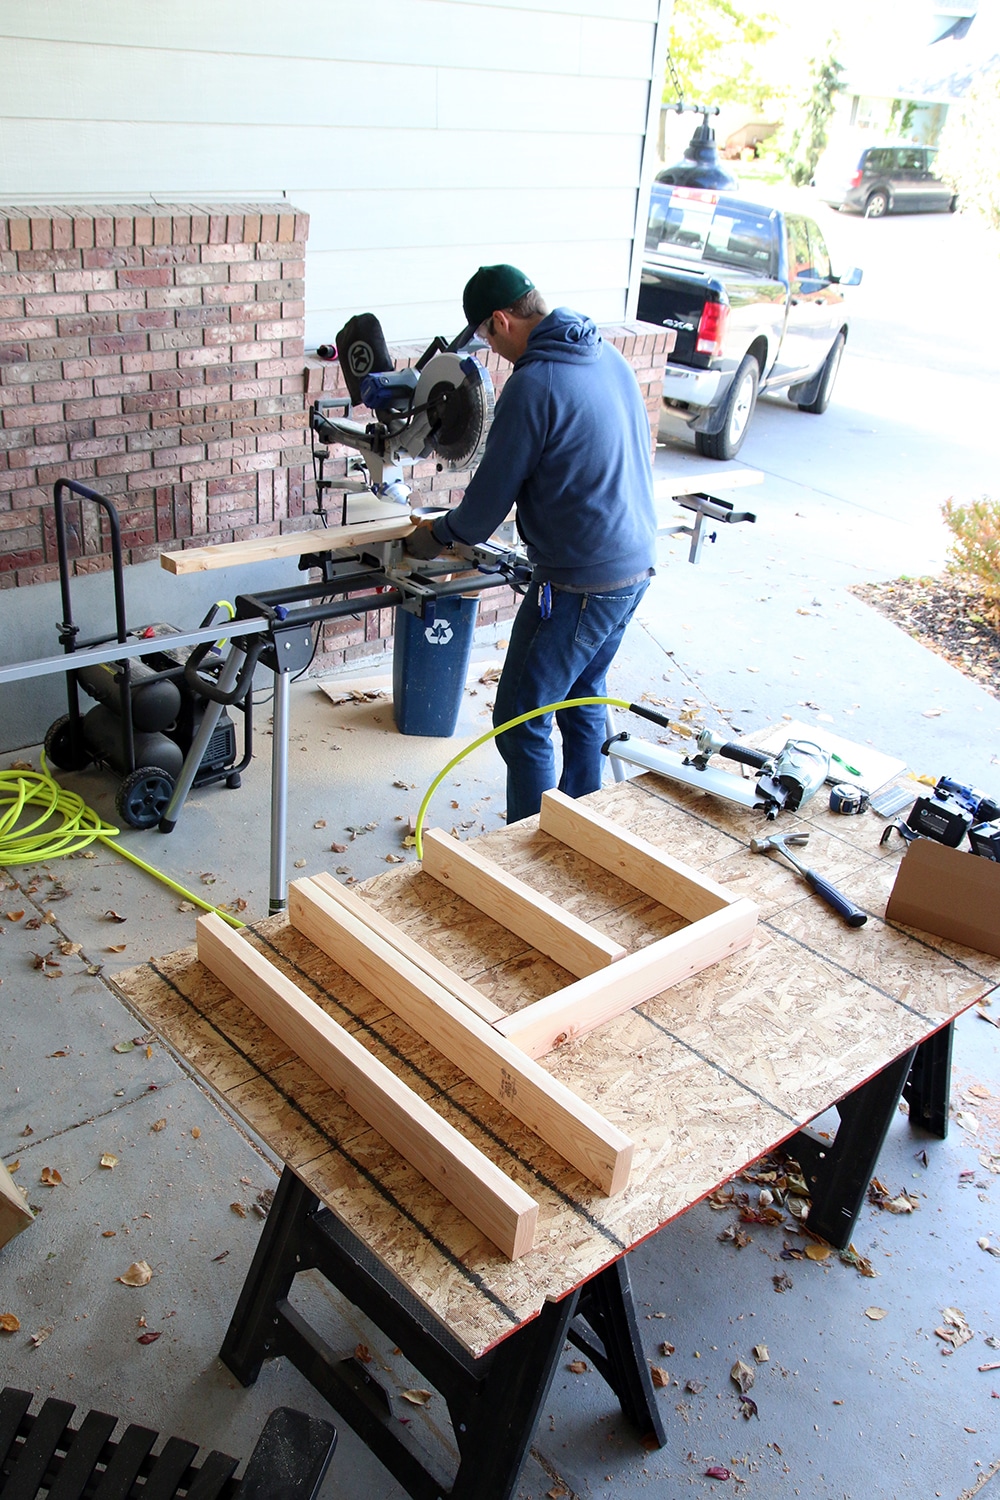

We likely won’t do a full tutorial for exactly how we built the reading nook, like we did for the bunks, but did want to walk through the design decision process and hope these photos of the bare full frame will help if you plan to do something similar in your own home.
The biggest design hurdle was figuring out how the seat would meet the bookshelves. If you think about it for more than 30 seconds, you can see how it could get awkward…leaning against shelves? In researching and looking through loads of inspiration photos, we saw basically three different options for how reading nooks combine shelving and seating.
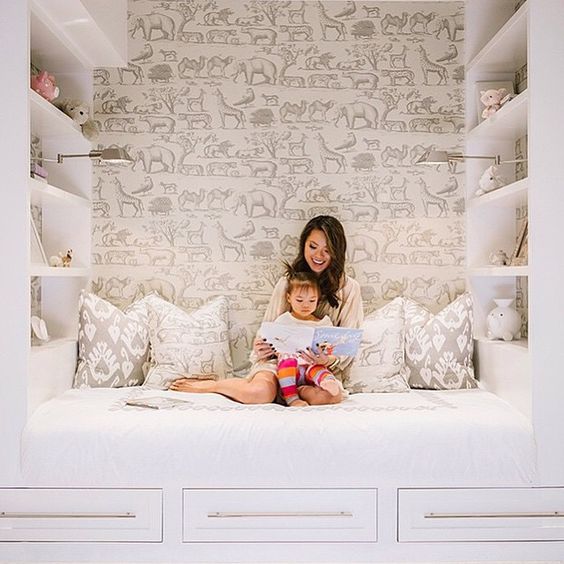
1. Bookcases on either side of the nook. This was definitely the most common trend I noticed and if we had the space, I’d be all for it. It creates a cozy nook with ample shelving while still allowing you to lean back comfortably and practically begs for pretty wallpaper as an accent–always a win. Unfortunately, our nook is not wide enough for this option.
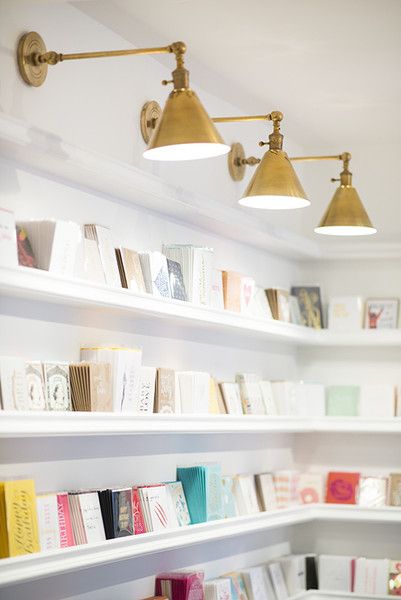
2. Utilizing Shallow Shelving. Shallow shelves, or book ledges are a great way to combat the awkward “where am I supposed to lean back while reading” scenario that comes with book nooks. They don’t stick out very far so you can stop them a little up the wall and any pillow or back cushion you add to the nook will protrude out farther leaving you with a nice depth hierarchy—totally a thing. The reason this one didn’t feel right for us, although I was initially leaning toward ledges over shelves, was because our nook is so deep. We didn’t need to minimize depth more.
3. Floating bookcase? The last trend we saw was kind of a floating bookcase above seating. I actually loved all the compartments in the example below but I couldn’t shake that gap between the seating and the books. Why was it there? Are those cups? candles? Despite the gap, this example, with its banquette type back board, ultimately inspired our final design.

What if we eliminated that gap and had the top of the “banquette” be the first shelf? Everything clicked when we started drawing out that option. We made the depth of the light soffit the same as the top of the seat which will be the same as all of the shelves. Again…you might have to squint looking at the frames, but do you see it now?
Do my illustrator mock-ups help? (I can’t stop!)
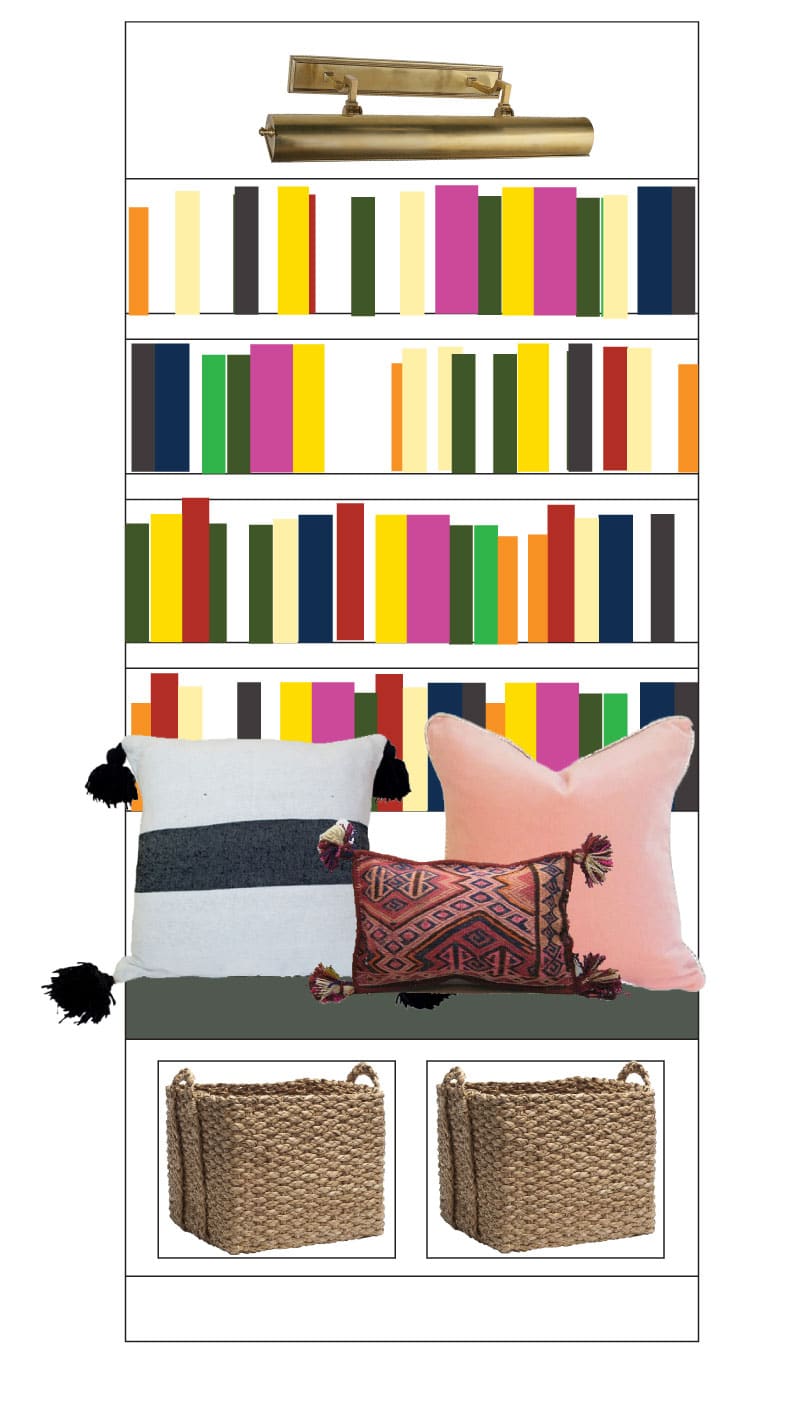 Sources: Baskets (only $29!), Kilim Pillow, Blush Pillow, B&W Pillow, Reading Light
We’ll be facing the book nook, giving everything a coat of paint and installing lights all before next week so we can start on getting the wardrobes in place. And hopefully, a few more pieces will have arrived, too. Fingers crossed!
Catch up on what all the other ORC participants are up to this week by clicking the links below! The progress is amazing, I’m loving following along (and secretly wondering if anyone is as stressed as we are).

Jana Bek | Chris Loves Julia | Shannon Claire | Coco.Kelley | The Curated House
Driven by Décor | The English Room | From the Right Bank | Sherry Hart
Hi Sugarplum | House of Jade | Hunted Interior | The Makerista | Making it Lovely
Marcus Design | Pencil & Paper Co. | Megan Pflug | Place of My Taste | Suburban B’s
Waiting on Martha Media Partner House Beautiful | TM by CIH
Leave a Reply
What do you think?
Previous Post
Next Post


Semihandmade
Our wood grain Shaker cabinet fronts were designed for busy, high-traffic homes like ours. Clad with durable textured thermofoils, this line is compatible with Sektion, Akurum, Godmorgon, and Besta cabinets from IKEA. It's the perfect, practical way to add the warmth of wood to all the rooms of your home.
Collaborations
learn more

next
Loloi
We have teamed up with Loloi to create a line of rugs that are as affordable as they are beautiful. This collection houses a great mix of traditional and modern rugs, in cottage-y colorways, as well as vintage-inspired beauties that you’ll want to roll out in every room.
Collaborations
learn more

next
STUGA
We partnered with Stuga on a line of hardwood floors — The Ingrid is really livable, and the color is very neutral. It doesn’t lean warm or cool, it’s that just right in-between. We have really loved putting it everywhere in our house. It’s the best jumping-off point for design, no matter your interior style. In addition to being beautiful, Ingrid is really durable — we have three kids, and we always have a home construction project going on. Ingrid stands up to it all.
Collaborations
learn more

next


SHop all
What We're Right Now
What We're Right Now
Looking for our favorite things? A place to shop our home room by room, or just catch up on what Julia's wearing / loving right now? Browse the CLJ shop.
Loving


Portfolio


Design
Befores, afters, mood boards, plans, failures, wins. We’ve done a lot of projects, and they’re all here.
BROWSE BY CATEGORY
let's break this thing up
We have a long-standing relationship with DIY, and love rolling our sleeves up and making it happen.
Projects
Even when you don’t want to rip down a wall, you can make that space in your home better. Right now.
read more
read more
read more
02
01
03
looking for inspiration?
A reader recently asked me if I’m starting to fully embrace traditional style and whether we still consider our house to be a “modern Colonial” and why. It was a really great question and so timely — I had really just been thinking about my approach to this home and how my style has changed […]


SEARCH THE BLOG
We've been doing this since 2009 and we've posted a whopping 24145+ blog posts and counting. You might need a little help searching, huh?
looking for something?
find stuff like:
")
Can We Send You Our Love Letter?
Another way for us to stay in touch! Joining our weekly newsletter gives you access to exclusive content, never-before-seen photos, your questions answered, and our favorite DIYs. Sign up below!
Follow Along on Instagram
Welcome to our online community where we've posted home, DIY, style, renovations, and family since '09. Renovating our #cljmoderncottage in Idaho and headed for new adventures in Raleigh, NC. #cljfam #cljtransformations
@chrislovesjulia


Links
Get Around
Make yourself right at home
Portfolio
Design
Casual Friday
Projects
Lifestyle
Gift Guides
All Posts
Shop
Love where you live.
Social
RivrLinks
Links
Get Around
Make yourself right at home
Portfolio
Design
Casual Friday
Projects
Lifestyle
Gift Guides
All Posts
Shop
Love where you live.
Social
RivrLinks
I think any book lover would die to have a sweet space like this! Unfortunately, my reach-in closet is TINY at 2’ 6” deep X 3’ 6” wide!! I have about a 10’ ceiling.
Anyway, though all I have is this option, I still would like to turn this unused space into at least storage for all my books (250-300 in all), if not a sweet little book nook of my own. Any ideas? I am not DIY – talented, but I’m game, and desperate!
Looks inviting already…happy nesting!
I’m sorry. I try to warn everyone about 6 posts = 5 weeks. Starting a week before the first post is doing it in real time. I hope you are not mad. It looks amazing and your skills are through the roof.
Linda! We’re not mad at all! We are having the time of our lives and have never shied away from a tight deadline. Thanks so much for including us. Really. We’re just silly for not doing the math. Haha.
I love the idea of a book nook. I’m such a bookworm! That’s such a great idea to eliminate the gap that was in the picture. Your book nook will look so much better. I can’t picture the grand finales in my mind too well so I’m looking forward to week 6!
Oh man, if it were me, I would utilize that dead space by making a cabinet that opens into each bunk, or at least a little cubby. Somewhere to put a water bottle or a journal or something. I feel like there’s a way to use it!
I think this little nook will be one of my favorite parts of the room!
Love your plans. So cozy. Love the gold light too!
Since you are planning a shared bedroom space for the girls, what are you going to do with their current rooms? I’m sorry if you’ve already answered this question…………..I did try to look back to see if you already addressed this :)
Greta’s current room will be the guest room. And Faye will slowly transition down to the shared room. Eventually, we’d love to have one more baby.
Looks great. Chris’ handyman know-how blows my mind.
Mine too! Every time!
Ah, I’m always so amazed by the progress you two make in just a week! Can’t wait to see how the reading nooks turn out – such a great addition to the space! XO
Wow, this is going to be so amazing!! I kind of thought we were clicking along too, until I realized we hadn’t actually done anything yet, and we’re at the halfway point!! #nowisthetimetopanic ;)
You guys made a lot of progress! I would love that reading space myself…..I could hide there and procrastinate to my hearts content:)