DIY

How To Make your Grout Look New in an Afternoon for $10

July 12, 2018

We believe we should all love where we live.

We’re a couple of homebodies, working to uncover the home our home wants to be. And we’re so happy to have you here. 

Portfolio

Projects

Design

We're Chris + Julia

read more

What we're                   right now

Loving

browse the shop

Befores, afters, mood boards, plans, failures, wins. We’ve done a lot of projects, and they’re all here. 

We have a long-standing relationship with DIY, and love rolling our sleeves up and making it happen. 

Even when you don’t want to rip down a wall, you can make that space in your home better. Right now.

browse all

browse all

browse all

02

01

03

Popular Posts

1.

2.

3.

Top Categories

This post is sponsored by Lowe’s. We’ve partnered with them to share how-to’s, from easy to elaborate. This one is an easy one!

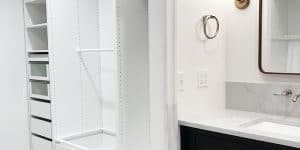
In preparation for summer guests, some of our friends were talking about replacing their tile in one of their bathrooms, because it looked “so dingy”. When we looked at it, we realized, it wasn’t the tile that looked dingy, it was just the grout! And dyeing it is a fast, $10 project.

1. Make sure the floor is clean.

Before you dye the grout, make sure the floor is nice and clean. We just sprayed it with some tile/floor cleaner and wiped it down with a clean rag.

2. Apply the Grout Refresh

Lowe’s carries MAPEI Grout Refresh in a bunch of different colors–we went with white. It’s a dye, but goes on like paint. The top has a small spout that’s easy to squeeze out a small amount along the grout line.

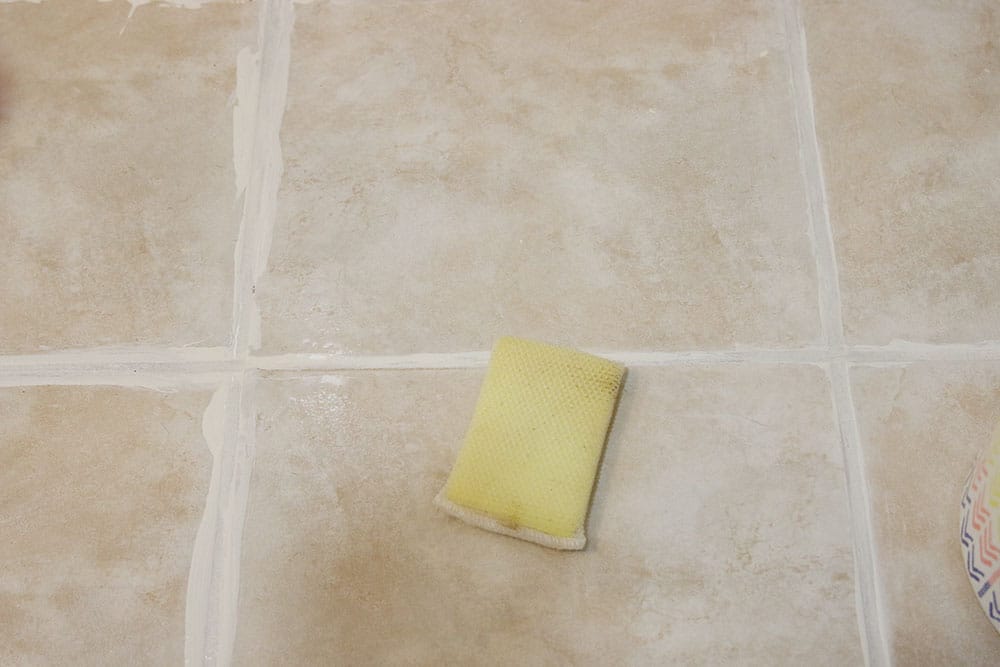
3. Brush the Grout Refresh into the Grout Lines

An old toothbrush comes in handy for this step. A little bit of grout paint goes a long way and brushing it into the lines will help it set for the long haul. Don’t worry about staying in the lines right now.

4. Remove the excess.

After letting the grout dye set for 30-60 minutes, you can spritz the tile with water and remove the excess Grout Refresh from the tile with a scrubbing sponge. (Alternatively, you can wipe the excess off with a clean cloth or paper towel as you go.)

The whole process took us less than an hour and their floor looked clean, fresh and new!

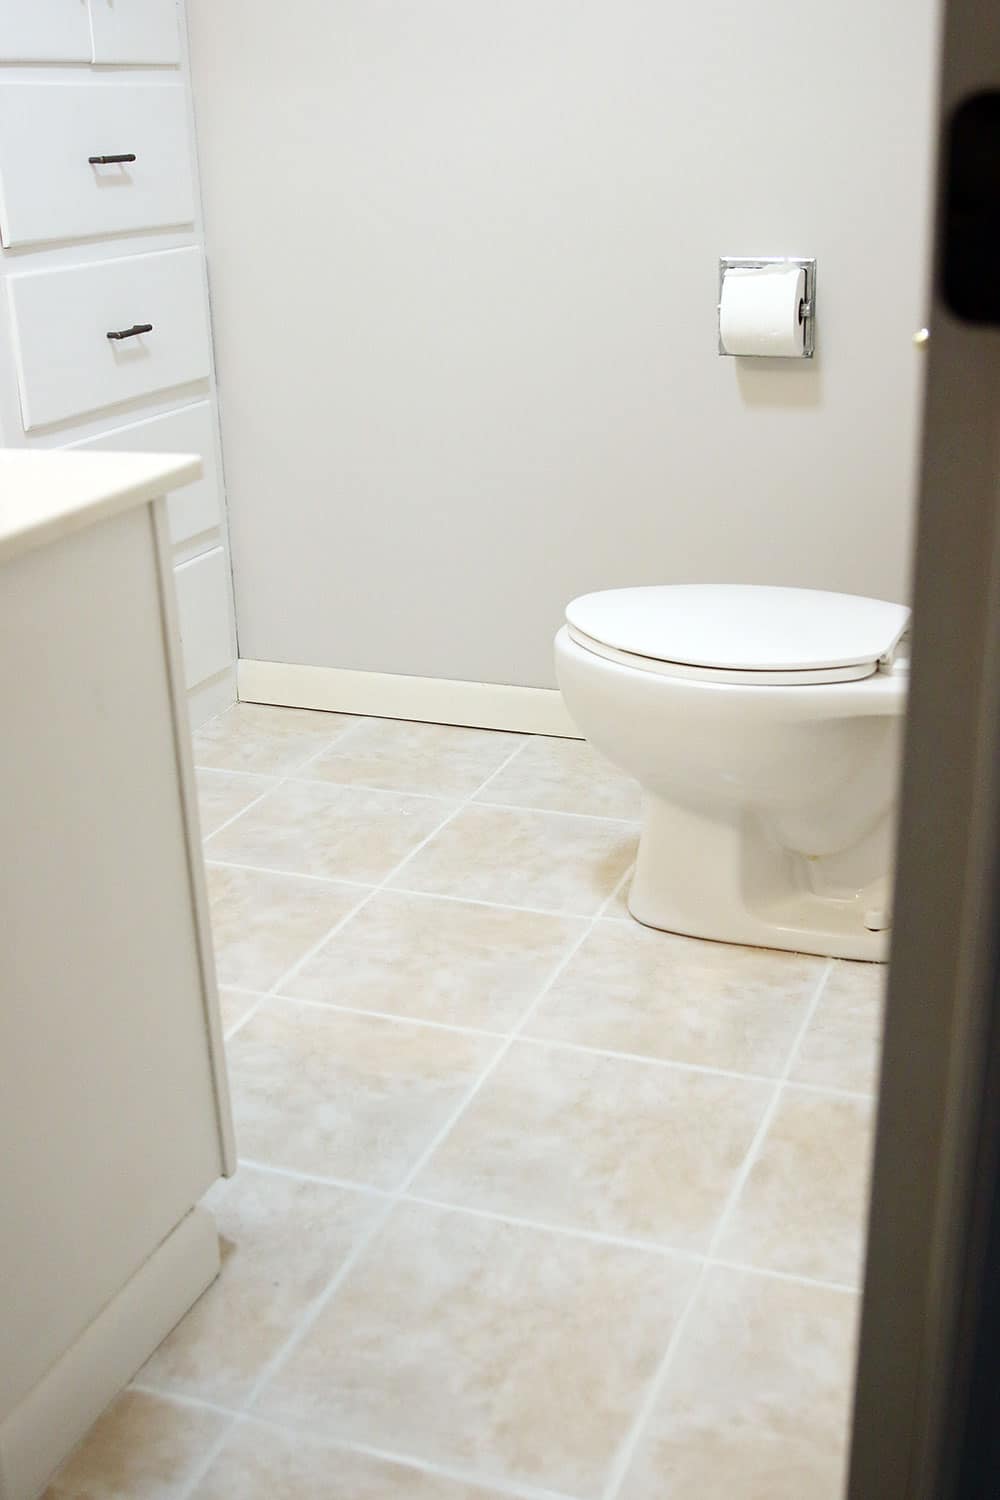
And the MAPEI Grout Refresh was only $10! So if you’re not in a place to replace your tile, whether it’s time or budget, keep this easy DIY in your back pocket that can change the look of your whole floor in an afternoon or less.

SaveSave

SaveSave

SaveSave

Leave a Reply

Your email address will not be published. Required fields are marked *

This site uses Akismet to reduce spam. Learn how your comment data is processed.

What do you think?

  1. shannon ortega says:

    the link for the grout is not working

  2. Mori says:

    Loved this. Who knew. Wondering if you have used on marble floor with tight thin grout lines. Is it ok and how easy to get excess off? Should I go for it?
    Mori

  3. Randy says:

    I searched for “grout paint” as mentioned in multiple places–but found nowhere, only restorers and cleaners. SF column says that item is epoxy based and regular paints will not work.

    Where is “grout PAINT” that your ad mentions? I see only dye/colorant here.

  4. Elyse says:

    We moved into a new home and the tile in our kitchen is white with a white grout. Our granite is white and a bunch of different hues of gray. I was thinking of painting the grout to a light gray. Do you foresee any issues doing this? Love love love you guys!!

  5. ZOE says:

    Do you know the name of the tile in this project? I have the same ones and need to replace a few and cannot find an exact match. Knowing the mark might help narrow my search.

  6. Kristen Thompson says:

    Will this product work if your bathroom floor and shower had a tile and grout sealer applied to the surface?

  7. Gretchen says:

    I REALLY want to try this but a little worried about the white staining our dark gray tile. Do you think that would be a problem if we wipe as we go?

  8. Amy says:

    Love this idea! Could this work if we wanted to add in a dark charcoal grout?

  9. Love this! Thanks for sharing….my grout needs a facelift!

  10. Nora says:

    I’m not sold. The floor in your ‘before’ picture is clear and your ‘after’ picture is fuzzy. Makes me skeptical of a sponsored post. Is it really that easy to clean off the surrounding tile or are your ‘after’ grout lines fuzzy on purpose, to hide the imperfections?

  11. Donna Marie says:

    Wow. just wow–looks great!!!

  12. Linda Grubbs says:

    Ohhhh! great idea, thanks! I had no idea. :) I have been scrubbing my grout with a toothbrush and a cleaner….works ok, but I foresee in the future that I can easily dye the grout. Thanks for the demo!
    You guys are awesome!

  13. Sara says:

    It kind of looks like the dye bled into the tile a bit, making the lines looks less sharp? Is that the case, or just an optical illusion withe the grout lines being so much closer in tone with the tile now that it looks less “straight”? Are the lines on the right of your close up picture post-wipe, or not? Love the look of the lighter grout, but would love a real close up of the finished lines to get a better sense of what that product really looks like. Can you post some detail shots on Instagram, perhaps? Thanks!

  14. Janice Lynch says:

    If you have a brown grout now, will it cover with white refresh?

  15. My bathroom tile looks like your “before” pic and I always feel like the floor never looks clean. Definitely trying this grout refresh product. Thanks for sharing your amazing results using it!

  16. Is it pretty permanent? Worried about the harsh cleaners I use in our bathroom messing up the dye job!

    • Chris says:

      It’s not permanent, but pretty resilient after curing for 48 hours. Maybe ease up on the scrubbing of the ground lines themselves, but this is more meant to be a stepping stone to take tide you over until you’re ready for the full renovation.

  17. Allison says:

    Love seeing you work in other people’s homes (and yards)! DIY and elbow grease are definitely my price point, and I appreciate you showing an alternative to replacing tile.

  18. Jackie says:

    Thanks for this! I’m curious if their original grout was a darker color or if it was light and got dingy over time. Ours looks similar, but it’s definitely because the grout color itself is medium brown and we would like to go much lighter.

  19. I just did this a couple months ago!! Completely transformed a space we used to hate. Couple questions…

    1. Have you guys tried scrubbing the grout with a grout brush & cleaner after painting? Or will that just remove/chip the paint job? And if so…

    2. Is it a bad idea to put on a few more coats of paint over time, as it dirties up again?

  20. Cindy says:

    That’s MY tile and MY problem … jumping in the car now!

  21. Natalee Harris says:

    Now this is my kind of sponsored post! I need to get this for a dingy shower.

  22. Cathy says:

    Do you recommend an additional sealer afterwards?

  23. Susie G says:

    This feels like the exact kick in the butt I need to refresh the grout in our shower stall. The tile is fine (white subway) but the grout lines feel about 2 feet wide and the previous owners used some sort of orangey grout that I have never liked. Thanks for the tips!

  24. Jessica says:

    Would this work on shower walls, too?

  25. Julia says:

    I used a product similar to this and was so disappointed. It seemed like if you let it dry long enough that the actual product didn’t wipe off of the grout, the excess needed to practically be sanded off of the tile. I ended up painting it on with a small paintbrush. I did it as an “in-between” until we can redo our floor, but honestly it was so tedious and is already washing off. DIY regret. I’m curious if you think it is product-related.

    • Julia says:

      I like wiping as I go. But we have had great results with this product!

    • Emily says:

      I did a similar project with a different brand – great results but you definitely had to wipe it off as you went. It was more of a paint than a dye. That said, I had good luck with it standing up over time. Was well worth it!

  26. Erin says:

    Do you think this would work with grout in a tile shower? Do you think the water would have an effect on it?

  27. Janine says:

    Do you have to seal it? How long will it last?

  28. Laura says:

    Do you suggest this for marble tile?

  29. Amanda says:

    What if your grout is old (super old, like pink and yellow vintage hexagon tiles, probably original grout from the 50s) and has hairline cracks? Do you think this will “fill” those in?

all the latest

We believe we should all love where we live.

We’re a couple of homebodies, working to uncover the home our home wants to be. And we’re so happy to have you here. 

HI! We're Chris + Julia

read more

Load More

Reader Faves

SHop all

What We're                     Right Now

What We're                 Right Now

Looking for our favorite things? A place to shop our home room by room, or just catch up on what Julia's wearing / loving right now? Browse the CLJ shop. 

Loving

looking for inspiration? 

A reader recently asked me if I’m starting to fully embrace traditional style and whether we still consider our house to be a “modern Colonial” and why. It was a really great question and so timely — I had really just been thinking about my approach to this home and how my style has changed […]

Can We Send You Our Love Letter?

Another way for us to stay in touch! Joining our weekly newsletter gives you access to exclusive content, never-before-seen photos, your questions answered, and our favorite DIYs. Sign up below!

Follow Along on Instagram

Welcome to our online community where we've posted home, DIY, style, renovations, and family since '09. Renovating our #cljmoderncottage in Idaho and headed for new adventures in Raleigh, NC. #cljfam #cljtransformations

@chrislovesjulia