


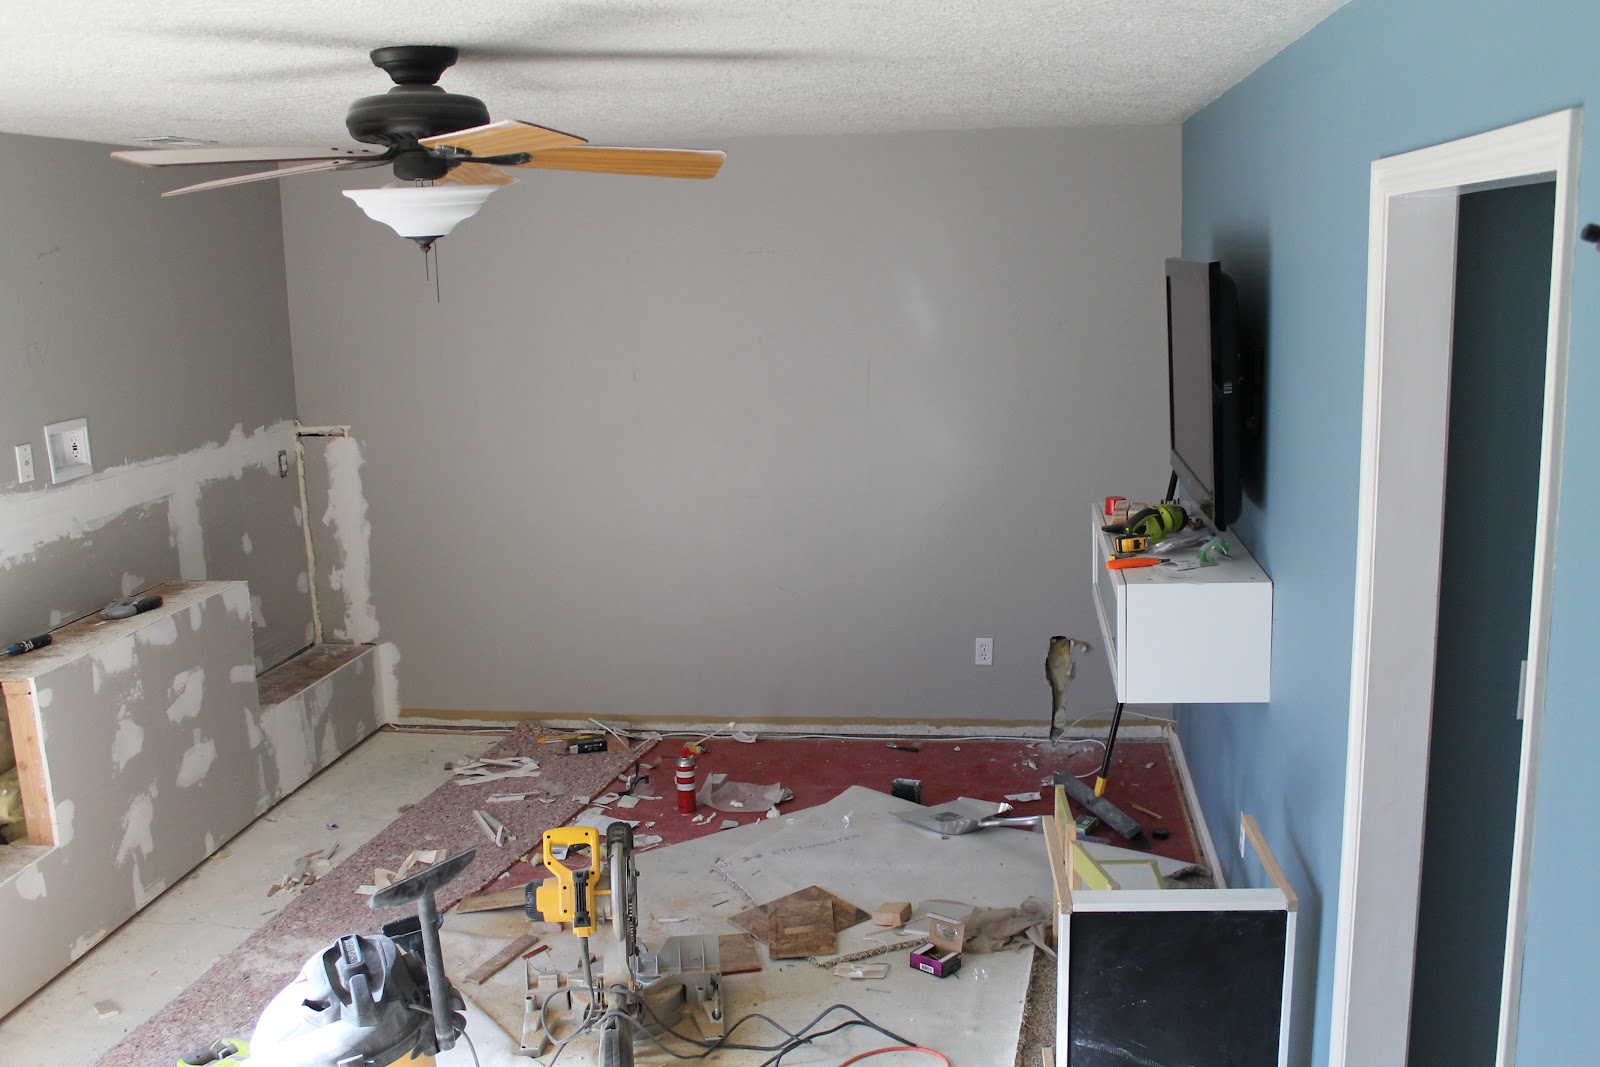


We also switched out our normal switches for dimmers, which I’m officially obsessed with. Especially in a media room–dim lights are nice to have. All in all, installing our own recessed lights wasn’t perfectly smooth. We hit a few bumps a long the way, but we did it. And it wasn’t that hard–even for us first-timers. It definitely wasn’t $650 hard. We’re glad we saved money and did it ourselves, although it wasn’t completely free.
We spent:
$59 on can lights and dimmer switches–thanks to a big help from the remaining balance on our True Value gift card.
$25 on electrical wire.
$30 on patches and joint compound.
$0 on labor. :)
Total: $114. Way below the amount we were quoted for labor to just run the wire. This renovation is a great example of saving on some projects and products and splurging on others. We splurged on our new couch and the carpet we wanted–and other things like electrical and framing out and sheetrocking our own wall we are saving loads of money by doing it ourselves. It’s pretty addicting. And the results aren’t too shabby either.

Psst. I owe you more after shots of this project. I am well aware. But we are working on about 3 other things simultaneously for this room and this was the only shot I could give without teasing the heck out of the other projects. Although we are anything but a before and after blog (we like to share every detail as we go), we also like to dedicate posts to one aspect of the transformation–especially lengthy posts like this one. Hang tight, a full span is not far away.
Leave a Reply
What do you think?


Semihandmade
Our wood grain Shaker cabinet fronts were designed for busy, high-traffic homes like ours. Clad with durable textured thermofoils, this line is compatible with Sektion, Akurum, Godmorgon, and Besta cabinets from IKEA. It's the perfect, practical way to add the warmth of wood to all the rooms of your home.
Collaborations
learn more

next
Loloi
We have teamed up with Loloi to create a line of rugs that are as affordable as they are beautiful. This collection houses a great mix of traditional and modern rugs, in cottage-y colorways, as well as vintage-inspired beauties that you’ll want to roll out in every room.
Collaborations
learn more

next
STUGA
We partnered with Stuga on a line of hardwood floors — The Ingrid is really livable, and the color is very neutral. It doesn’t lean warm or cool, it’s that just right in-between. We have really loved putting it everywhere in our house. It’s the best jumping-off point for design, no matter your interior style. In addition to being beautiful, Ingrid is really durable — we have three kids, and we always have a home construction project going on. Ingrid stands up to it all.
Collaborations
learn more

next


SHop all
What We're Right Now
What We're Right Now
Looking for our favorite things? A place to shop our home room by room, or just catch up on what Julia's wearing / loving right now? Browse the CLJ shop.
Loving


Portfolio


Design
Befores, afters, mood boards, plans, failures, wins. We’ve done a lot of projects, and they’re all here.
BROWSE BY CATEGORY
let's break this thing up
We have a long-standing relationship with DIY, and love rolling our sleeves up and making it happen.
Projects
Even when you don’t want to rip down a wall, you can make that space in your home better. Right now.
read more
read more
read more
02
01
03
looking for inspiration?
A reader recently asked me if I’m starting to fully embrace traditional style and whether we still consider our house to be a “modern Colonial” and why. It was a really great question and so timely — I had really just been thinking about my approach to this home and how my style has changed […]


SEARCH THE BLOG
We've been doing this since 2009 and we've posted a whopping 24145+ blog posts and counting. You might need a little help searching, huh?
looking for something?
find stuff like:
")
Can We Send You Our Love Letter?
Another way for us to stay in touch! Joining our weekly newsletter gives you access to exclusive content, never-before-seen photos, your questions answered, and our favorite DIYs. Sign up below!
Follow Along on Instagram
Welcome to our online community where we've posted home, DIY, style, renovations, and family since '09. Renovating our #cljmoderncottage in Idaho and headed for new adventures in Raleigh, NC. #cljfam #cljtransformations
@chrislovesjulia


Links
Get Around
Make yourself right at home
Portfolio
Design
Casual Friday
Projects
Lifestyle
Gift Guides
All Posts
Shop
Love where you live.
Social
RivrLinks
Links
Get Around
Make yourself right at home
Portfolio
Design
Casual Friday
Projects
Lifestyle
Gift Guides
All Posts
Shop
Love where you live.
Social
RivrLinks
This is totally off topic here, and I know you are neck deep in projects but I must ask. Do you plan on doing a March chalk board pic??? I’d love to see what you come up with. :)
Jain Electro Mech is a largest Ceiling Fan Manufacturer, with different models.
We are still waiting for the final glass to come in for our window. We are just as anxious as you are–promise. Just got word, he should finish up tomorrow, so hopefully we’ll have all those details and lots of photos for you on Wednesday.
It’s really impressive you figured out how to do this on your own! I really like having lights controlled by a dimmer switch. Hope you enjoy them, too!
Hi, question for you. Are all the lights connected to I switch? Meaning, if you turn on one all will be on at the same time or you have different switches for each area of the room?
The drawing is done! I am just waiting to pick up the prints from my print company. Crossing my fingers I’ll have that for you tomorrow! Thanks for your interest, Summer. ;)
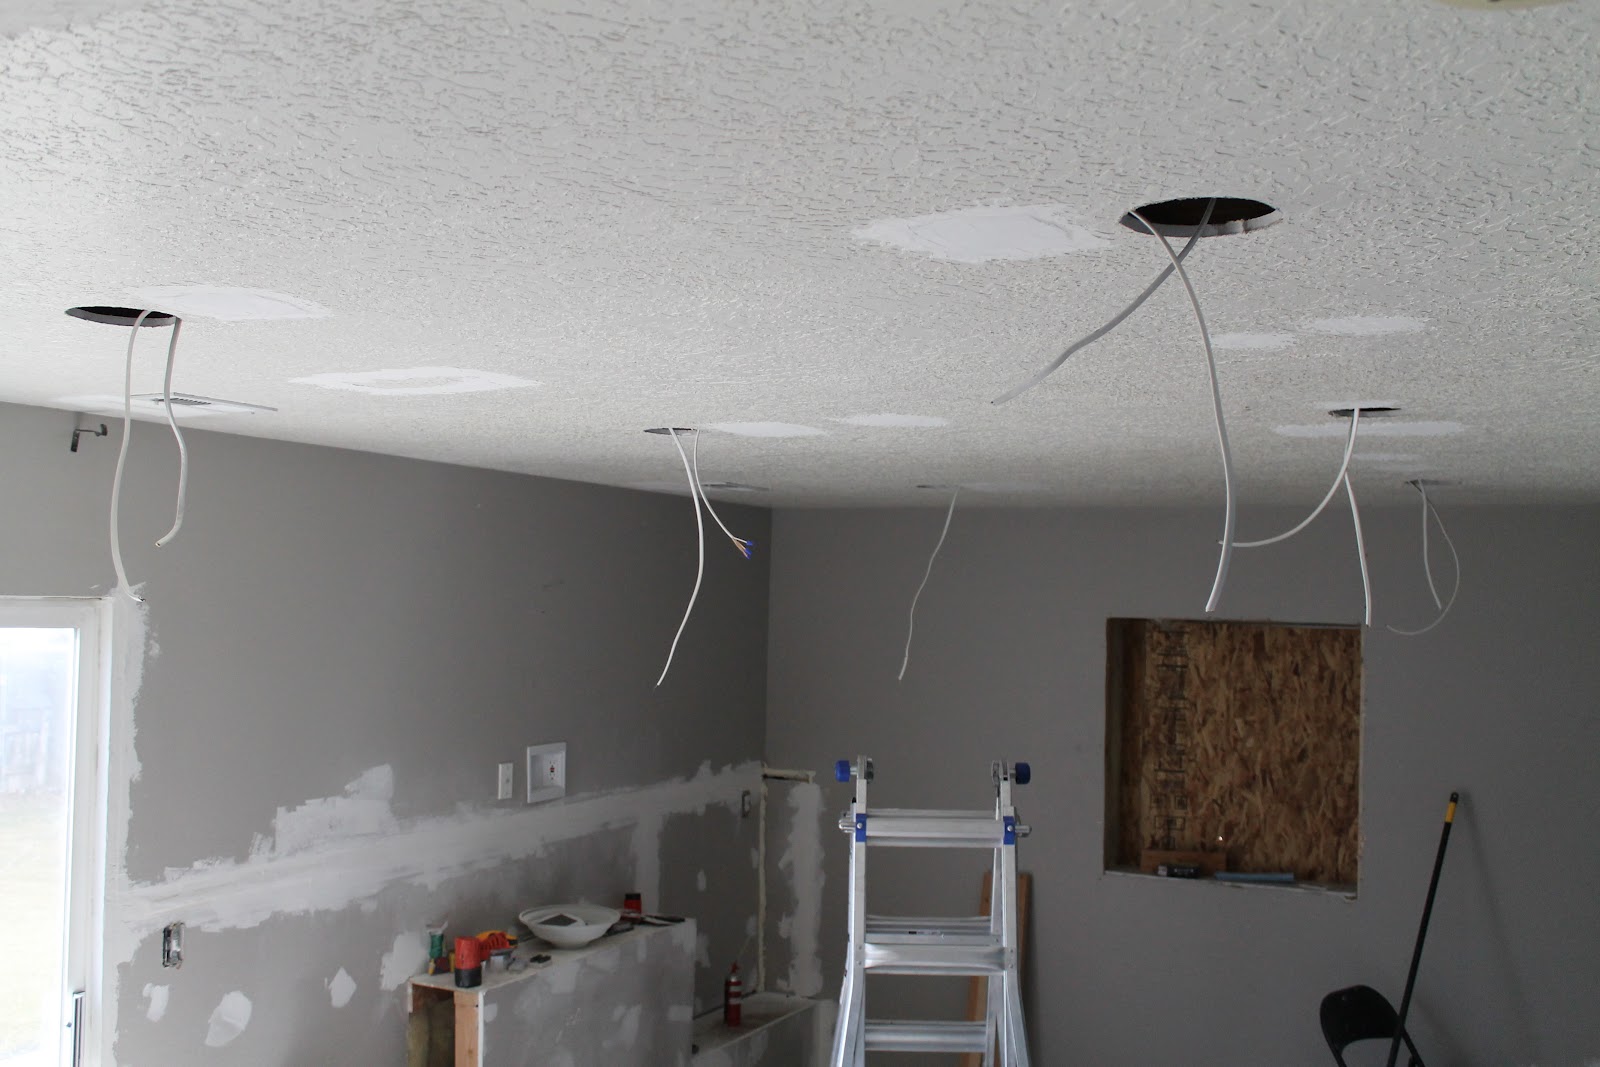
How did you deal with the wiring at the floor joists? Did you cut holes in the joists to fish the wire through?
Floor joists actually have a perforated circle that you can knock out and fish wire through. I imagine that is why they are there. There were times when we drilled a new hole as well.
well done!!!!!!
Your ceiling does NOT look bad at all! Wow! I can’t believe how much you saved. That’s crazy. I’m learning so much from this! Canned lighting is for me!
You never cease to amaze me with your quick thinking, extreme resourcefulness and hard work. you guys just always make it happen, you like…do it yourself…or something : D
I love that you guys figured out how to do this yourselves! The recessed lighting looks great!
Stop teasing and post about the window!!!!!!! :-) I’m getting anxious.
It helps that y’all are all over 6 feet so I’m sure that helped when dealing with the ceiling!
Hi Leila,
There are two switches for this room, one in the hallway and one on the wall by the stairs that leads down to this space. However, both are for all of the lights in the room. We did change both switches to be dimmers, but we don’t have control of which lights stay on and which lights don’t. They are all apart of the same circuit.
Hope it helps!
Yes it helps a lot. Thank you :) I will do the same in my house and I dont feel like paying for stuff we can DYI, right?
what a wonderful, talented, amazing guy!
Have you tried taking a small-grit piece of sand paper on some of the patches to see if that helps blend them in with the rest of the ceiling? I have no clue if that would work, but it’s a thought. I love what you guys are doing! It’s so fun to watch.