


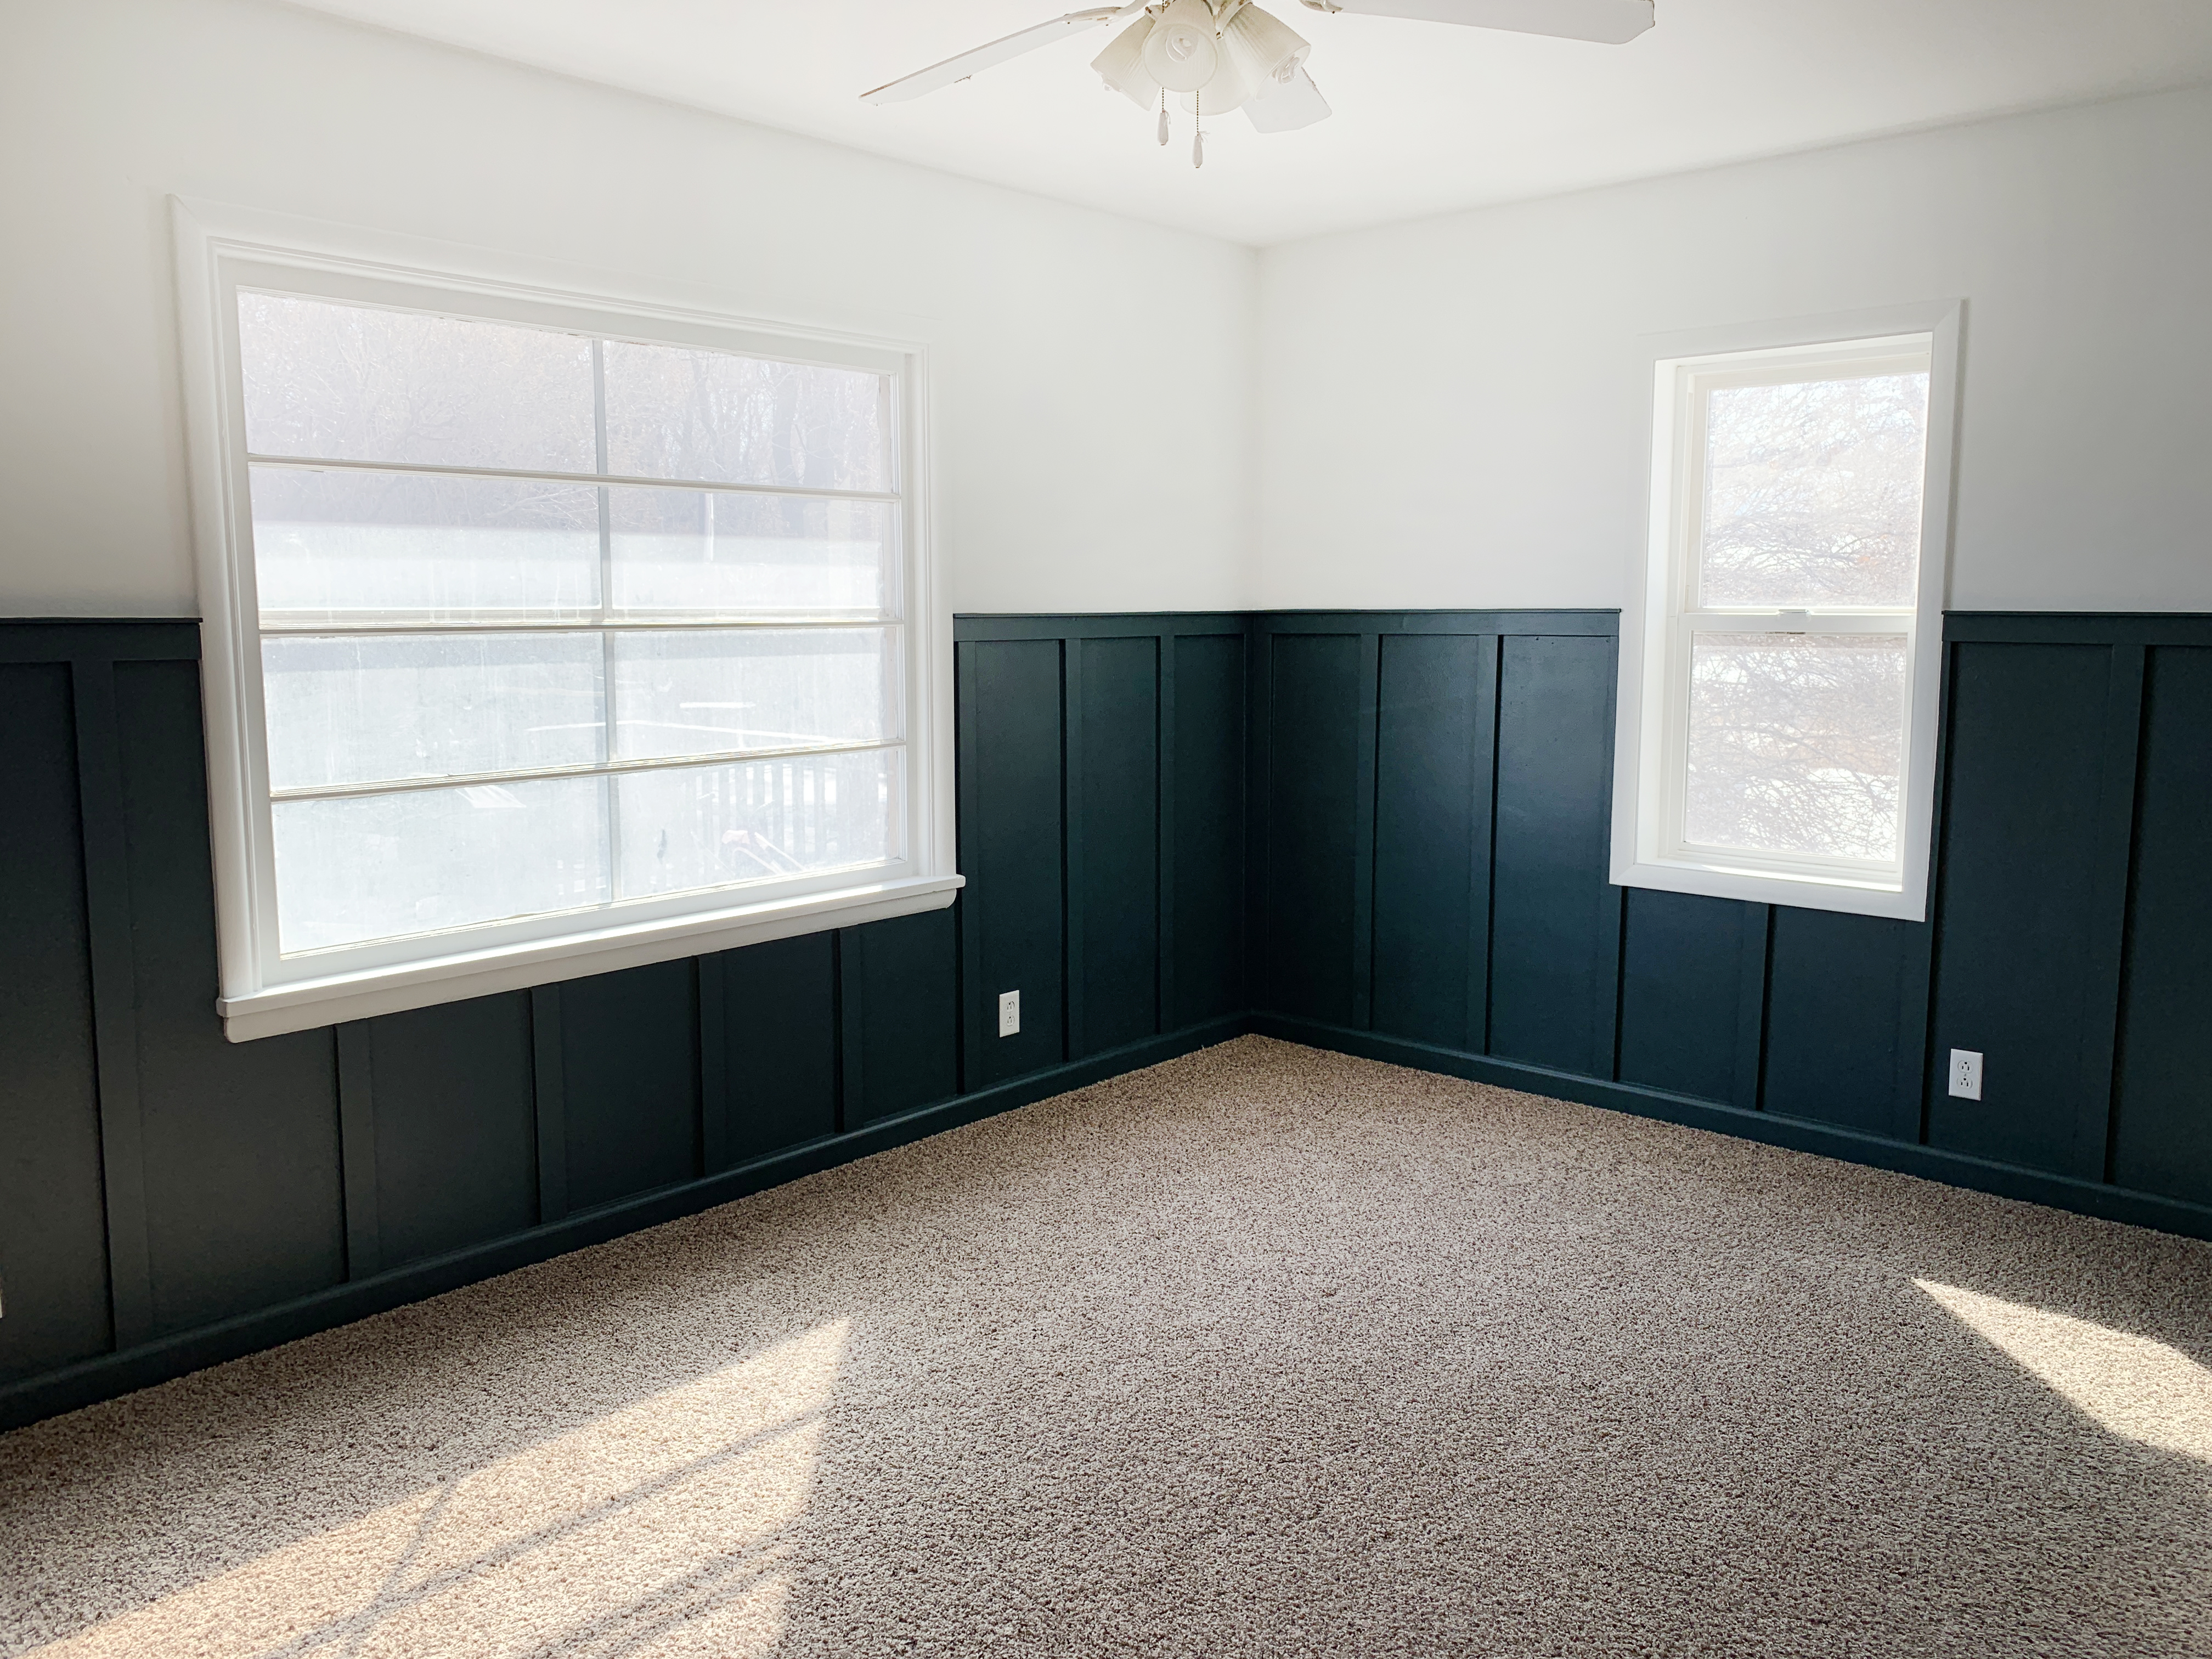
Over the weekend, we did a whirlwind bedroom makeover and we can’t wait to show you how it turned out later this week! But first, I wanted to show you the board and batten wall treatment we added that completely transformed the room.
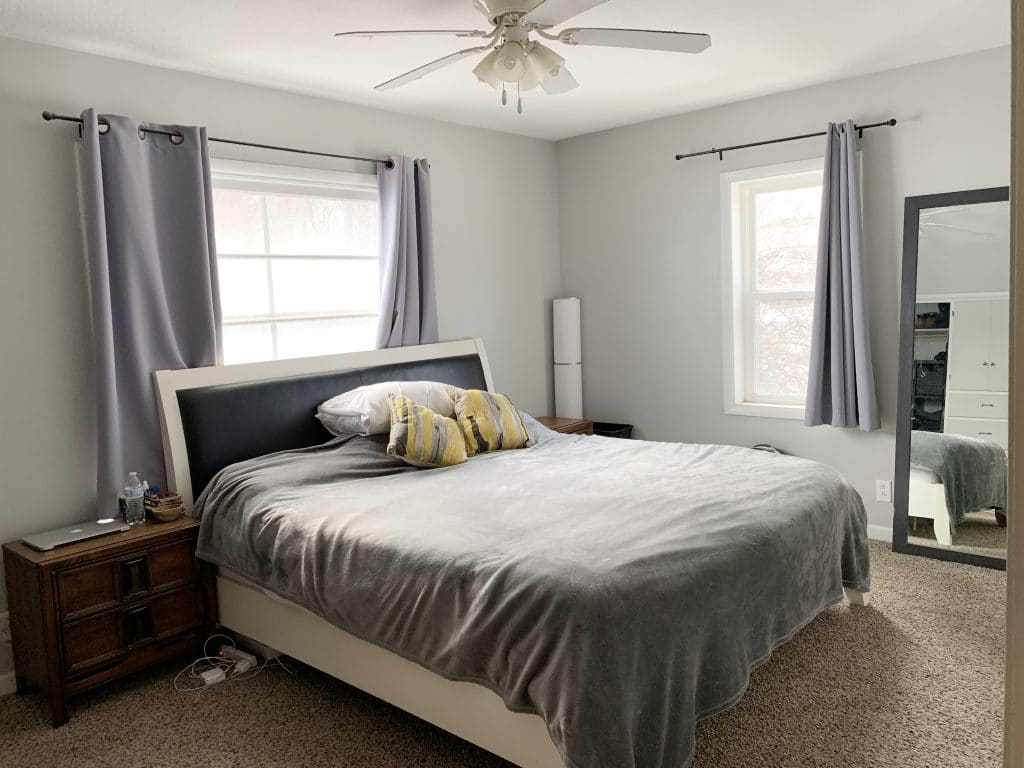
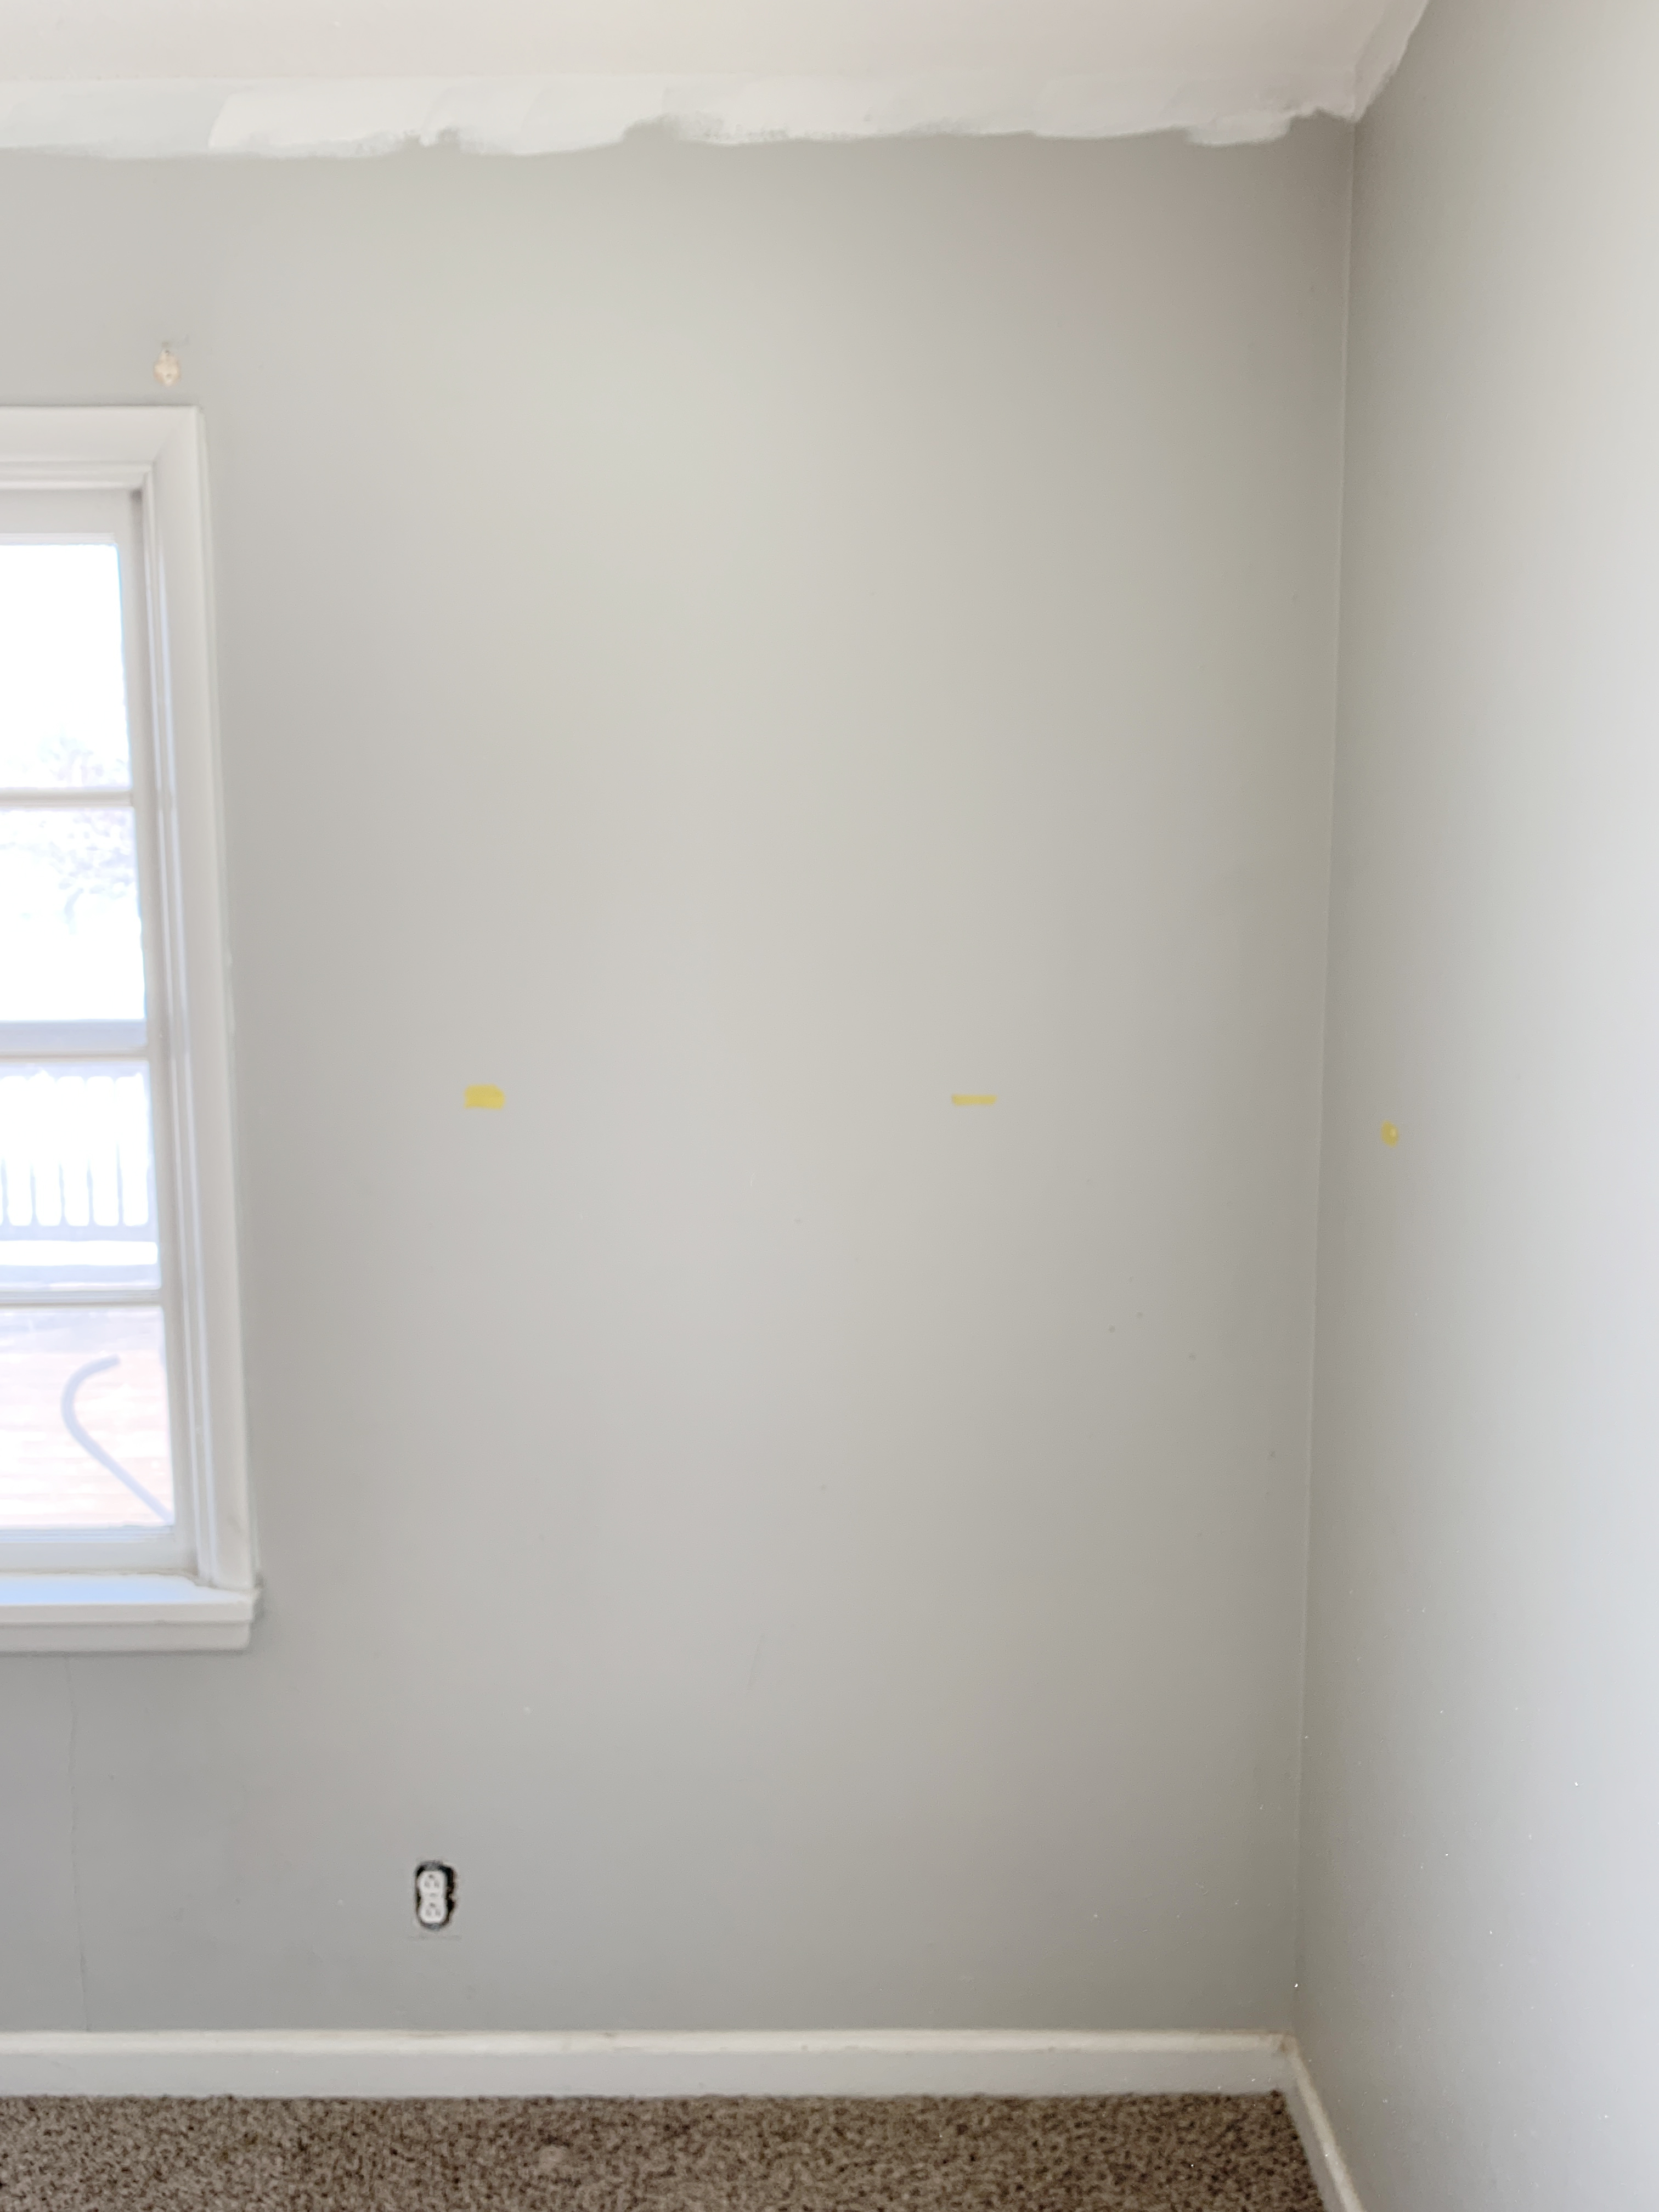
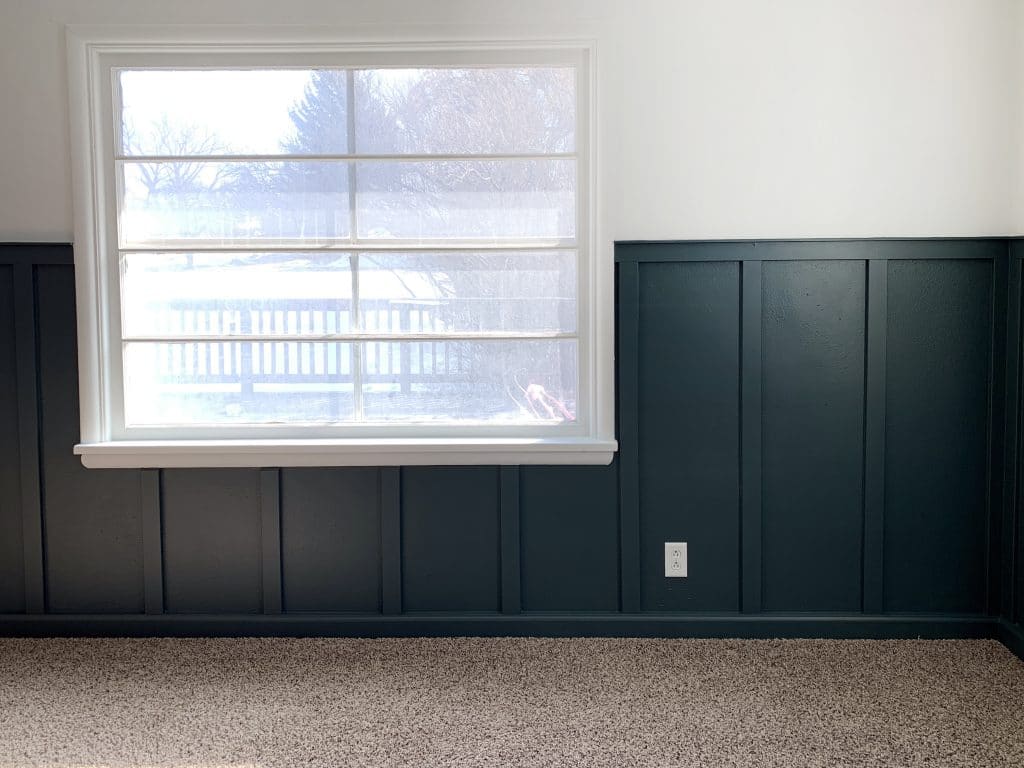
Here’s how it looked when we started–just your basic, neglected master bedroom:
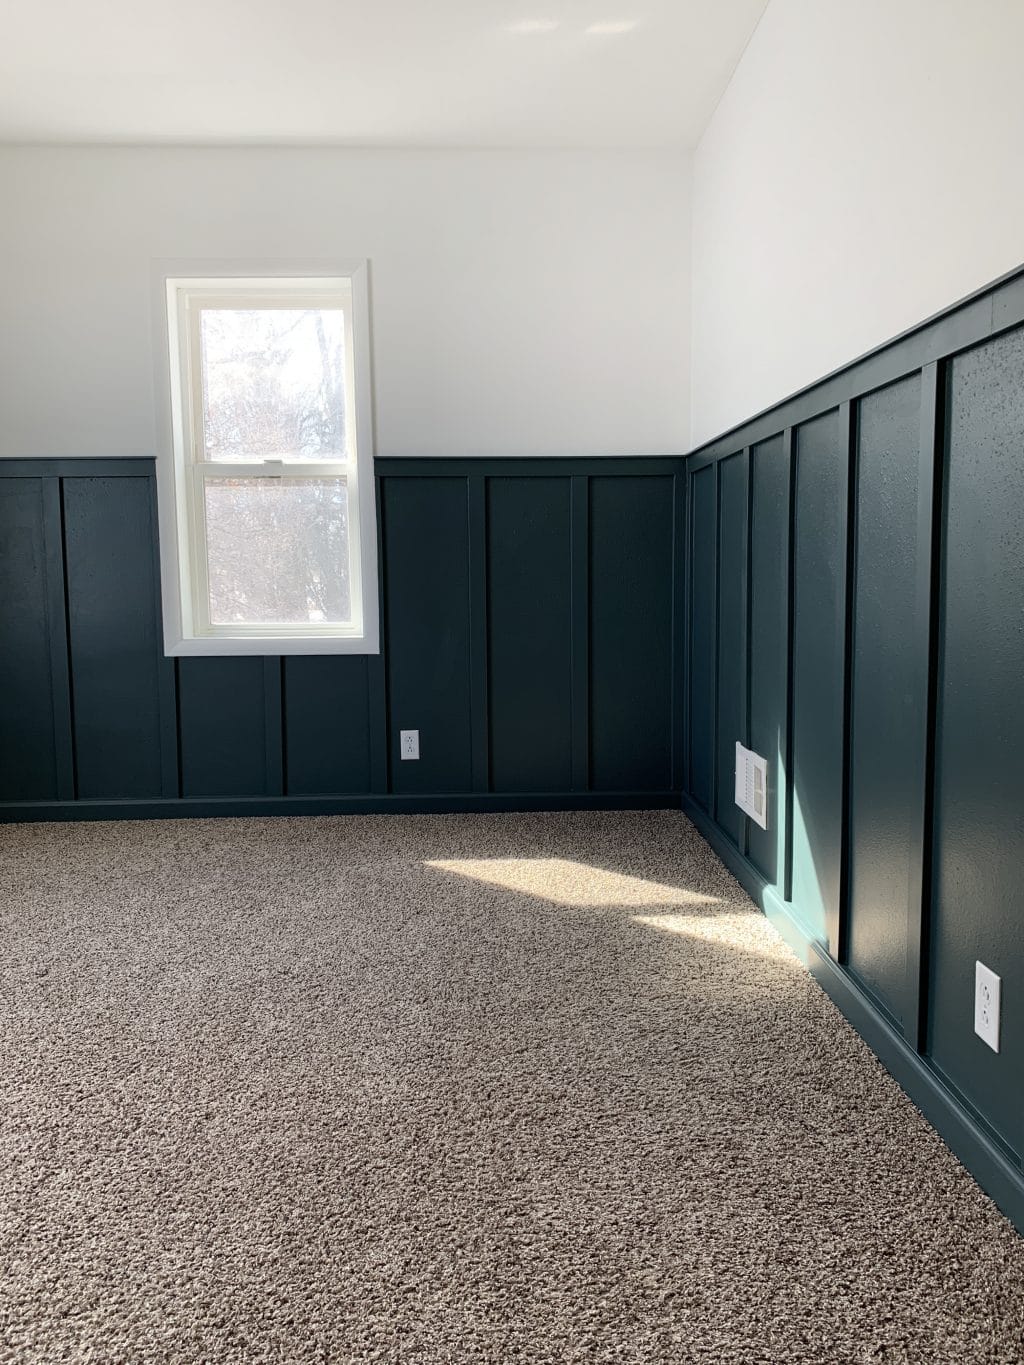
Adding board and batten to walls is not a new thing, but I love that we’re seeing a resurgence of it in color, instead of white. It feels fresh and interesting and sophisticated. In here, we went with a really rich, saturated greenish-blue called Deep Pewter by Benjamin Moore (color matched to Valspar) in a satin finish. Up top, we used with Sherwin Williams Extra White in a flat finish. The contrasting colors and sheen really allow the trim work to pop!
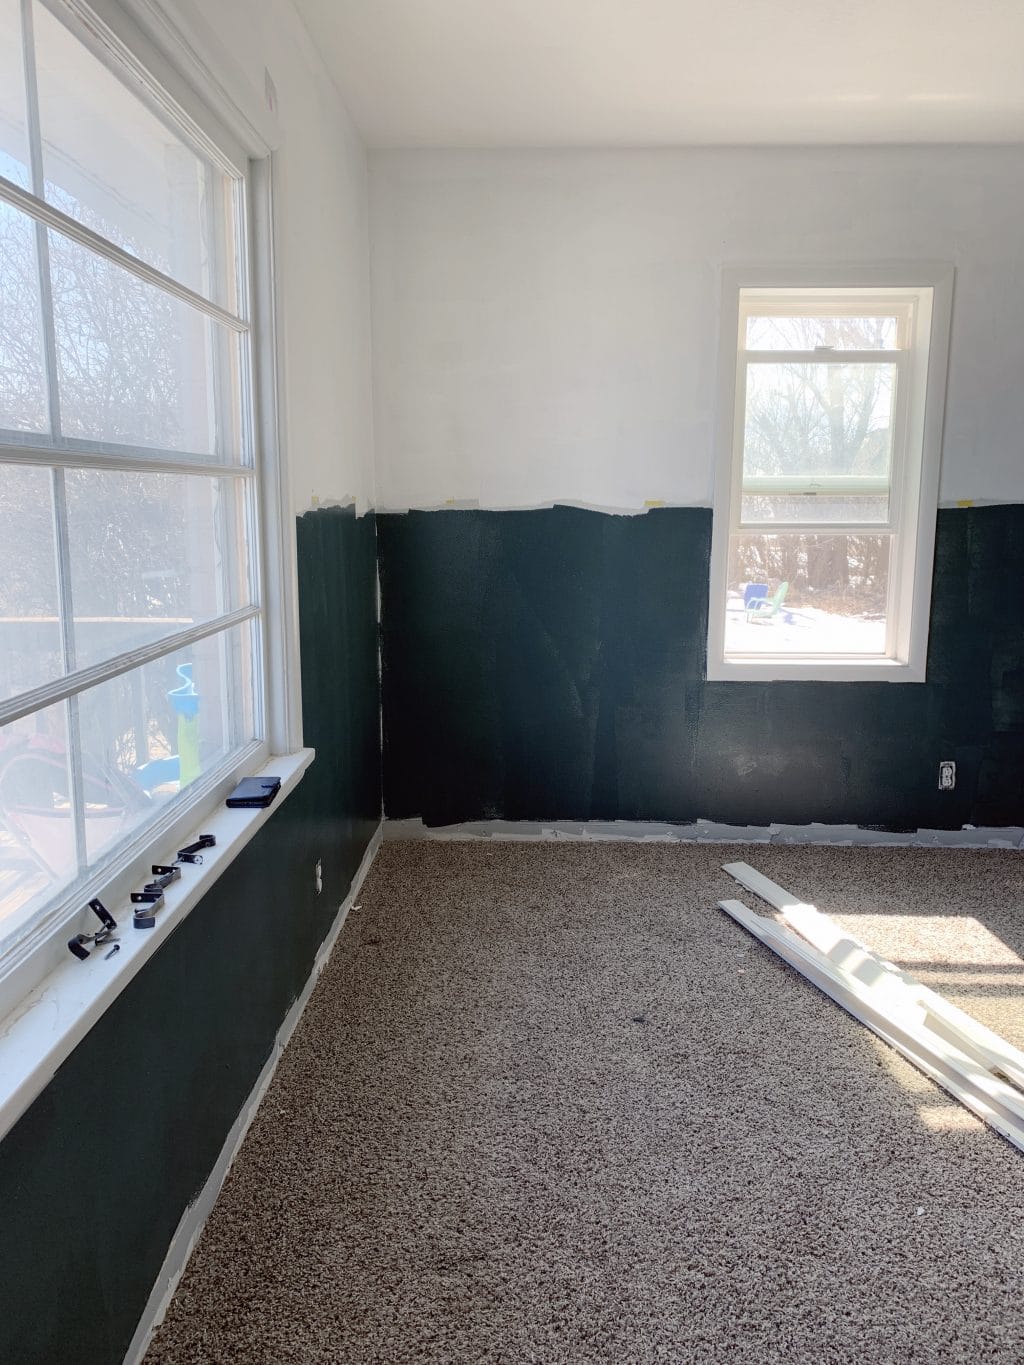
Before getting started adding the trim, we taped off 48″ above the baseboard and painted two coats of each color.
It didn’t have to be exact since we would be adding a horizontal border around the entire room–just close to make our lives easier down the road.
How to Install the board and batten
1. Install flat MDF baseboard
The purpose of the flat MDF baseboard is to give the wall pieces something to but up against, evenly. If you have decorative baseboard that tapers at the top and you add wainscot on the walls that is thicker than the top of the baseboard, the intersections look off, you know? By adding a layer of MDF baseboard the same thickness as your wall pieces, you’ll have more seamless connections and can then add a more decorative baseboard on top of the flat MDF. Ensure the width of this moulding is at least that of your baseboard, and not more than 1/4in wider. Ours was 3.5in wide, with 3.25in baseboard. We removed the old baseboard before doing this.
2. Cut and layout all the vertical pieces
Measure and cut the vertical pieces to your desired length. Since we were working with 8ft pieces (which were actually about 8ft 1in – we used these) we cut our pieces to 48in to reduce waste. Cutting them all at once also speeds up the process. Once you have a stack of them cut, lean them up against the wall approximately where you’d like them to go, with pieces flat against each wall.
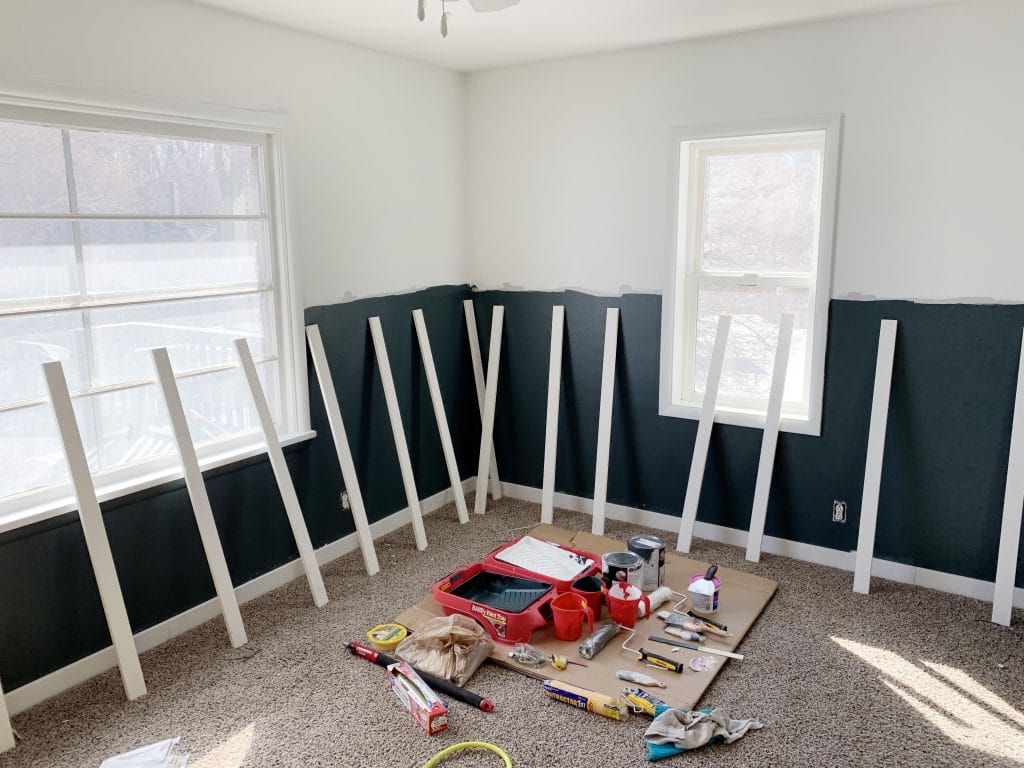
3. Calculate placement of vertical pieces
Once you’ve leaned the boards up against the wall in the approximate spacing you’d like, calculate the exact spacing before attaching. You do this by measuring the width of the entire wall, subtracting the width of one of the vertical boards, and dividing the remainder by how many spaces there are between the boards on that wall.
For example, our wall was 15ft, and we had 12 vertical boards on the wall. With one full board at each end of the wall, that left us with 11 spaces between the boards. Each board was 2.5in wide, so the formula looked like:
15×12 = 180 (this is converting feet to inches)
180-2.5 = 177.5
177.5/11 = 16.13
This meant that from the right side of one board to the right side of the next, it would be 16.13 inches (on the measuring tape, that’s about 16 and 3/16). It’s important to remember the 16.13 is not the space in between boards, but from the right side to right side (or left side to left side).

Of course, most rooms will not have walls that are all the same length. That’s why you eyeball the vertical board placement first, so the boards look like they’re spaced out fairly evenly. Do the same formula for each wall, and you’ll likely end up with variations of an inch or so which, for the most part, won’t be noticeable.
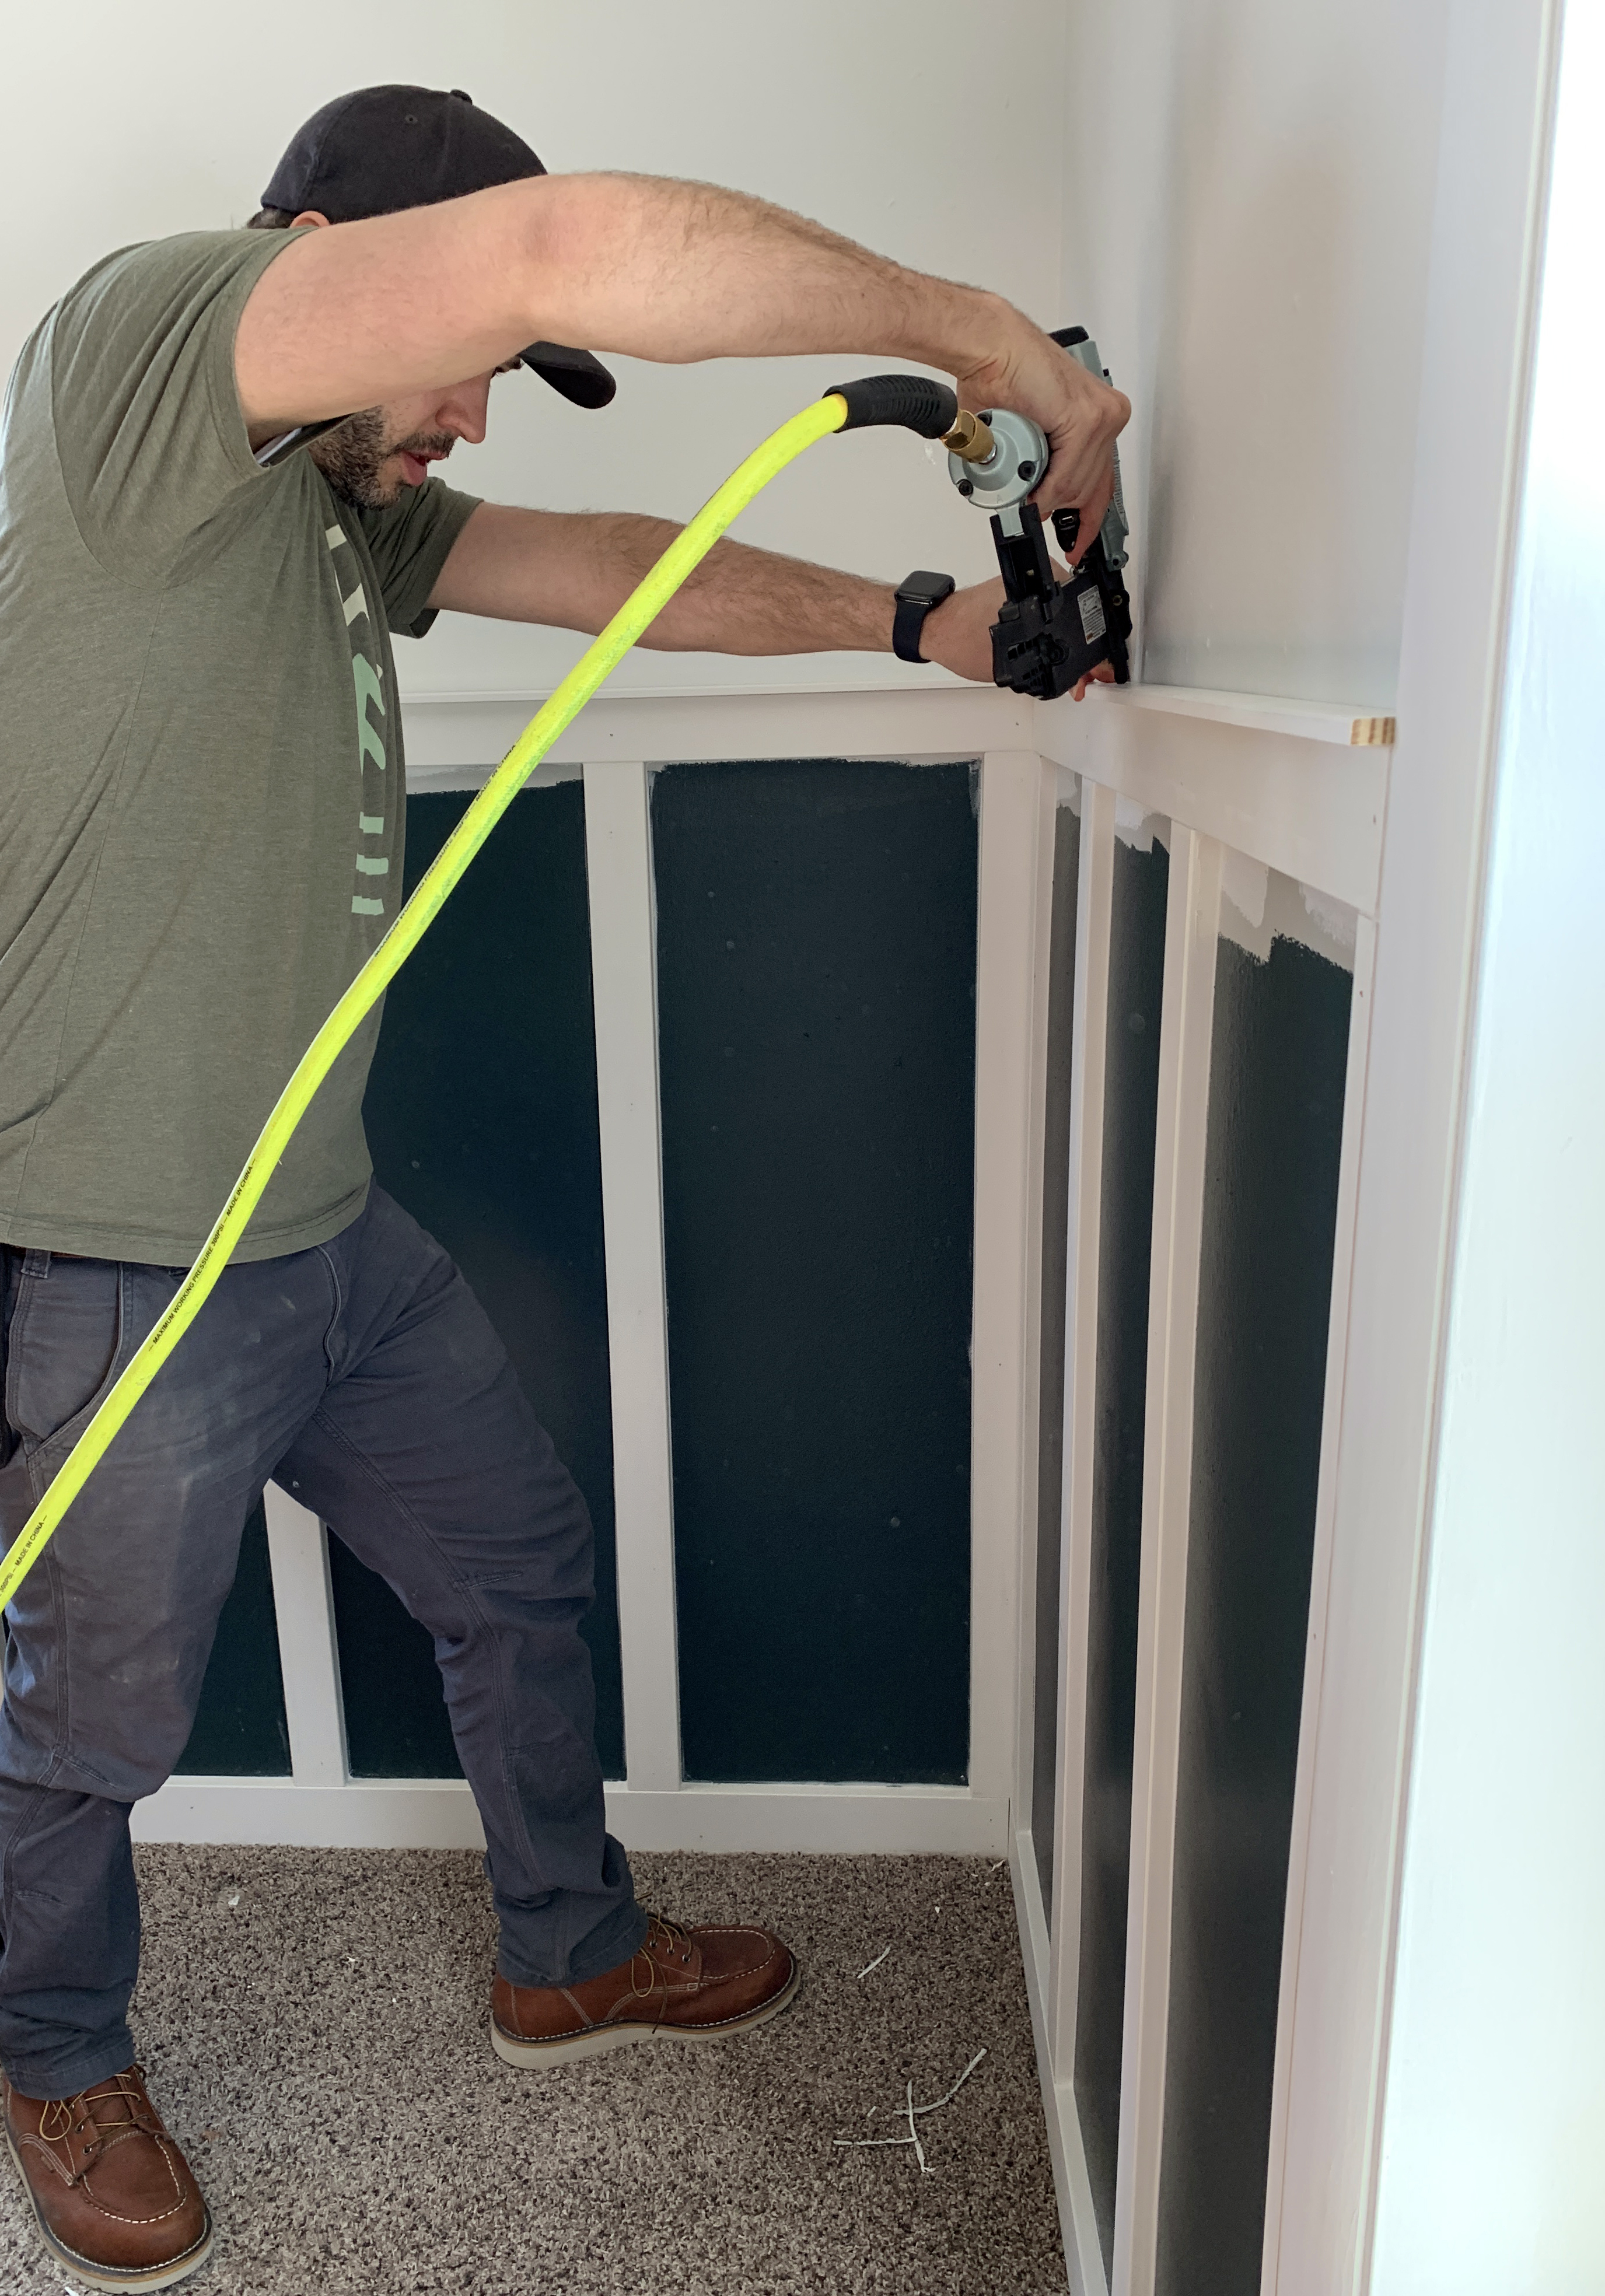
4. Attach the vertical boards
Attach your first board to the wall so it’s level, vertically. Mark the base MDF you installed previously according to your measurements (for our first wall, using the example above, that was 16 3/16). Meaning, if you calculated 16 3/16 inches, make a mark on the base MDF every 16 3/16 inches. Line the same edge of each board on those marks, level the pieces, and attach to the wall.
If attaching to sheetrock walls, you’ll usually want to run a small bead of liquid nails or paneling adhesive along the backs of the board before putting in place. Then, using a brad nailer with 2in brad nails, nail the board in place putting your nail gun at a slight angle, alternating the angle for each nail. Since you most likely won’t hit a stud with each board, the adhesive will be what holds it to the wall. By adding nails at alternating angles, they will create enough grip to hold the board in place. If the nails all go straight in, the board can easily be pulled out before the adhesive cures. Which is also the case if all the nails are at the same angle.

5. Attach chair rail
Chair rail is installed horizontally along the tops of the vertical pieces. They have decorative chair rail, which is most common. But for this project, we simply used the same size MDF as we did for the vertical pieces, and attached a narrow piece of moulding on top like a hat that was a small detail that added so much.
6. Install baseboards on top of the base MDF
Make sure your baseboard doesn’t extend beyond the top of your base MDF.
7. Caulk all the gaps and seams
This is the most tedious part of the job, but also makes it so your job doesn’t look amateur. I recommend this fast drying caulk and this comfort-grip caulk gun–it’s life changing!
Last step is to finish painting. You may be wondering why paint the bottom half to begin with at all if you’re going to have to go back and paint all the trim pieces anyway? I promise it will still save you time! Rolling in between every board is very tedious and you can quickly roll the added trim pieces and cut in the sides. It’s not a bad idea to paint the top baseboard before installing it, but we didn’t have time, so I just taped off the carpet with painter’s tape, shoving it a little under the baseboard, and it went fast.
You’ll also notice that these walls have a slight orange peel texture–still worked great!
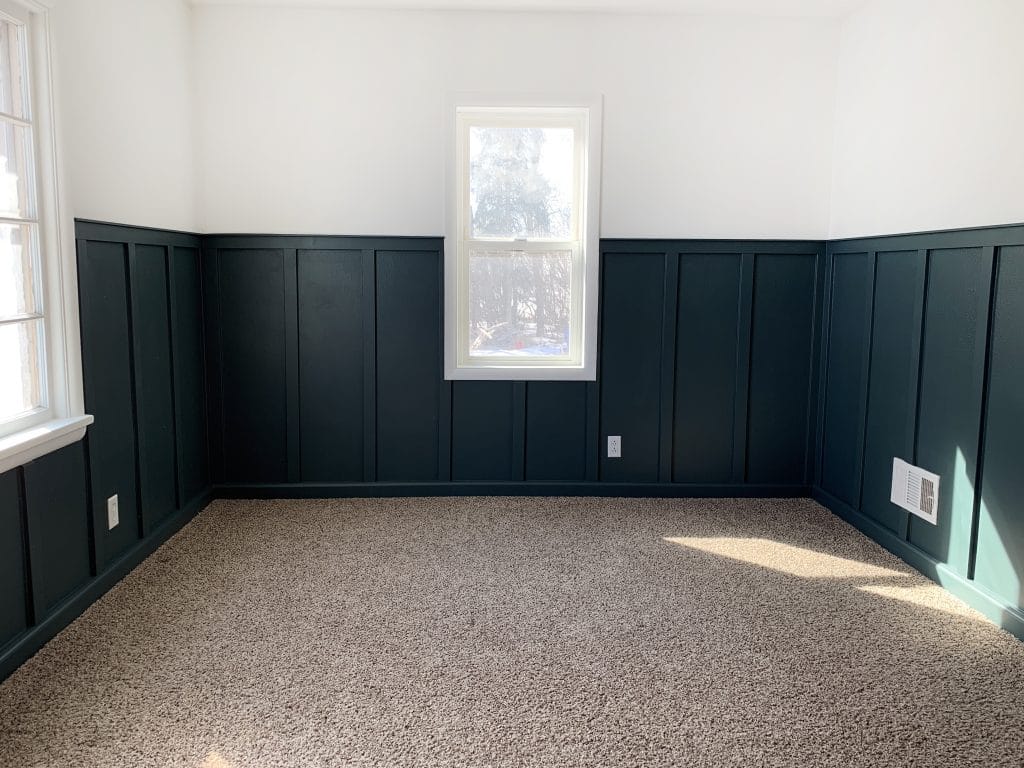
We added up all of our receipts for this project and the trim pieces came to $205.35 and the two gallons of paint were $35/each for a grand total of $275! Such a steal for how it impacted the space. We already have most of the furniture in place and I’m off to photograph the afters for you! If you try this, we’d love to see photos!
Leave a Reply
What do you think?


Semihandmade
Our wood grain Shaker cabinet fronts were designed for busy, high-traffic homes like ours. Clad with durable textured thermofoils, this line is compatible with Sektion, Akurum, Godmorgon, and Besta cabinets from IKEA. It's the perfect, practical way to add the warmth of wood to all the rooms of your home.
Collaborations
learn more

next
Loloi
We have teamed up with Loloi to create a line of rugs that are as affordable as they are beautiful. This collection houses a great mix of traditional and modern rugs, in cottage-y colorways, as well as vintage-inspired beauties that you’ll want to roll out in every room.
Collaborations
learn more

next
STUGA
We partnered with Stuga on a line of hardwood floors — The Ingrid is really livable, and the color is very neutral. It doesn’t lean warm or cool, it’s that just right in-between. We have really loved putting it everywhere in our house. It’s the best jumping-off point for design, no matter your interior style. In addition to being beautiful, Ingrid is really durable — we have three kids, and we always have a home construction project going on. Ingrid stands up to it all.
Collaborations
learn more

next


SHop all
What We're Right Now
What We're Right Now
Looking for our favorite things? A place to shop our home room by room, or just catch up on what Julia's wearing / loving right now? Browse the CLJ shop.
Loving


Portfolio


Design
Befores, afters, mood boards, plans, failures, wins. We’ve done a lot of projects, and they’re all here.
BROWSE BY CATEGORY
let's break this thing up
We have a long-standing relationship with DIY, and love rolling our sleeves up and making it happen.
Projects
Even when you don’t want to rip down a wall, you can make that space in your home better. Right now.
read more
read more
read more
02
01
03
looking for inspiration?
A reader recently asked me if I’m starting to fully embrace traditional style and whether we still consider our house to be a “modern Colonial” and why. It was a really great question and so timely — I had really just been thinking about my approach to this home and how my style has changed […]


SEARCH THE BLOG
We've been doing this since 2009 and we've posted a whopping 24145+ blog posts and counting. You might need a little help searching, huh?
looking for something?
find stuff like:
")
Can We Send You Our Love Letter?
Another way for us to stay in touch! Joining our weekly newsletter gives you access to exclusive content, never-before-seen photos, your questions answered, and our favorite DIYs. Sign up below!
Follow Along on Instagram
Welcome to our online community where we've posted home, DIY, style, renovations, and family since '09. Renovating our #cljmoderncottage in Idaho and headed for new adventures in Raleigh, NC. #cljfam #cljtransformations
@chrislovesjulia


Links
Get Around
Make yourself right at home
Portfolio
Design
Casual Friday
Projects
Lifestyle
Gift Guides
All Posts
Shop
Love where you live.
Social
RivrLinks
Links
Get Around
Make yourself right at home
Portfolio
Design
Casual Friday
Projects
Lifestyle
Gift Guides
All Posts
Shop
Love where you live.
Social
RivrLinks
Hi Julia,
Thanks for this tutorial. I was wondering, did you treat the trim pieces first before painting?
We have board and batton all over the downstairs of our house. When painting someone recommended that I should paint it the same color that I paint the wall. I like the two tone of yours but is that just personal preference or if you have a lot of it is it better to do all one color?
Where you have inside or outside corners on the walls, would you recommend mitering the battens, or would they be flush with the wall? Especially at outside corners, I am having trouble visualizing what would look best. Thanks so much for this tutorial!
I have been searching for an informative tutorial on how to do this!!! Thank you! Is there a way to make this project renter friendly? We can paint/add nails, but the adhesive would have me worried.
Ooo! Great question! Could you try to apply the board and batten with command strips? Or, could you show your landlord this blog and recommend the improvement? :)
Love this! We are currently doing in our master! Question on the paint..is it all in an eggshell finish or did you do the baseboard and window/door trim in semi gloss? Thanks!
LOVE this so much, I’m inspired to paint my nursery like this! I ran into a snag though – I went to get the paint sample from BM, and they said “Deep Pewter” was not a BM color, but one they could match from Portman Paints…is there any possibility the color is noted wrong, or goes by a different name?
Oops! It’s supposed to be DARK Pewter.
We’re thinking of using your tutorial to redo a small bathroom. Is there anything you’d do different in a bathroom? It doesn’t have windows and we’re going to add wallpaper above it.
Depending on your climate you may want to opt for exterior-grade trim, which is made with vinyl and would be less susceptible to moisture damage. But if you live in a dryer climate (like we do) regular trim and a good quality paint are great.
I am in love!!! I have to ask how you painted the baseboard when it meets up the the door trim???? I assume the door trim is white like the windows.
Correct – the door trim was white.
I see how you decided on 48″ long pieces, which matches up nicely to the midline of the windows. I am strongly considering this wall treatment for a bedroom in my house but the bottom of our windows comes up 43″ from the floor (our windows are shorter yet wider). Would you recommend doing the 48″ long vertical pieces anyway or should I go up higher? Or maybe even lower beneath the window sill? Thanks!
I’d tape it off and see how it looks! That’s what we did first to determine which height looked best in this room.
I’d love to do this in my stairway which currently has gross old paneling…but my baseboards are decorative and original to the house, so I wouldn’t want to remove them. They’re slightly curved at the top as well as well. Any thoughts/advice on how to resolve the edge? Was thinking I could try adding an additional skinny trim piece.
That’s a tough one. You could carefully remove the baseboards and put them back on top of a new trim board to bring them out like we did, but that’s a dangerous game. Especially old trim can be brittle and snap easily. You could bevel the cut a bit so the edge tapers into the baseboards, or use thinner trim pieces.
Maybe measure the thickness of the upper edge of your decorative floor trim and visit the wood trim department of a store. They sell 1x4s that might be a better option, not actually 1″ thick. Also some stores will cut your trim for free, you could certainly inquire. There’s also the slats made to cover staples when screening a porch, very thin and probably less expensive. Also consider vinyl trim. I haven’t utilized it for that purpose but it is often available in unusual sizes. (I had a friend that rented a home, she wanted this technique but her landlord was against it. We painted faux B&B on the walls. Her landlord actually liked it and approved adding wood but she was happy with the less expensive option.)
I just love how this turned out, and the color is gorgeous.
Do you miter the corners of the vertical pieces that meet in the corner?
Yes we did!!
How did you finish the end pieces of the chair rail? In one photo I can see the unpainted bare end next to the door. Or ends at a window.
I’m really enjoying this project. Big impact and short term work. Definitely want more like these!
Just painted them!
This transformation is so beautiful and inspiring! The paint color is perfection.
Amazing! I may have to give my own neglected bedroom some attention after reading this. Love this color!
Love this project and i think with furniture and curtains the halfway board and batten will definitely even out. Such a pretty green, too. I loved to recognize the old bedroom furniture as yours and Chris’ from way back in 2011 or 2012. That’s what friends are for, I always try to give my furniture to friends and family that will use them for a couple more years. Great way to help out when you’re just starting out as a family and even better for the environment. :)
I love that deep green, and how the board and batten adds architectural interest. I think one thing that would really take it up a notch would be to use a darker colored electrical outlet and vent cover. Those white outlets just stand out so much and black ones would blend in so much better and look really custom. Looking forward to seeing the entire makeover!
So gorgeous! Hoping to do something similar all in white. My issue is that the wall isn’t hugely square to the floor and ceiling. When I’ve put wood panels up to it there is often a gap in the middle- do you just accept this and caulk it?
Could you cap it like we did here? And yes, caulk is your friend!
Thank you for sharing. I am wondering, we have board and batten work in our hallway. We are thinking of adding Baboa Mist (BM) to the bottom portion, and wondering what sheen would you recommend for a high traffic area?
I would recommend Satin. :)
Looks fantastic! I’m glad you decided to keep the windows white. I look forward to seeing the finished room.
Super pretty color and I’m so surprised you painted satin paint over orange peel texture! It doesn’t really bother me like I thought it would. I’ve got a wall in my bedroom I’m eventually planning to do box moulding on (after the wallpaper is removed) and am on the fence about whether to do a thin backer board over the whole wall first or not.. because there is orange peel texture under the wallpaper (I know!!). this makes me want to at least mock it up with the orange peel left alone.
Maybe consider ¹/⁴” sheetrock.
Love this! I’ve eyed various projects like this over the years but always felt I can’t do it because we have thick texture on our walls. Do you think it still works on heavily textured walls?
If your walls are textured more heavily than a light orange peel, you might consider adding a smooth, thin board to the lower half first.
We have the same problem. I have used 1/8th inch Masonite 8 x 4 sheets that we cut to size and are about $10 each at either Lowe’s or Home Depot. (Can’t remember which one carried them) it was definitely a big extra step, but turned out nice. I used staples to put it onto the wall where the would be covered by the battens since the brads pulled right through the thin board.
A beautiful color choice and I can’t wait to see it done. There’s just one thing niggling at me, and perhaps it’s my art history degree. Because the board and batten goes halfway up the wall, it chops the room in half in a way that is not pleasing to the eye … my eyes anyway. This has been a pet-peeve of mine for years! If you use the rule of thirds of classic architecture, meaning you go up the wall 1/3 of the way and the top is a chair rail, or you go up 2/3 of the way and the top is a picture rail, it is so much more pleasing to the eye. The proportions are perfect that way! I get that you were trying to save time and money by cutting the 8-ft boards in half, but you also chopped the room in half. Curtains, art, and furniture will all help, though. :-)
I actually was an art major too so I know all about the rule of thirds and I agree, it’s very pleasing to the eye, but in this case because the room isn’t even 8ft tall, pushing up to the third actually made the room look even shorter and heavy! I think it totally depends on the room, as always.
I have to agree with Debbie in that I wish the height were closer to the 1/3 mark than the halfway mark! I get that 2/3 up would look too heavy in this room with that color but halfway does bug me proportionally speaking.
I guess I just love breaking the rules. Haha
Go on breaking the rules and ignore the haters!!!
I don’t think anyone is being a hater! Some people are very respectfully commenting that they don’t like the way the walls feel cut in half horizontally. Voicing a differing opinion on a design element is not being a hater. :) Hopefully you were just joking. :)
I am an Interior Designer and like the way the board and batten looks. Though I respect the thirds rule of classic architecture, I think it would have looked a bit old fashioned in this room. I like how the chair rail hits mid window.
What does it look like at the point when the baseboards hit the door trim? Do they stick out beyond the trim?
The baseboard meets the door trim.
Can you show a close up picture? I have been wanting to do b&b but I worry that adding msf behind our baseboards will make them protrude our beyond the door trim. I’d love to see a picture of the baseboards with the door trim for reference. It looks great, and I love that you painted the baseboards to match the color instead of leaving them white- not that I hate that, but I like the color best!
Are the windows trimmed out in different trim? If so, I love that y’all embraced the quirkiness
Yes! They’re are molded plaster so not going anywhere hahaha
Looks amazing! I’m thinking about doing a grid patterned board and batten look floor to ceiling on a wall in my dining room and painting it white. I’m a fellow Idahoan with orange peel wall texture. Covering up the whole thing with board or skim coating the whole wall would take a lot of time and more $. Do you think it’s worth it? Would you guys have done it if you had more time and could have spent a little more money? Thanks!!
We’ve done a variation of this project a few times and never added a board underneath
Looks amazing! We are planning to do the same on one focal wall in our room. Our baseboards are currently white. Would you recommend painting the baseboard the same color as the board and batten if it is only one wall or keeping it white? I keep going back and forth =)
The accent wall in our living room we painted the baseboard the same color but I think it could go either way
Oooh! I can’t wait to see how that looks with curtains and then the bed placement. I’m wondering, with the change in tone, if you have to change the curtains and other things, increasing the cost??
The before curtains were way too short so yes we changed them, but we kept the same rods! Excited to share