


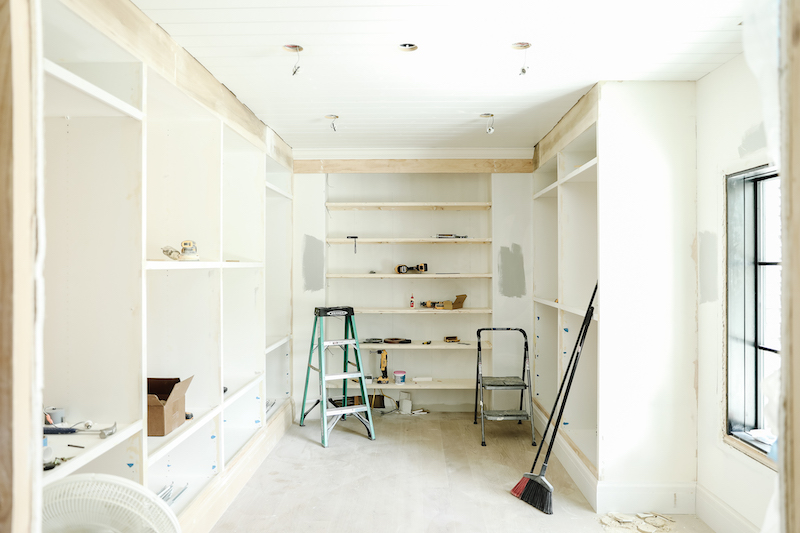
We’ve talked about wanting to give our ceilings a bit more attention in this home than we have in previous homes, and yesterday we did just that! Though things have really slowed down these past few months (for everyone), we’re making such great progress and are getting so close! Here’s how our closet started out this week:
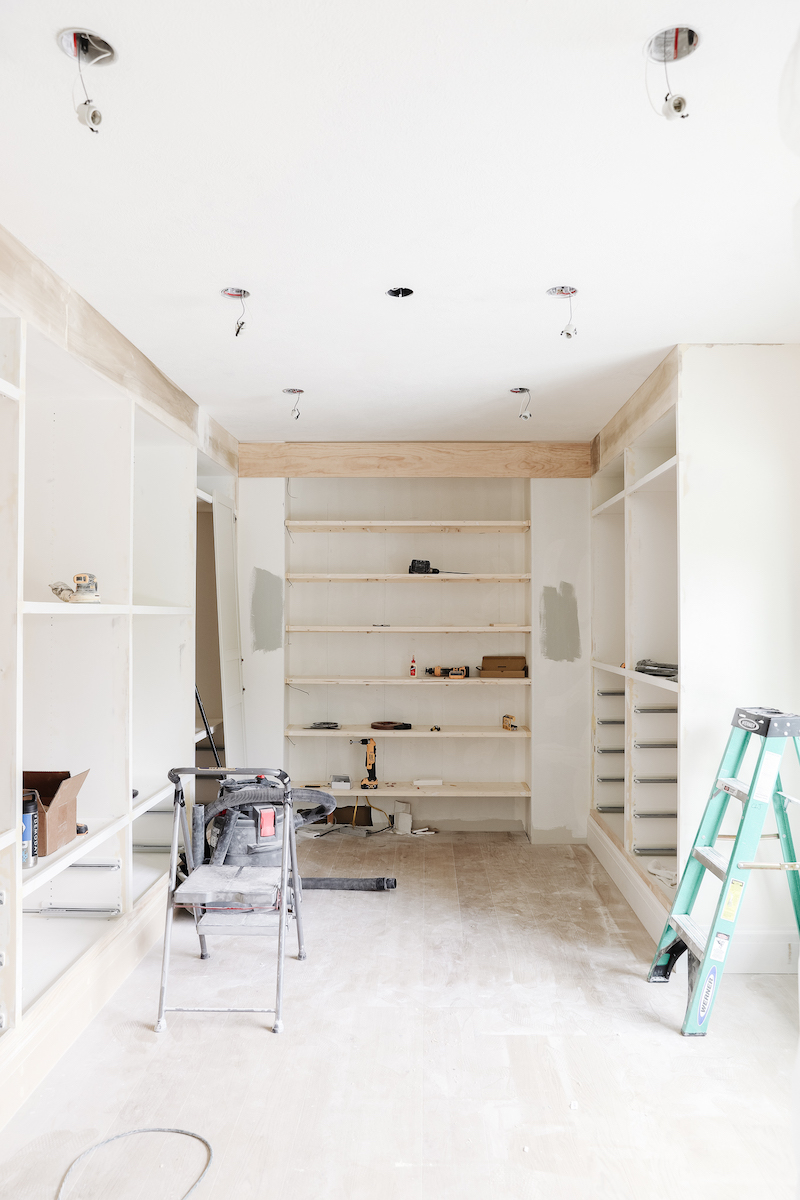
Not bad, not bad. But today she’s looking more like:
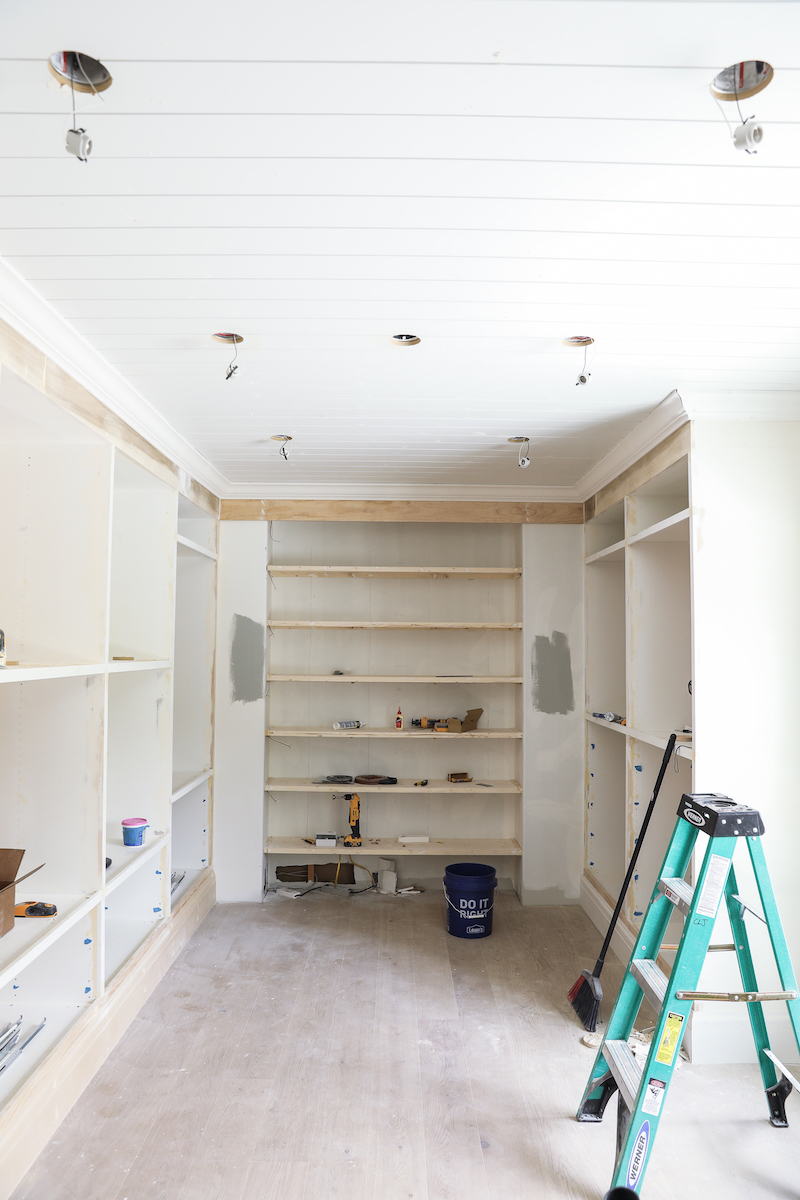
Doesn’t that ceiling just make you so happy?! The planks only took 2 hours and the crown another 2, so this could definitely be a 1-day project for a lot of applications – the shiplap installs so fast. Here’s how we did it.
Materials you’ll need for this project:
• primed shiplap
• primed crown moulding
• brad nails
• liquid nails
• spackle/wood filler
• paintable caulk
Tools you’ll need for this project:
• miter saw
• measuring tape
• brad nailer
• jigsaw/angle grinder (if coping the crown)
• caulk gun
Plan for your room
Notice we didn’t list how many pieces of shiplap or crown moulding we used. We didn’t list that because it’s irrelevant to your room. When measuring out for shiplap, take the following factors into consideration:
• Do you want seams (butting two boards together to span an area)?
– you have less waste with seams, but not as a clean of a look
– depending on the size of your room, you may not have the option of no seams
• Which direction do you want the lines to run?
– do you want the gaps in the boards to look like lanes on a road, or steps of a ladder?
• What length of boards would be best?
– depending on your room size, you can sometimes reduce waste and avoid seams by purchasing the right length of boards
Our closet is about 10 feet at its widest, and a little under 8 feet at the narrow. We went with 12ft and 8ft boards and were able to save a lot of waste (and some cost), as opposed to going all 12ft. And when we cut our boards, we didn’t have to be exact since we added crown moulding after that covered the edges (more on that in a bit).

Hang the shiplap
If the direction you choose for your shiplap runs perpendicular to your ceiling joists, happy day! Simple run a chalk line alone each joist and pop a brad nail into each board right on the joists. Glue is optional in this case, but usually a good idea as it keeps the boards from loosening and beginning to rattle over years of tiny vibrations that occur in every home.

If your boards run parallel to your ceiling joists, as in our case, then you definitely need to use liquid nails on the back of your boards. Additionally, you’ll still use the brad nailer to drive brad nails through the shiplap into the ceiling, at alternating angles. The nails are really just there to hold the board in place as the liquid nails dries.
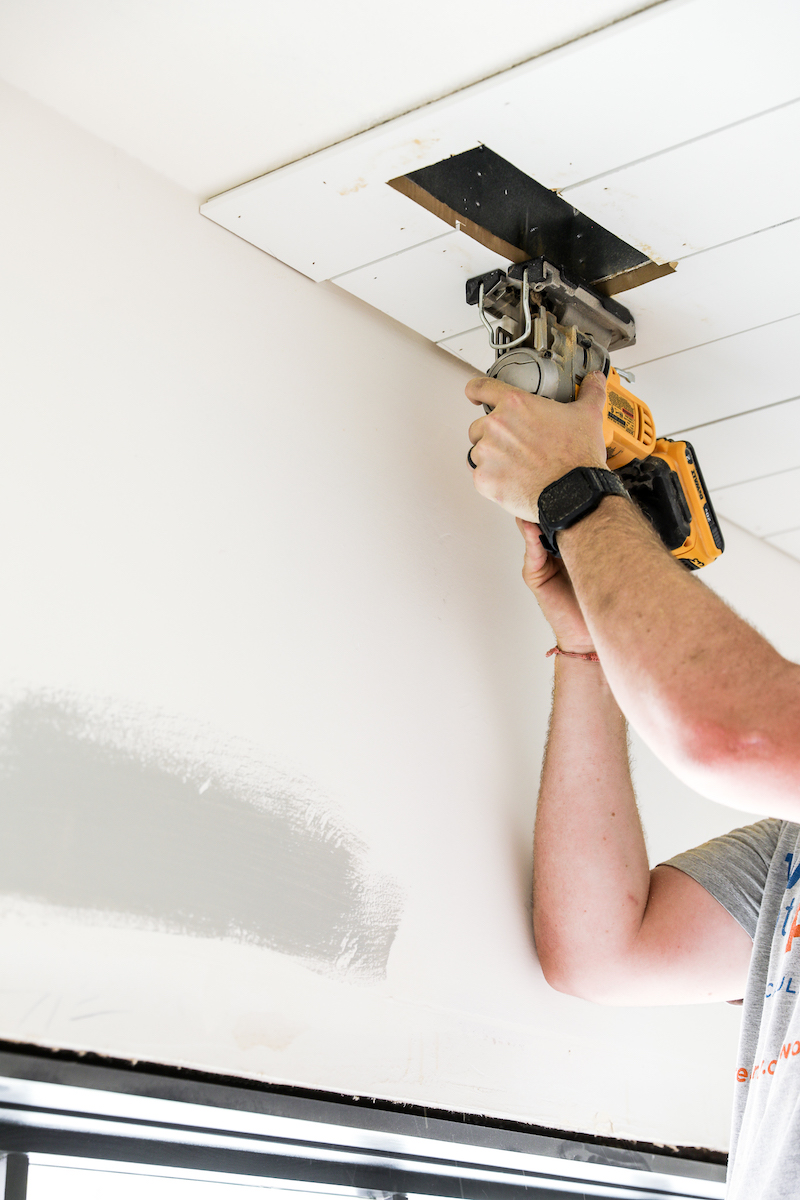
Cut out lights and vents
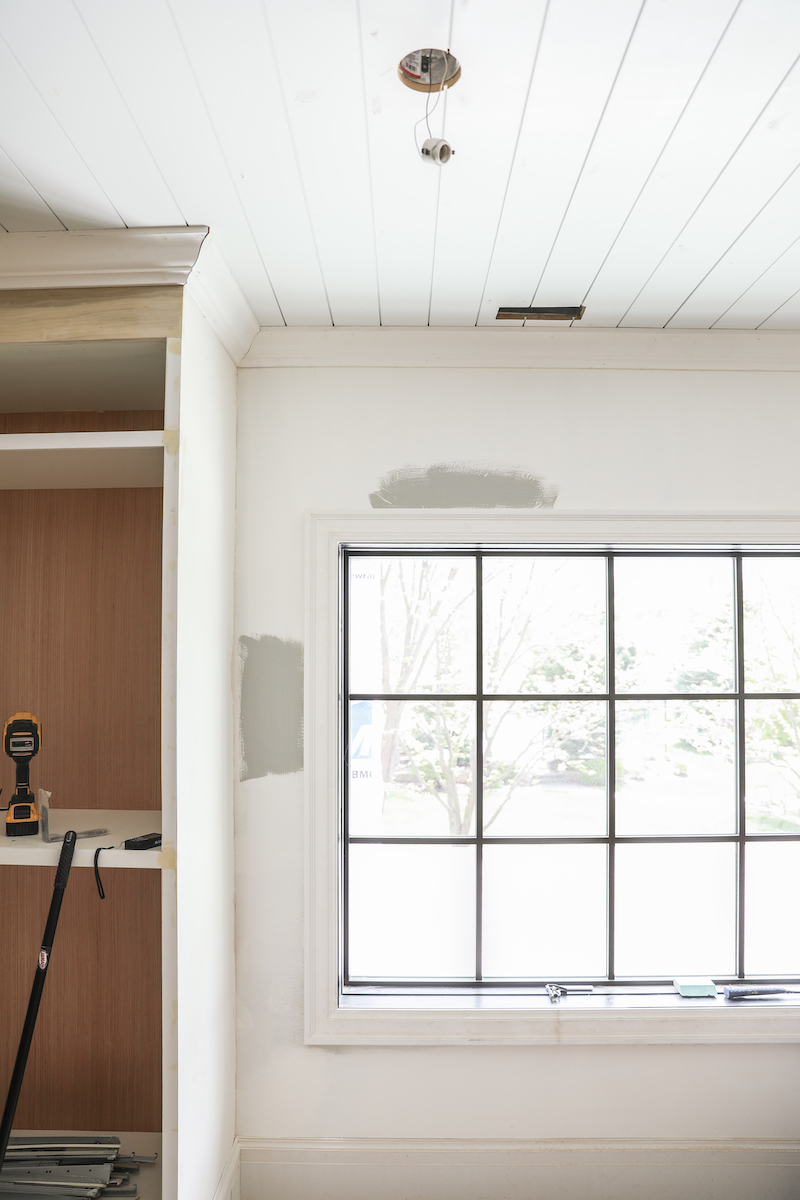
Most rooms will have lights, so be sure to cut those out. We used a 4in drywall saw and it was perfect. Just make sure that, as you’re hanging your shiplap, you measure and mark the locations of every light.
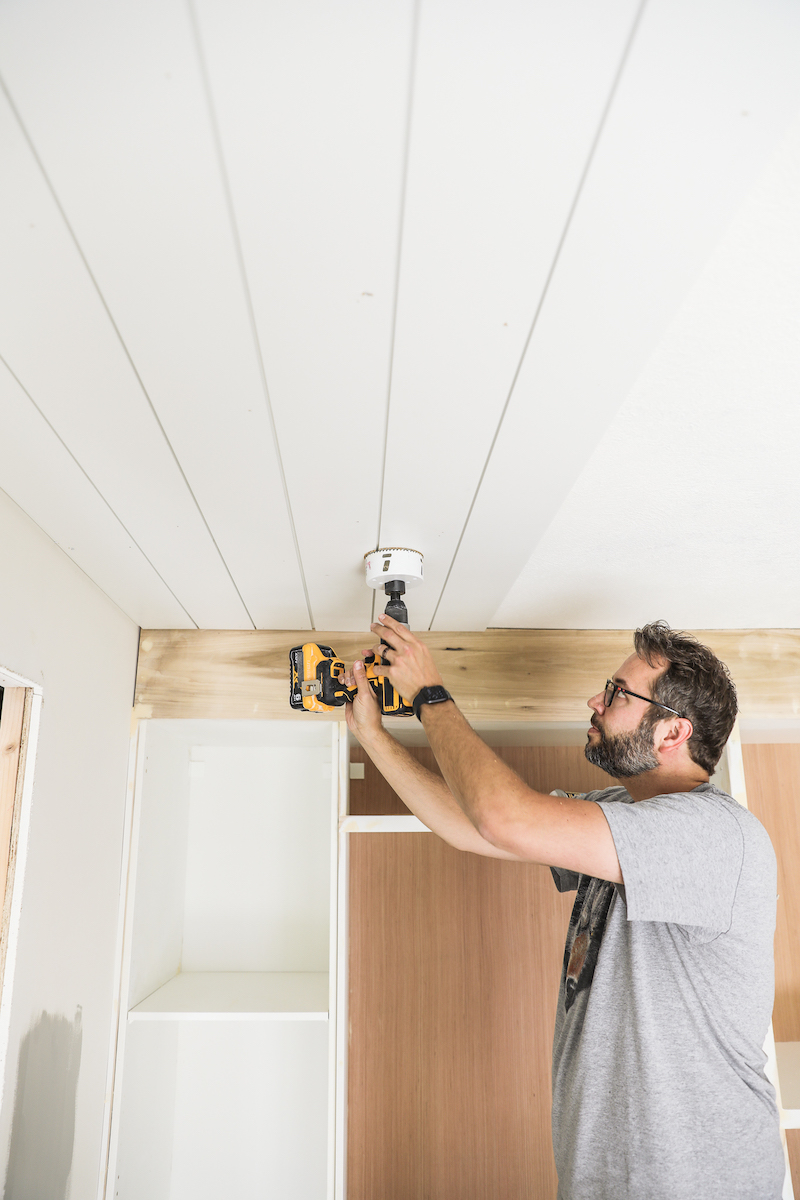
You may also run into vents in your ceiling. Nail the plank into the ceiling on each side of the vent before using a jigsaw to cut the profile of the vent.
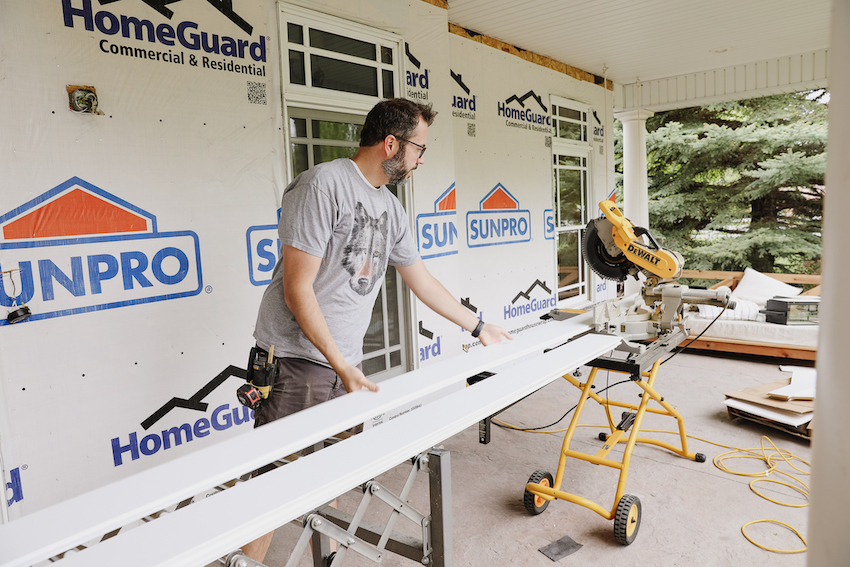
Cut and Cope the Crown
Say that ten times fast.
Crown moulding is tricky. With baseboard or window trim you’re dealing with one or two planes – crown moulding is three and they’re almost never squared. You can take one of two approaches – use the miter saw to cut 45 degree angles on inside and outside corners, hoping for the best and caulking the rest. OR, coping. My preferred task is mitering, my preferred result is coping. So we cope.
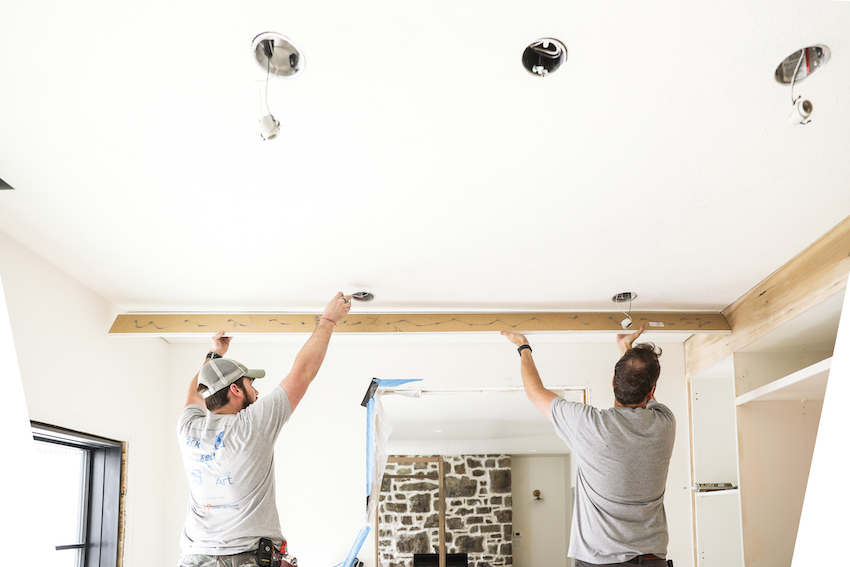
When coping crown, you start by installing a solid piece of crown, with straight-cut ends, at your strongest visual point. This is often the wall opposite the entrance to the room, as in the picture above. Then you cut the piece adjacent at the appropriate angle, and carve out the profile using a jigsaw or angle grinder so it slides tightly into it.

I prefer to use the jigsaw for a rough cutout of the profile, then I fine-tune with the grinder.

I’m by no means a pro, but I’ll do a more in-depth post and video on coping in the future. It’s a pretty slow process, but ends up with much tighter joints.
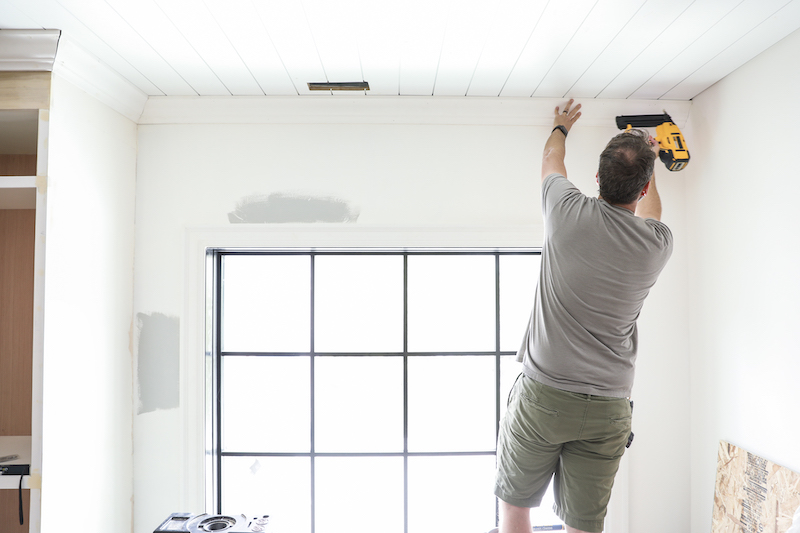
Of course, as you see in the picture above, you still have to miter the outside corners, and mine wasn’t quite snug. But wood filler and sanding will make that disappear. That inside corner, however. Magnifique.
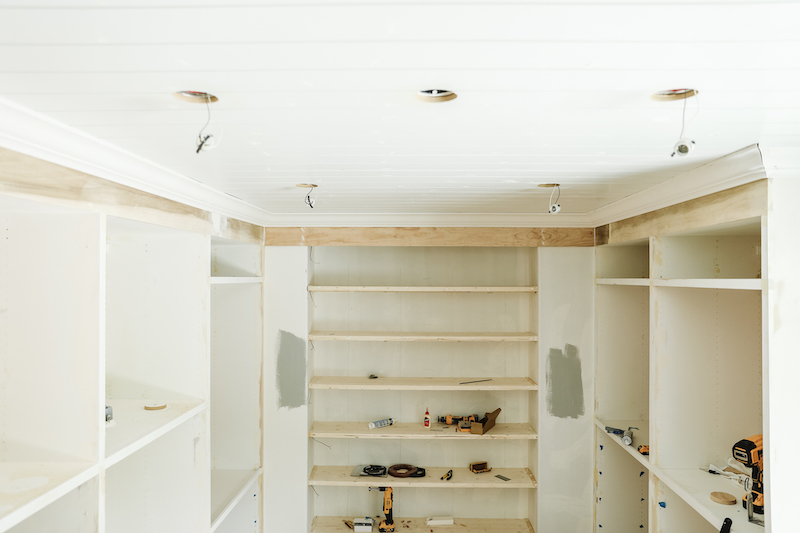
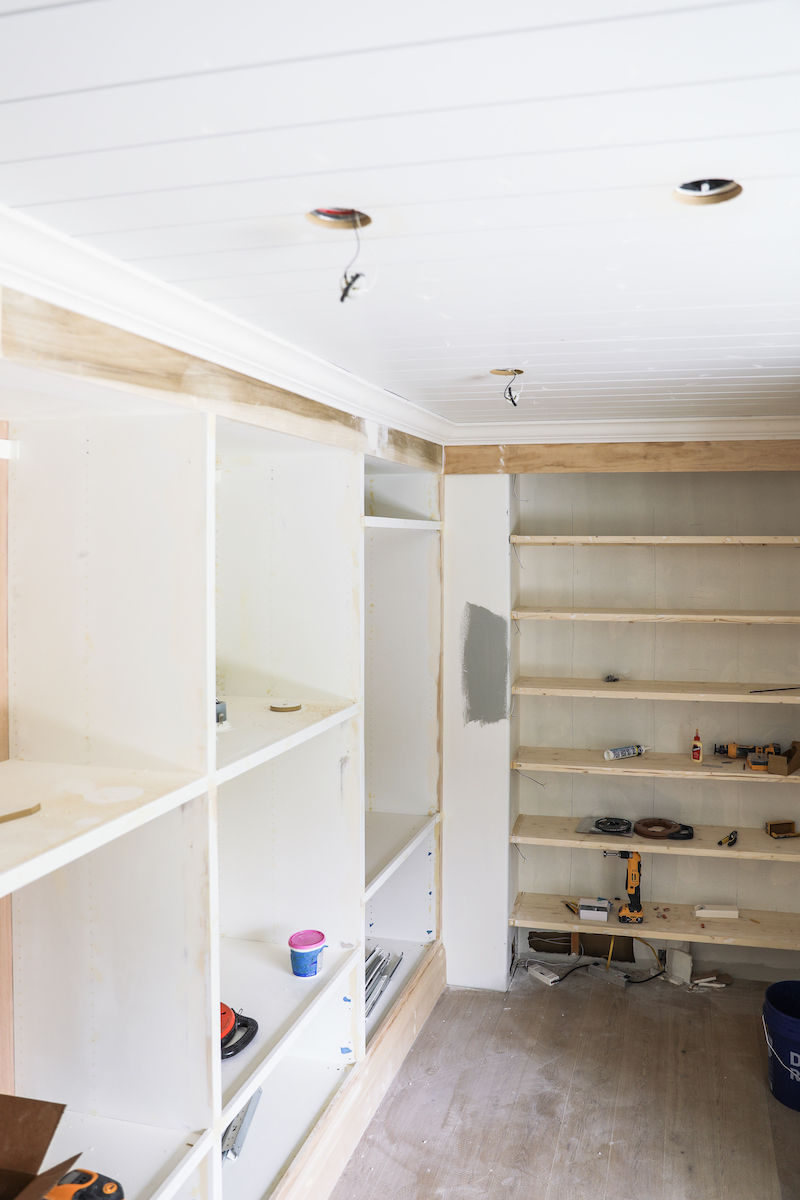
I’d say we’re 80% of the way to making these IKEA cabinets look anything but. Once everything is sanded, caulked, and taped off, we’ll be ready for paint, which is gonna blow some minds! But today, we’re celebrating this the progress by staring at it endlessly.
Leave a Reply
What do you think?


Semihandmade
Our wood grain Shaker cabinet fronts were designed for busy, high-traffic homes like ours. Clad with durable textured thermofoils, this line is compatible with Sektion, Akurum, Godmorgon, and Besta cabinets from IKEA. It's the perfect, practical way to add the warmth of wood to all the rooms of your home.
Collaborations
learn more

next
Loloi
We have teamed up with Loloi to create a line of rugs that are as affordable as they are beautiful. This collection houses a great mix of traditional and modern rugs, in cottage-y colorways, as well as vintage-inspired beauties that you’ll want to roll out in every room.
Collaborations
learn more

next
STUGA
We partnered with Stuga on a line of hardwood floors — The Ingrid is really livable, and the color is very neutral. It doesn’t lean warm or cool, it’s that just right in-between. We have really loved putting it everywhere in our house. It’s the best jumping-off point for design, no matter your interior style. In addition to being beautiful, Ingrid is really durable — we have three kids, and we always have a home construction project going on. Ingrid stands up to it all.
Collaborations
learn more

next


SHop all
What We're Right Now
What We're Right Now
Looking for our favorite things? A place to shop our home room by room, or just catch up on what Julia's wearing / loving right now? Browse the CLJ shop.
Loving


Portfolio


Design
Befores, afters, mood boards, plans, failures, wins. We’ve done a lot of projects, and they’re all here.
BROWSE BY CATEGORY
let's break this thing up
We have a long-standing relationship with DIY, and love rolling our sleeves up and making it happen.
Projects
Even when you don’t want to rip down a wall, you can make that space in your home better. Right now.
read more
read more
read more
02
01
03
looking for inspiration?
A reader recently asked me if I’m starting to fully embrace traditional style and whether we still consider our house to be a “modern Colonial” and why. It was a really great question and so timely — I had really just been thinking about my approach to this home and how my style has changed […]


SEARCH THE BLOG
We've been doing this since 2009 and we've posted a whopping 24145+ blog posts and counting. You might need a little help searching, huh?
looking for something?
find stuff like:
")
Can We Send You Our Love Letter?
Another way for us to stay in touch! Joining our weekly newsletter gives you access to exclusive content, never-before-seen photos, your questions answered, and our favorite DIYs. Sign up below!
Follow Along on Instagram
Welcome to our online community where we've posted home, DIY, style, renovations, and family since '09. Renovating our #cljmoderncottage in Idaho and headed for new adventures in Raleigh, NC. #cljfam #cljtransformations
@chrislovesjulia


Links
Get Around
Make yourself right at home
Portfolio
Design
Casual Friday
Projects
Lifestyle
Gift Guides
All Posts
Shop
Love where you live.
Social
RivrLinks
Links
Get Around
Make yourself right at home
Portfolio
Design
Casual Friday
Projects
Lifestyle
Gift Guides
All Posts
Shop
Love where you live.
Social
RivrLinks
Hi! Just wondering what kind of paintable caulk you use? Thank you!
Love it! What are the two grey-ish paint colors sampled around the window if you don’t mind sharing? Thanks!
That’s Farrow and Ball Lamp room Gray
funny, my husband wears the same safety shoes when he’s doing anything on a ladder
Love this!! It looks beautiful!We just finished planking our kitchen ceiling with Armstrong’s Woodhaven planking… we are in a 1890’s farmhouse, so I’m keeping this in mind for any of the rooms with ceiling issues :)
Beautiful job! I’m hoping to hang shiplap on the ceiling and walls of our mudroom, which is currently not drywalled. Would you recommend installing drywall first, or can it go right over the insulation? Do you think the walls would basically be the same process as the ceiling? Thanks so much!
Do you start hanging your shiplap from the center and work your way out?
Look great! Curious— what size/ type of can lights do you plan on using? Do you mind sharing a link? Thank you kindly!
4″!
Thanks for opening up your home to us. This is going to be the best IKEA hack of ALL TIME!!! I’m in awe at what a difference the ceiling detail and crown make????. Absolutely glorious!!!!
Well! That ceiling just inspired me! I had no idea it would be such a quick and easy project. I have been dying to get rid of our popcorn ceiling but the mess keeps deterring me from taking it on. New plan is to cover it up!
This is incredibly satisfying — I can’t wait to see it with paint, and I’m sure you guys feel the same way!
Love the look! Did you run it horizontally across the room to give less seams and/or to contrast with the floor? I really struggle with orientation!
I like the look of when you walk into the room the ceiling is horizontal. But also for no seams.
I can’t wait to see this painted! I’m guessing it’s going to be wildly good ❤️
I love watching this project unfold! Will you be painting the ceiling the same color as the cabinets?
Yes! It will all be the same color!
Where’d you get your shiplap? It looks beautiful!!
We linked it in the materials list
This is going to be such a great space! Can’t wait to see it painted.
Thanks for this tutorial! These ceilings are absolutely beautiful! We’re considering putting a type of planking in an unfinished space in our basement, so it is timely. At this point, our ceiling is just studs with insulation between them. With this type of shiplap, I see that there’s a little bit of a true lap (which would hopefully prevent insulation seepage), so would you see any reason to add drywall on the ceiling under the shiplap?
As long as you have something to nail to, no need for drywall!
Sometimes fire code requires drywall under planking…. you might want to check your local code.
I am just obsessed with this project. Is it the IKEA hack, the DIY, the accent ceiling? It’s all just so good. I *think* I know the look you are going for with the paint….but I know it will still blow my mind. And I’m ready.
Why did you stop the crown short on the back wall?
It’s there!