


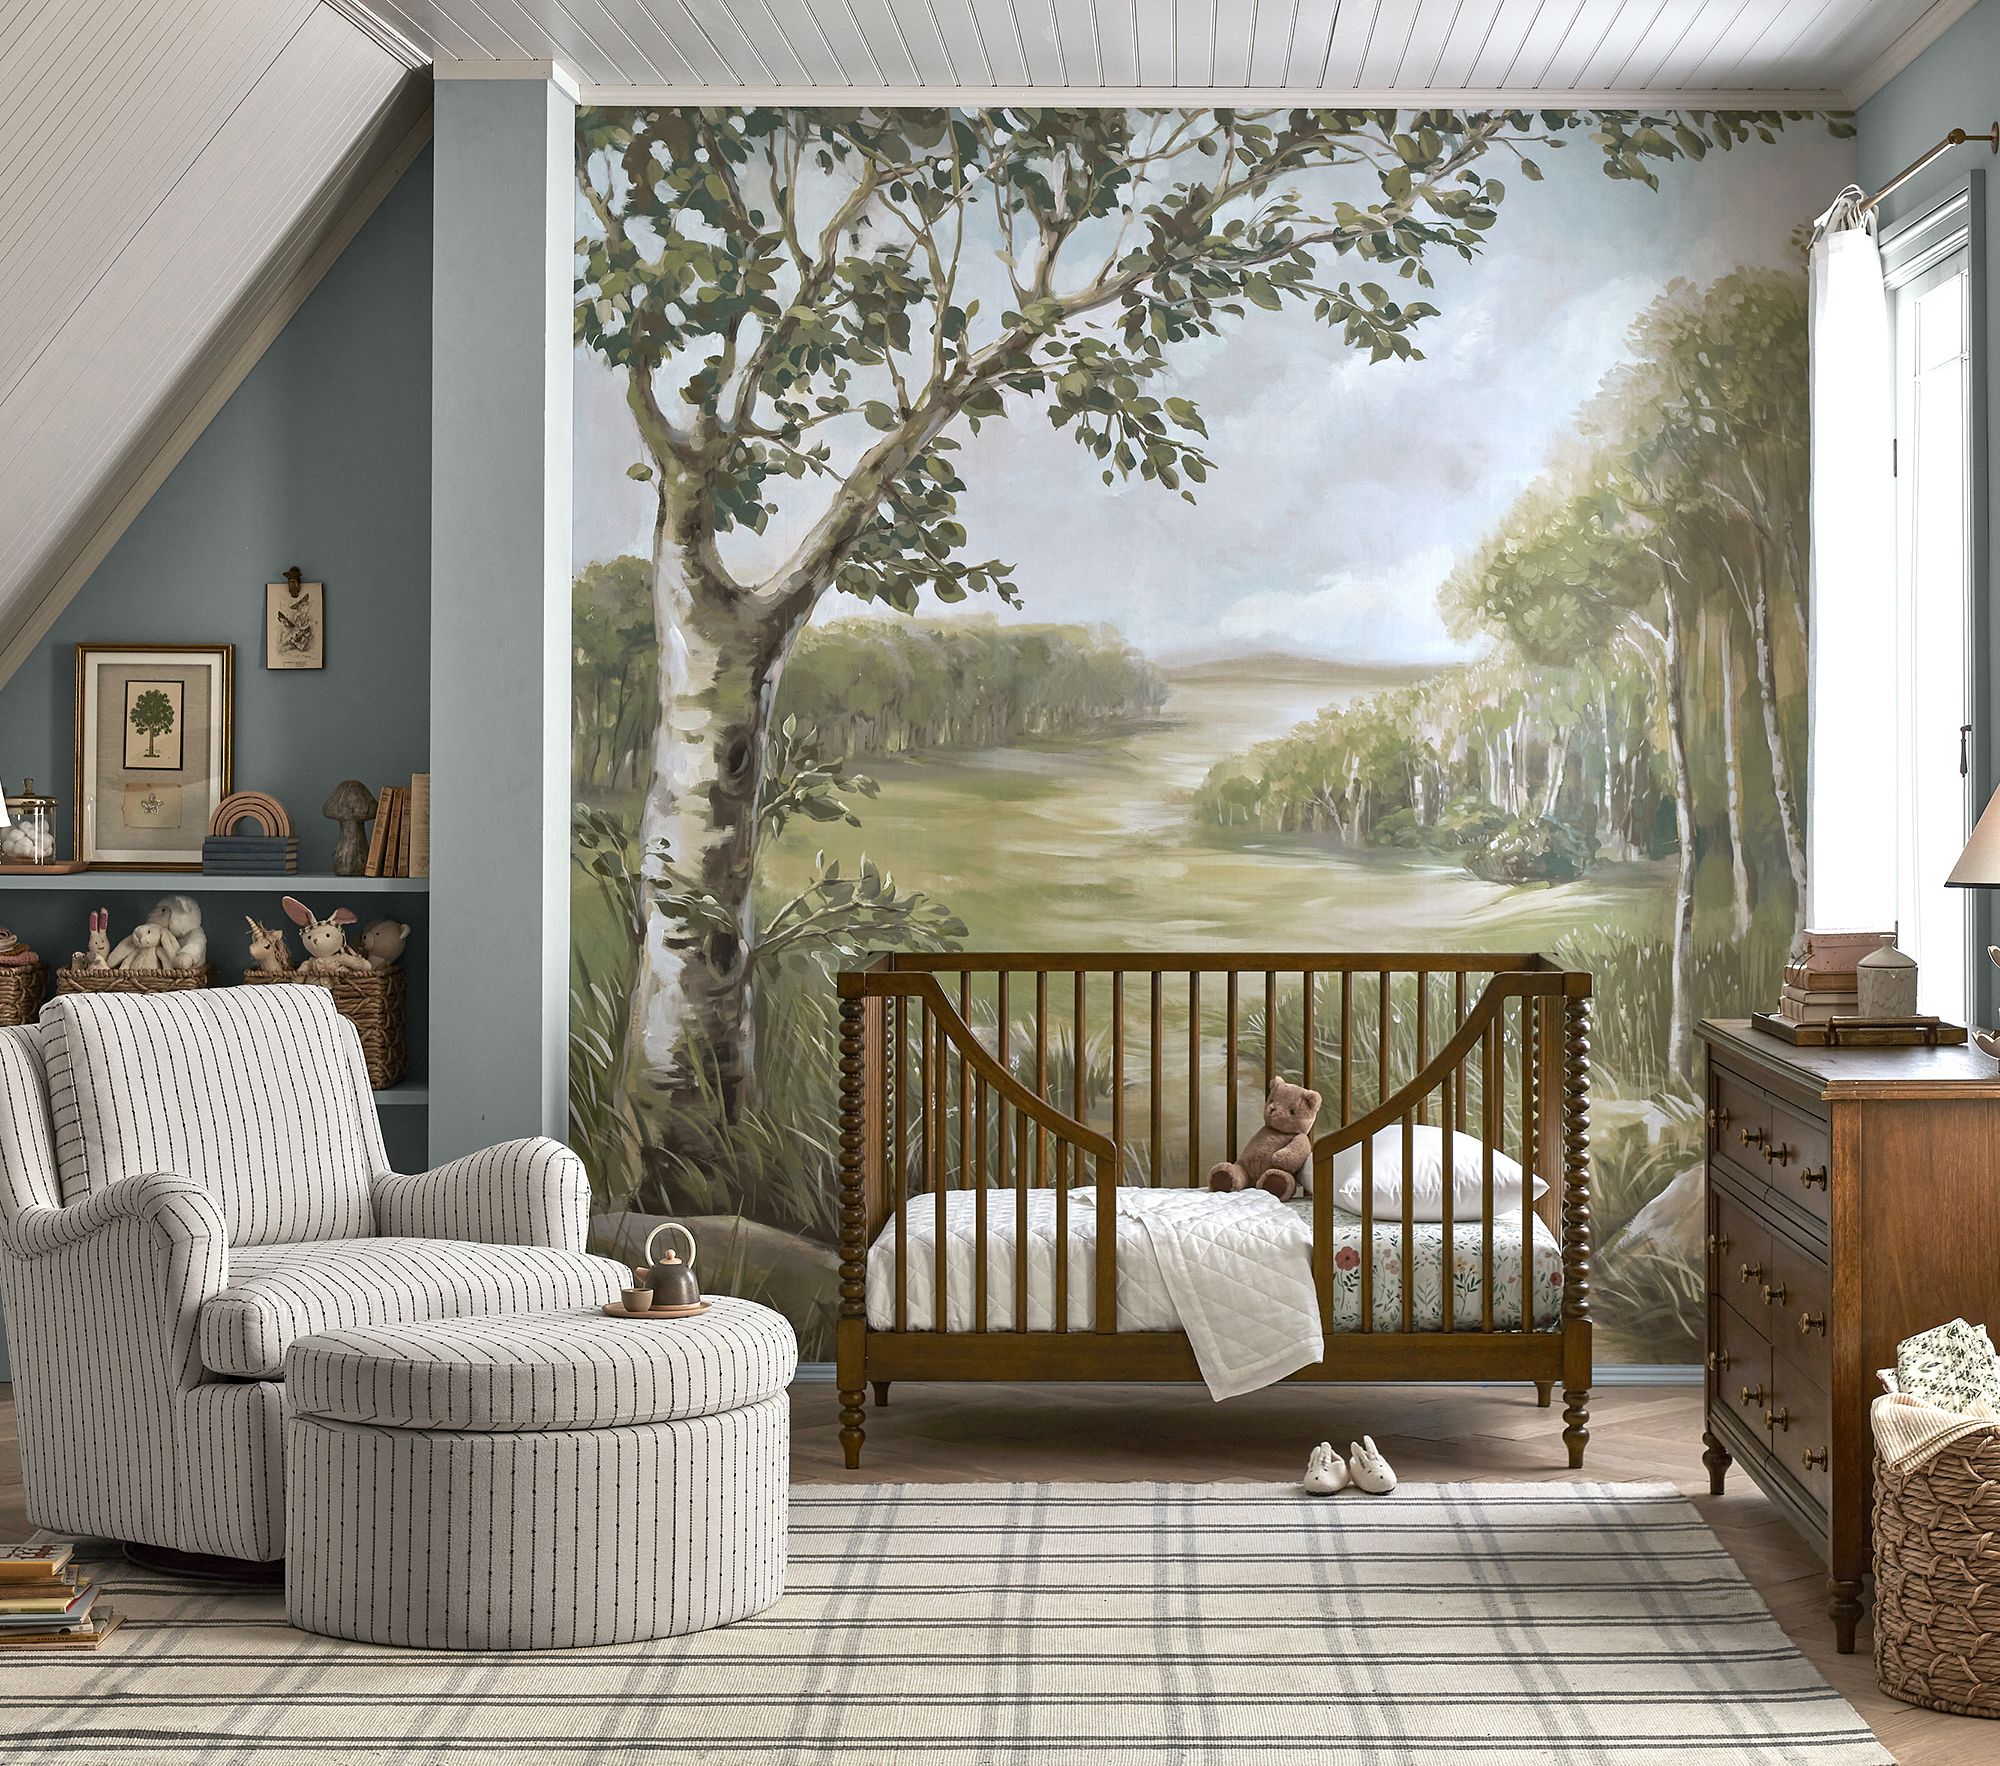
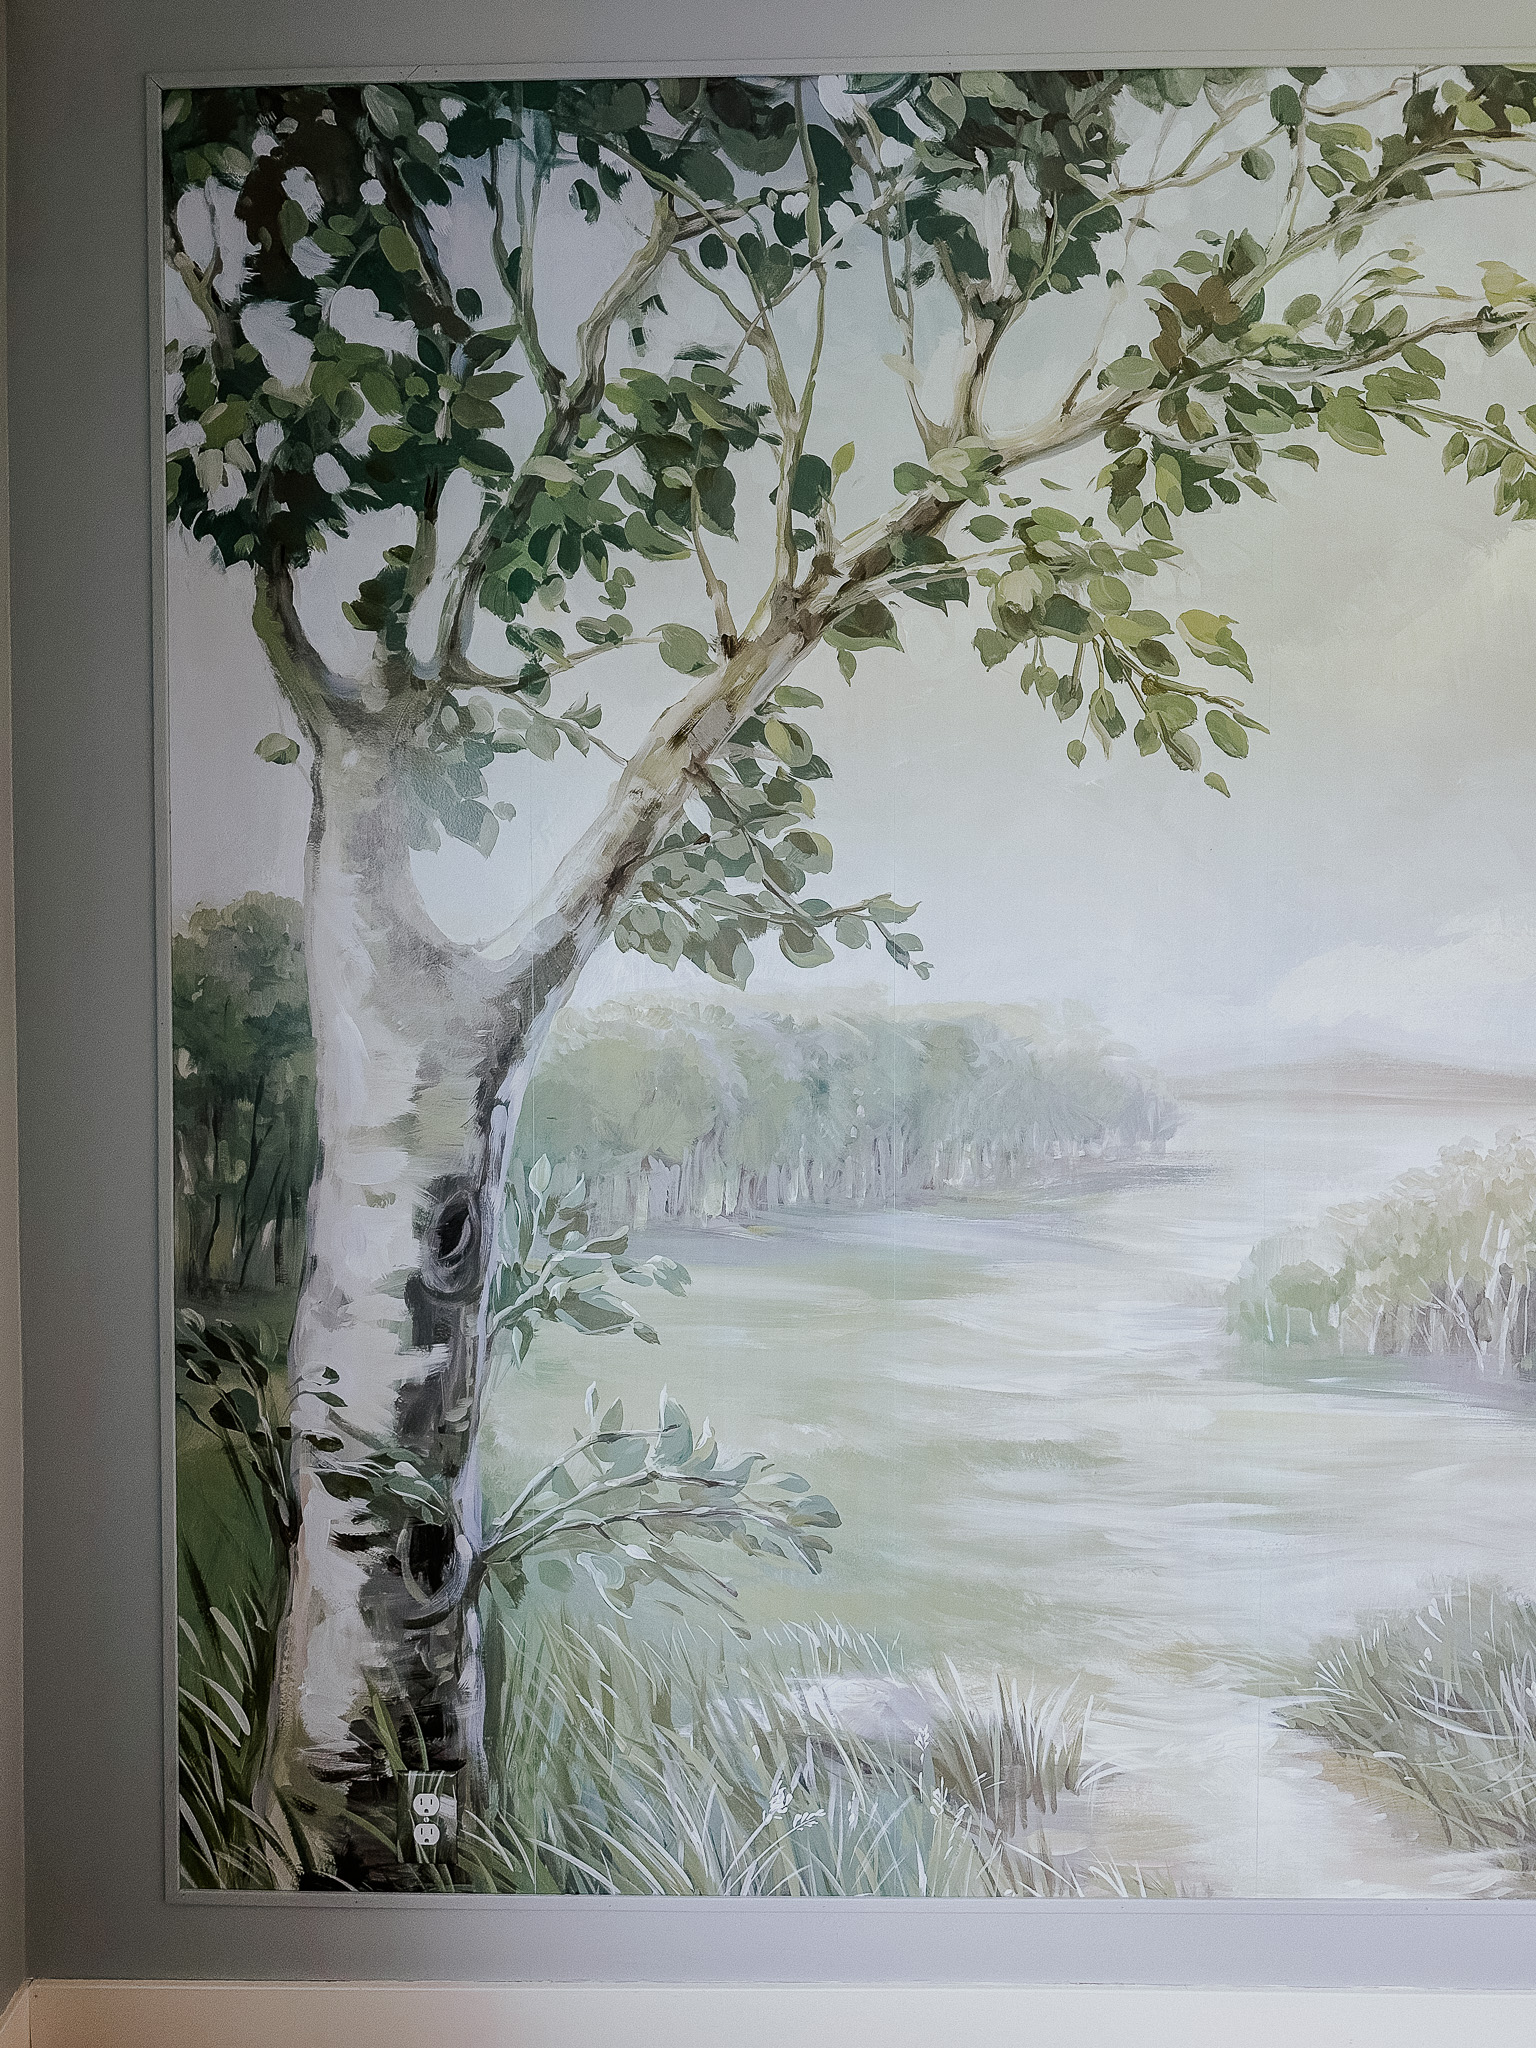
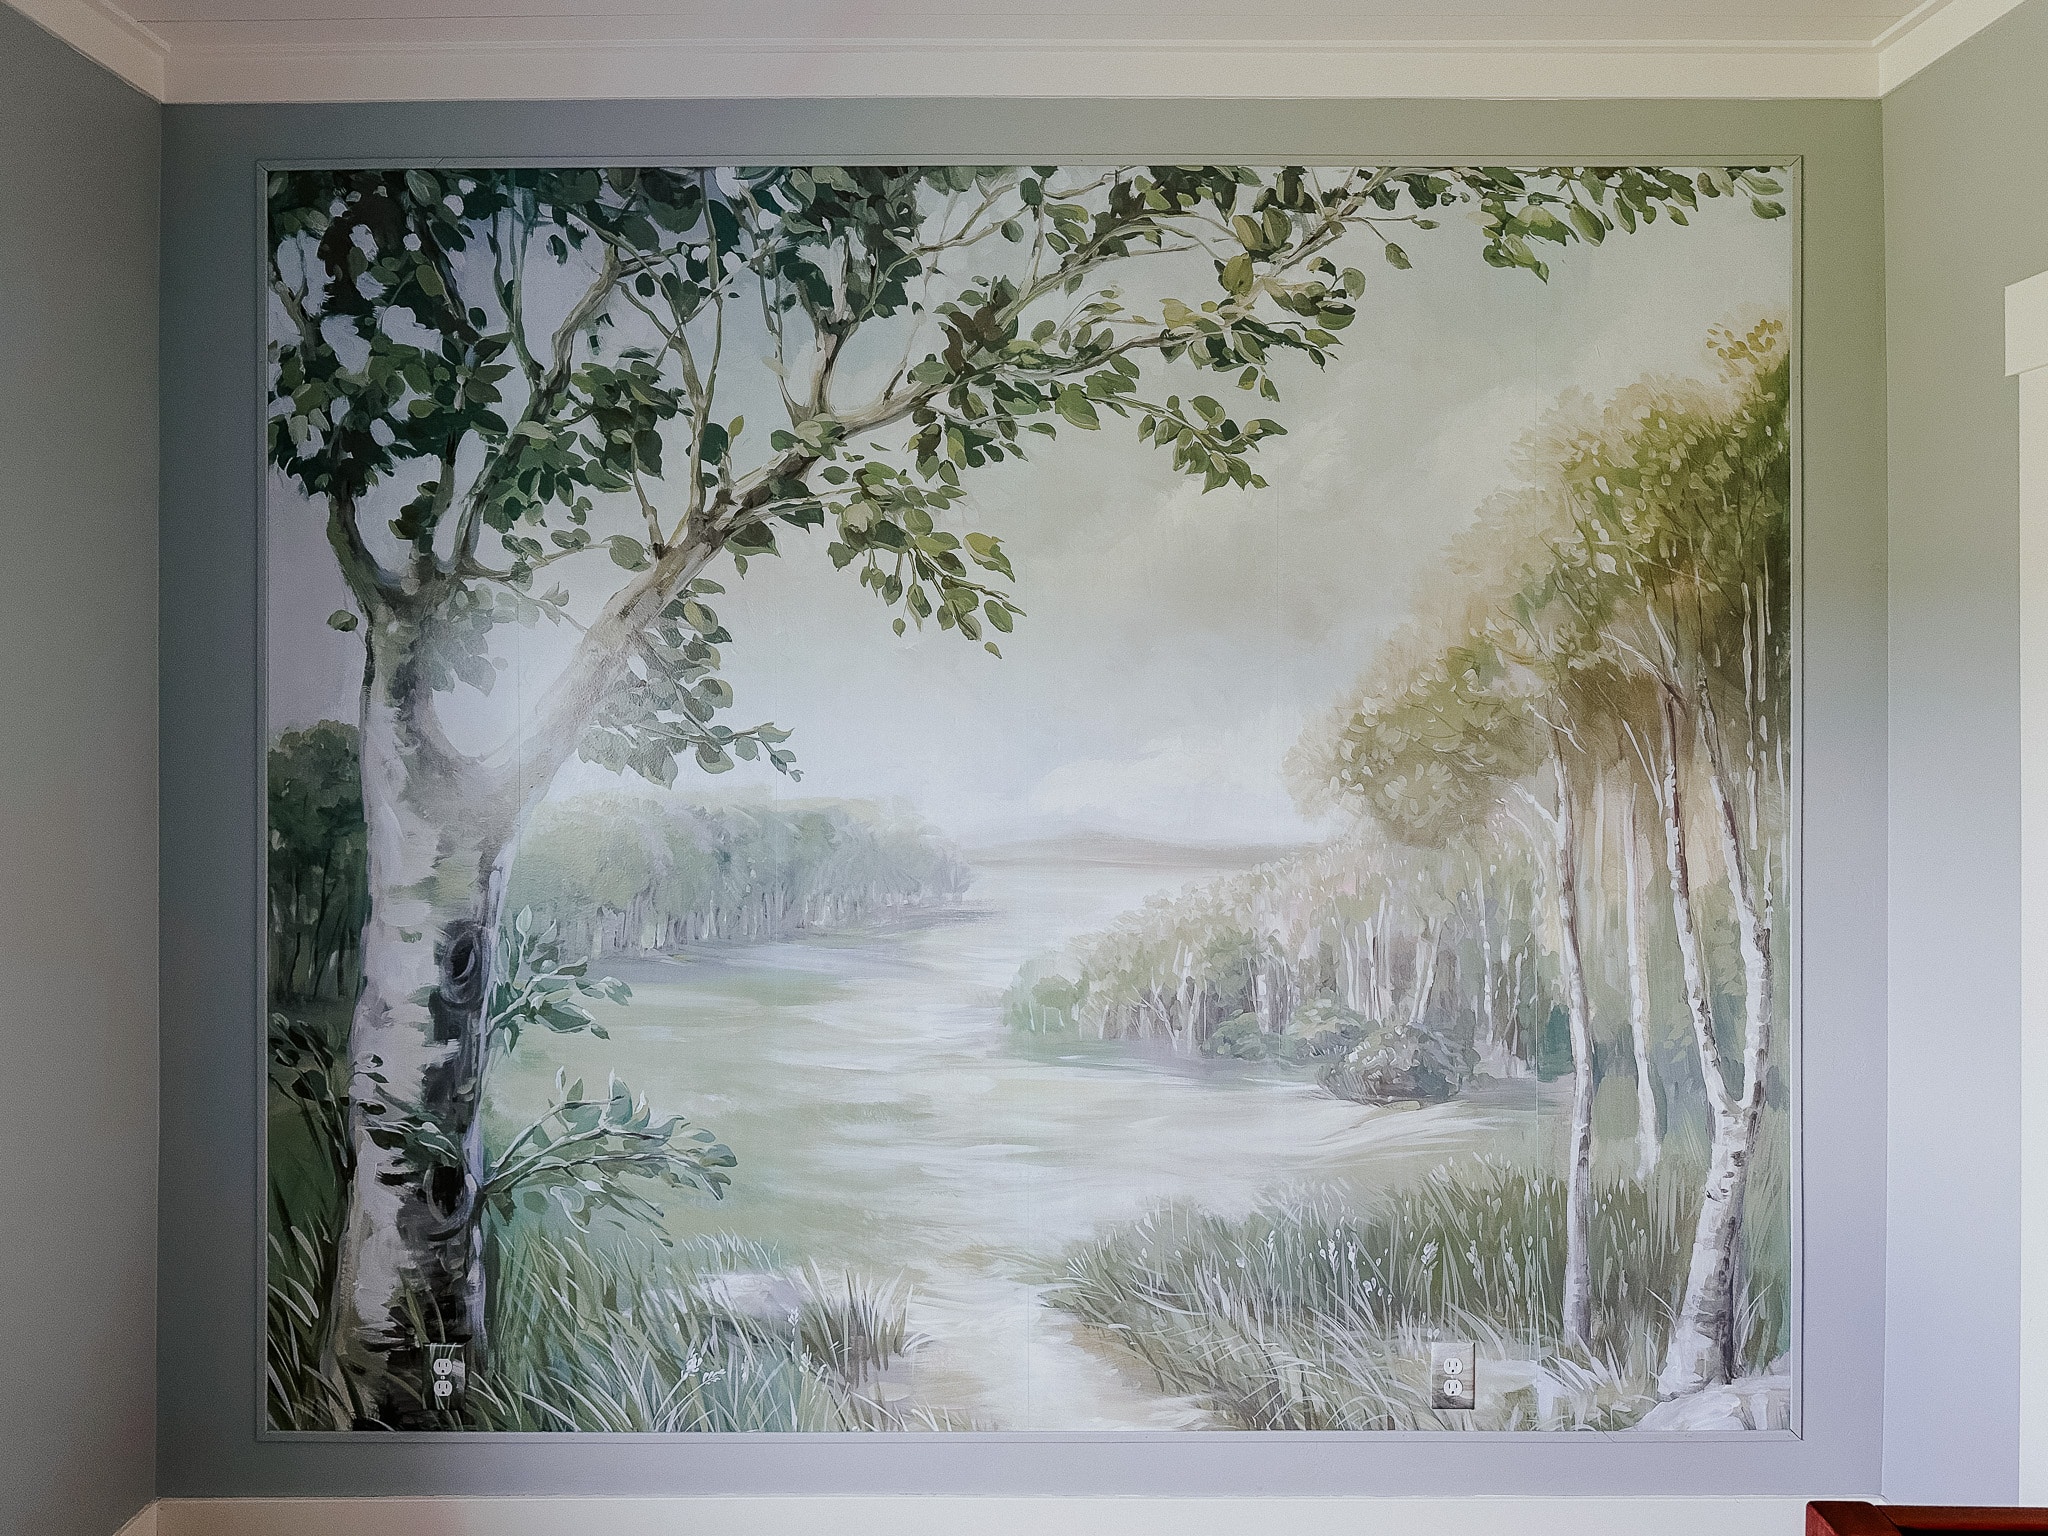
This last week Chris and I spent some time in Idaho with family, but we also made a pit stop to see our dear friends in Rexburg, Idaho, and finish their nursery that we started. You might remember from this mood board that we planned to install the peel-and-stick mural wallpaper from our new Pottery Barn Kids collection, and I’m really excited to show you how we did it! P.S. This is a photo from our PBK photoshoot, but stay tuned for the final nursery reveal coming soon.
Shop our CLJ x pottery barn kids collection

This whimsical, easy-to-apply wallpaper adds a foresty touch to any nursery, kid’s room, or really anywhere you see fit! The peel-away backing is going to make any professional installer happy, but it’s also very DIY friendly, not to mention budget-friendly! The entire mural comes in a pack of 6 panels for the price of $169, which is nearly unheard of in the world of wallpaper, let alone mural wallpaper. Each panel is 9′ tall and 1.5′ wide, which would be perfect for installing on a wall that’s 9 feet or less. However, if your wall happens to exceed that, no problem. For little Freddy’s nursery, we added some picture-frame molding around the mural–here’s how!
Materials & Tools
Mural Wallpaper
Razorblade Knife
Vinyl Squeegee
Measuring Tape
Chalk Line
Oscillating tool with round blade
Construction adhesive
Pin nailer
Speed Square
Trim of choice
Instructions specifically for applying to a wall that is larger than the mural itself.
1. Mark the mural placement on the wall
Measure the wall and determine the center point. You can start with panel three flush with the midline and work your way out. Alternatively, you can find the total width of the wall, subtract 9ft (the total width of the mural), then divide the remaining number by 2. This is how many inches away from the left wall you will begin panel 1.
Next, decide how much space you want above and below the mural (equal to or less than the excess space on the left and right sides) and measure this distance from the ceiling or crown molding. Mark the two ends of where the mural will be, and run a chalk line from one to the other. This will be the guide for the top of the mural.
2. Hang the first panel
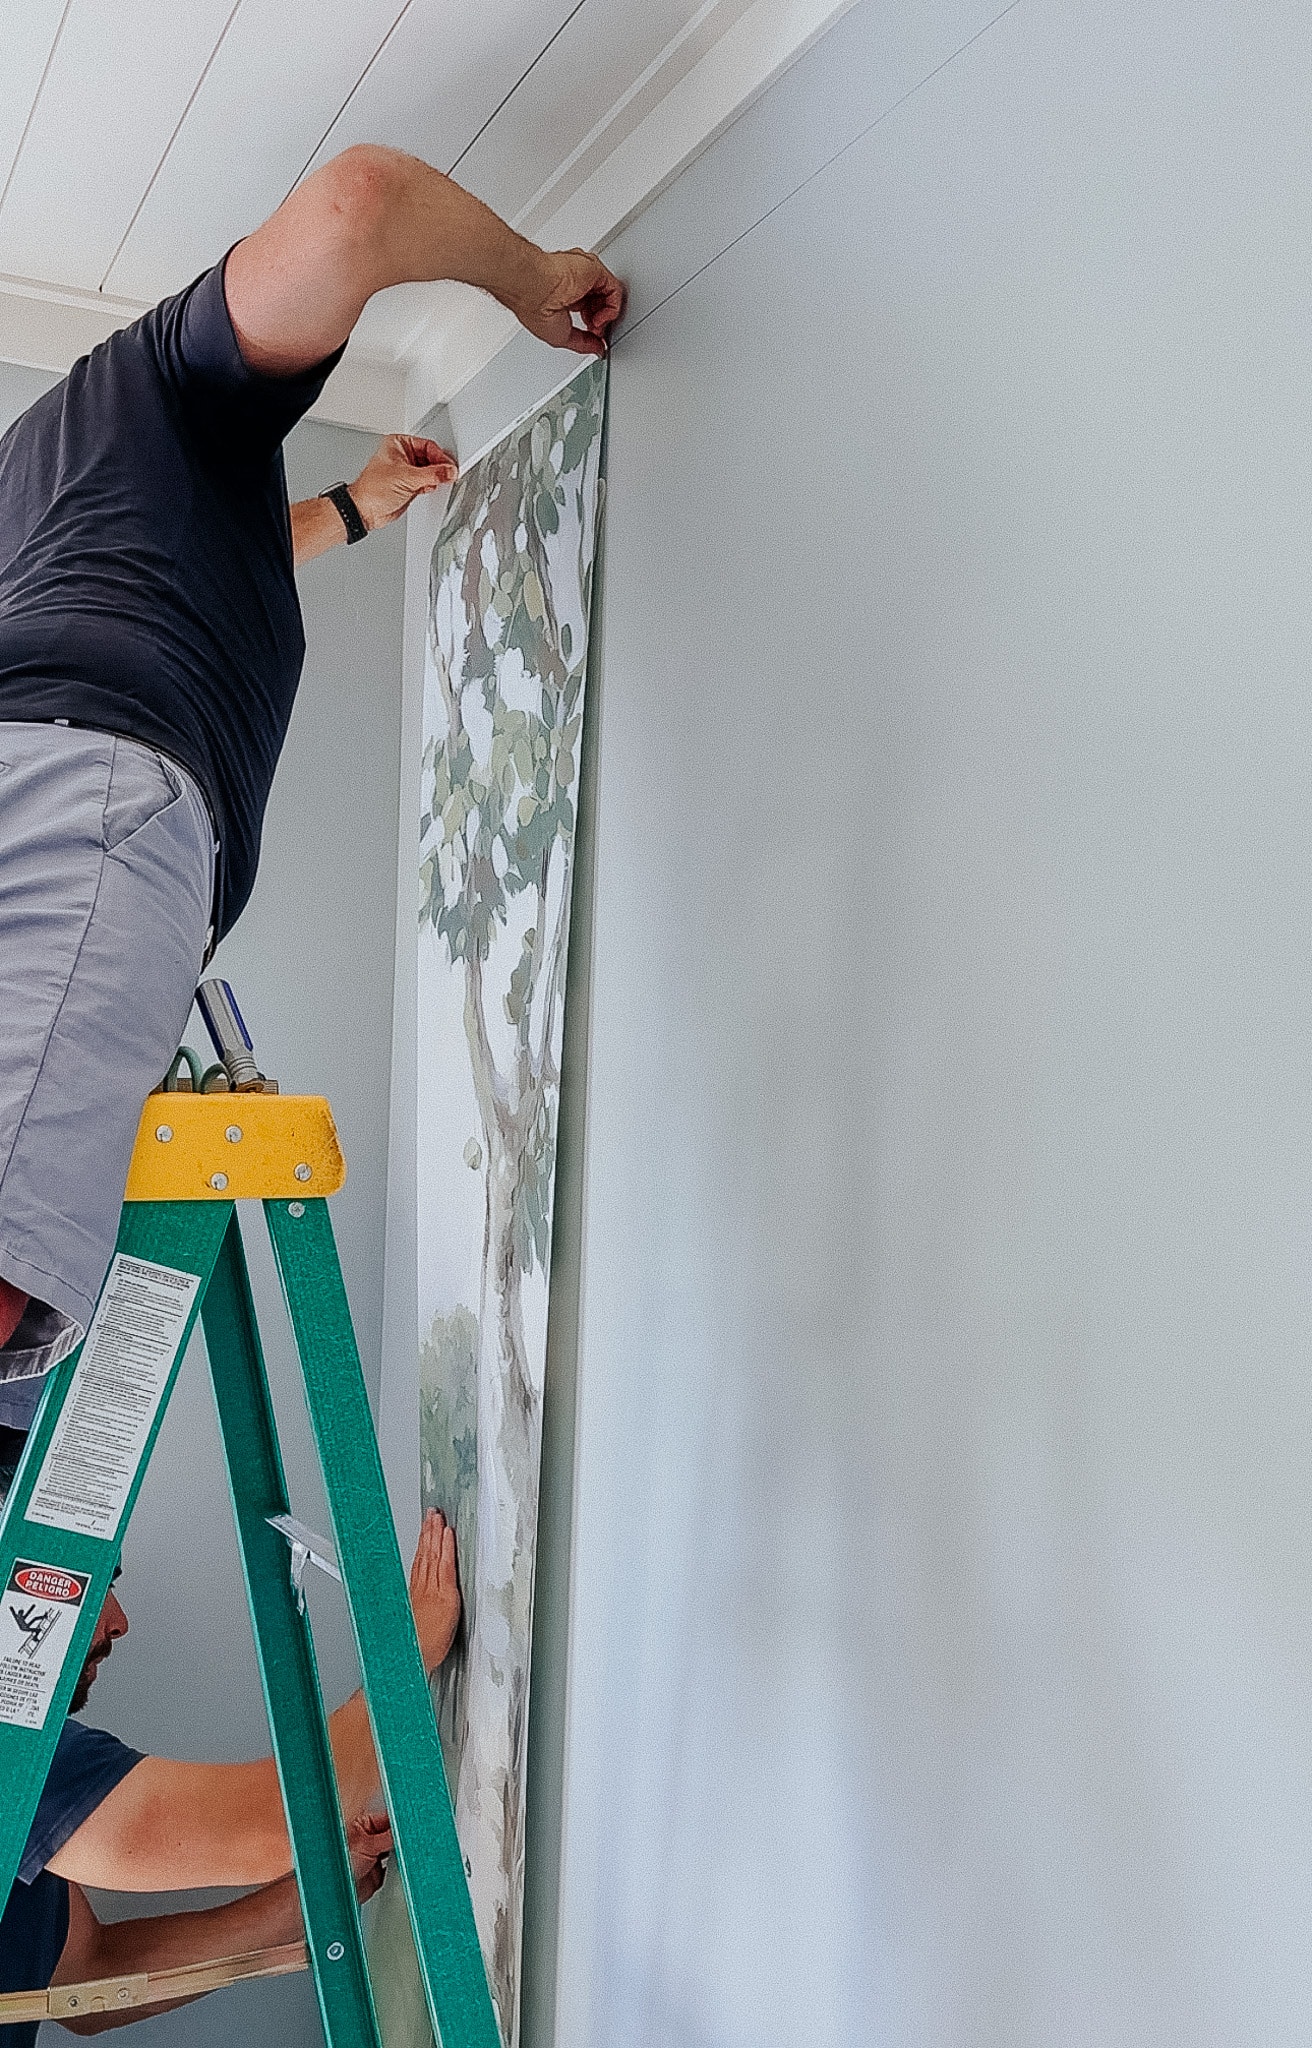
Now comes the fun part. Whether you begin with panel three (starting at the center and working outward) or panel one (left to right), peel the top 8 inches of the backing down and line the top of the mural with the chalk line. Apply slowly, top to bottom, using a soft, straight-edge of squeegee vinyl tool to flatten out any air bubbles. Chris used a cardboard children’s book–whatever gets the job done!
As you work your way down, peel more of the backing down and smooth the panel out with the vinyl tool. If bubbles or wrinkles form, grab the panel on each side and gently pull away from the wall until the bubbled area is released, then reapply, starting in the middle and scraping outward with the vinyl tool.
3. Hang the remaining panels
Choose your next panel and line it up with the first. The vinyl stretches a little to help with alignment, but if you’re having to stretch too much, you’ll never get it lined up correctly. If you find yourself having a wider and wider gap between the panels as you work your way down, carefully peel the mural off the wall from the bottom up, adjust the top, and slowly reapply downward. You may need an extra set of hands to hold the mural away from the wall as you do this so it doesn’t stick at a lower point and cause wrinkles and bubbles.
4. Trim the edges
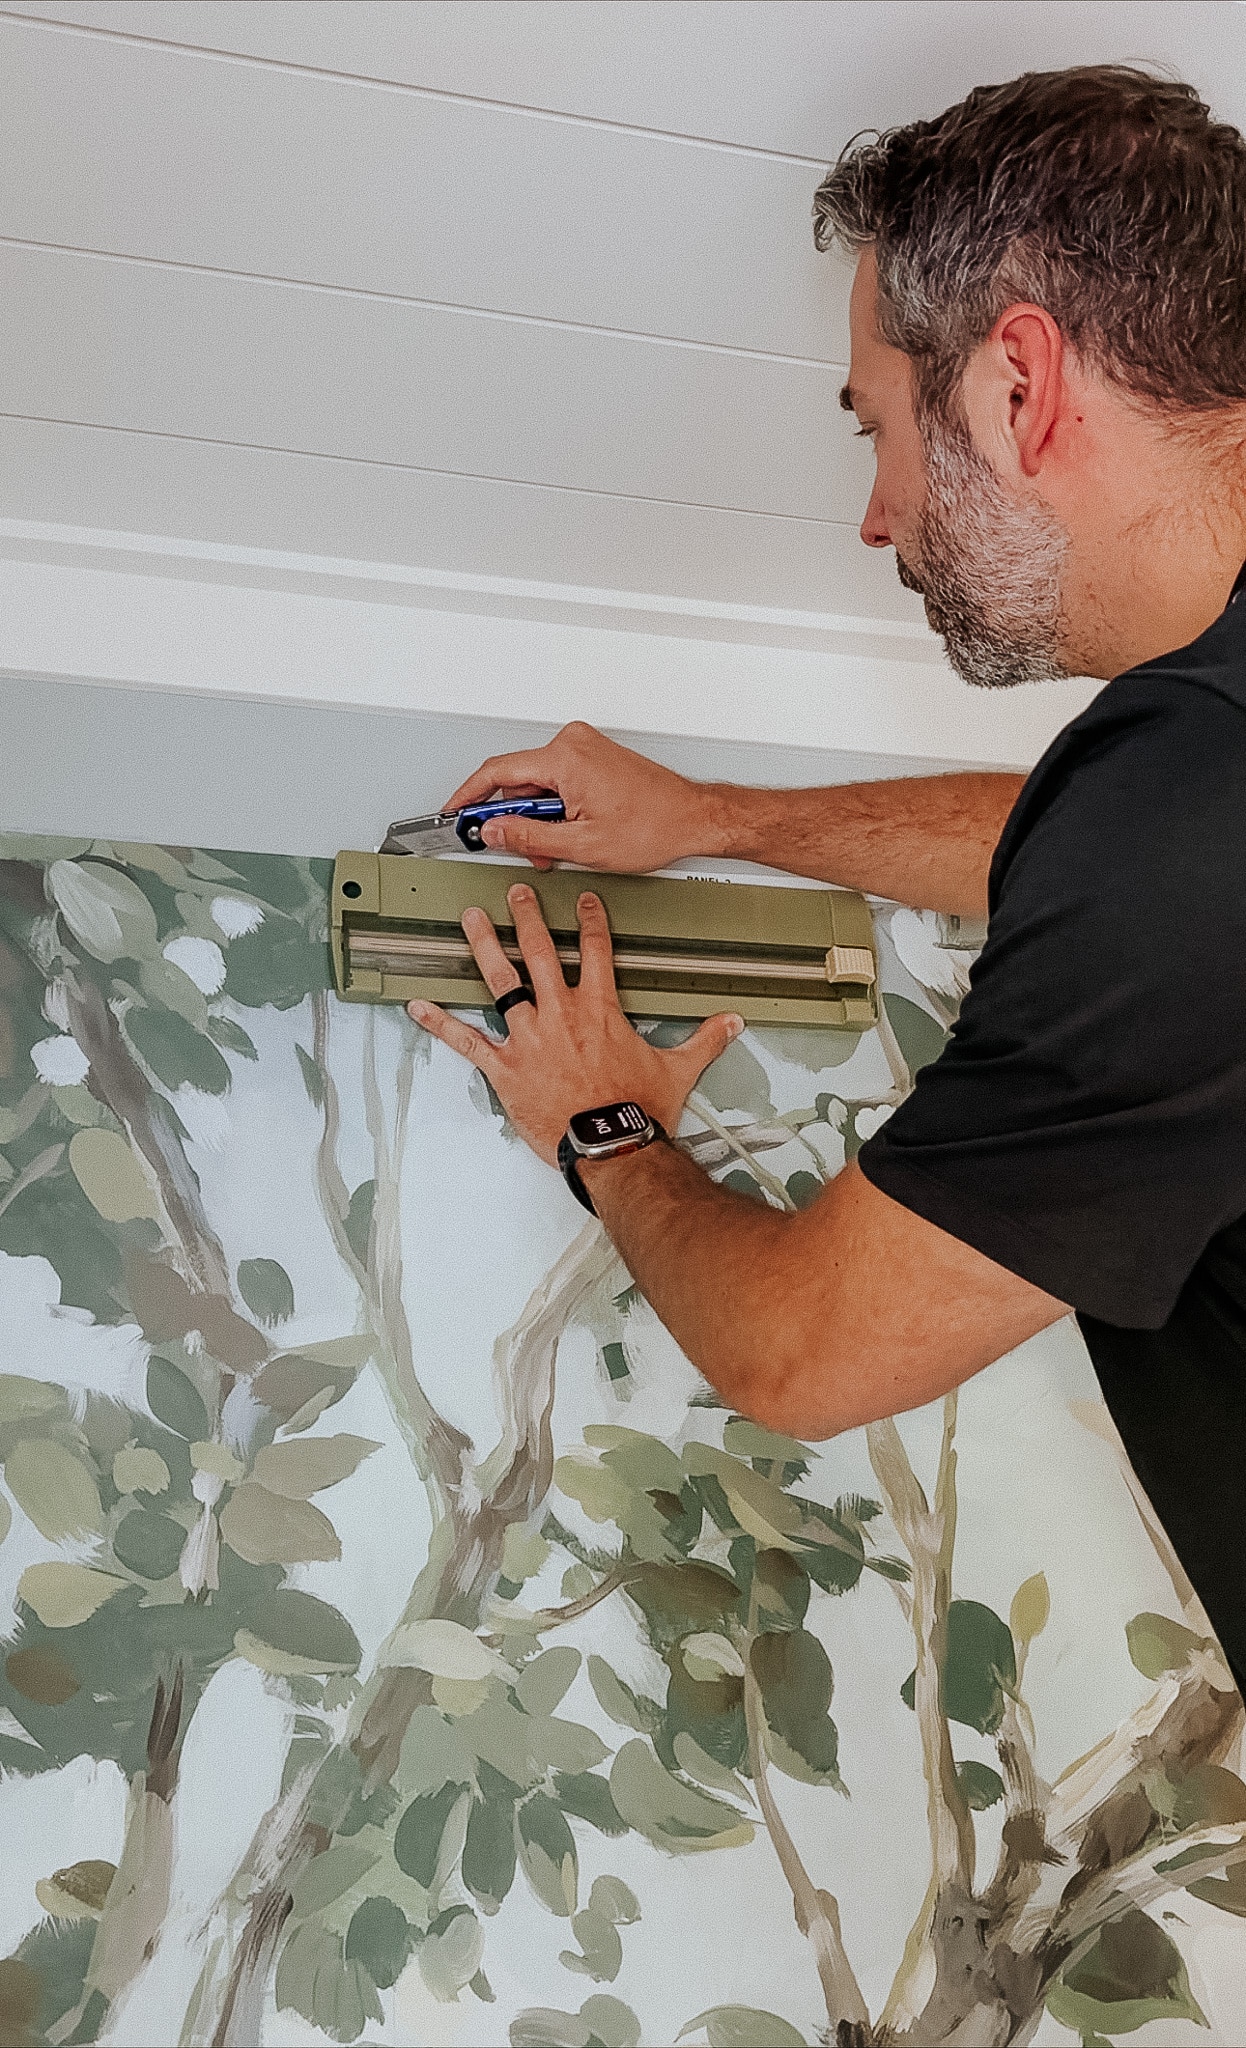
Once all the panels have been hung, measure and mark your bottom trim line so it is the same distance from the floor/baseboard as the top line is from the ceiling/crown. Use a razor blade knife and a straight edge to trim along this line. Use the razor blade to also trim the white from the top of the panels along the ceiling. Peel off the trimmed areas.
Note: if there are outlets or switches on the wall where the mural is being added, remove the cover plates before applying the mural. Once you apply the mural and get to an outlet, use the razor blade knife to cut out around the outlet/switch. You can also apply any remaining trim pieces taken from the bottom of the mural to the outlet/switch covers to help them blend into the mural.
5. Adding Trim
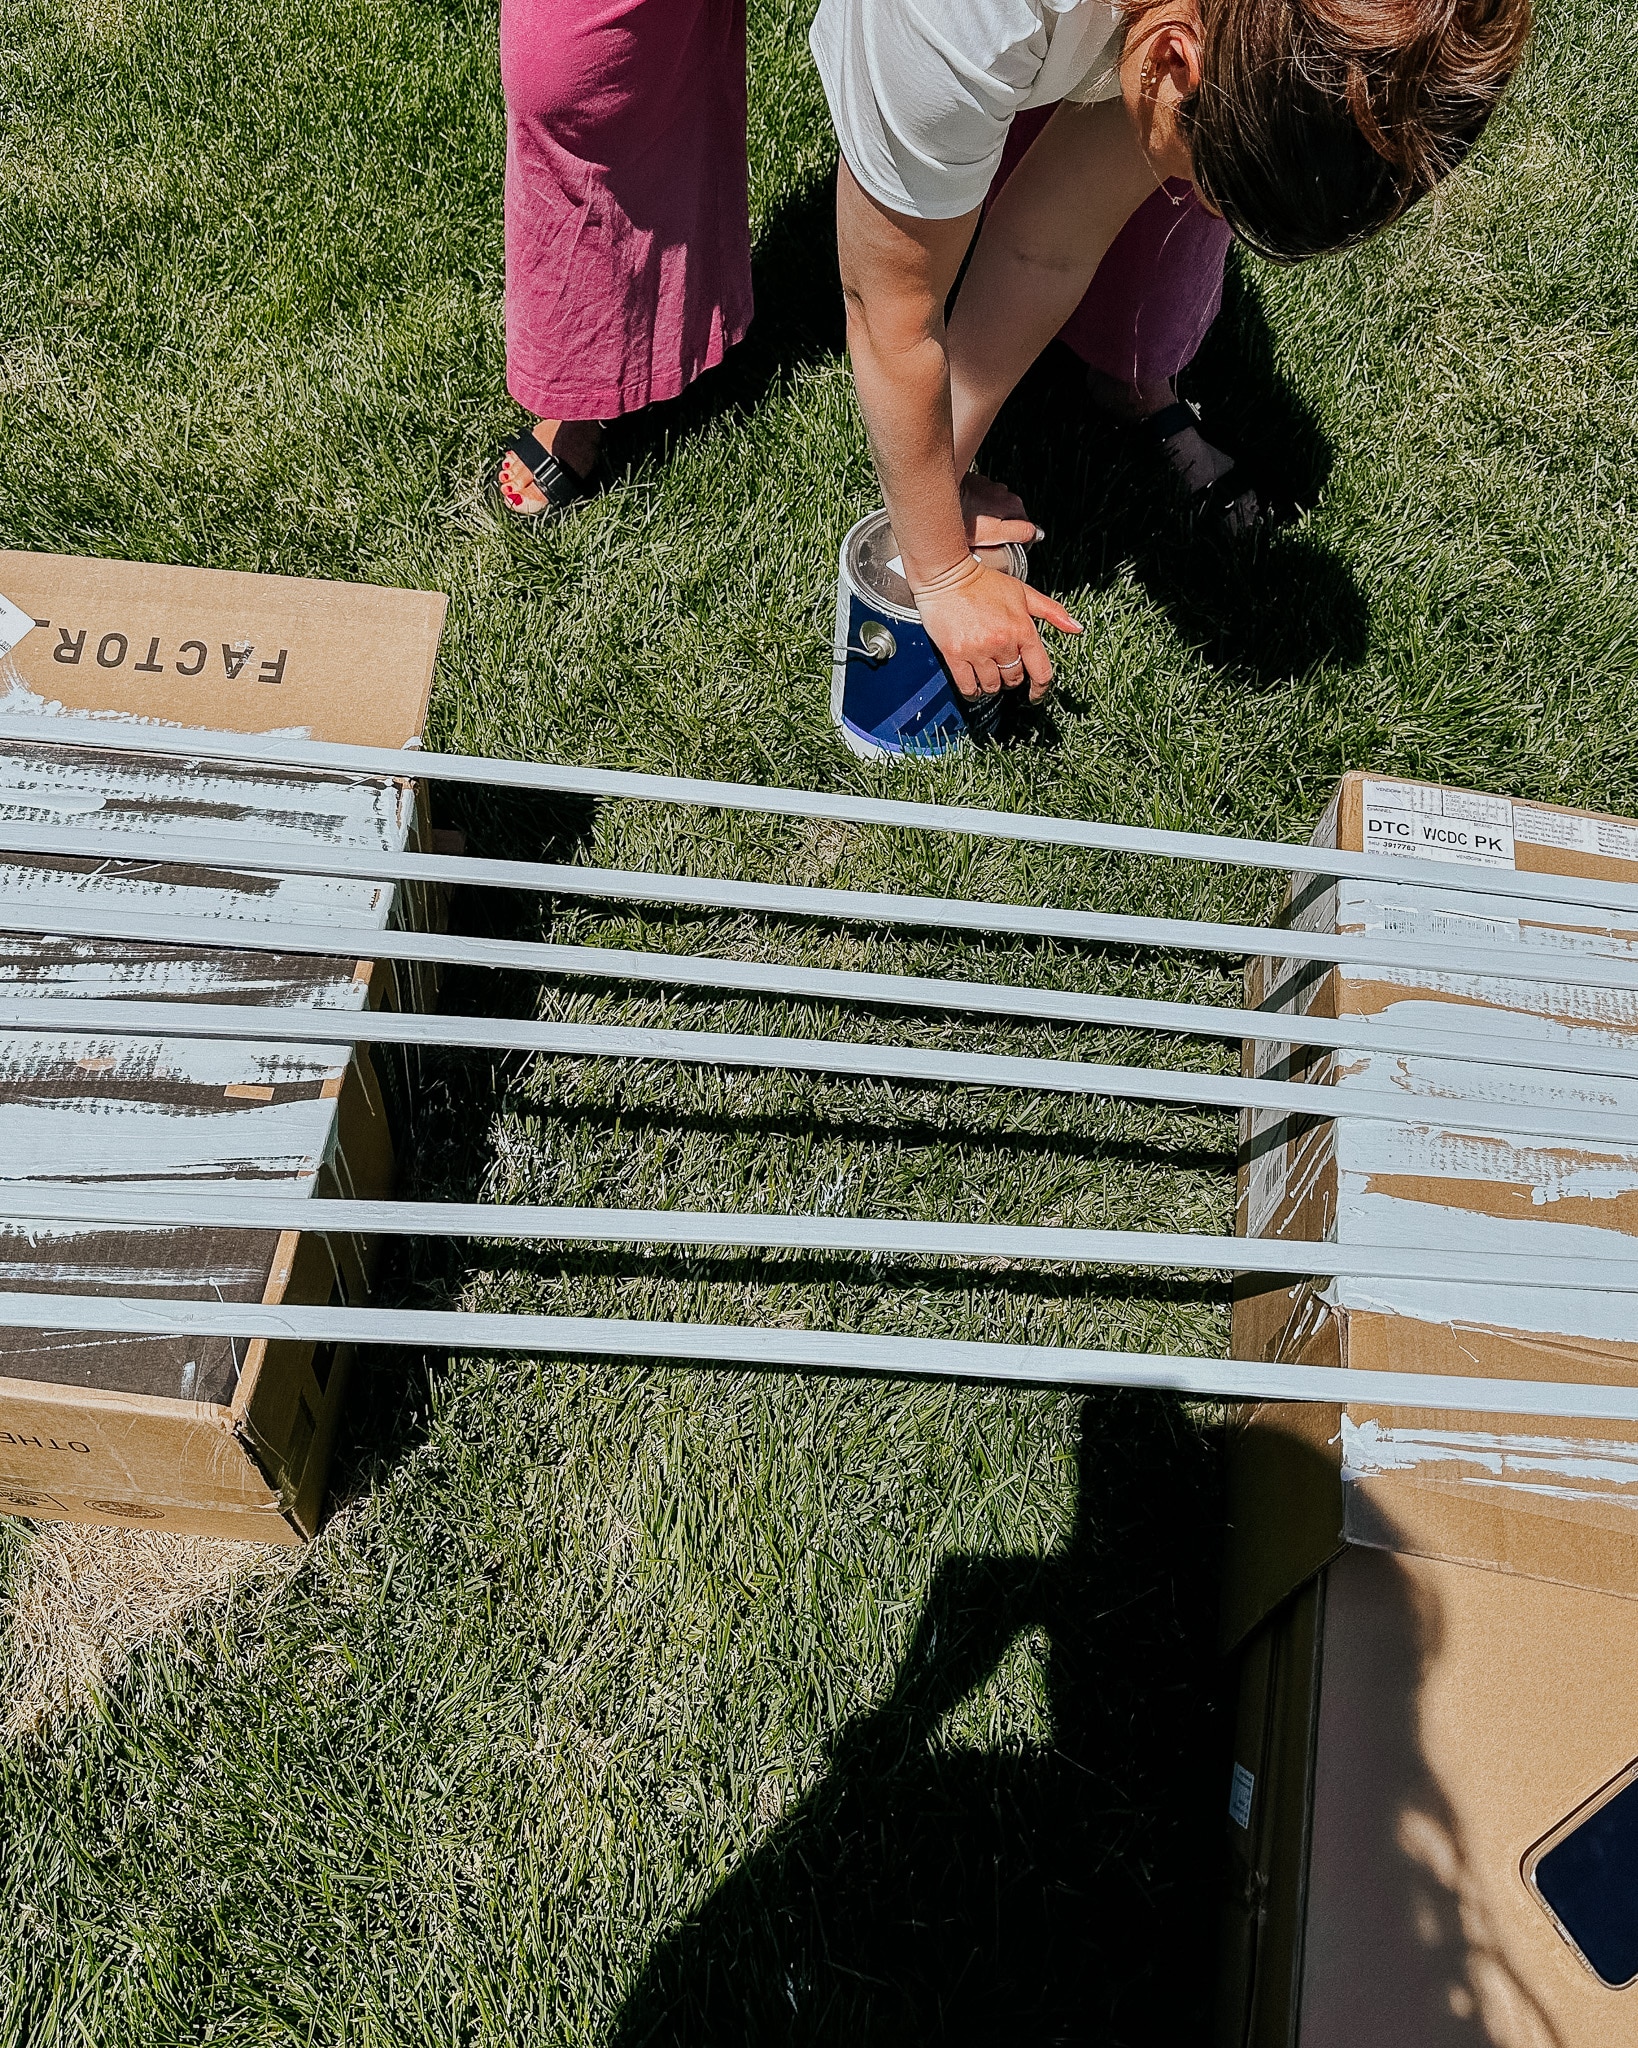
Before applying the trim, we painted it to save us from having to tape the mural off and risk getting paint on it. We chose this trim we found from their local hardware store, but you can really use whatever you’d like!
One thing to note when installing the trim is to keep your trim placement as parallel to the walls or floor and ceiling as possible. The trim doesn’t have to follow the edge of the mural necessarily but should be lined up with the walls as this will make it feel visually lined up, even though most ceilings and walls are not squared with each other.
Measure the top piece of trim first, mark the mitered corners with the square, and cut with the oscillating tool.
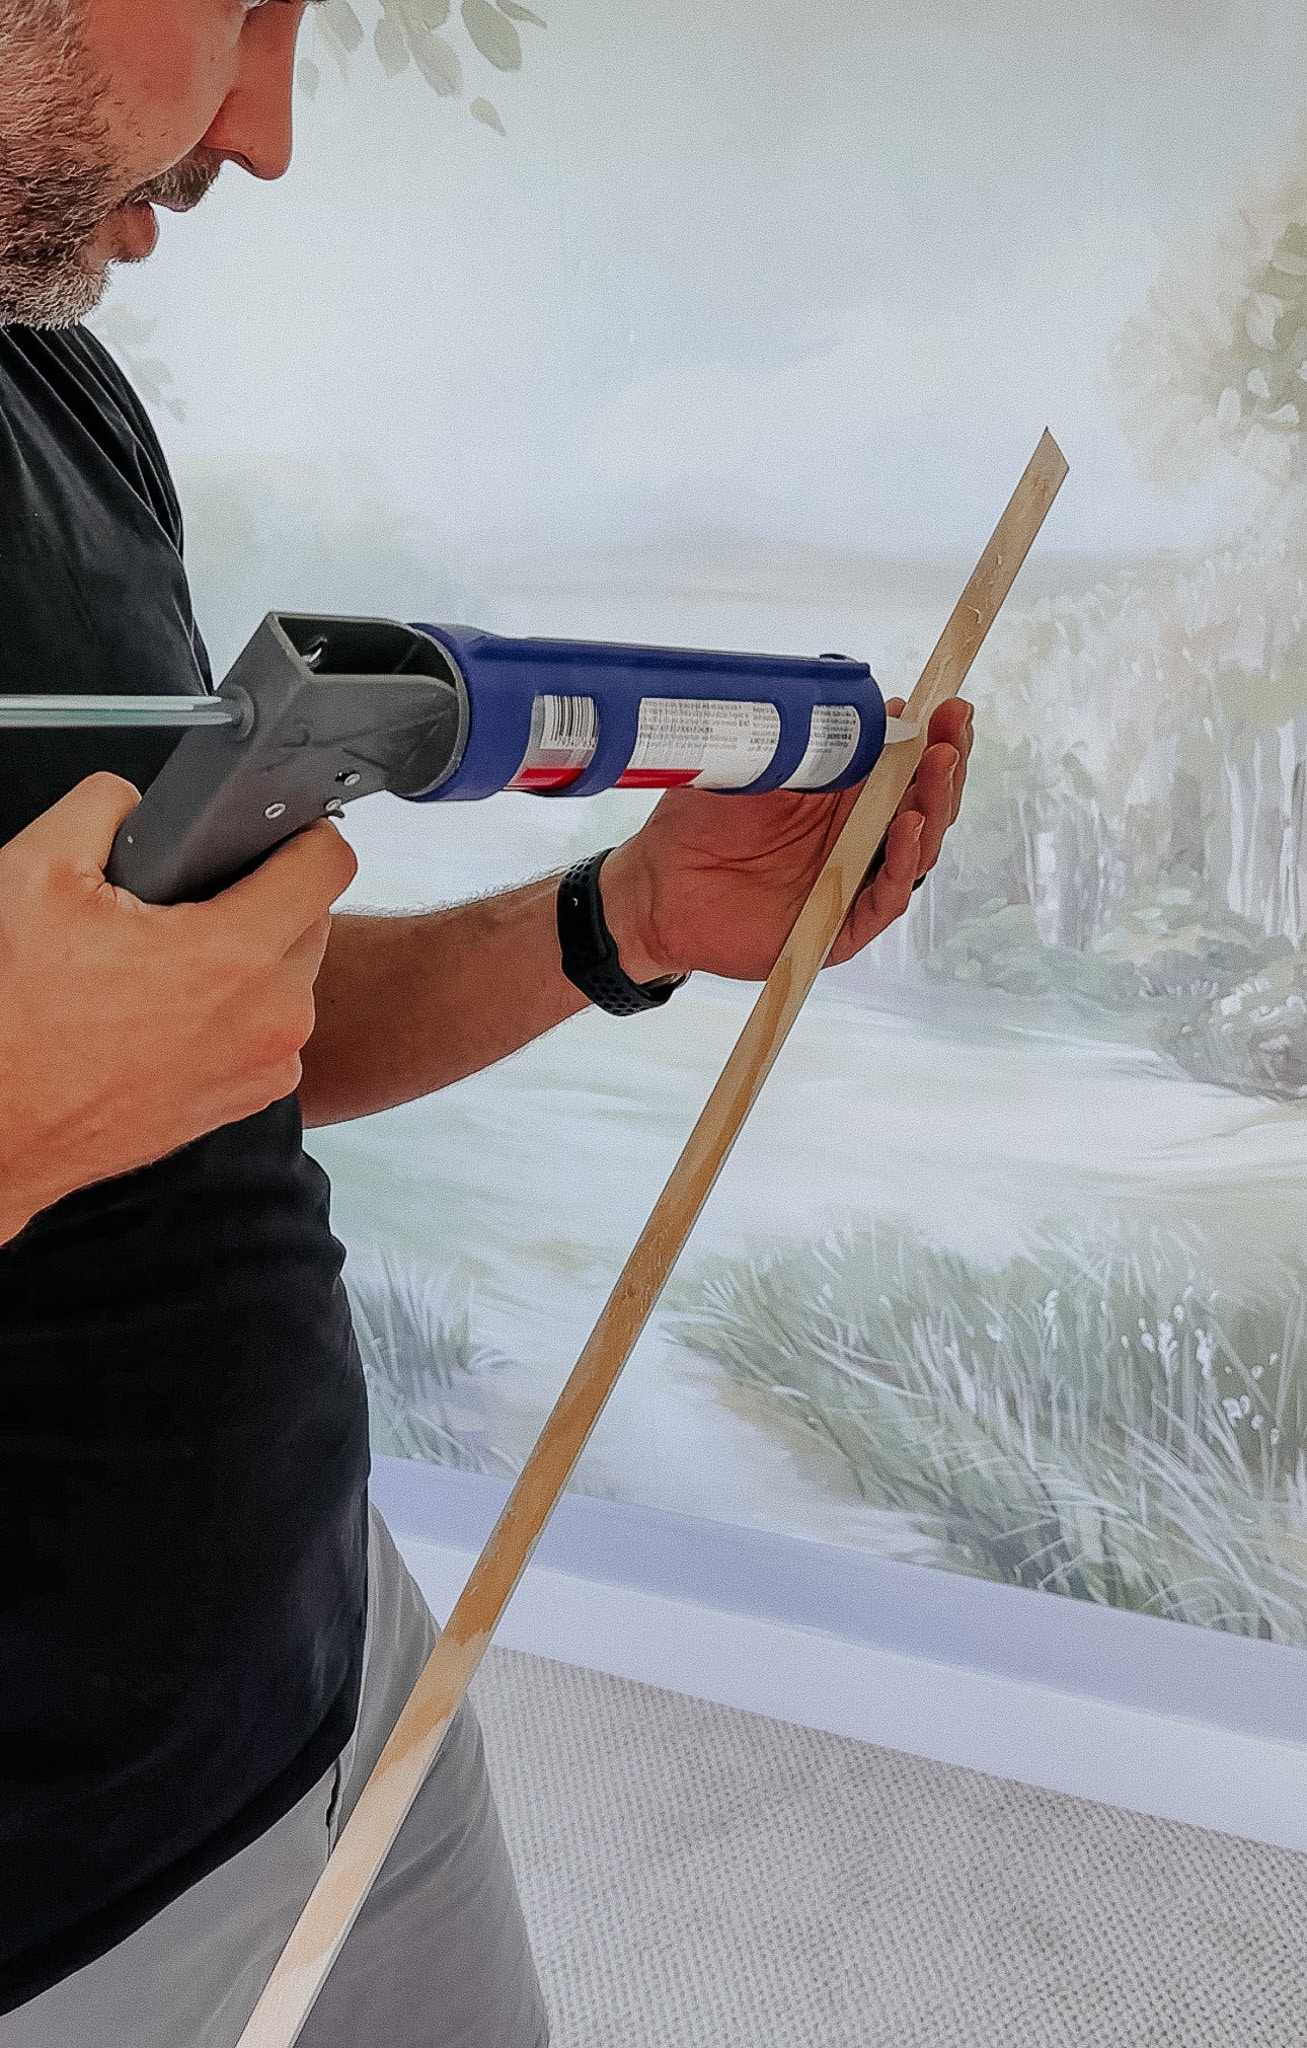
Lastly, you’ll apply a thin line of adhesive to the back, hold the trim in place, and tack in with a pin nailer. Repeat on all four sides, taking note of the directions of the mitered edges to get them to line up. After a bit of touch-up caulking and painting, if necessary, you’re finished!
We’d really love to see how you use this mural in your own homes, so please be sure to tag us on Instagram and use the hashtag #cljxpbk!
Leave a Reply
What do you think?
Previous Post
Next Post


Semihandmade
Our wood grain Shaker cabinet fronts were designed for busy, high-traffic homes like ours. Clad with durable textured thermofoils, this line is compatible with Sektion, Akurum, Godmorgon, and Besta cabinets from IKEA. It's the perfect, practical way to add the warmth of wood to all the rooms of your home.
Collaborations
learn more

next
Loloi
We have teamed up with Loloi to create a line of rugs that are as affordable as they are beautiful. This collection houses a great mix of traditional and modern rugs, in cottage-y colorways, as well as vintage-inspired beauties that you’ll want to roll out in every room.
Collaborations
learn more

next
STUGA
We partnered with Stuga on a line of hardwood floors — The Ingrid is really livable, and the color is very neutral. It doesn’t lean warm or cool, it’s that just right in-between. We have really loved putting it everywhere in our house. It’s the best jumping-off point for design, no matter your interior style. In addition to being beautiful, Ingrid is really durable — we have three kids, and we always have a home construction project going on. Ingrid stands up to it all.
Collaborations
learn more

next


SHop all
What We're Right Now
What We're Right Now
Looking for our favorite things? A place to shop our home room by room, or just catch up on what Julia's wearing / loving right now? Browse the CLJ shop.
Loving


Portfolio


Design
Befores, afters, mood boards, plans, failures, wins. We’ve done a lot of projects, and they’re all here.
BROWSE BY CATEGORY
let's break this thing up
We have a long-standing relationship with DIY, and love rolling our sleeves up and making it happen.
Projects
Even when you don’t want to rip down a wall, you can make that space in your home better. Right now.
read more
read more
read more
02
01
03
looking for inspiration?
A reader recently asked me if I’m starting to fully embrace traditional style and whether we still consider our house to be a “modern Colonial” and why. It was a really great question and so timely — I had really just been thinking about my approach to this home and how my style has changed […]


SEARCH THE BLOG
We've been doing this since 2009 and we've posted a whopping 24145+ blog posts and counting. You might need a little help searching, huh?
looking for something?
find stuff like:
")
Can We Send You Our Love Letter?
Another way for us to stay in touch! Joining our weekly newsletter gives you access to exclusive content, never-before-seen photos, your questions answered, and our favorite DIYs. Sign up below!
Follow Along on Instagram
Welcome to our online community where we've posted home, DIY, style, renovations, and family since '09. Renovating our #cljmoderncottage in Idaho and headed for new adventures in Raleigh, NC. #cljfam #cljtransformations
@chrislovesjulia


Links
Get Around
Make yourself right at home
Portfolio
Design
Casual Friday
Projects
Lifestyle
Gift Guides
All Posts
Shop
Love where you live.
Social
RivrLinks
Links
Get Around
Make yourself right at home
Portfolio
Design
Casual Friday
Projects
Lifestyle
Gift Guides
All Posts
Shop
Love where you live.
Social
RivrLinks
What is this paint color?
The color is Benjamin Moore Wales Gray.
Absolutely beautiful! I just may have to do this in my grand babies room!!
Very clever!! I love this!
What wallpaper paste/glue would you recommend?
The beauty of this wallpaper is that it’s peel and stick — no paste required! :)