


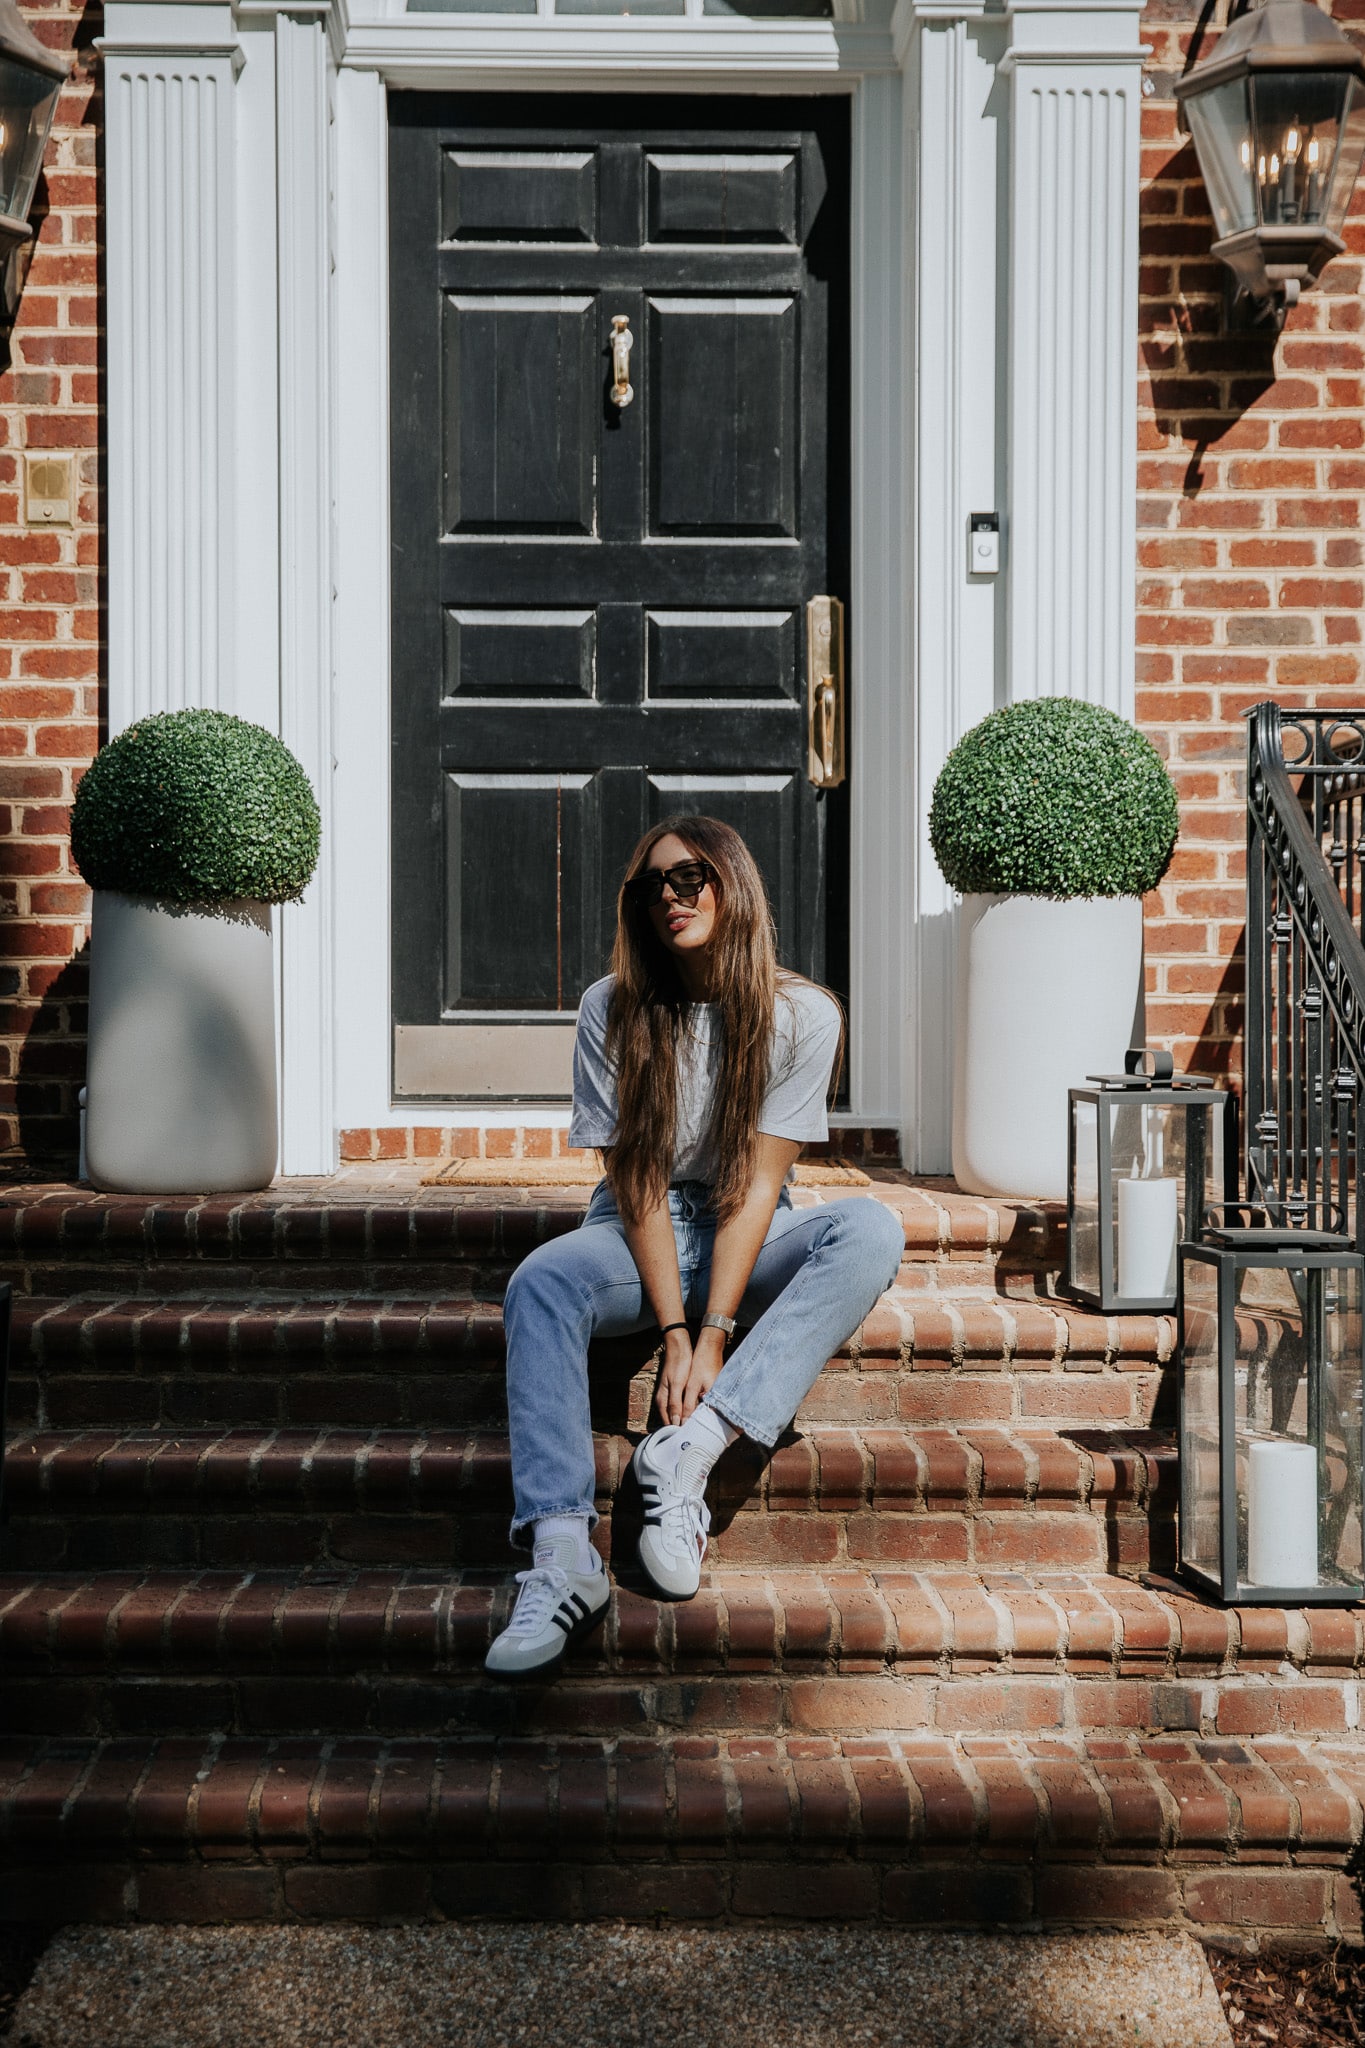
I’m not one to be afraid of hanging things on my walls, but I know that’s a real fear of homeowners! Hanging decor, in my mind, is far from permanent and is typically one of the easier decisions to make when it comes to home renovation. But I’m not a perfectionist! I’m known for eyeballing the center of a wall, holding my finger to mark the nail hole, grabbing a hammer and nail, and just going for it. Sure, it’s maybe not the most accurate or precise way, but it’s kind of liberating not to care so much! After all, the only way to get over the fear of decision paralysis is actually to make a decision! Worst case scenario, you live with it for a while, decide you don’t like it, and take it down. Repairing drywall is easier than you think, but even if you live with some holes in the wall for a few months, that’s not so bad. The moral of the story: stop deciding and start doing so you can actually enjoy your home! Keep reading to learn how to hang anything!
How to Hang Art
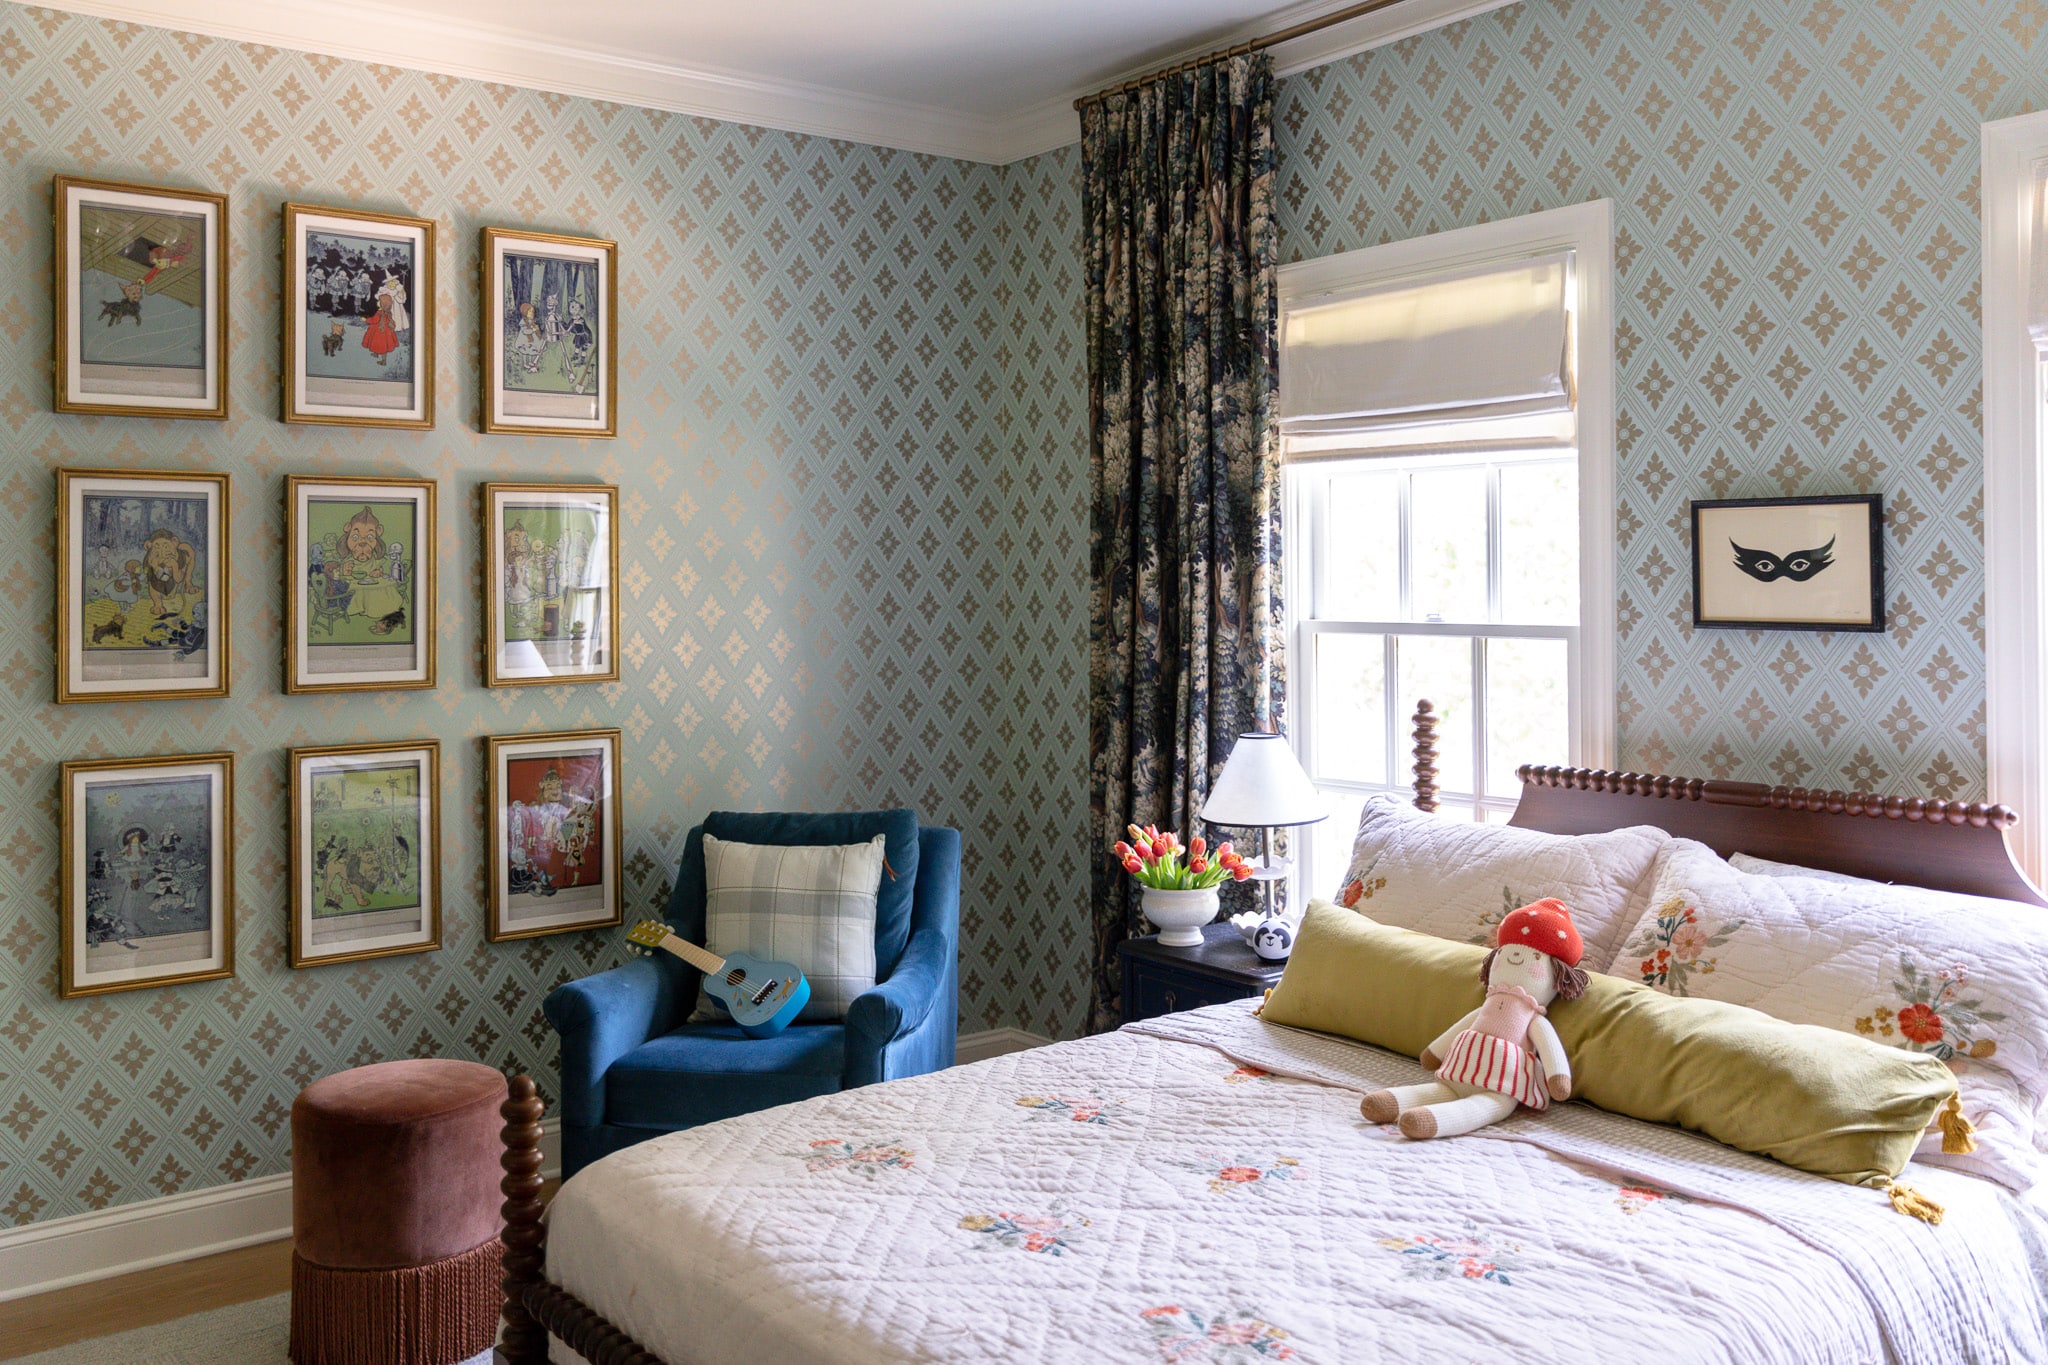
Shop Faye’s Room

In Faye’s room, we used my very favorite picture hanging hooks. These won’t work through a stud, so you’ll want to use a stud finder to locate and avoid any studs if you can. But before we made any holes in the wall, we located the center of the wall. As I said earlier, I usually eyeball it, but if you care about precision, you can use a measuring tape! In this case, where we hung a grid of frames, I would recommend using a laser level and a tripod. Start with the top center frame and work your way out and down. If any of your holes need to be made into a stud, you can just use screws and a cordless driver.
How to Hang Large Art

Chandelier | Picture Light | Artwork (custom) | Slipcover Bed | Bedding | Velvet Bench | Polly Rug
If your art is larger and heavier, and you’re hanging on drywall, you’ll want to use anchors that can handle the weight and not ruin your drywall. And typically, large art has more than one nail hole, so we like using this picture hanging level measurer as a guide to get the hole placement correct and level. Highly recommend adding this device to your picture-hanging toolkit!
How to Hang a Mirror
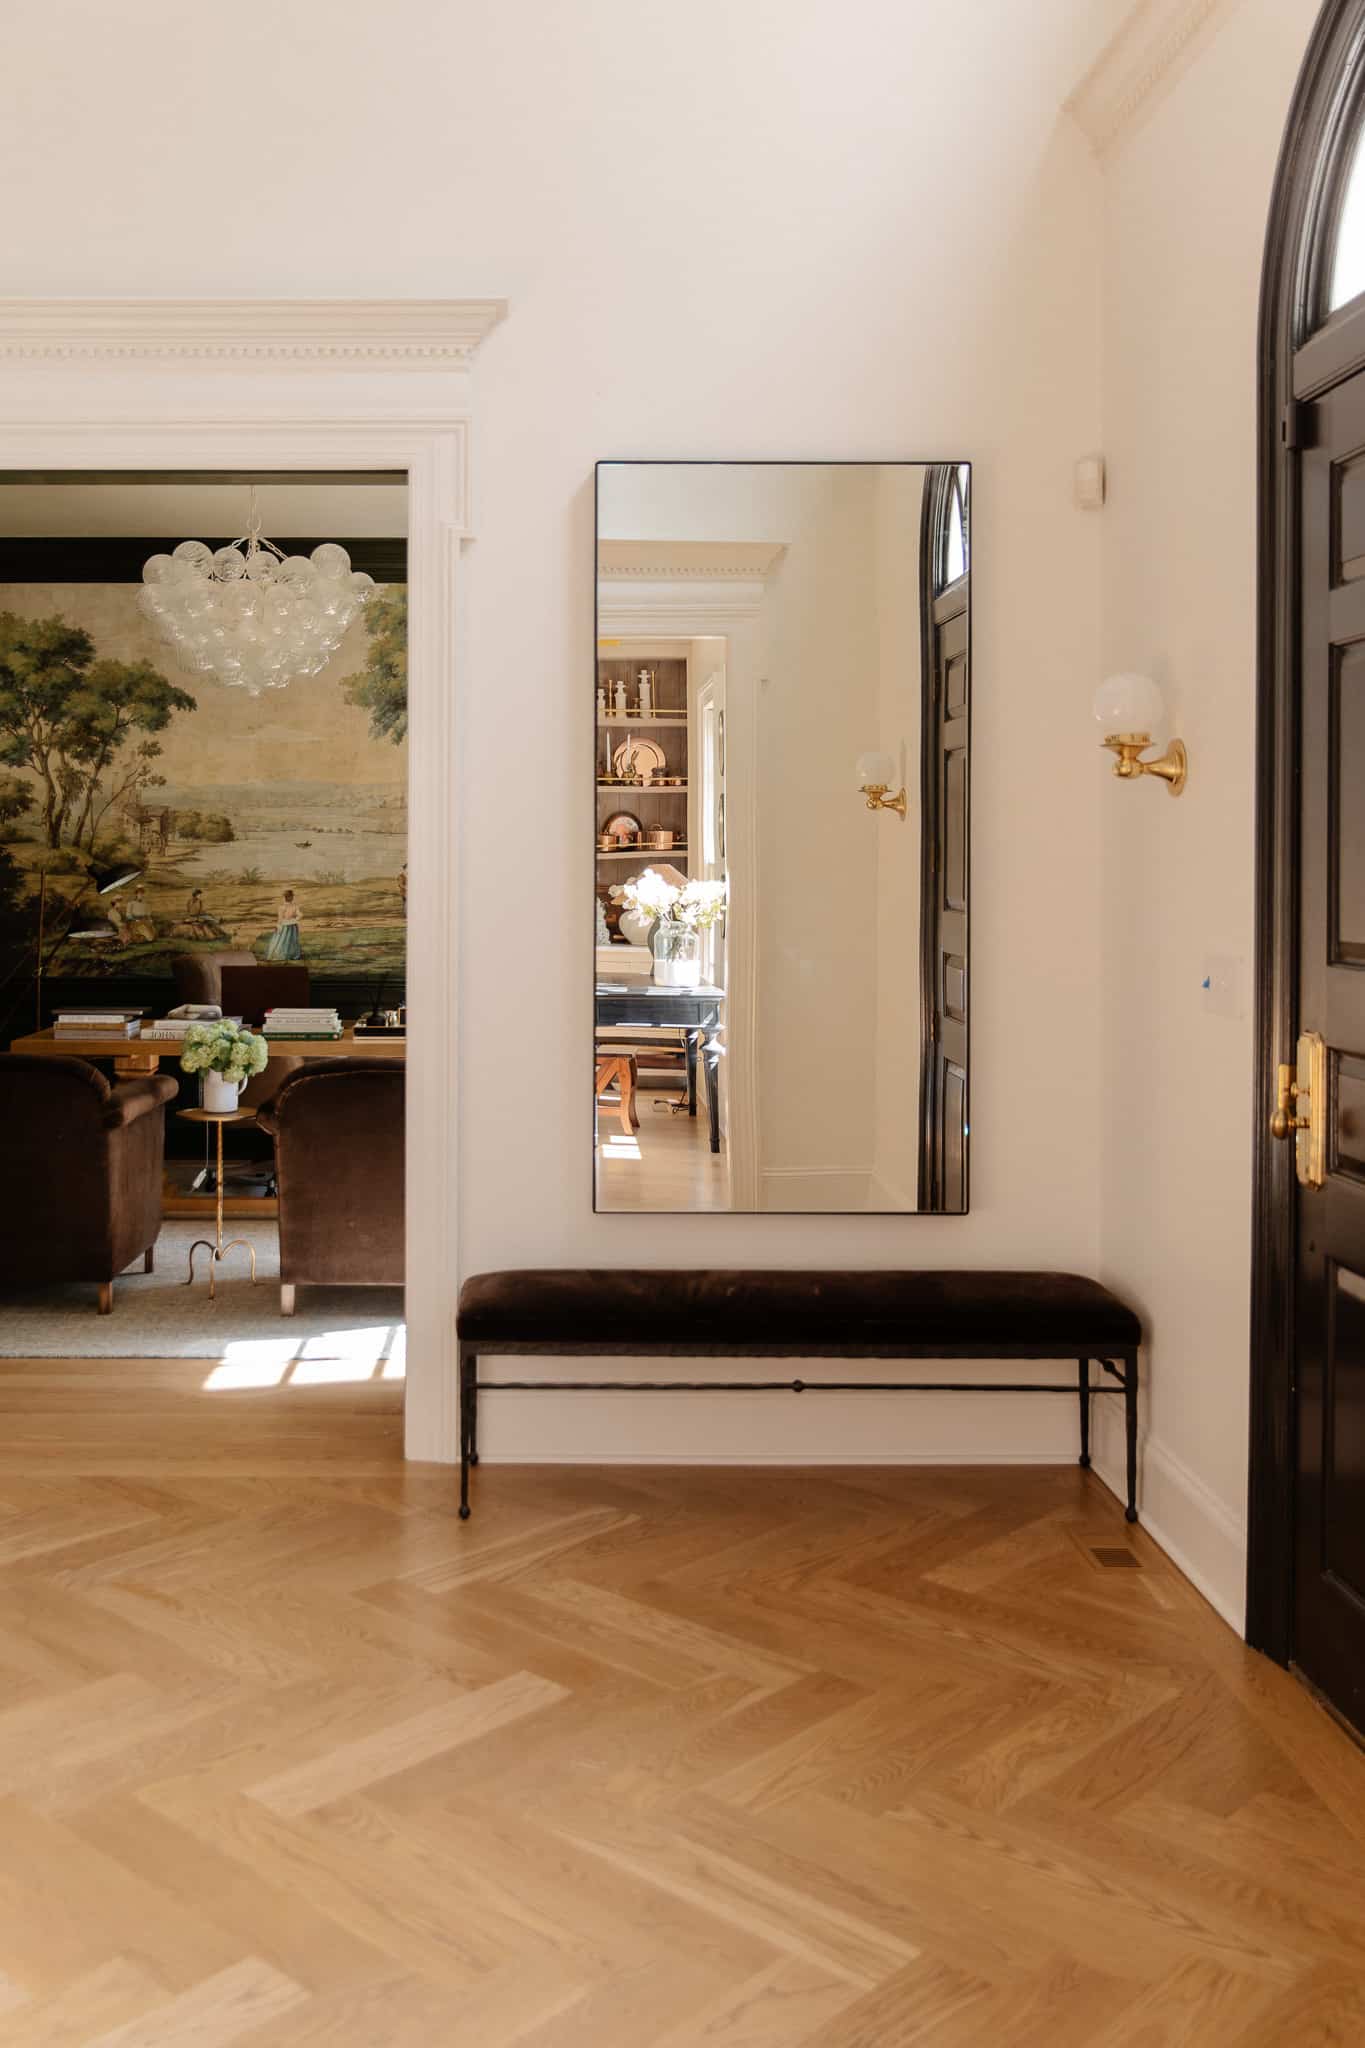
Hanging a mirror isn’t much different than hanging large art, but depending on the size of your mirror, you might need to upgrade your anchors to these Snaptoggles, which can hold 265 lbs! Regardless of that number, it’s always best to drill your holds directly into studs. This is what we did with the front entry mirror because it weighed around 150 lbs, and regardless of what those anchors say, we would like this mirror to stay securely on the wall for a very long time. If you don’t get lucky with stud placement, then a heavy-duty French cleat is going to be your best friend. One bracket gets installed into the back of the mirror, and the other adjoining piece gets hung on the wall, securing directly into the studs. Then simply hang the mirror, interlocking the two cleats together. This set will hold up to 500 lbs!
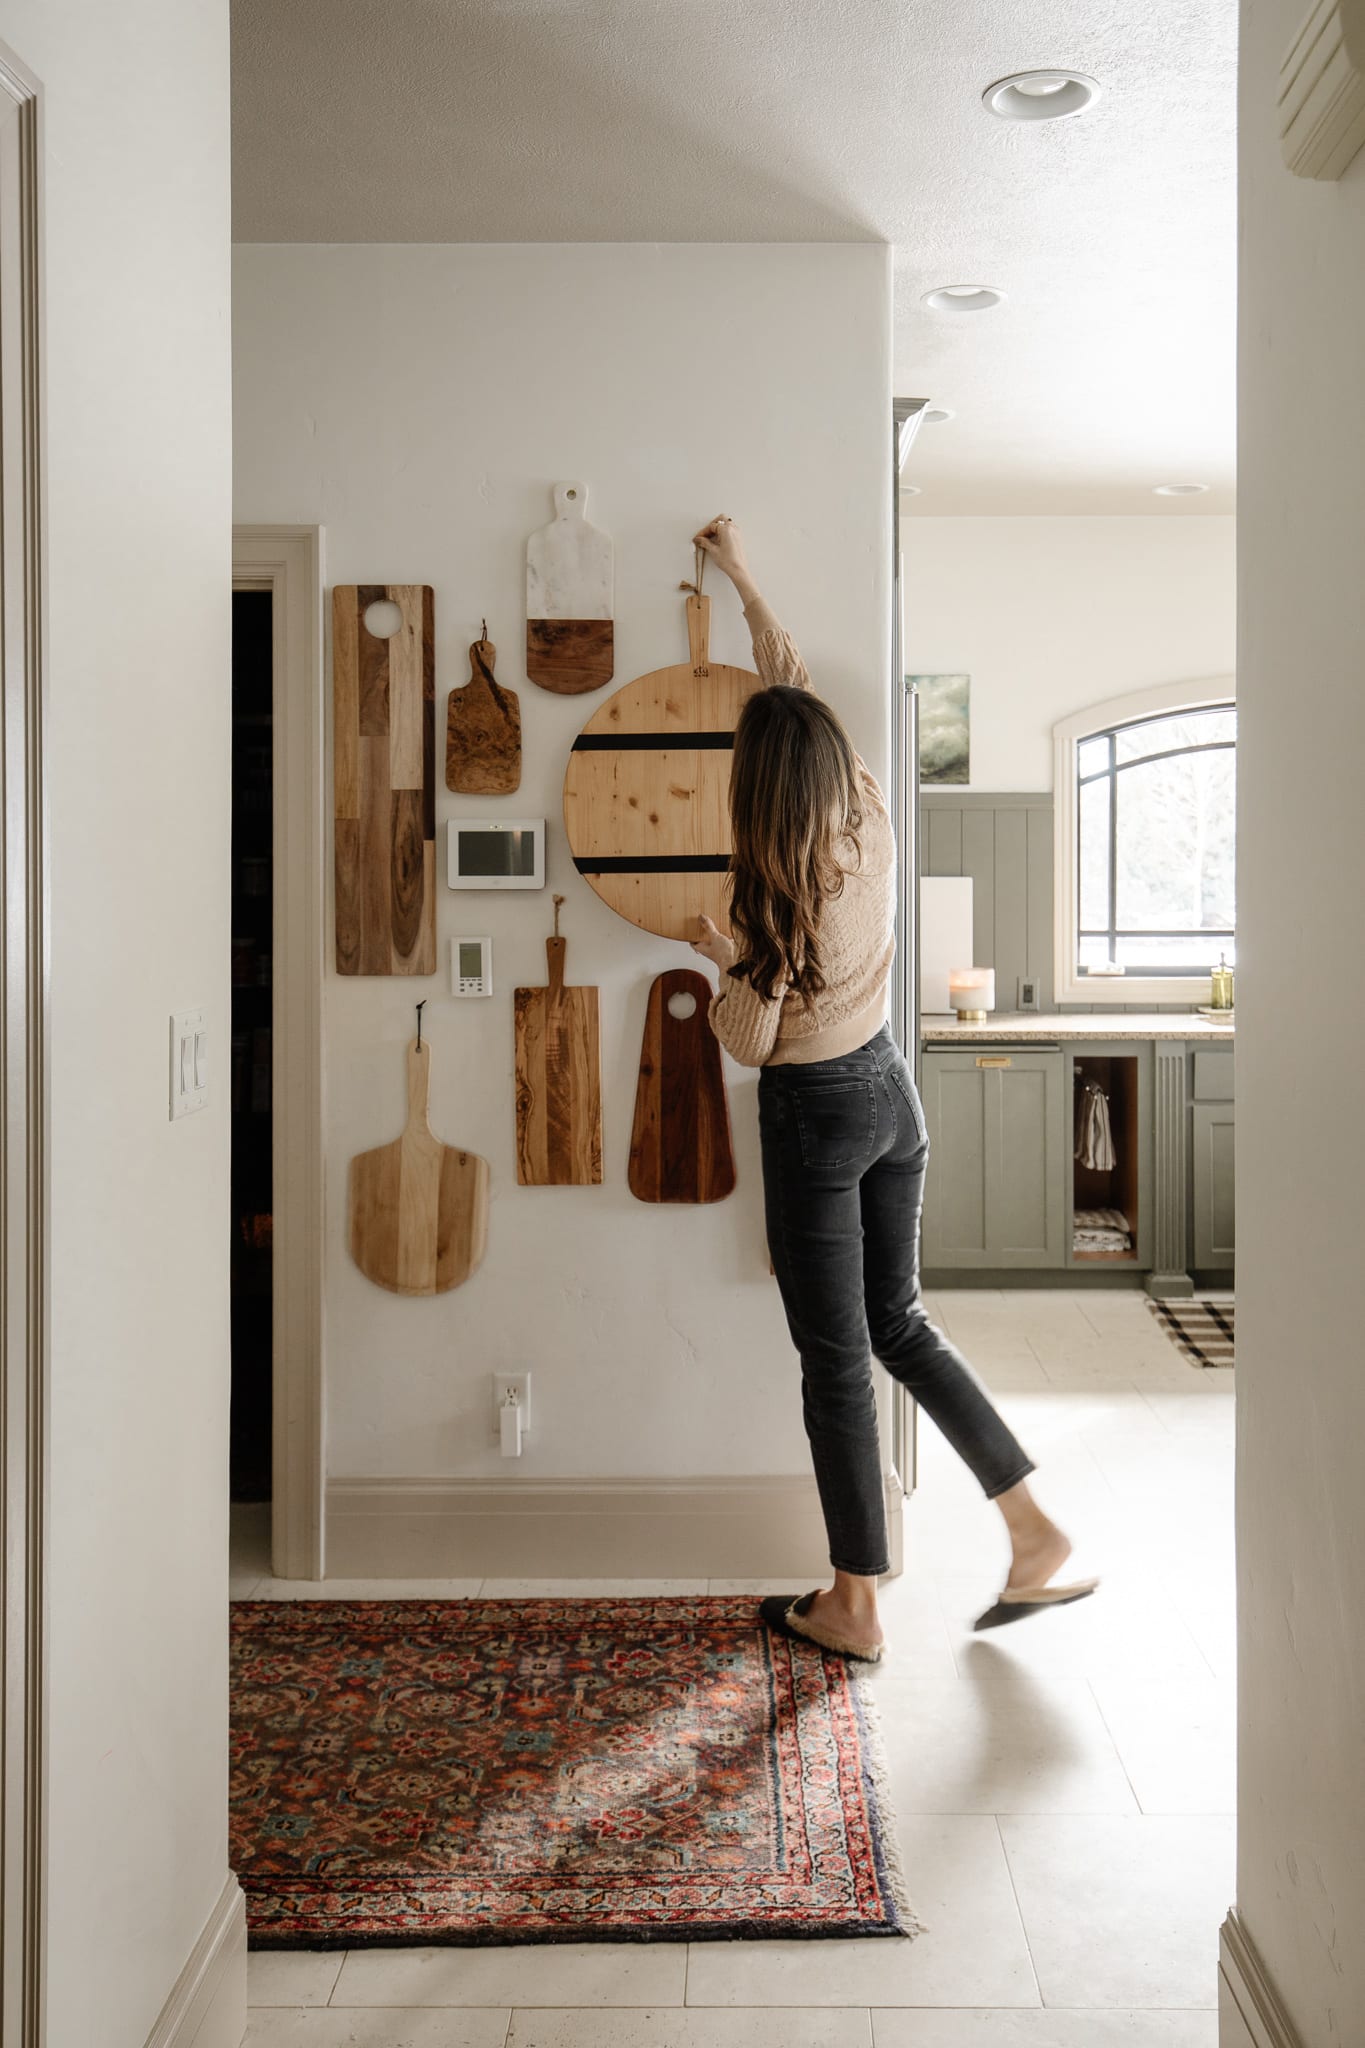
How to Hang Cutting Boards
Shop Our Cutting Boards
For our cutting board collection, I grabbed a hammer and some nails and just eyeballed the placement! For some of the heavier ones, it would be a good idea to use an anchor, though.
How to Hang String Lights

Outdoor String Lights | Chaise Lounges | Umbrellas | Umbrella Stands | Adirondack Chairs
Lastly, if you find yourself wanting to hang anything on brick or stone, you’ll need a masonry drillbit attachment for your impact driver. An impact driver is basically a drill but more forceful and strong, which is perfect for touch surfaces like brick. This is what we did when we installed the string lights on the outside of our house.
For easy reference, we’ve gathered up some of the essentials to have on hand for all of your hanging needs! Did we miss anything?
Hanging Essentials Toolkit
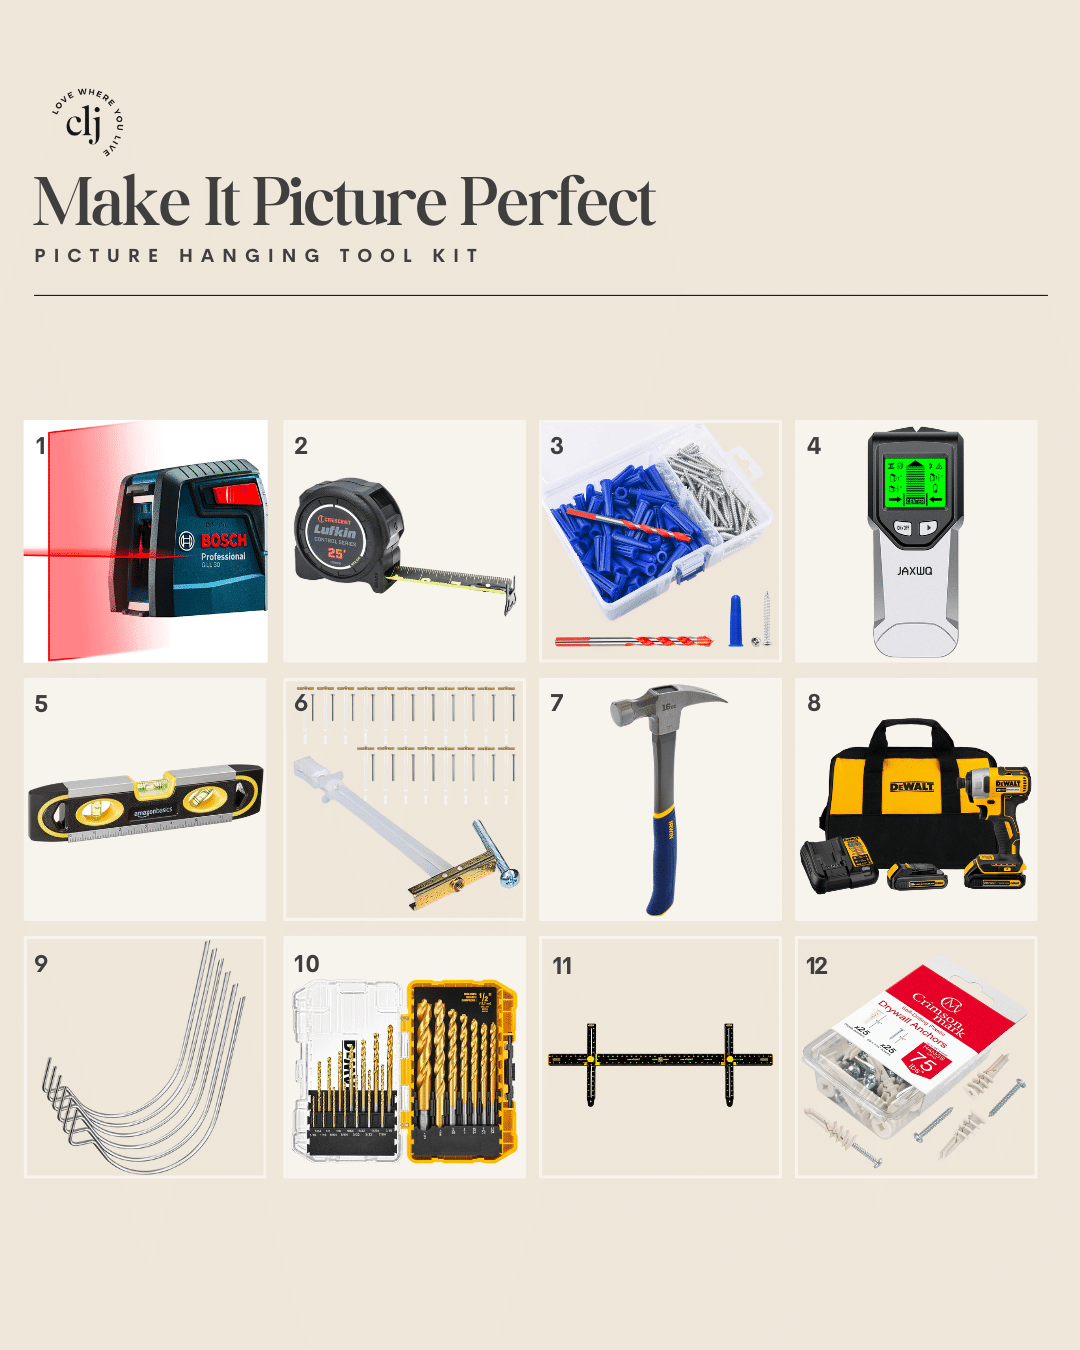
- Cross Line Laser Distance Device $57
- Standard Tape Measure $16
- Concrete Anchors and Screws Kit $16
- Stud Finder Wall Scanner $27
- Level $8
- Snaptoggle Anchor Set $19
- Hammer $9
- DEWALT Cordless Impact Driver Kit $159
- Picture Hanging Hooks $8
- DEWALT Titanium Nitride Coated Drill Bit Set $26
- Picture Hanging Level Measure $17
- Drywall Anchors & Screws $6
Leave a Reply
What do you think?
Previous Post
Next Post


Semihandmade
Our wood grain Shaker cabinet fronts were designed for busy, high-traffic homes like ours. Clad with durable textured thermofoils, this line is compatible with Sektion, Akurum, Godmorgon, and Besta cabinets from IKEA. It's the perfect, practical way to add the warmth of wood to all the rooms of your home.
Collaborations
learn more

next
Loloi
We have teamed up with Loloi to create a line of rugs that are as affordable as they are beautiful. This collection houses a great mix of traditional and modern rugs, in cottage-y colorways, as well as vintage-inspired beauties that you’ll want to roll out in every room.
Collaborations
learn more

next
STUGA
We partnered with Stuga on a line of hardwood floors — The Ingrid is really livable, and the color is very neutral. It doesn’t lean warm or cool, it’s that just right in-between. We have really loved putting it everywhere in our house. It’s the best jumping-off point for design, no matter your interior style. In addition to being beautiful, Ingrid is really durable — we have three kids, and we always have a home construction project going on. Ingrid stands up to it all.
Collaborations
learn more

next


SHop all
What We're Right Now
What We're Right Now
Looking for our favorite things? A place to shop our home room by room, or just catch up on what Julia's wearing / loving right now? Browse the CLJ shop.
Loving


Portfolio


Design
Befores, afters, mood boards, plans, failures, wins. We’ve done a lot of projects, and they’re all here.
BROWSE BY CATEGORY
let's break this thing up
We have a long-standing relationship with DIY, and love rolling our sleeves up and making it happen.
Projects
Even when you don’t want to rip down a wall, you can make that space in your home better. Right now.
read more
read more
read more
02
01
03
looking for inspiration?
A reader recently asked me if I’m starting to fully embrace traditional style and whether we still consider our house to be a “modern Colonial” and why. It was a really great question and so timely — I had really just been thinking about my approach to this home and how my style has changed […]


SEARCH THE BLOG
We've been doing this since 2009 and we've posted a whopping 24145+ blog posts and counting. You might need a little help searching, huh?
looking for something?
find stuff like:
")
Can We Send You Our Love Letter?
Another way for us to stay in touch! Joining our weekly newsletter gives you access to exclusive content, never-before-seen photos, your questions answered, and our favorite DIYs. Sign up below!
Follow Along on Instagram
Welcome to our online community where we've posted home, DIY, style, renovations, and family since '09. Renovating our #cljmoderncottage in Idaho and headed for new adventures in Raleigh, NC. #cljfam #cljtransformations
@chrislovesjulia


Links
Get Around
Make yourself right at home
Portfolio
Design
Casual Friday
Projects
Lifestyle
Gift Guides
All Posts
Shop
Love where you live.
Social
RivrLinks
Links
Get Around
Make yourself right at home
Portfolio
Design
Casual Friday
Projects
Lifestyle
Gift Guides
All Posts
Shop
Love where you live.
Social
RivrLinks
Look at the 3M Claw for another hanging hardware option. We recently used it when there was ductwork right behind the drywall.
Have you had any experience hanging things on old, plaster walls? I would love some help or recommendations, as it’s very challenging material to deal with.
I recently bought the picture hanging hooks and they are great! I am scared each time that they will poke through the other side of the wall but of course they don’t. I do have a couple of times I’ve left an unseen hole because I also eyeball it, but usually the piece covers whatever mistake I made.
I have not had luck with the picture hanger thingie. Eyeballing it or using a tape measure seems much better,
As a side note, thought you would benefit from this article:
https://cupofjo.com/2023/08/17/vogue-september-issue-photoshop-supermodels/
QUIT WITH THE FILTERS ALREADY!!!
Rude.
Unfollow if the content isn’t for you.
This has nothing to do with this post and will probably be deleted as spam, but in case it’s not: I did not see what the hubbub was about. The article itself reads, “It is also true that, having seen Naomi Campbell in person, I can tell you that she does not have a line on her face.” So what exactly were these women supposed to look like? Who can afford personal chefs, trainers, luxury skincare?
Hi! Can you share the link to the related post about how high to hang art when it’s not above anything? I cannot seem to find the post through my searches.
Is this the one you’re thinking of? https://www.chrislovesjulia.com/large-art-when-to-hang-it-and-where-to-buy-it/
Hi! Do you use the hung cutting boards or are they mostly for decoration? Thanks!!!
We use them all the time!! It’s actually a really functional storage for us.
We’ve been in our home for two years, and I am so reluctant to hang things on my walls, because I have this weird fear of putting holes in my walls! We have several of these tools already, and I’m hoping this will inspire me to just go for it!