
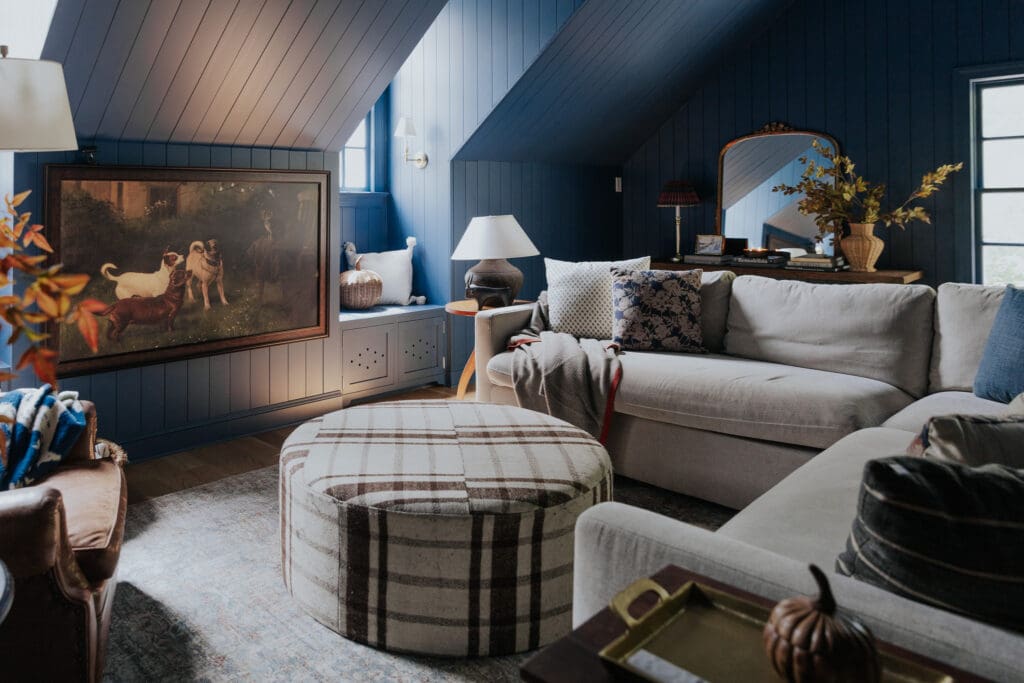
Our oldest daughter, Greta (10 this month!) has a real passion for horses. She’s taking riding lessons and learning so much that I have a feeling our pasture in the backyard won’t be empty for too long. So when it came time to choose art for her room, horses were a natural choice. I went for the more vintage-looking route and wanted a horse above each bed, facing each other. I found these two prints from BFF Print Shop and they were perfect!

It’s a digital print shop so you purchase the print and then can have it printed however you’d like. I decided to have them printed on Canvas and went through CanvasHQ because I heard such great things about the quality (all true!), but I heard even Costco does canvas prints. So you can shop around and find which one is best for you here. I had them printed as a 16×24 with a 1.5″ return knowing we’d want to DIY a frame for it!

When framing a canvas, it looks so much more professional to have a space between the canvas and the frame so it looks like it’s floating. And that’s just what this tutorial is about today–how you can do the same!

This tutorial is for a canvas that is 24x16in. For larger or smaller frames, you may need to adjust the amount and length of materials needed.
Materials Needed
• Two .5x3in oak project boards (4ft long), ripped to 1.5in wide
• Two .25x3in oak project boards (4ft long)
• wood glue
• painters tape
Tools Needed
• pin nailer
• miter saw
• table saw (or you can have your lumber yard rip your boards for you)
• 4-6 small clamps

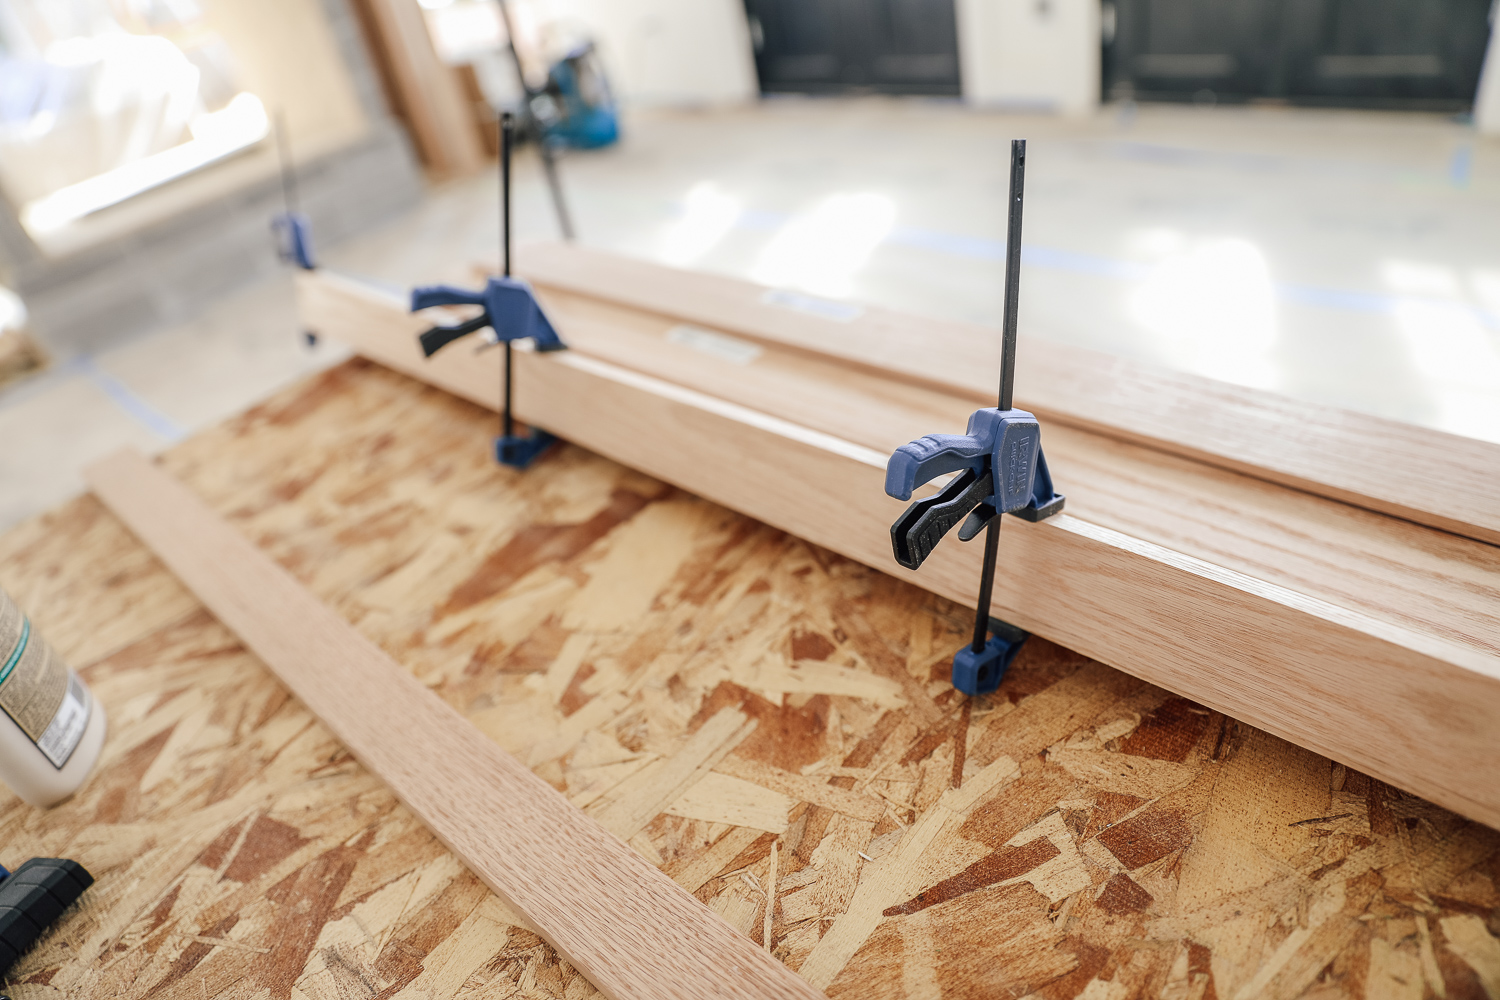
Step 1: Connect the side and back boards
The .5in board will be the side of the frame and the .25in board will act as the support behind the canvas, and is what you will nail to the canvas frame as the final step. Add a small bead of glue along the skinny edge of the .5 board and stand it up on the .25in board, taking care to align it with the edge.

Clamp the boards together, drive pin nails through the .25in board into the .5in board to secure the two together. Allow the glue to set. Repeat this with both sets of .5in and .25in boards.

Step 2: Cut the frame to size
Once the glue has set, remove the clamps and use a miter saw set at a 45 degree angle to cut the frame pieces to size. You want a 3/16 gap around the canvas, so to calculate how long to cut your pieces (to the outside edge) use this formula:
Canvas axis + 3/16(x2) + width of edge of frame(x)
So, for example, our frame is 24×16. 24in is one axis, 16in is the other. To find how long your top and bottom pieces should be, you take the width (24), add 3/8 (you want a 3/16 gap on both sides of the canvas, thus the 3/8), then add 1in (the width of our frame is .5in, and that will be added to each side, giving you 1in).

24+3/8+1= 25 3/8
So 25 3/8 is how long each board is cut, to the long edges of your mitered cuts. Ensure the miter is angled correctly, so the .5 frame ends up on the outside.
This same formula works for the side pieces as well.
16+3/8+1= 17 3/8
So 17 3/8 is the length of your side pieces, to the long edges of your mitered cuts.

Step 3: Construct the frame
Glue the edges of the frame pieces where they will intersect, lay the frame pieces into position and use painters tape to secure them together. Drive pin nails into the sides of each corner, from both directions, to secure the pieces together. Clamp them if needed, and allow the glue to set.
If you plan to paint or stain the frame, once the glue has dried, remove the tape (and clamps if used) and paint or stain now, before putting the canvas in place. We actually decided to leave our frame raw!

Step 4: Put the canvas in place and attach
Put the canvas in place, measure to ensure even spacing around the edges, and use small clamps to clamp it in place.


Flip over so you have access to the backside of the frame. Drive pin nails through the back of the floater frame directly into the frame of the canvas itself to secure the two together. Space the nails out only ever 2-3 inches or so.

If you’re more of a visual learner, we put together a video outlining the quick DIY below!
We kept the natural wood on our frames for now, but that may change as her room evolves a little more.


Let us know if you try this–we’d love to see!
ROOM SOURCES
Beds
Duvet
Pillows (Target-old)
Nightstand (From Wayfair–no longer available)
Lamp (Vintage)
Wallpaper


The most important questions now is, have you bought a horse/pony yet?!
My husband and I renovated our 1960’s ranch home last year and nothing made my horse-girl-heart sing quite as much as the Piedmont (https://www.hyggeandwest.com/products/piedmont-pine) wallpaper we put in the master bath and the foxhunting wallpaper in the mudroom!
Hi Julia! im printing the same horse painting off of HQ Canvas. What finish did you select when doing yours? was it just he Matte Finish?
It was matte, yes!
Hey! I have no idea how to share, but I followed your tutorial and made two floating frames for paintings my grandmother in law made. Gorgeous! Thank you!
This is so helpful Chris and Julia! Putting this aside for future art purchases.
Love this room! Random question but can you share the source for the little clock on the nightstand? I saw it in your Instagram post initially. I’m looking for one like that for my son’s room.
It’s from Target!
Thank you!!