The wainscoting in the study is finished! When we do a project like this, we always like to bring it back to our DIY roots and share a tutorial! The fun thing about wainscoting is that there’s really no wrong way to do it, and you can customize it however you’d like. We’ve done wainscoting 5 OTHER times, and they’ve all been different! From really basic, to more layered. We wanted the wainscoting in the study to look like it has been there all along, so we used more substantial materials and went for a very clean, yet intricate design. Here’s how we did it!

Gather materials
These are the materials we used, but you can swap these out to achieve any look you like!
1×4-in poplar board for creating the box shape (vertical pieces are ripped down to 2-1/2-in)
1-3/8-in base cap moulding to create the chair rail
1-1/16-in stool material also to create the chair rail (typically used for window sills, but we ripped the back little nob off)
3/4-in poplar edging for the decorative pieces used inside the boxes

Hopefully this diagram is helpful in identifying what we used, and where we used it.
Gather tools
Table Saw
Miter Saw
Brad Nailer
18 Gauge Brad Nails
Wood Glue
Laser Level (our favorite!)
Laser Level Tripod (this tripod is a must because you can use the little crank to raise and lower the height)
Torpedo Level
Shims
Stud Finder
Wood Filler
Caulk
Plan out the dimensions for your wainscoting
The study has 10 ft ceilings, and we wanted the wainscoting to come up about one third of the way. Rule of thirds is a general design principal I constantly use as a guideline! We measured 36-in from the floor up and marked the height! That’s where we want the top of the chair rail to sit.
Next we determined where the top poplar board will be by subtracting the 1-1/16-in thickness of the stool material by the 36-in height.
From there we marked how far up we wanted the bottom poplar board to sit. Sometimes people will install wainscoting directly above the baseboards, but in this case, we want the baseboards to be installed in front (creating an overlap). The poplar board we used for the bottom is 4-in wide (or high in this case), and will partially get covered by the baseboard, revealing our desired 2 1/2-in. The height of the baseboard, plus the 2 1/2-in height is how we determined where the top of that bottom board will sit.
Next we just measured the distance between to determine how tall our vertical pieces should be.
Again with the rule of thirds, we wanted there to be 3 “boxes” on the back wall and the side wall. The window wall was done a bit differently, and technically there are 5 boxes (one on either side of the windows, one below each, and one in between). To determine the placement for the vertical pieces, we took the total wall width and subtracted the sum width of all the vertical pieces. Then we divided that number with the amount of boxes we had (3). For example one of the walls was 175-in, and each vertical piece is 2.5-in wide and there’s 4 of them. So subtract 175 by 10 (which is 2.5 multiplied by 4), then divide that number by 3. This is the distance between each vertical board.
The last thing we did was mark out where the studs are using a stud finder! This makes installing the horizontal pieces a breeze.
Install the poplar boards

Figuring out the dimensions for everything can be a bit of a headache, but it gets easier from here! Starting at the bottom, we used a laser level and tripod as a guide for the first piece. Nail the board to the wall using the Brad nailer, being sure to line up your nails to the studs for a more secure fit.
Repeat the exact steps for the upper poplar board.

For the vertical boards, we ripped the 1×4-in poplar to 2-1/2-in wide. We first installed the corner pieces and and worked our way in from there. To install we first applied wood glue before brad nailing since the boards didn’t line up with any studs. We also used shims beneath some of the vertical pieces to keep the front surface flush (seen in the picture below). This isn’t always essential, but this makes for a really clean end result. You can cut off the excess with an oscillating tool or just a razor blade.
Install the chair rail
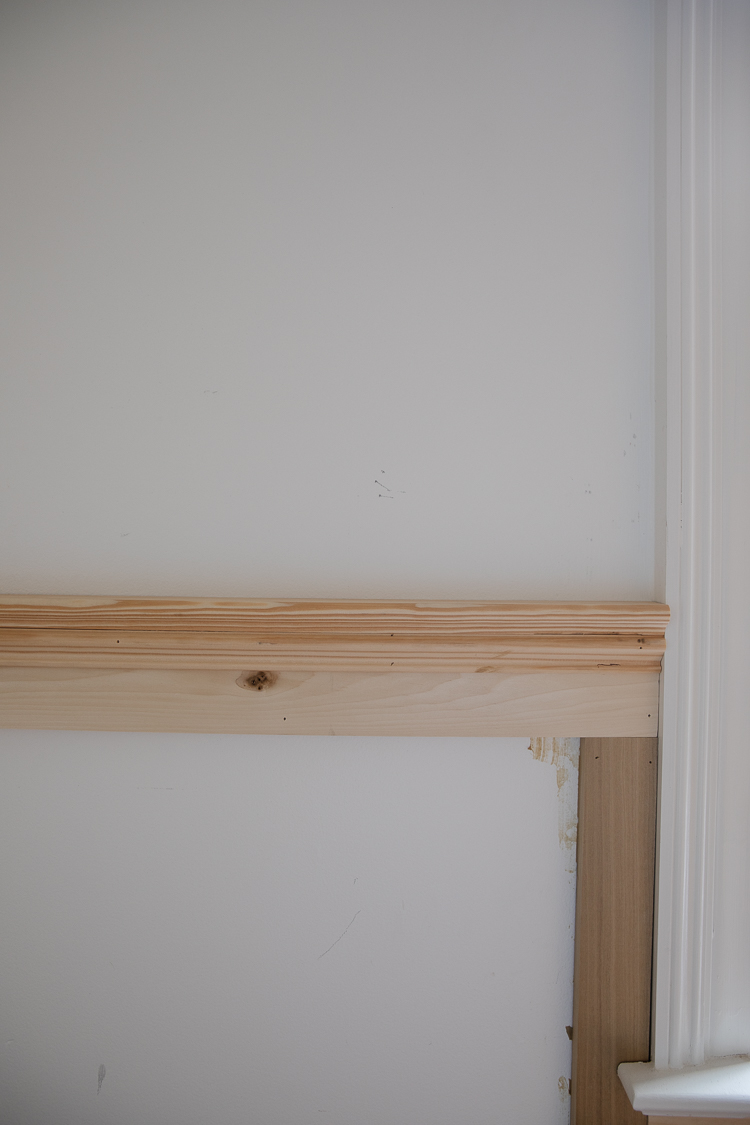
Once the boxes are installed, it’s time for the chair rail! If you refer to the diagram, you’ll see we used stool material and base cap moulding to make our own chair rail. You can customize this with whatever material you’d like. Starting with the stool material, you’ll see there’s actually a little nob that we ripped off on the rear so it wouldn’t stick out so far. We didn’t worry about mitering any joints on the poplar boards, but we did miter all the chair rail joints, and then installed the stool material by glueing and nailing it down into the poplar boards.
After all the stool material was in, we installed the base cap material by glueing and nailing it in below the stool material, but over the surface of the poplar board.
Install the edging detail

By now you should be a pro! We made our cuts being sure to miter the edges, then installed using the same glue, nail method we’ve been using!
Re-install baseboards

We installed the baseboards in front of the wainscoting, partially covering that bottom poplar board. Since the baseboard is no longer sitting flush against the wall, we did periodically use wood scraps to fill the gap between the baseboard and the wall, giving more of a secure fit.
Prep for paint!
Lastly we filled all the holes and seams with wood filler, let it dry, and sanded. We used caulk to fill any gaps between the wainscoting and the wall, and also the baseboards. And that’s it!
Sounds like a lot, but we did it over 2 days! Next up! A glossy mossy green paint. :)


We’re planning on re-doing some of the cheap looking wainscotting that was existing in our house. I think the additional intricate layers would look great.
Whenever I see the word “wainscotting” I think of the podcast episode where you guys were talking about how to pronounce it. So funny🤣