


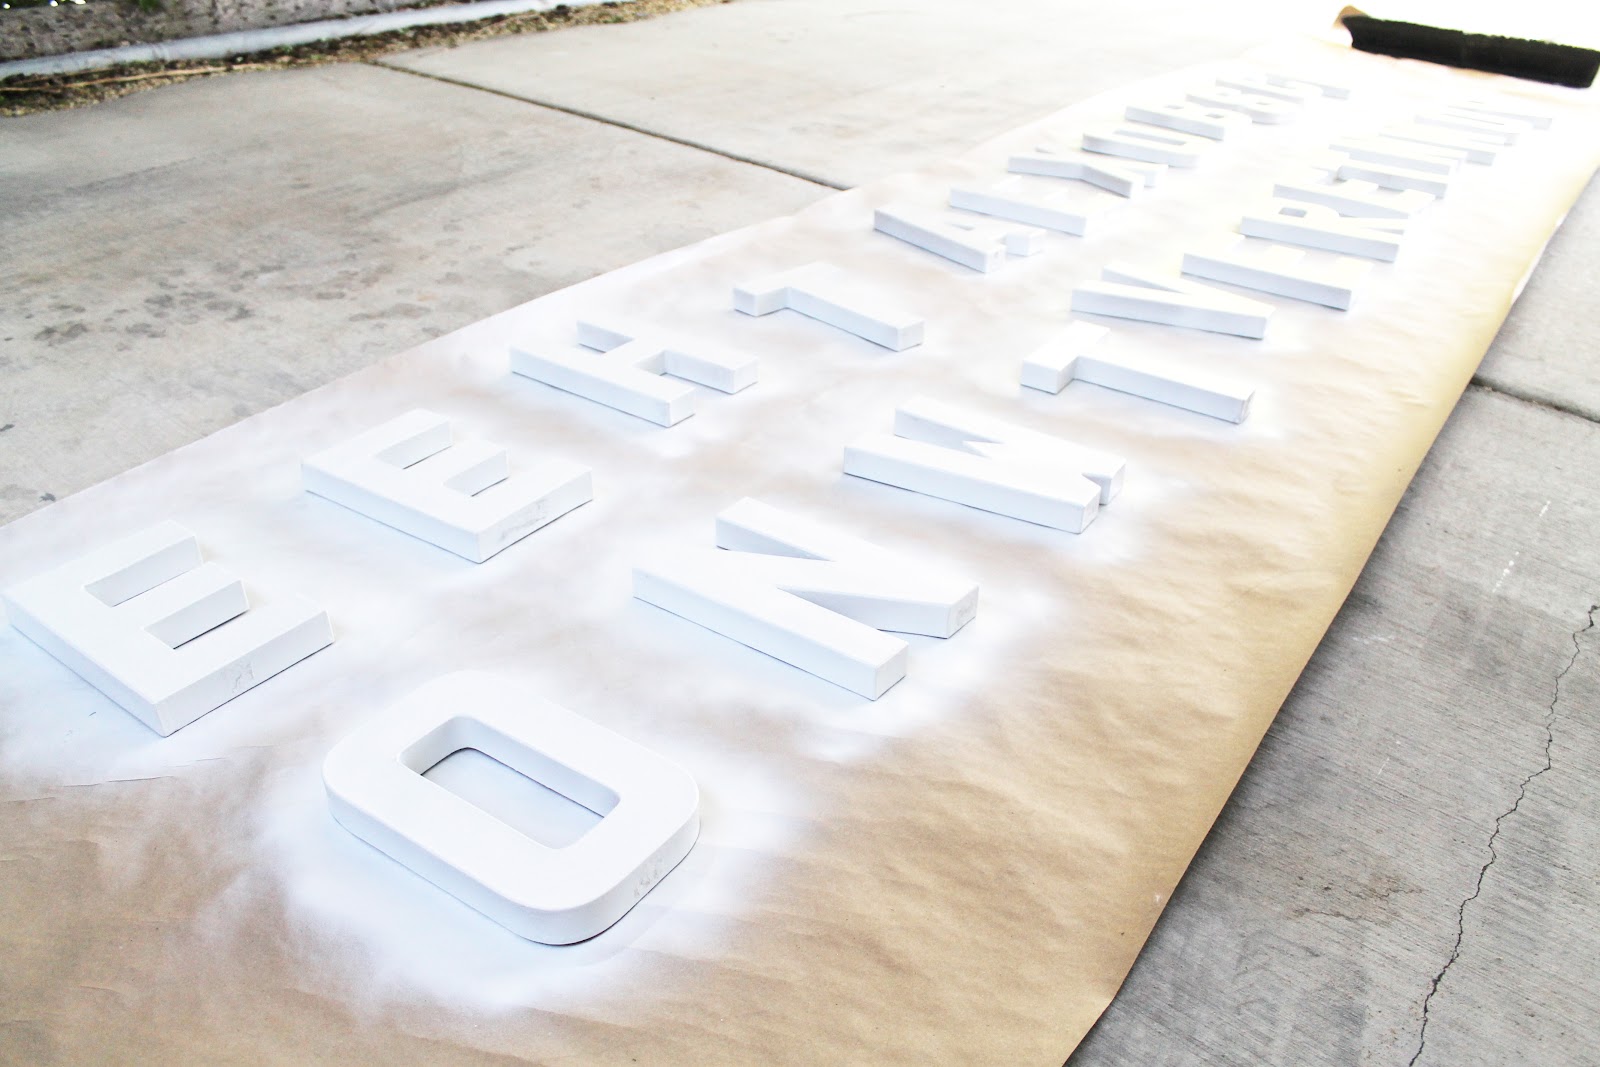
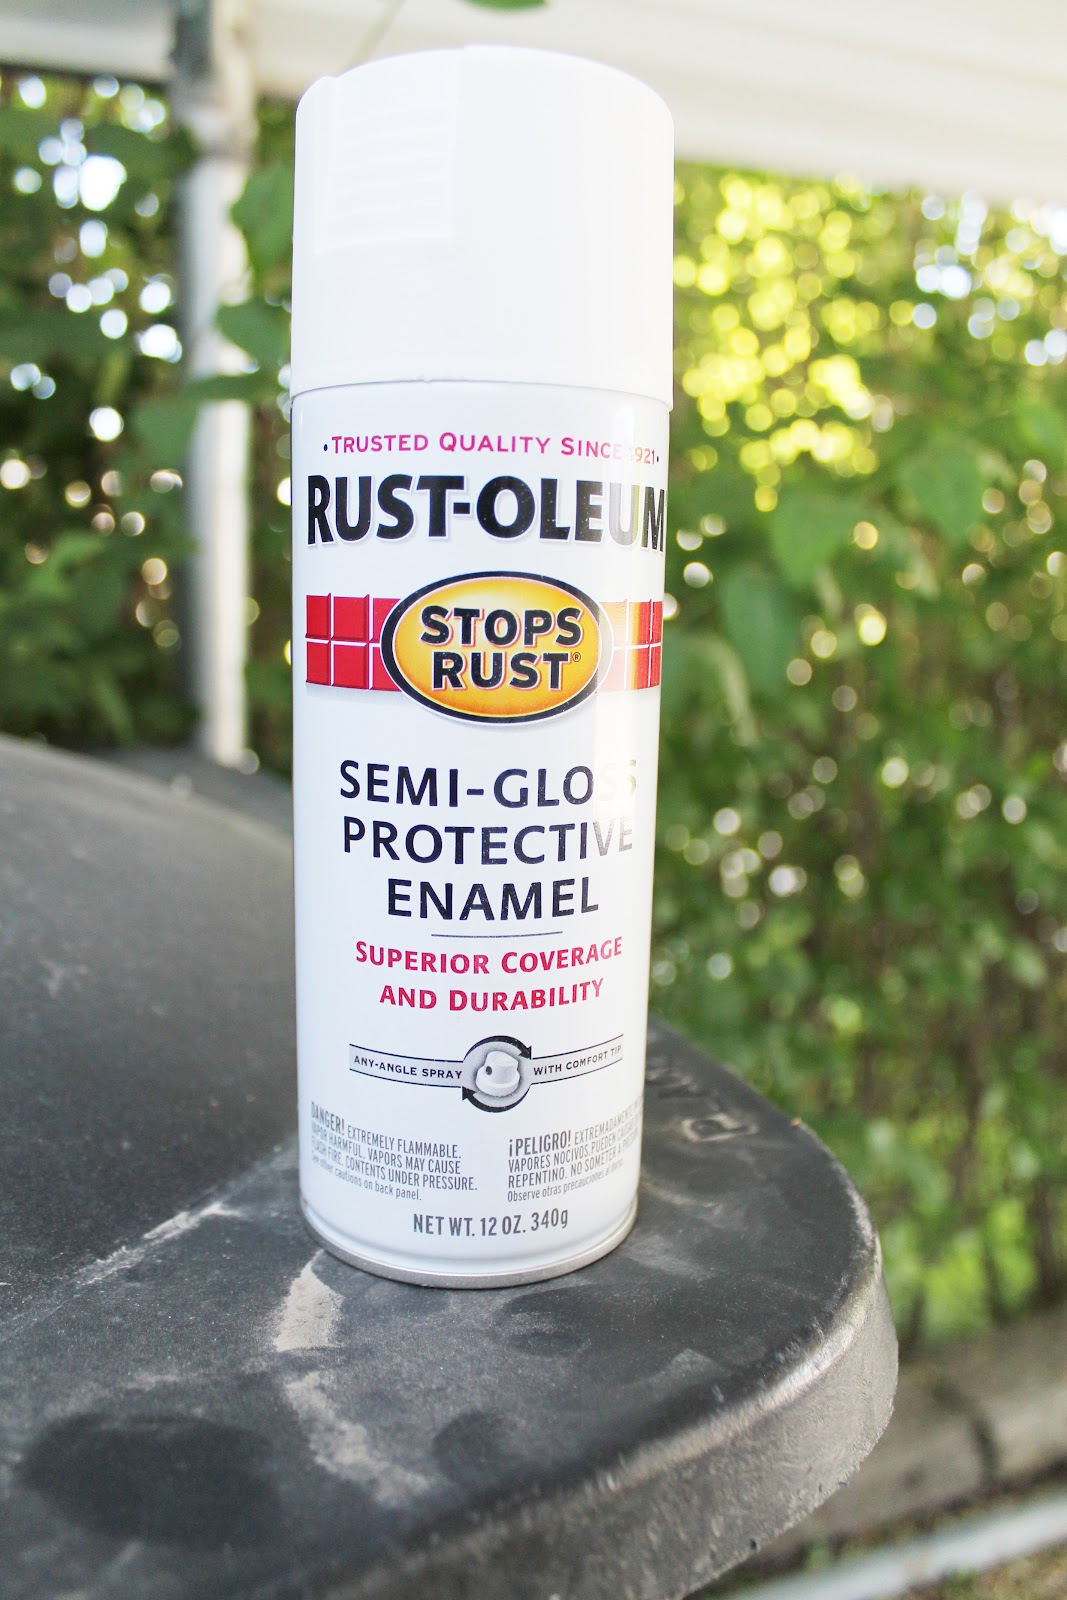
When I had an arrangement I liked, I took them outside and gave them all several coats of white spray paint.
I know, I know. Why not a bold color? Ultimately, I want the studio to be a place where I can not only work and paint but also photograph my art and such a large installment needed to not reflect any color onto the opposite wall. Also, and more importantly, I really dig the white-on-white look.
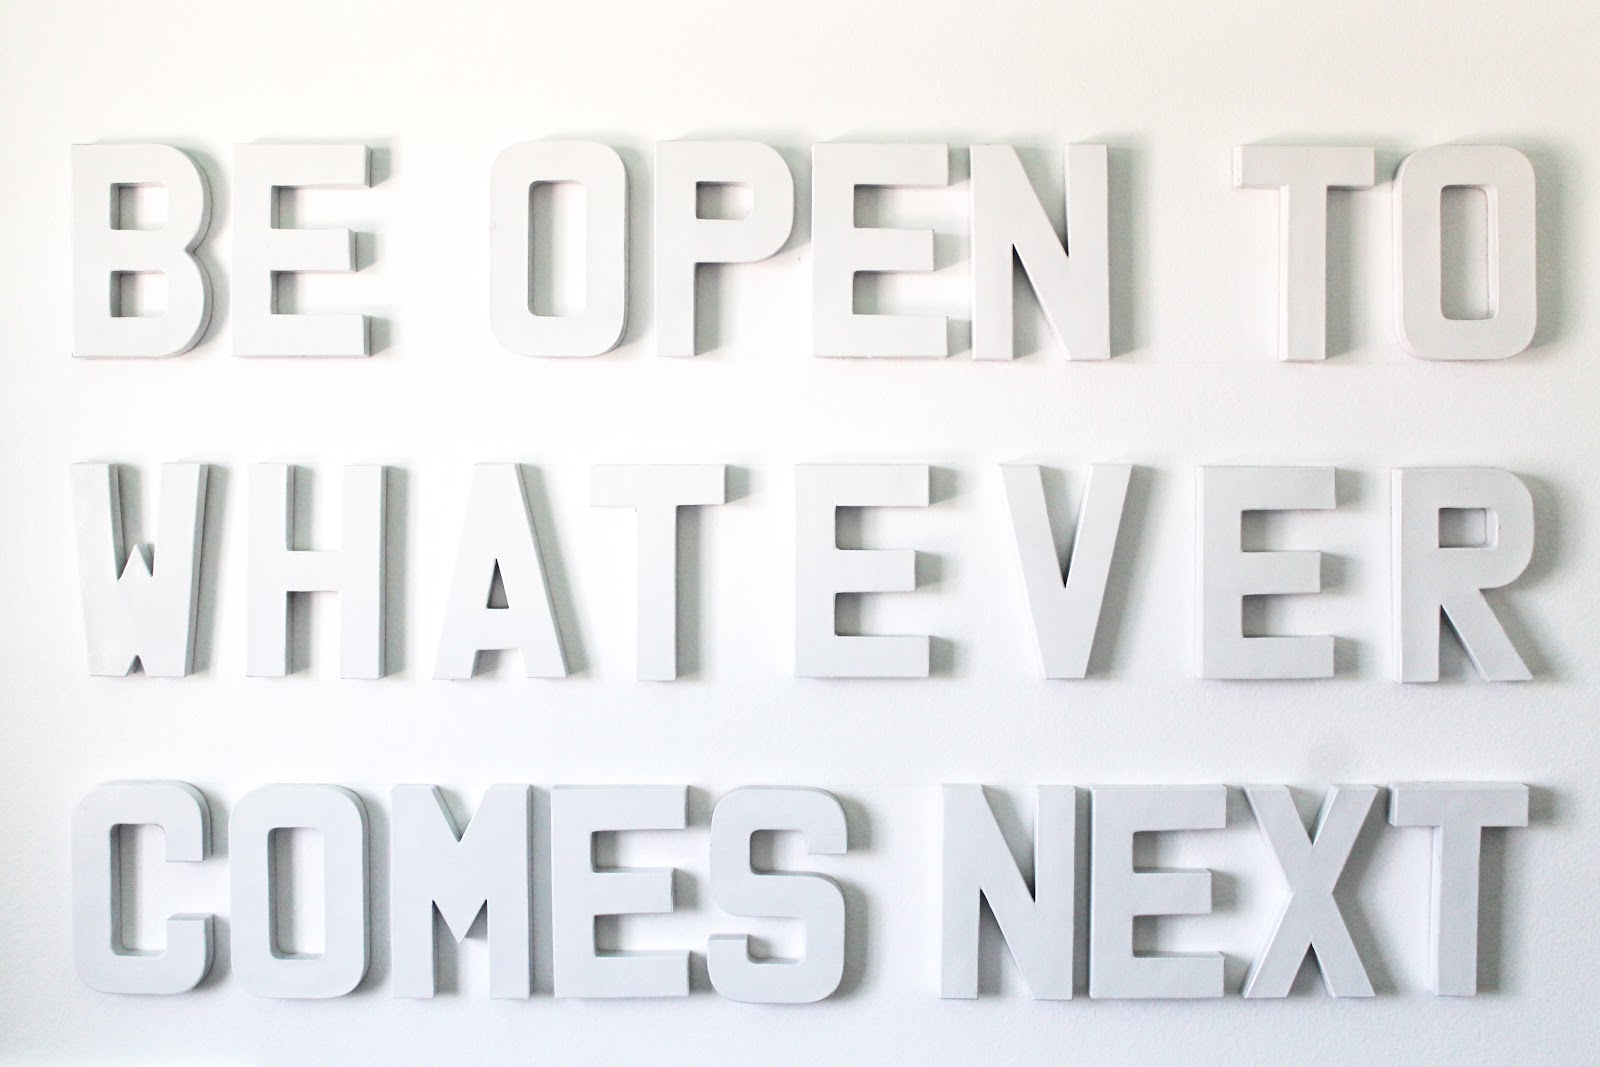
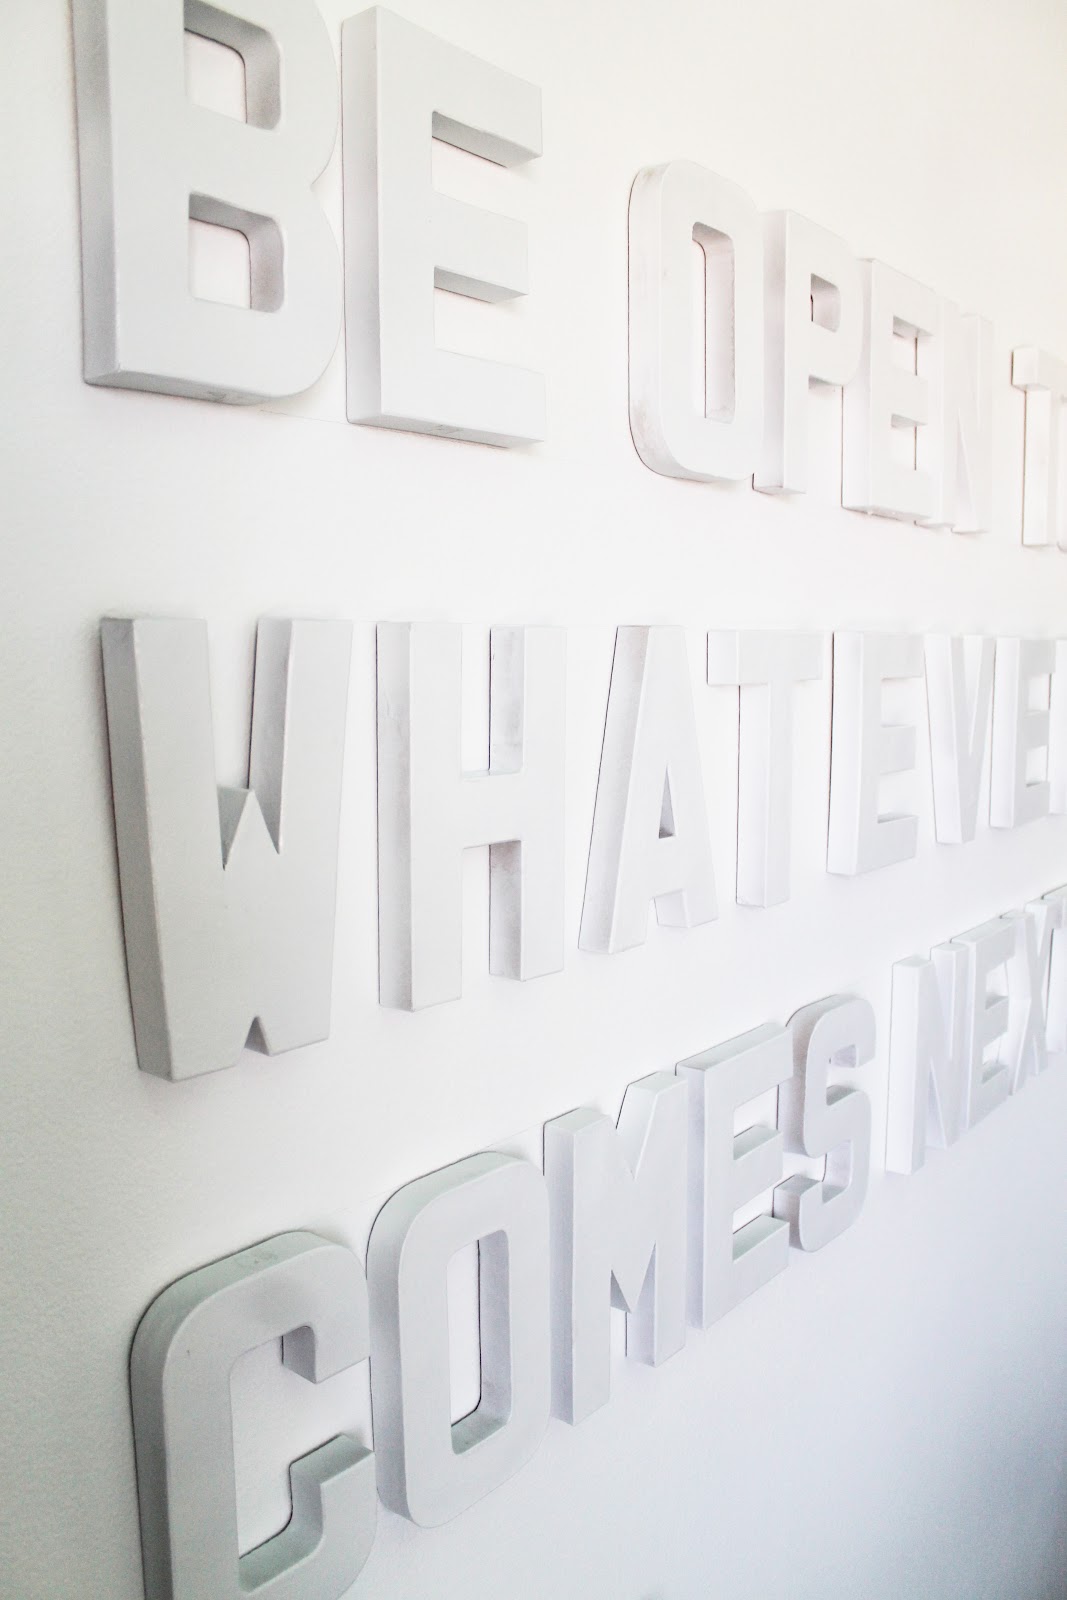
Starting with the top line, I played with the placement of the letters until it was centered on the wall. Once I had this line just as I wanted it, it became my guide.

For the second row, I started out making a light pencil line on the wall with my level (a laser level would be dynamite for this project) and placed the first and last letter lined up under the top row of words. Then, I just filled in the remaining letters.

Initially, I used masking tape to temporarily hang the letters so that I could make quick adjustments to placement.

Once I had each letter exactly where I wanted them, I stuck two heavy duty velcro squares cut into half-inch(ish) pieces to the back to hold up the light-weight letters for the long term.

The final look is just how I imagined it. I actually used this idea in a mood board for a client who needed help designing his office break room. I couldn’t wait to get it into my own home.
This project can be as cheap or as expensive as you want it depending on how many letters you need/want. This quote came in just under $75. Each letter cost around $2.50 + $5 for spray paint and $6 for the velcro. But for something this large and this personal, it feels completely worth it.

Do you see any 3D wall quotes in your future? Can’t wait to show you the rest of the studio tomorrow!
Leave a Reply
What do you think?
Previous Post
Next Post


Semihandmade
Our wood grain Shaker cabinet fronts were designed for busy, high-traffic homes like ours. Clad with durable textured thermofoils, this line is compatible with Sektion, Akurum, Godmorgon, and Besta cabinets from IKEA. It's the perfect, practical way to add the warmth of wood to all the rooms of your home.
Collaborations
learn more

next
Loloi
We have teamed up with Loloi to create a line of rugs that are as affordable as they are beautiful. This collection houses a great mix of traditional and modern rugs, in cottage-y colorways, as well as vintage-inspired beauties that you’ll want to roll out in every room.
Collaborations
learn more

next
STUGA
We partnered with Stuga on a line of hardwood floors — The Ingrid is really livable, and the color is very neutral. It doesn’t lean warm or cool, it’s that just right in-between. We have really loved putting it everywhere in our house. It’s the best jumping-off point for design, no matter your interior style. In addition to being beautiful, Ingrid is really durable — we have three kids, and we always have a home construction project going on. Ingrid stands up to it all.
Collaborations
learn more

next


SHop all
What We're Right Now
What We're Right Now
Looking for our favorite things? A place to shop our home room by room, or just catch up on what Julia's wearing / loving right now? Browse the CLJ shop.
Loving


Portfolio


Design
Befores, afters, mood boards, plans, failures, wins. We’ve done a lot of projects, and they’re all here.
BROWSE BY CATEGORY
let's break this thing up
We have a long-standing relationship with DIY, and love rolling our sleeves up and making it happen.
Projects
Even when you don’t want to rip down a wall, you can make that space in your home better. Right now.
read more
read more
read more
02
01
03
looking for inspiration?
A reader recently asked me if I’m starting to fully embrace traditional style and whether we still consider our house to be a “modern Colonial” and why. It was a really great question and so timely — I had really just been thinking about my approach to this home and how my style has changed […]


SEARCH THE BLOG
We've been doing this since 2009 and we've posted a whopping 24145+ blog posts and counting. You might need a little help searching, huh?
looking for something?
find stuff like:
")
Can We Send You Our Love Letter?
Another way for us to stay in touch! Joining our weekly newsletter gives you access to exclusive content, never-before-seen photos, your questions answered, and our favorite DIYs. Sign up below!
Follow Along on Instagram
Welcome to our online community where we've posted home, DIY, style, renovations, and family since '09. Renovating our #cljmoderncottage in Idaho and headed for new adventures in Raleigh, NC. #cljfam #cljtransformations
@chrislovesjulia


Links
Get Around
Make yourself right at home
Portfolio
Design
Casual Friday
Projects
Lifestyle
Gift Guides
All Posts
Shop
Love where you live.
Social
RivrLinks
Links
Get Around
Make yourself right at home
Portfolio
Design
Casual Friday
Projects
Lifestyle
Gift Guides
All Posts
Shop
Love where you live.
Social
RivrLinks
I have read so many articles or reviews about the blogger lovers except this
paragraph is really a fastidious post, keep
it up.
I absolutely love this! The white on white makes it so sophisticated! I have a huge wall in the dining room I have be trying to decorate. Maybe a quote is in it’s future. Thank you so much for sharing!
Wow. I love this! I just found your site via CocoCozy and am SO inspired by your projects. I just got married in April and my husband and I are working on turning his bachelor pad into our newlywed nest.
yep yep yep. this is MONEY! oh man. i think i’m gonna snag this idea. SO in love julia. brilliant.
really love this
Looks great! If the adhesive doesn’t pan out try these. They are amazing! It won’t ruin the wall either! http://www.command.com/wps/portal/3M/en_US/NACommand/Command/Products/Catalog/~/Command-Small-Picture-Hanging-Strips?N=5925378&rt=rud
oh my freaking goodness I LOVE it. I’m dying over it. I need it. I just found my next project.
Not a word of a lie: I’ve pinned this kind of white letter on white wall thing and have been wanting to do it for ages! Great minds . . . ;)
It looks fabulous – you did a beautiful job. And kudos for doing and not just dreaming it.
Love how it turned out, and just when I was wondering “but how did they stick?” I scrolled, and you answered! I was a little surprised with the price tag, I see DIY and I wouldn’t think $75. I can’t tell how big it is though, I’m excited for the full room reveal!
Sooooo awesome.
I really like this! Great idea!
Just Beautiful – I think the price tag is just right for something so elegant and special
Beautiful!! What a fabulous idea. Looks amazing…as always :)
Such a great idea! I must find a hobby lobby around me!
So creative! Great job. :-)
Stop it right now. I want to do this. SO amazing!!!
(love that mantra-quote….so so sooo inspiring)
What a great idea! I LOVE the way this looks!
Awesome!! Let us know what you come home with. :)
I love love love the white on white. Annnd just so you know, I’m heading to Hobby Lobby this weekend. I have a HUGE wall that needs something and I think this is JUST what it needs. Thanks, as always, for daily inspiration. (:
I also want to do this! Hobby lobby is sold out of a few letters online. But I found another site with them. Can you let me know how thick each letter is? I think the pop off the wall is key :)