


You may have caught that we moved the painting that was originally on the entry wall into the study a few weeks ago. It fit the vibe so well in there and the size was perfect for above the couch. I broke my rule of No taking items from one space to decorate another, but in this instance, it was worth breaking. It found its home.
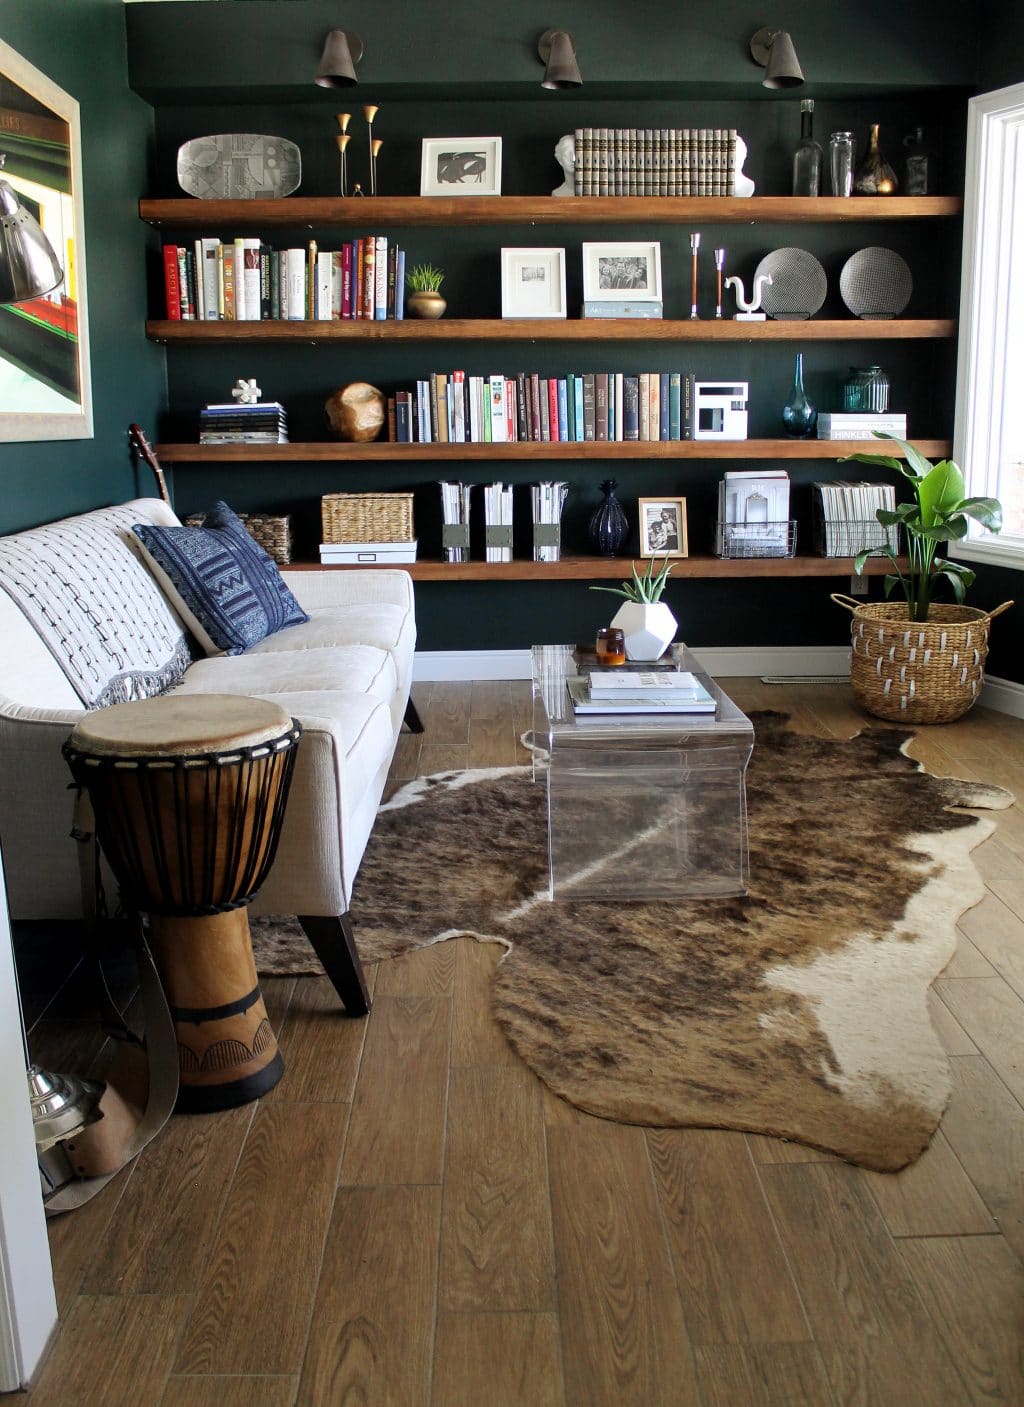
While things are dandy in there, the switch did leave us with a rather large blank wall in the entry and it is just the push I need to finally pull me out of my painting drought. I have been feeling a little less inspired in the past few months, compounded by all the other work and life stress–I haven’t picked up a paintbrush in too long.
I checked out a few pre-stretched canvases, but for the size we wanted, the shipping alone was astronomical. So we decided to make our own. It’s a cheap and relatively easy alternative if you want a larger canvas in your home. (Smaller sized canvases are generally cheaper to just buy, in my opinion.) Here’s how we did it:
Materials Needed:
Pine 1x4s
L-Brackets
Flat brackets
Screws
primed canvas roll
Staple gun
Originally we made a HUGE 48″x72″ canvas frame. Even though I swore we measured the wall three times, after we made the frame, it looked too big, so we modified it.
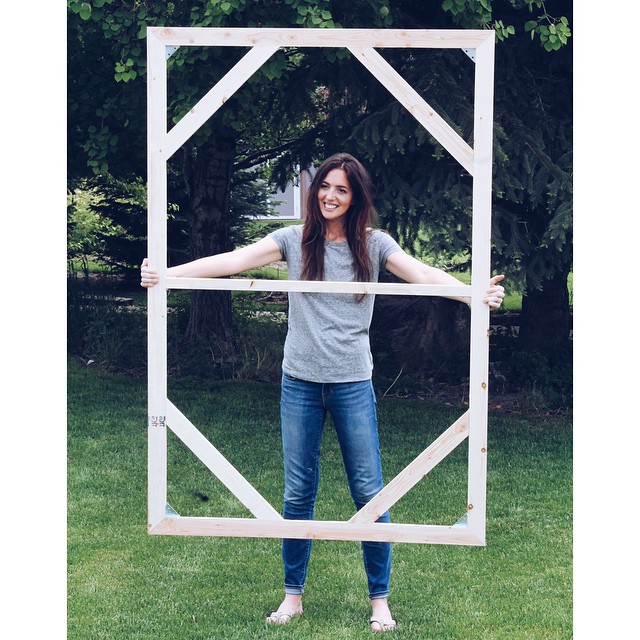
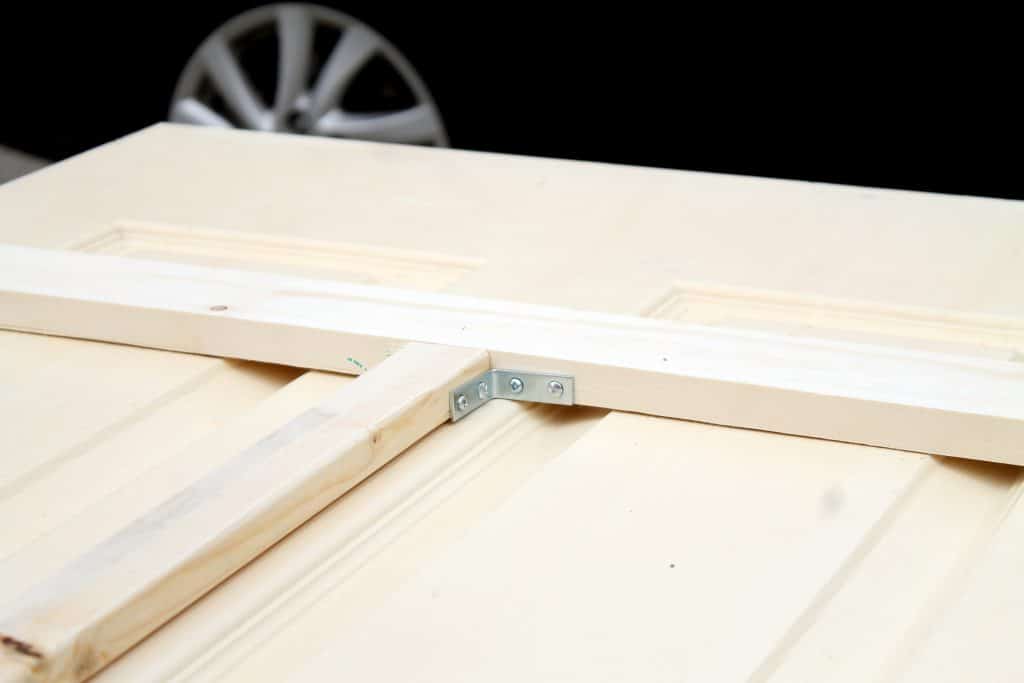
But the first thing you need to do is make a frame, maybe measure your wall FOUR times and tape it off if you need to. And cut your wood to make the outside frame. The corners should be cut at a 45 degree angle and the outside points are equivalent to your full length/width.
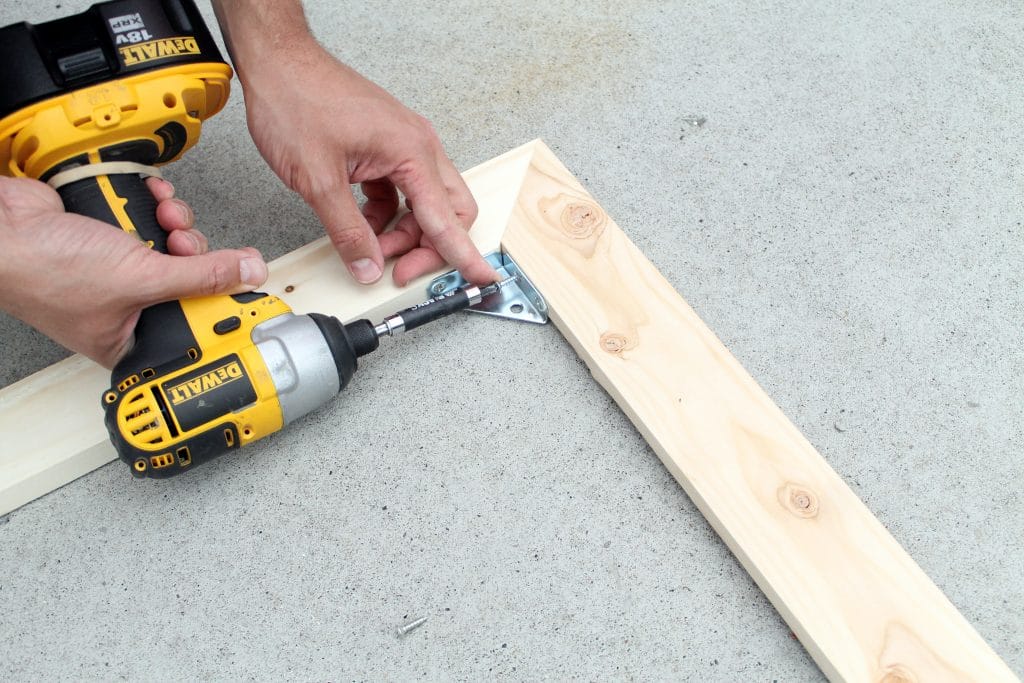
To secure the corners together, we used an L-bracket (it doesn’t have to have the extra flat support on the front–this is just what we had on hand) in each corner.
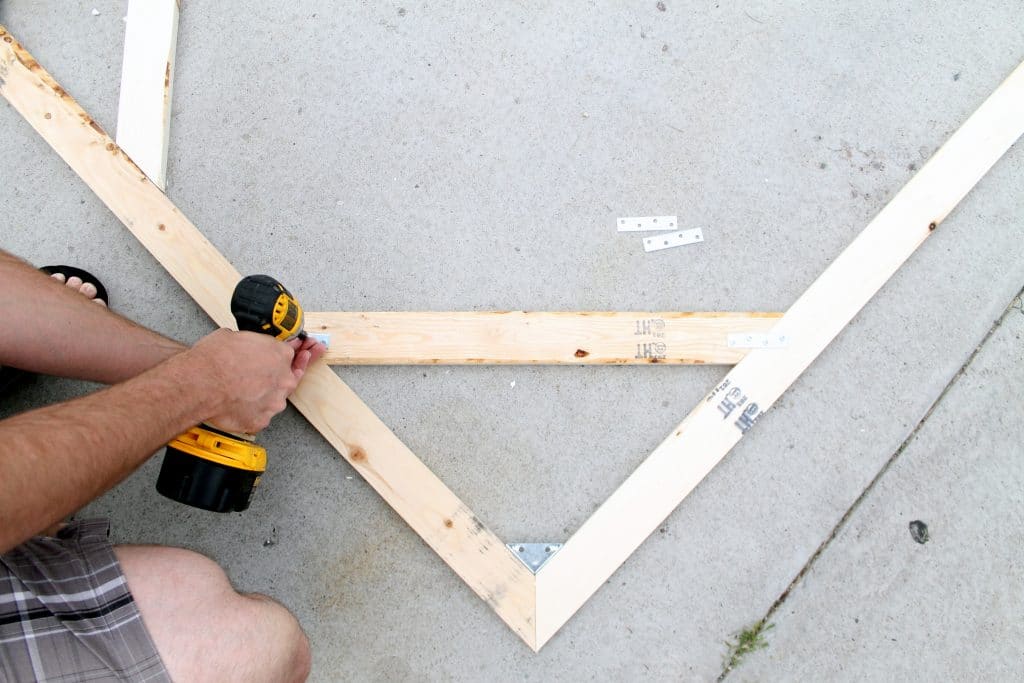
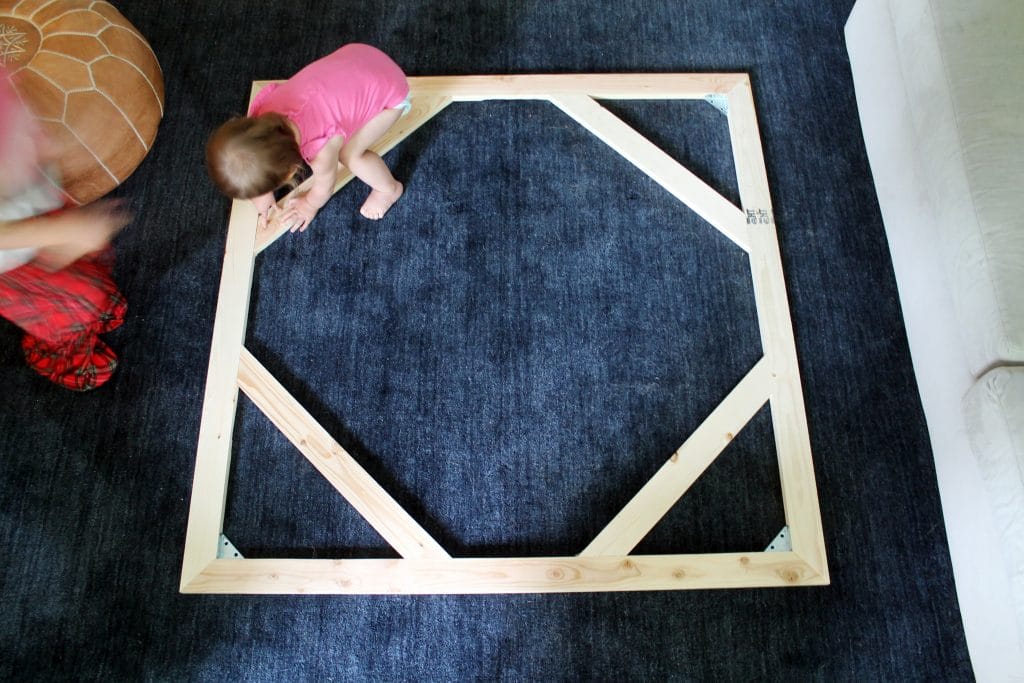
Almost any canvas frame (maybe starting at 24×30?) needs some sort of supports. Using the leftover board length from making the outer frame, we angled the scraps at a 45 degree angle and slid them into the frame until they sat flush and secured them with flat brackets.
When we initially made the 48″x72″ canvas frame, we added one more straight center support, but when we modified it to a 48″x48″, we no longer needed it–the diagonal supports made the frame plenty strong.
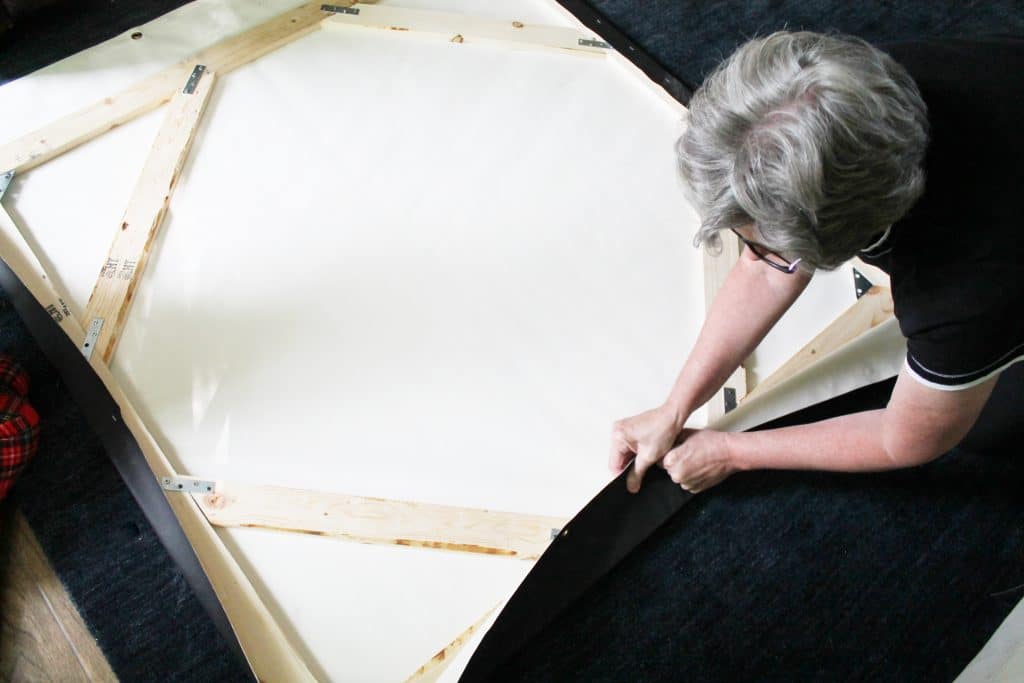
At this point, it’s time to stretch the canvas. Now, disclaimer. This is not the professional way to do this. They make canvas stretchers and everything. BUT, this is a great DIY way to get the job done. You’ll need an extra set of hands to ensure you’re pulling it as taut as possible. Chris was at work, so I had my mom come over and help me. Contrary to popular practice, I wouldn’t recommend pulling and securing the middle of each side and then going back and filling in. Secure one whole side first. I like starting with the beginning of my canvas roll because I know it’s nice and straight. I secure it completely with a staple gun (I love this one!) and THEN move directly across from that side and pulllllllllll and staple a few times and then go to the remaining two sides and eventually back to fill in.
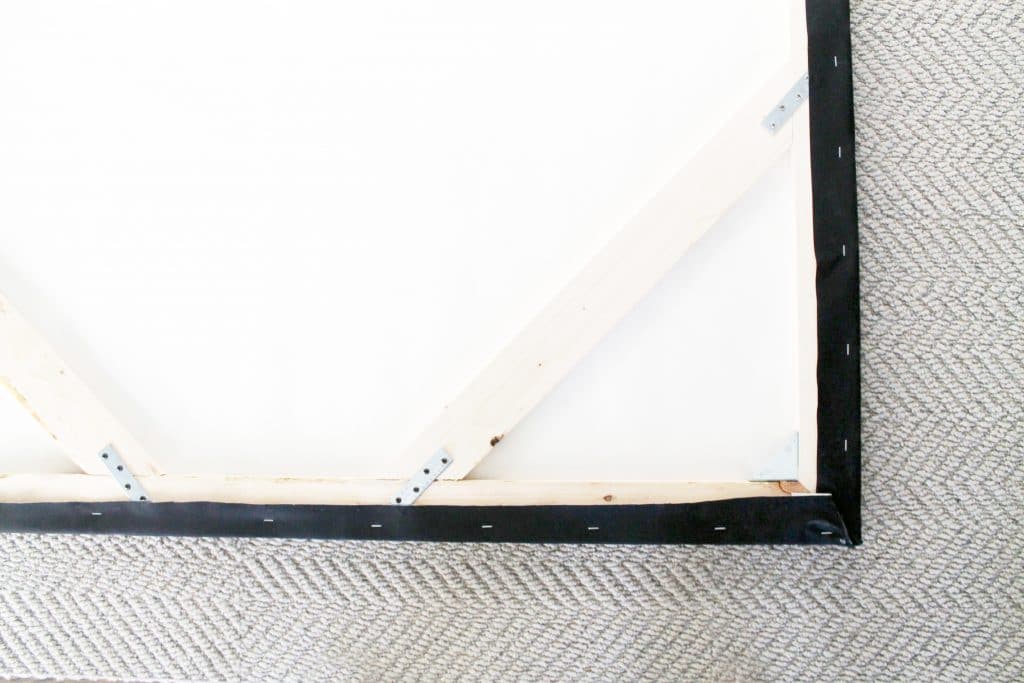
That’s it! I decided to try out black-primed canvas this time (since I typically find myself painting my whole canvas dark to start anyway), but a roll of white primed canvas is quite a bit cheaper and you’ll likely get several big paintings out of it.
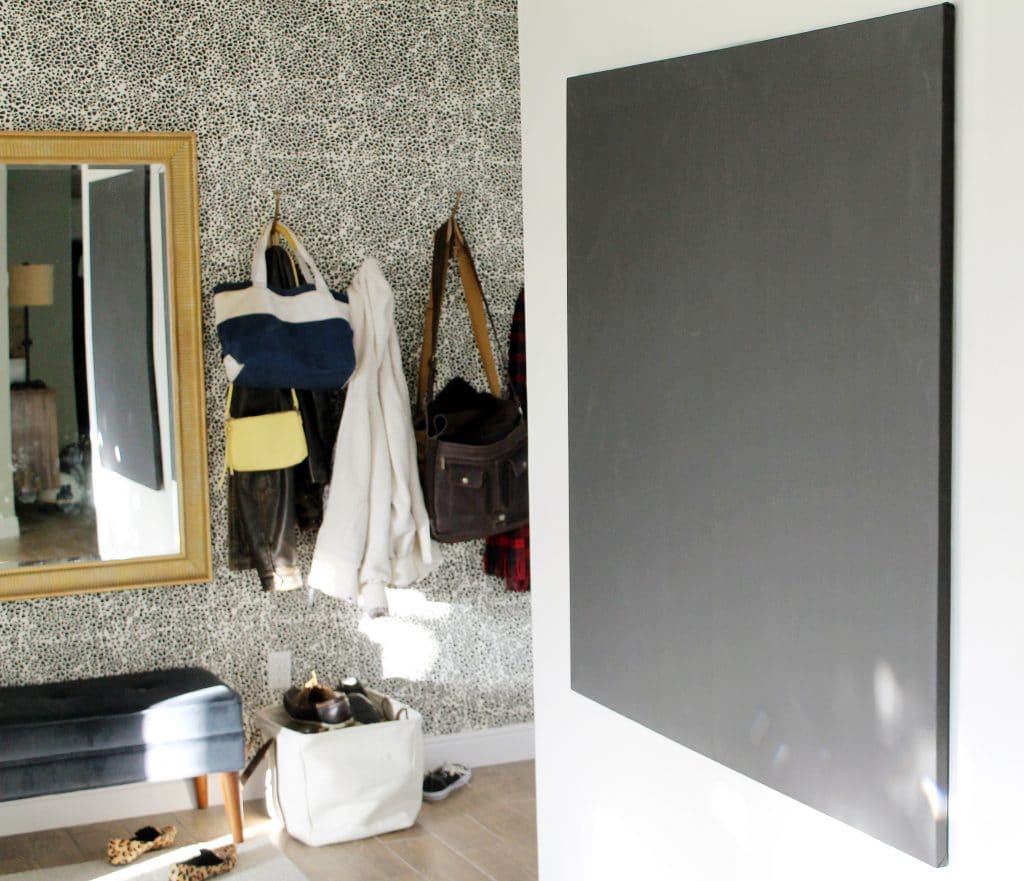
I am still mapping out what I want to paint and gaining inspiration. So, now we just have a great big black square hanging in our entry, but as soon as inspiration does strike, I plan on doing a time-lapse video of the whole thing since I’ve received a few requests for that. Can’t wait to dive in!
Leave a Reply
What do you think?
Previous Post
Next Post


Semihandmade
Our wood grain Shaker cabinet fronts were designed for busy, high-traffic homes like ours. Clad with durable textured thermofoils, this line is compatible with Sektion, Akurum, Godmorgon, and Besta cabinets from IKEA. It's the perfect, practical way to add the warmth of wood to all the rooms of your home.
Collaborations
learn more

next
Loloi
We have teamed up with Loloi to create a line of rugs that are as affordable as they are beautiful. This collection houses a great mix of traditional and modern rugs, in cottage-y colorways, as well as vintage-inspired beauties that you’ll want to roll out in every room.
Collaborations
learn more

next
STUGA
We partnered with Stuga on a line of hardwood floors — The Ingrid is really livable, and the color is very neutral. It doesn’t lean warm or cool, it’s that just right in-between. We have really loved putting it everywhere in our house. It’s the best jumping-off point for design, no matter your interior style. In addition to being beautiful, Ingrid is really durable — we have three kids, and we always have a home construction project going on. Ingrid stands up to it all.
Collaborations
learn more

next

SHop all
What We're Right Now
What We're Right Now
Looking for our favorite things? A place to shop our home room by room, or just catch up on what Julia's wearing / loving right now? Browse the CLJ shop.
Loving


Portfolio


Design
Befores, afters, mood boards, plans, failures, wins. We’ve done a lot of projects, and they’re all here.
BROWSE BY CATEGORY
let's break this thing up
We have a long-standing relationship with DIY, and love rolling our sleeves up and making it happen.
Projects
Even when you don’t want to rip down a wall, you can make that space in your home better. Right now.
read more
read more
read more
02
01
03
looking for inspiration?
A reader recently asked me if I’m starting to fully embrace traditional style and whether we still consider our house to be a “modern Colonial” and why. It was a really great question and so timely — I had really just been thinking about my approach to this home and how my style has changed […]


SEARCH THE BLOG
We've been doing this since 2009 and we've posted a whopping 24145+ blog posts and counting. You might need a little help searching, huh?
looking for something?
find stuff like:
")
Can We Send You Our Love Letter?
Another way for us to stay in touch! Joining our weekly newsletter gives you access to exclusive content, never-before-seen photos, your questions answered, and our favorite DIYs. Sign up below!
Follow Along on Instagram
Welcome to our online community where we've posted home, DIY, style, renovations, and family since '09. Renovating our #cljmoderncottage in Idaho and headed for new adventures in Raleigh, NC. #cljfam #cljtransformations
@chrislovesjulia


Links
Get Around
Make yourself right at home
Portfolio
Design
Casual Friday
Projects
Lifestyle
Gift Guides
All Posts
Shop
Love where you live.
Social
RivrLinks
Links
Get Around
Make yourself right at home
Portfolio
Design
Casual Friday
Projects
Lifestyle
Gift Guides
All Posts
Shop
Love where you live.
Social
RivrLinks
Researching how to make canvases. I see this one does not have beveled edges. Was that on purpose?
Really love the article! Thanks a bunch!
Whatever you do will be amazing, I’m sure.
Can’t wait to see the process !
Not sure if you are aware, but your side bar is not working properly. It is now located at the bottom of the page and overlaps some of your site. I am on an iPad if that helps.
A time lapse of the art process! Yes! Yes! I’m so interested in this. Especially when this painting is for your own home. I think it makes it so special. What inspires you?
I had no idea that this was possible to DIY! Great way to get a custom size
Ok–that pic of you is adorable, and TOTALLY you. Love it. And I can’t wait to see what you come up with for that black canvas. I wish I had your artistic abilities!