


This past Christmas I surprised Chris with a trip to Barbecue University where he was able to learn and grill from top professionals and try out all of the best grills on the market. He had the most fun, but he also got to take all sorts of grills for a test run and try them on for size, if you will.
In anticipation of the outdoor kitchen, Chris has been dreaming up these plans for months and months! For a more detailed breakdown of everything included in the kitchen, check out the Outdoor Kitchen Plans. Everything in this outdoor kitchen was sent to us by Chris’s dream grilling company, Twin Eagles.
Twin Eagles + Dometic is a premium grilling brand that Chris has had his eye on for years. They make the best grills out there. He mentioned them a bit in the Grill Guide, but this equipment is his dream.
Now, if you’ve been keeping up on Instagram at all, you know this outdoor kitchen has not come without bumps along the way.
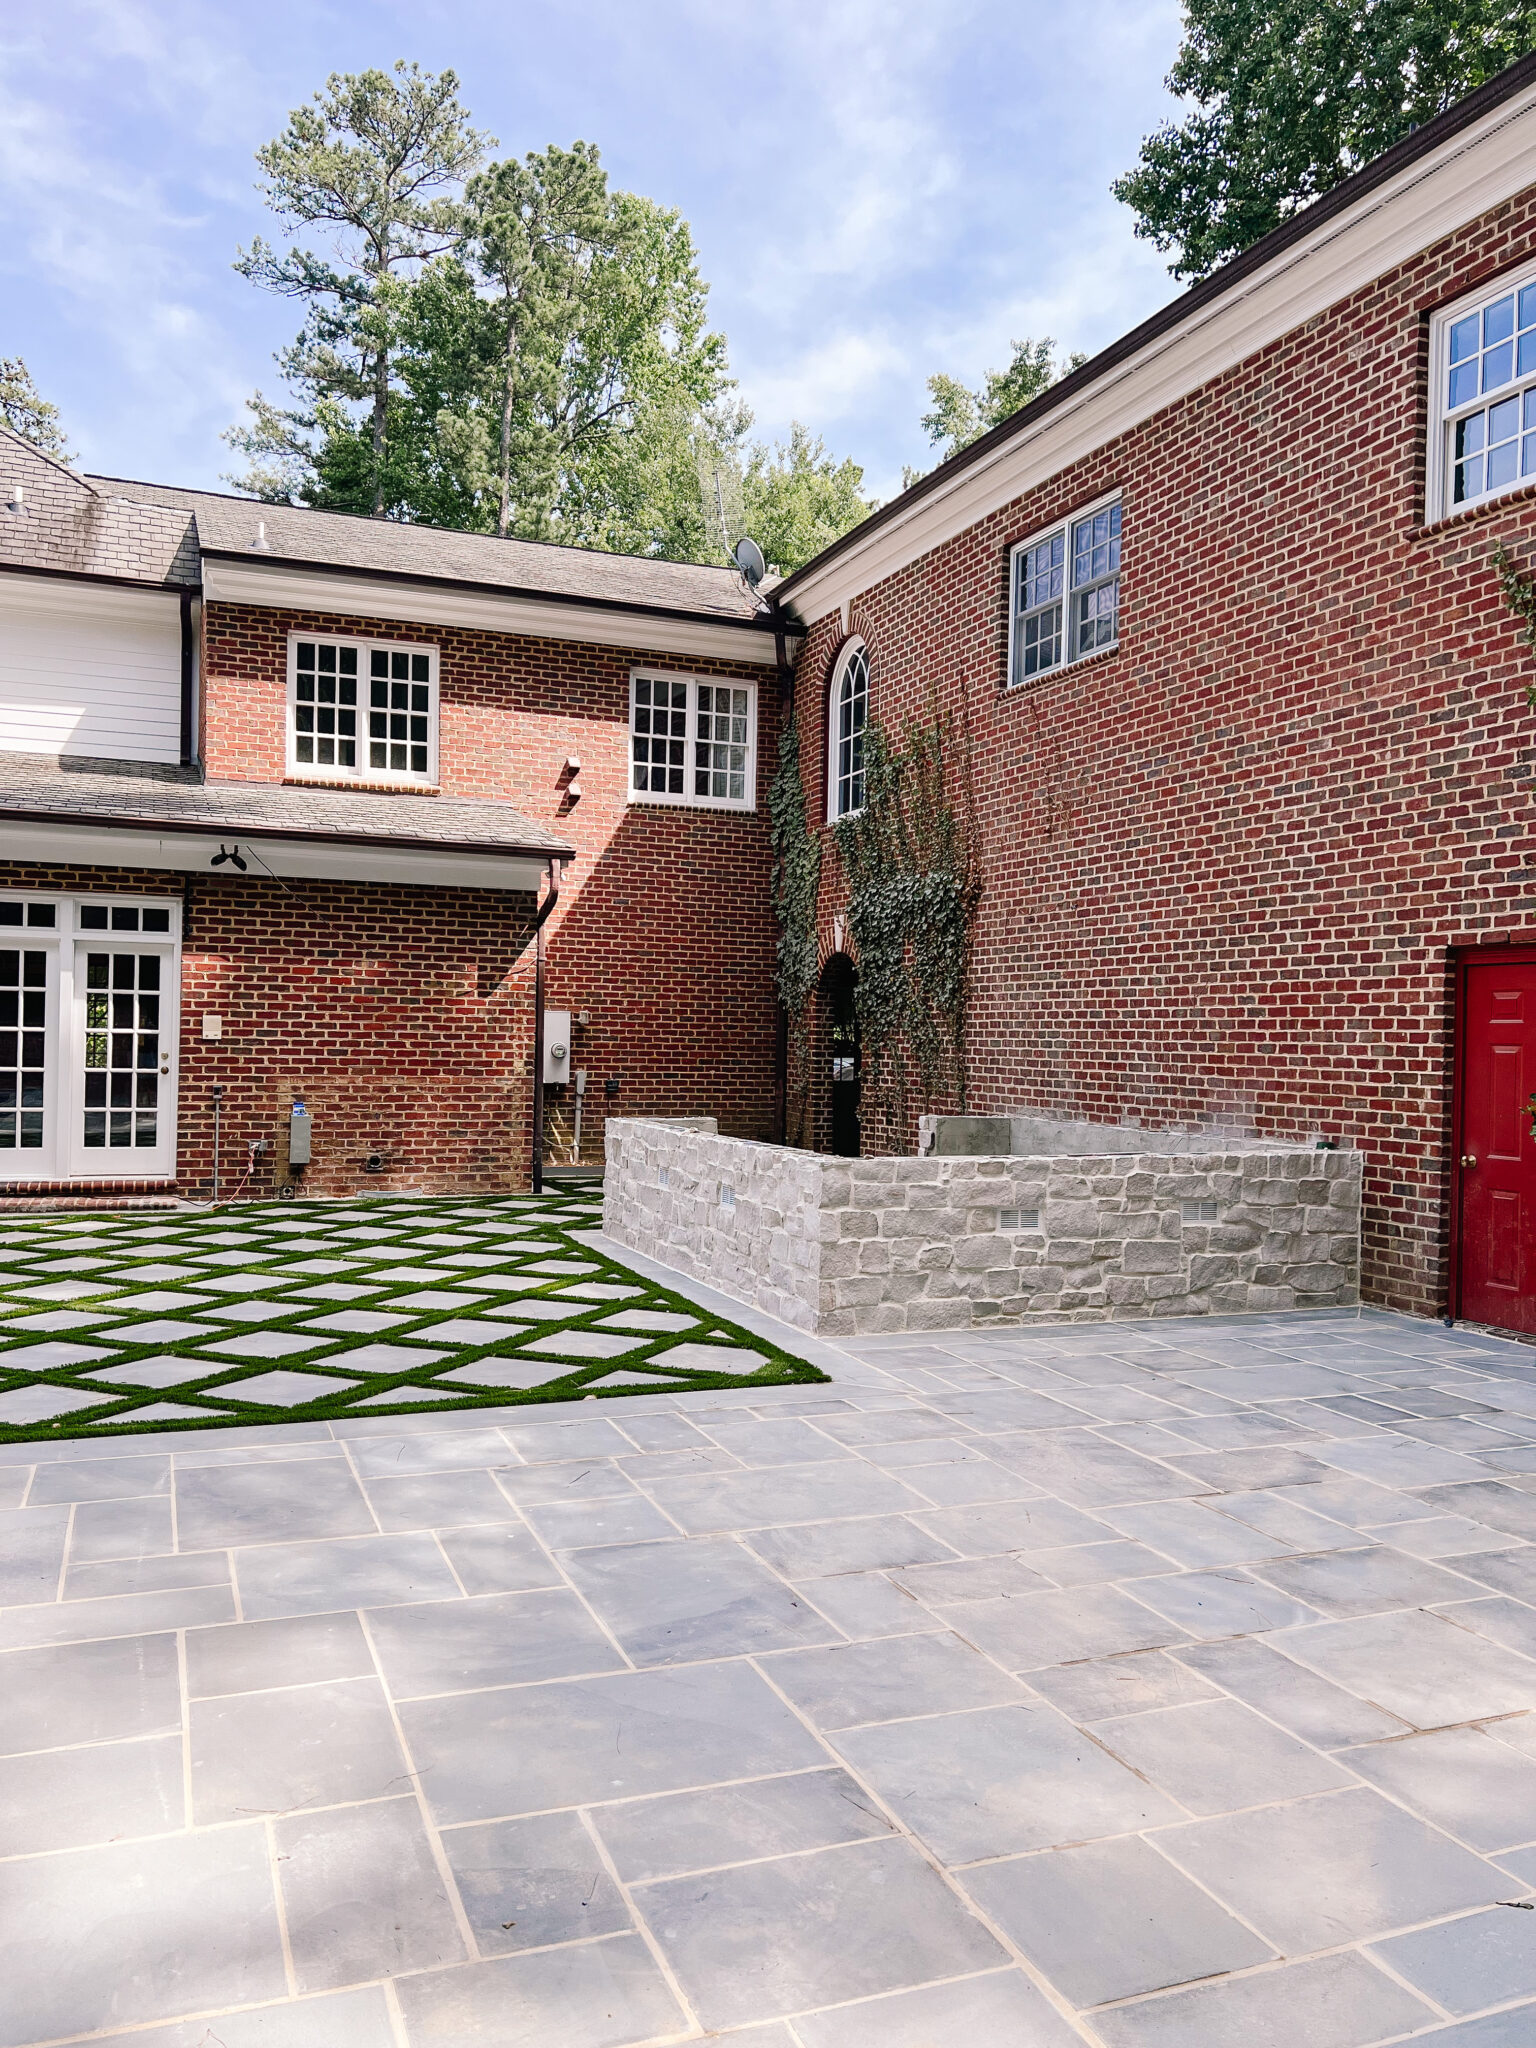
We first had stone installed on the outdoor kitchen, but next to the brick and the pavers it felt like too much hardscape. I wanted something softer and more subtle to break up the hardscape a bit more. I honestly knew I hated it as soon as the stone started being put on but I hoped my mind would change once I saw it finished.
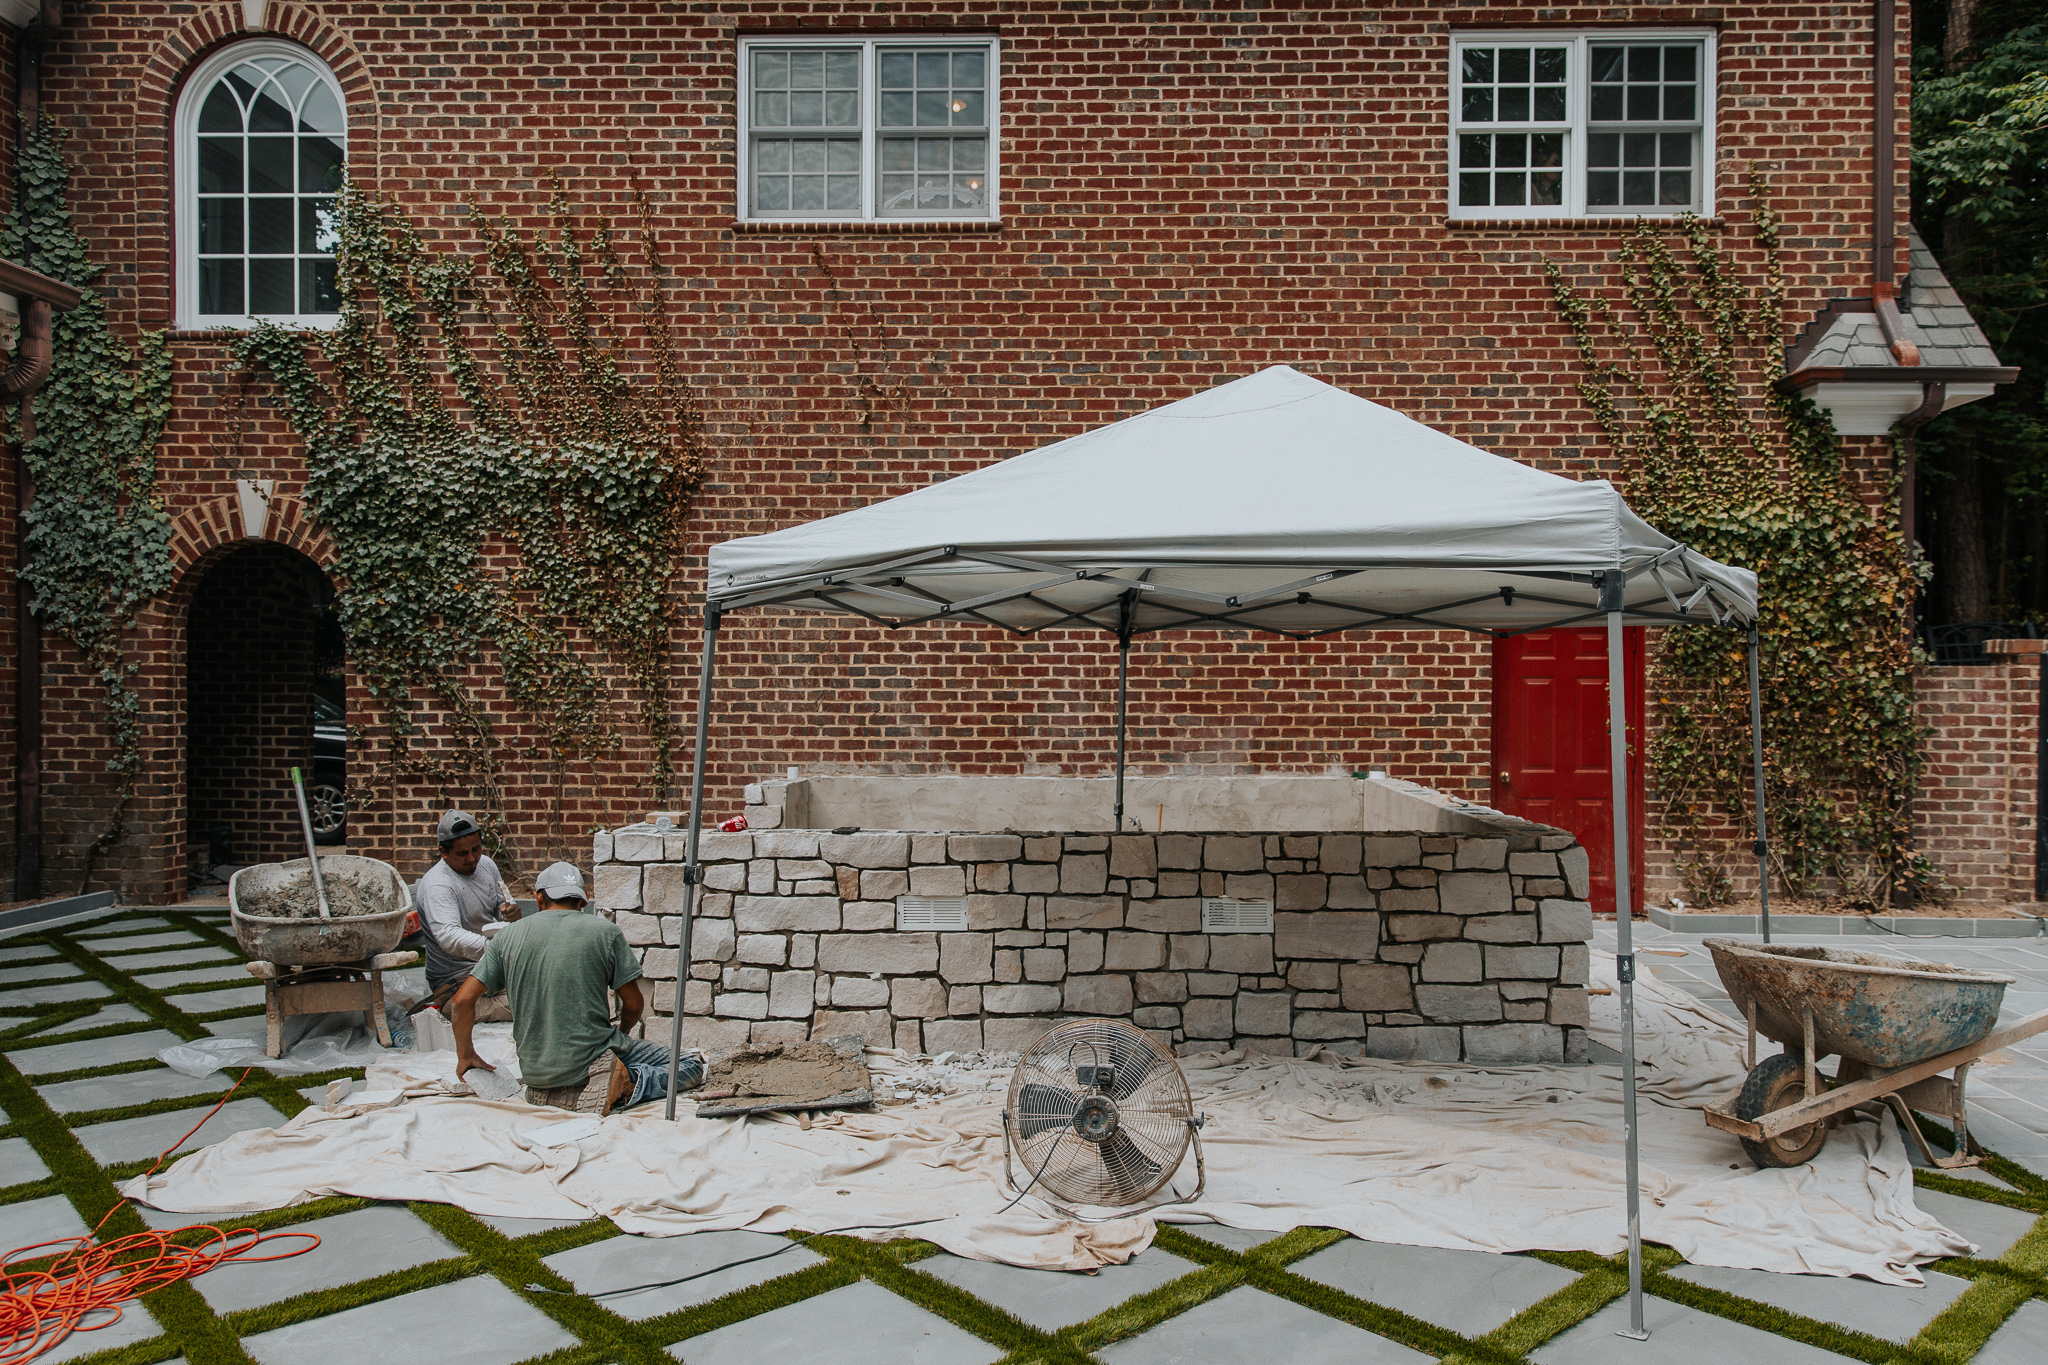
Here’s a photo of what it looked like with the stone on. 👆 It’s too much of a juxtaposition of styles (and not in a good way).
The mortar helped it look a little better, but there’s just too many hardscaping elements going on.
Back to the drawing board!
Before jumping ship I had to try on a few different options for size though. We did a few mockups including one with the finished grouted stone. Maybe I would like it more with the finished look!–countertops, lights, pergola, stools. It still wasn’t doing it for me and I couldn’t get past this idea of taking off the stone and doing panelling instead?
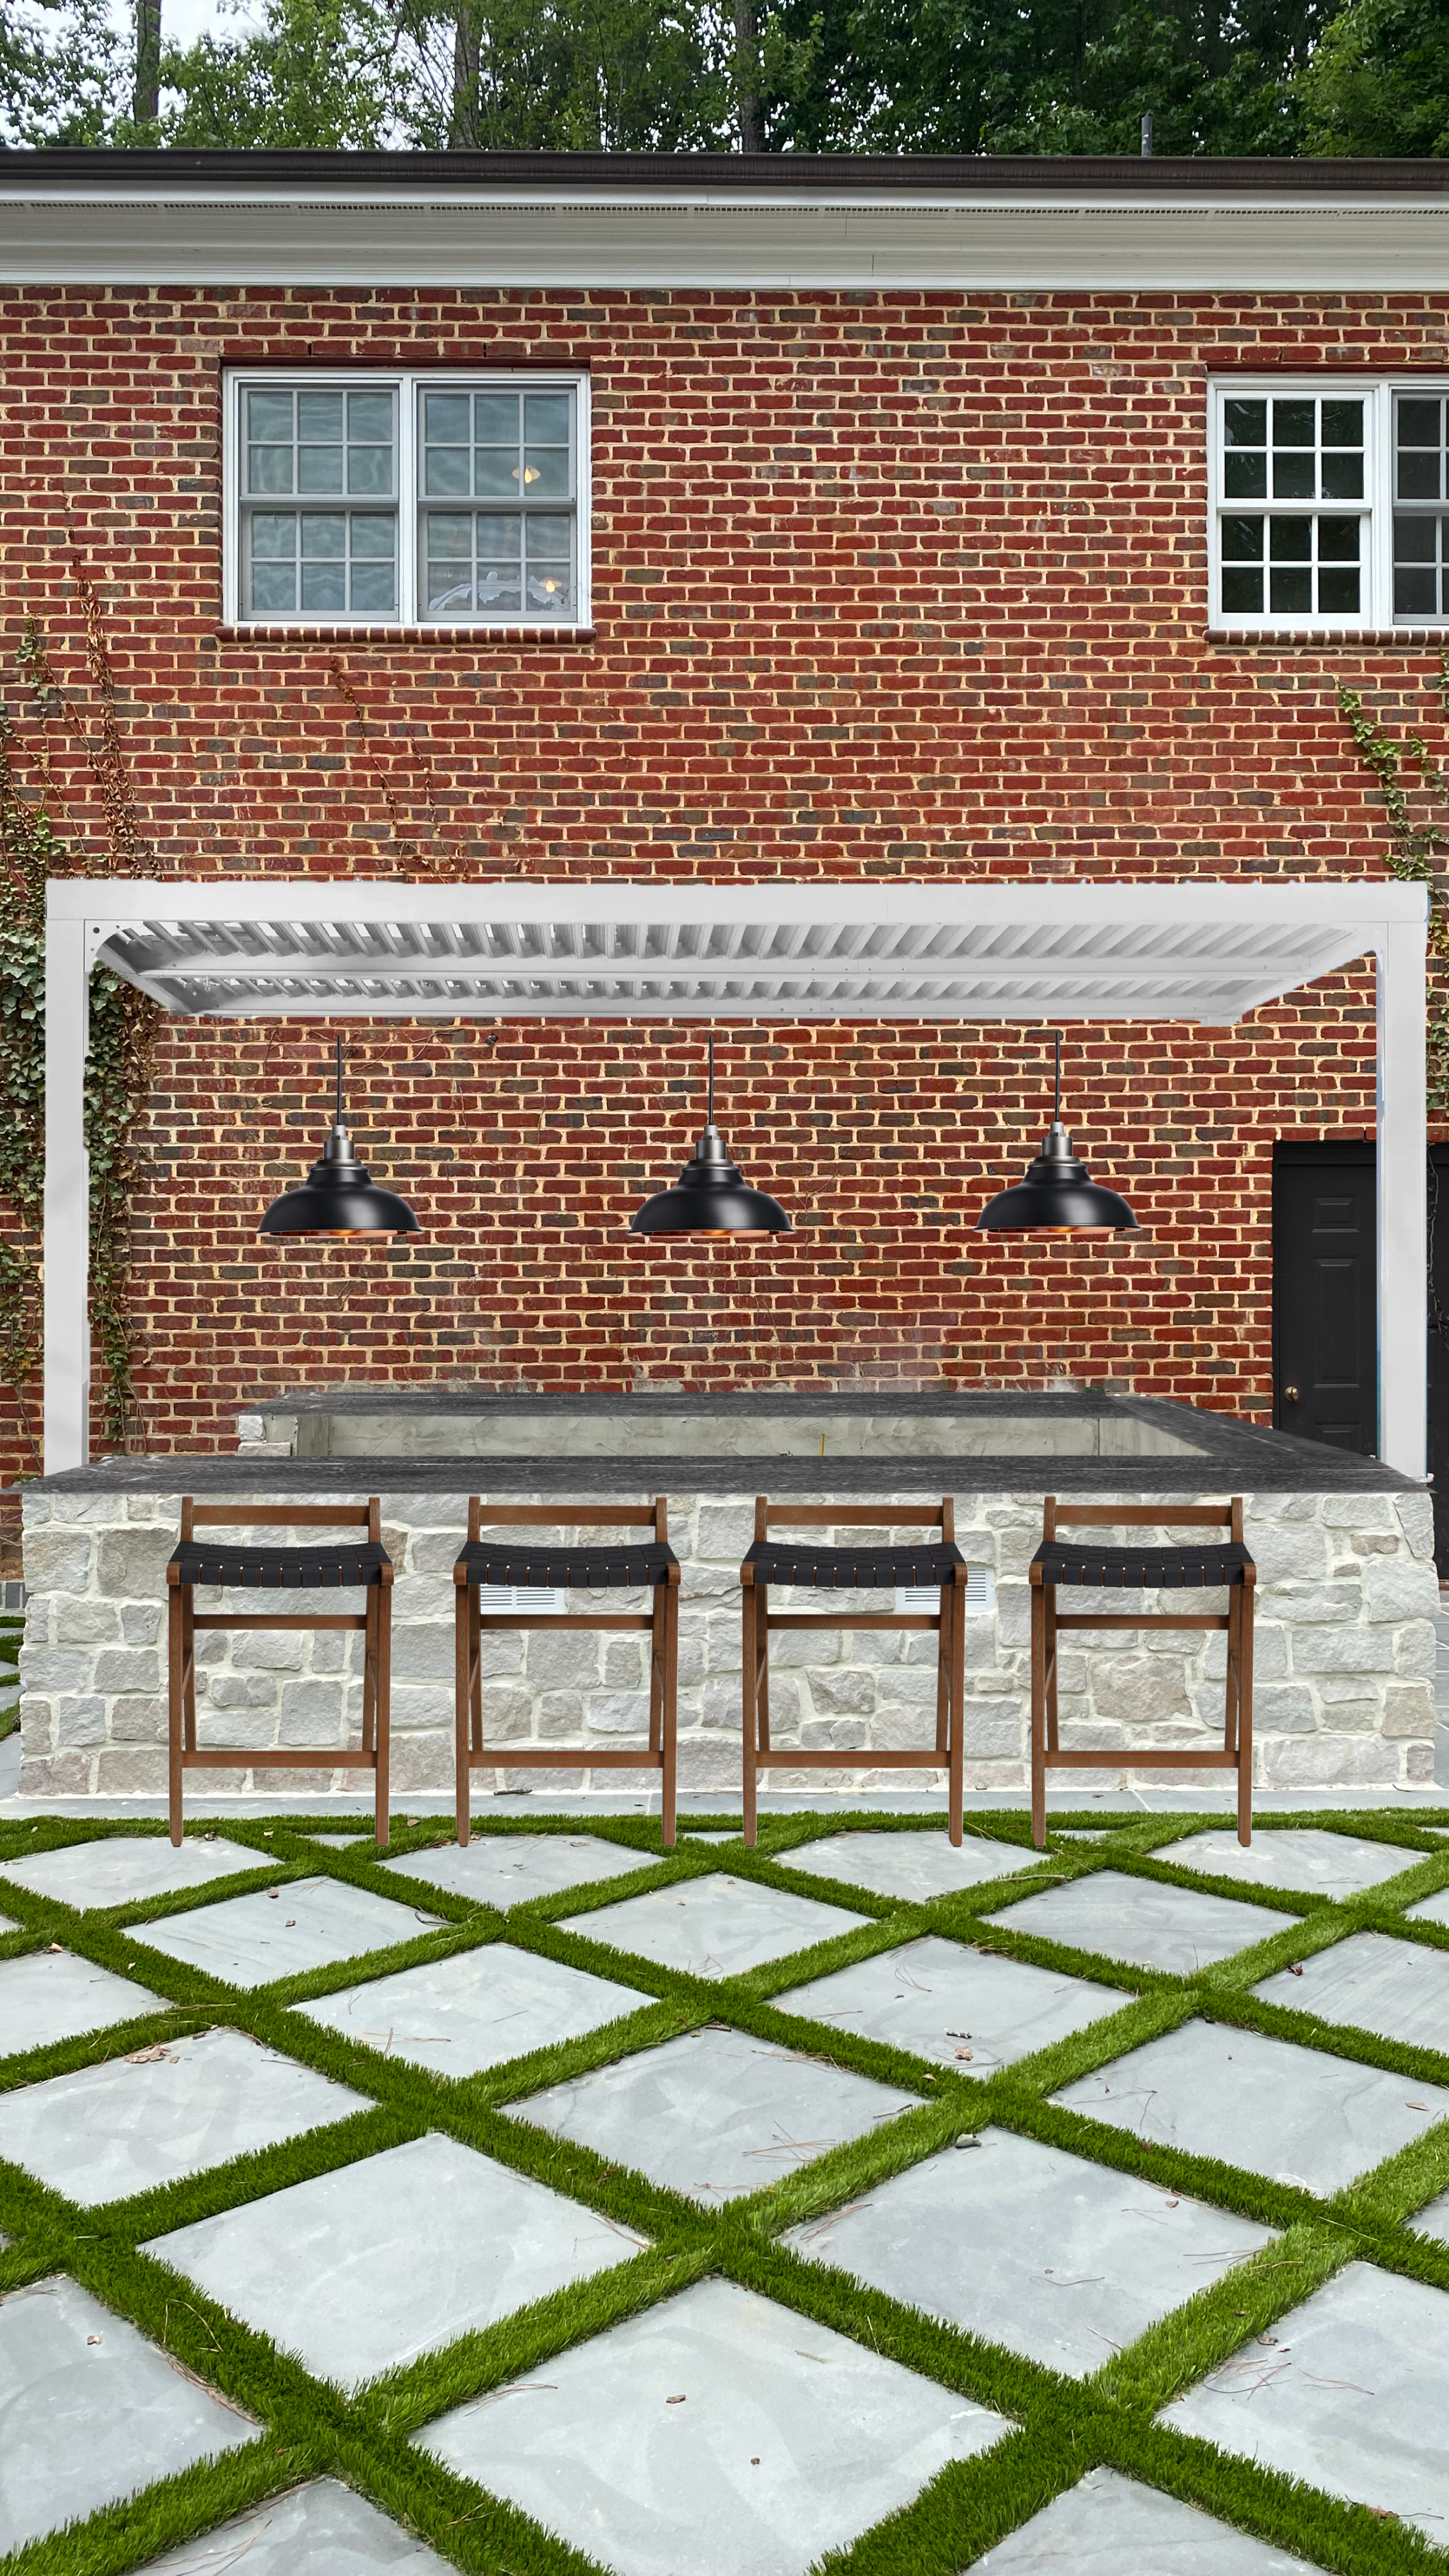
Seeing it all mocked up like this gave me the clarity I needed–paneling it is!
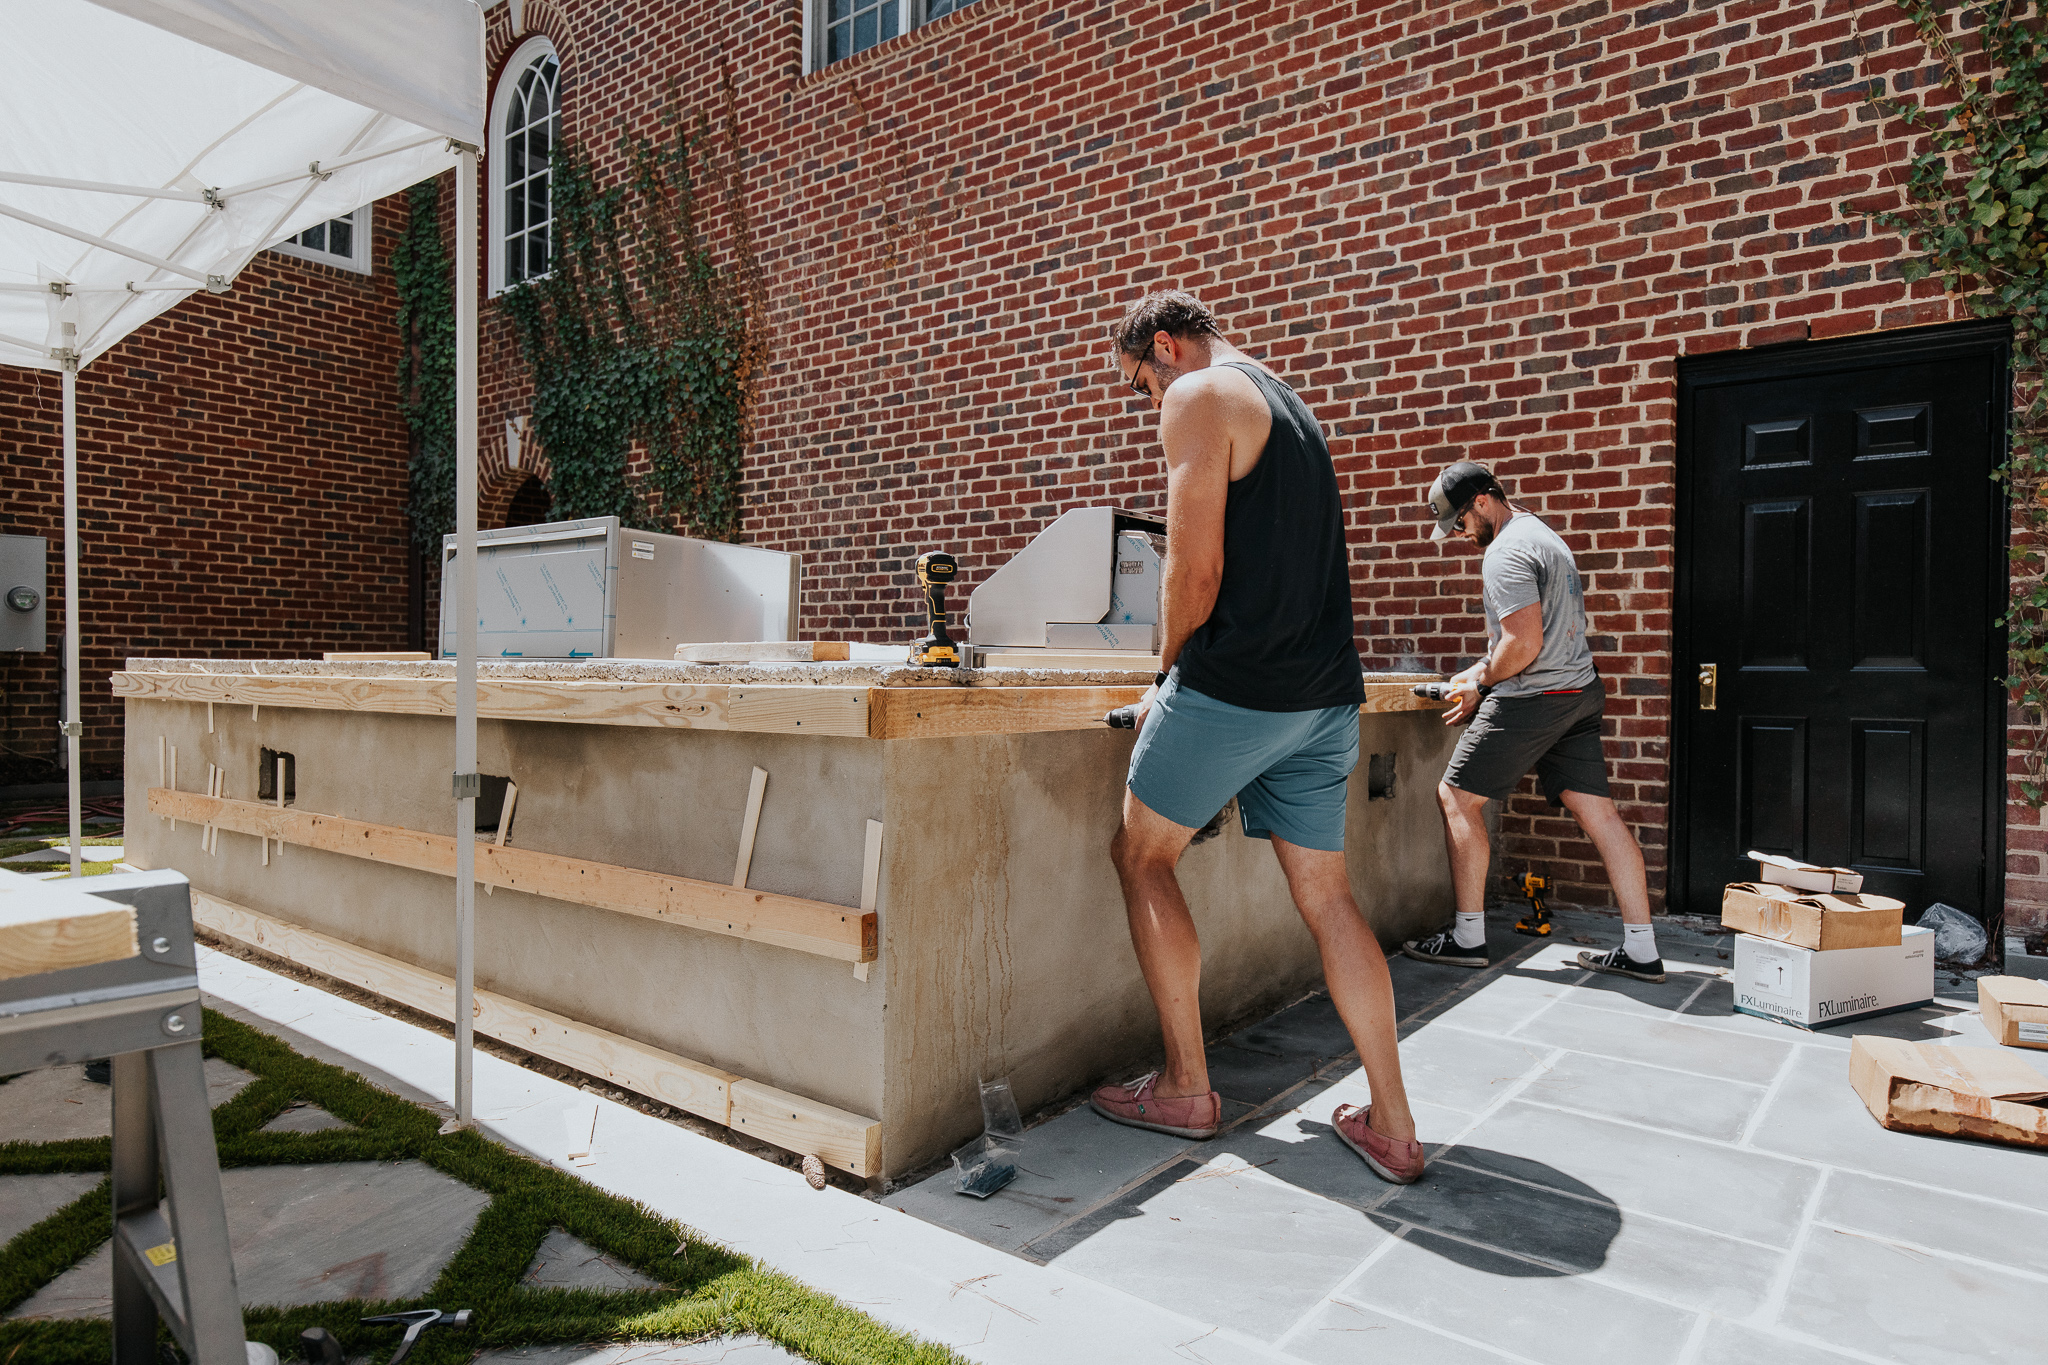
So the contractors took off the stone and we went back to square one. Originally, this outdoor kitchen was under the jurisdiction of our landscaping crew but they had to unexpectedly take time off from our project. Since we’re racing against the clock to get the countertops templated, we couldn’t sit around waiting.
Enter Chris and Tristan.
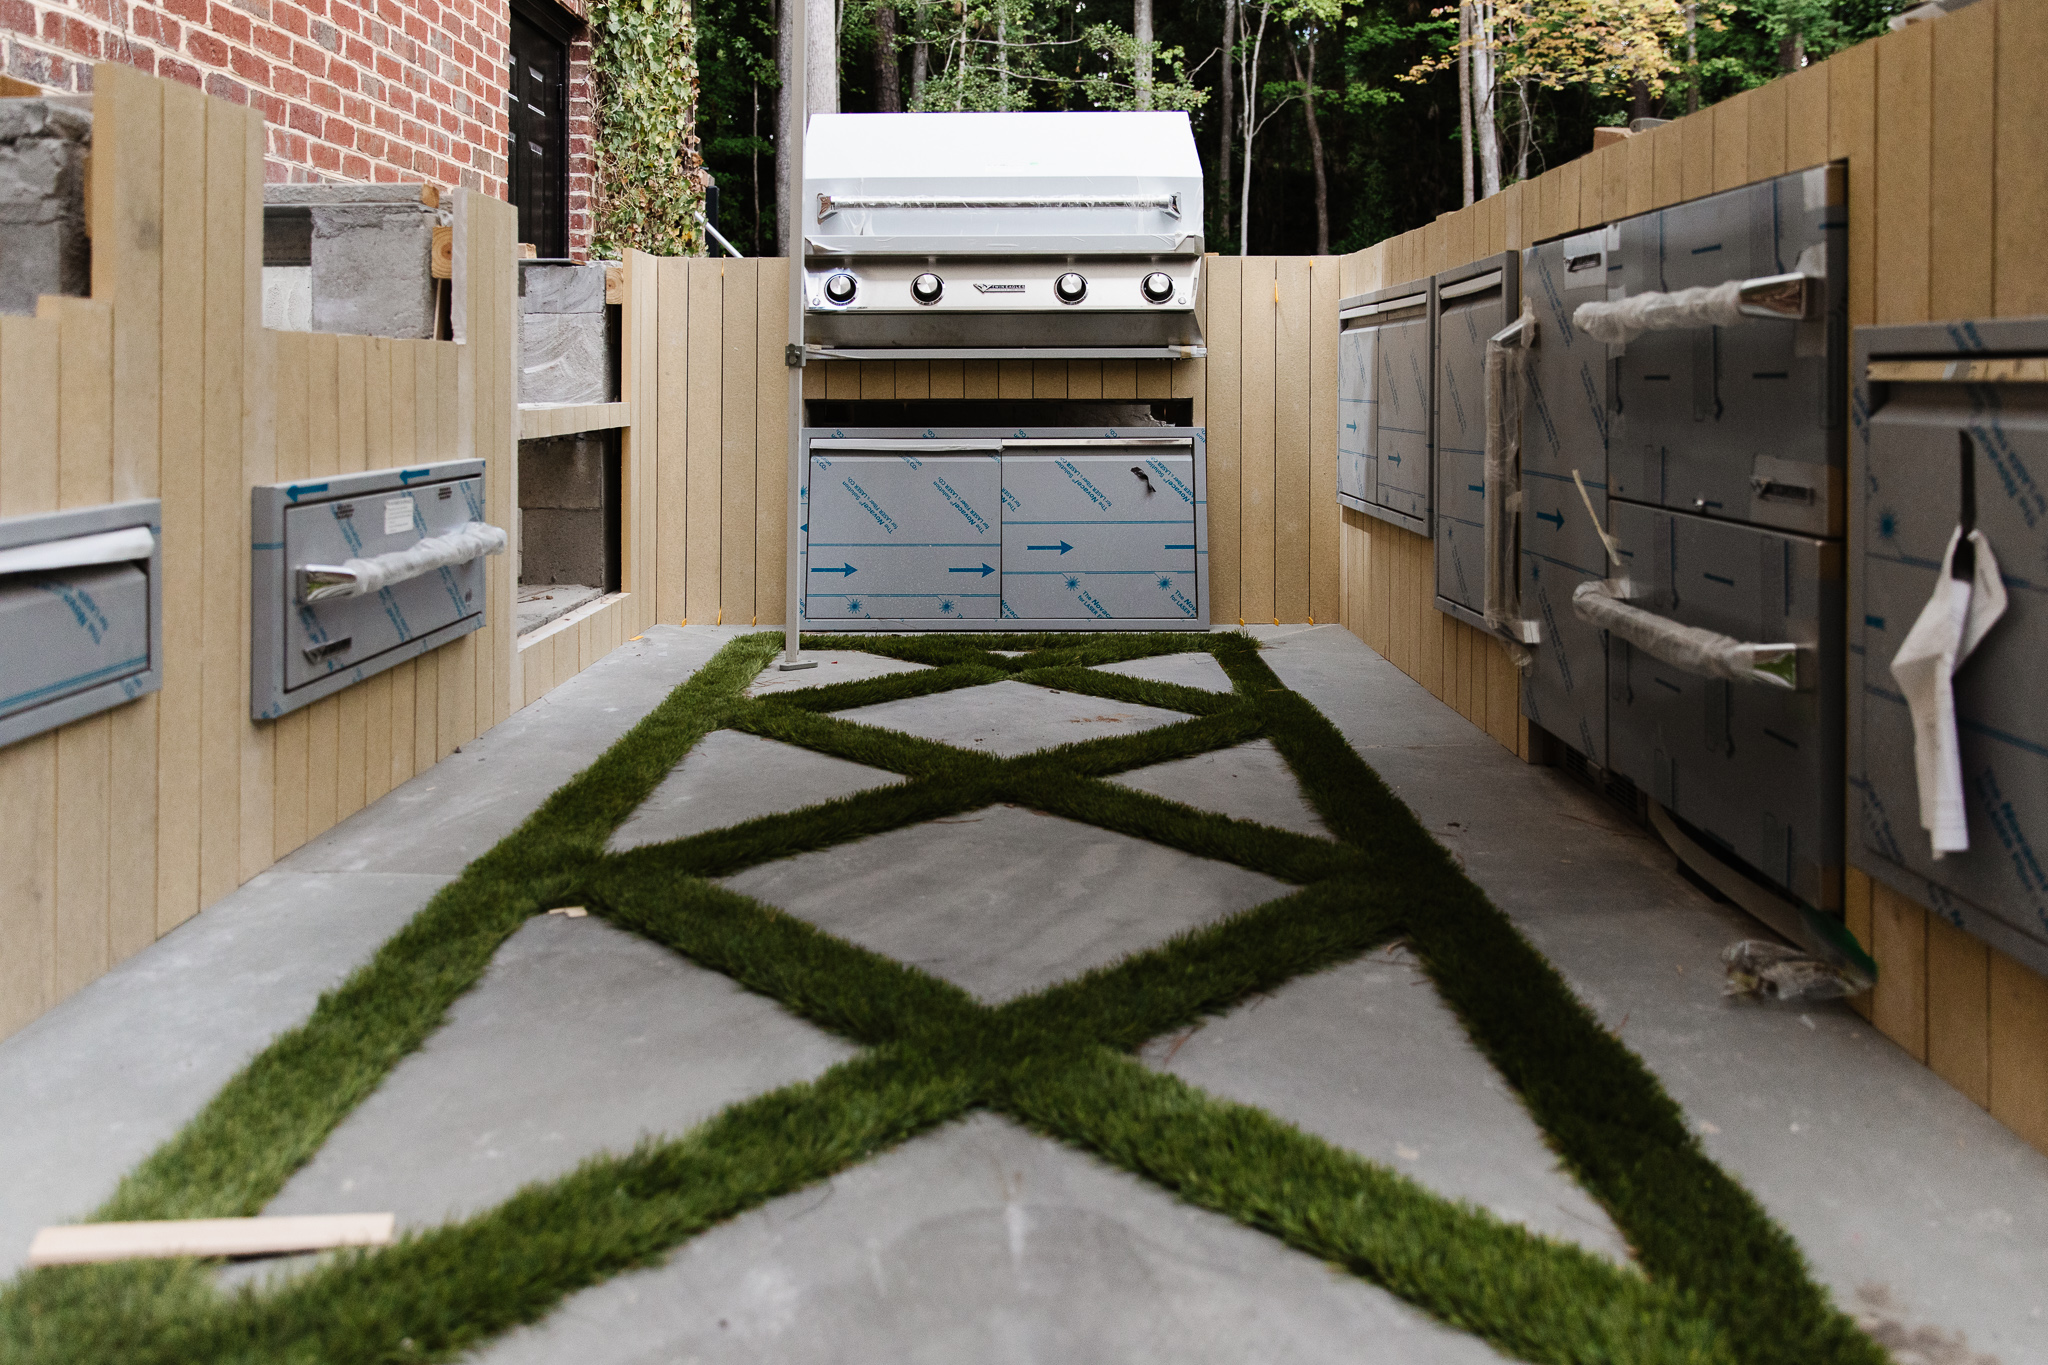
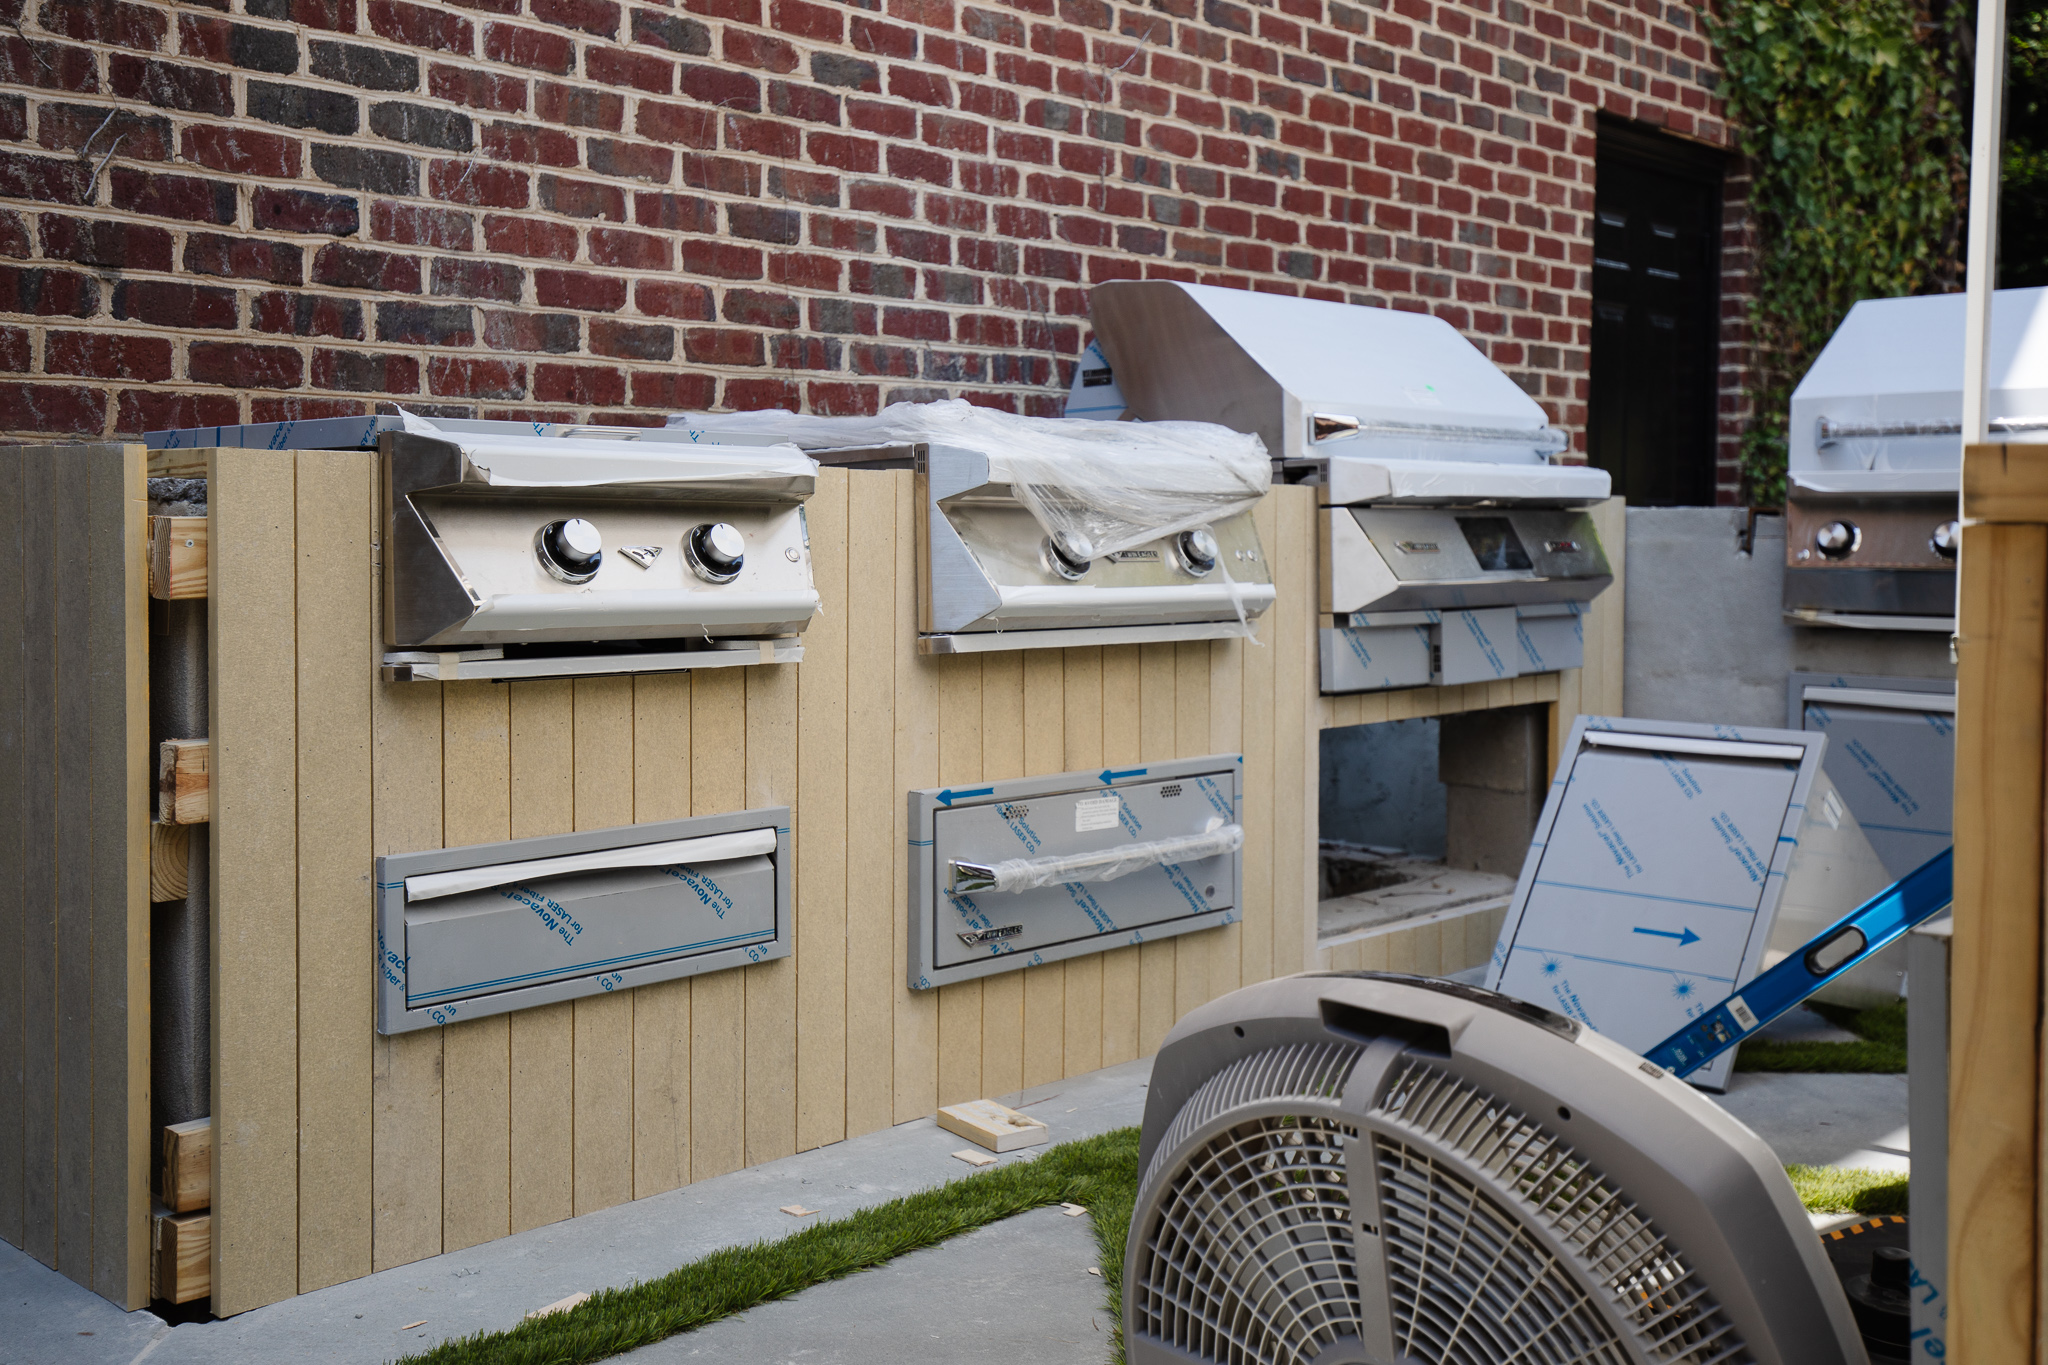
Installing the Outdoor Kitchen Paneling
Since this is an exterior kitchen, we went with a Hardie board for the paneling because it’s a weatherproof material that is known to stand the test of time outdoors. It’s actually a composite material made out of cement, sand, and cellulose fibers. Super durable and premium outdoor quality. Here’s the rest of what was used for this.
Material & Tools Used
1″ x 3.5″ Hardie Board
Screws to attach the 2×4’s (this box also comes with the masonry drill bit needed)
Pressure Treated 2×4’s used as a frame to attach the Hardie board to
Brad Nailer
Brad Nails
Glue
Impact Driver
Shop Material & Tools


1. For the installation, Chris and Tristan teamed up to first install the horizontal wood furring beams into the concrete with long screws and a masonry drill bit. Chris recommended staggering the screws for more stability. This furring makes it so that the vertical paneling pieces can be nailed into some wood!

2. The trickiest part of all of this was making the 3 horizontal furring pieces level with each other so that when the panels were installed, they’re all nice and flush. We used shims to jut out the furring when needed.
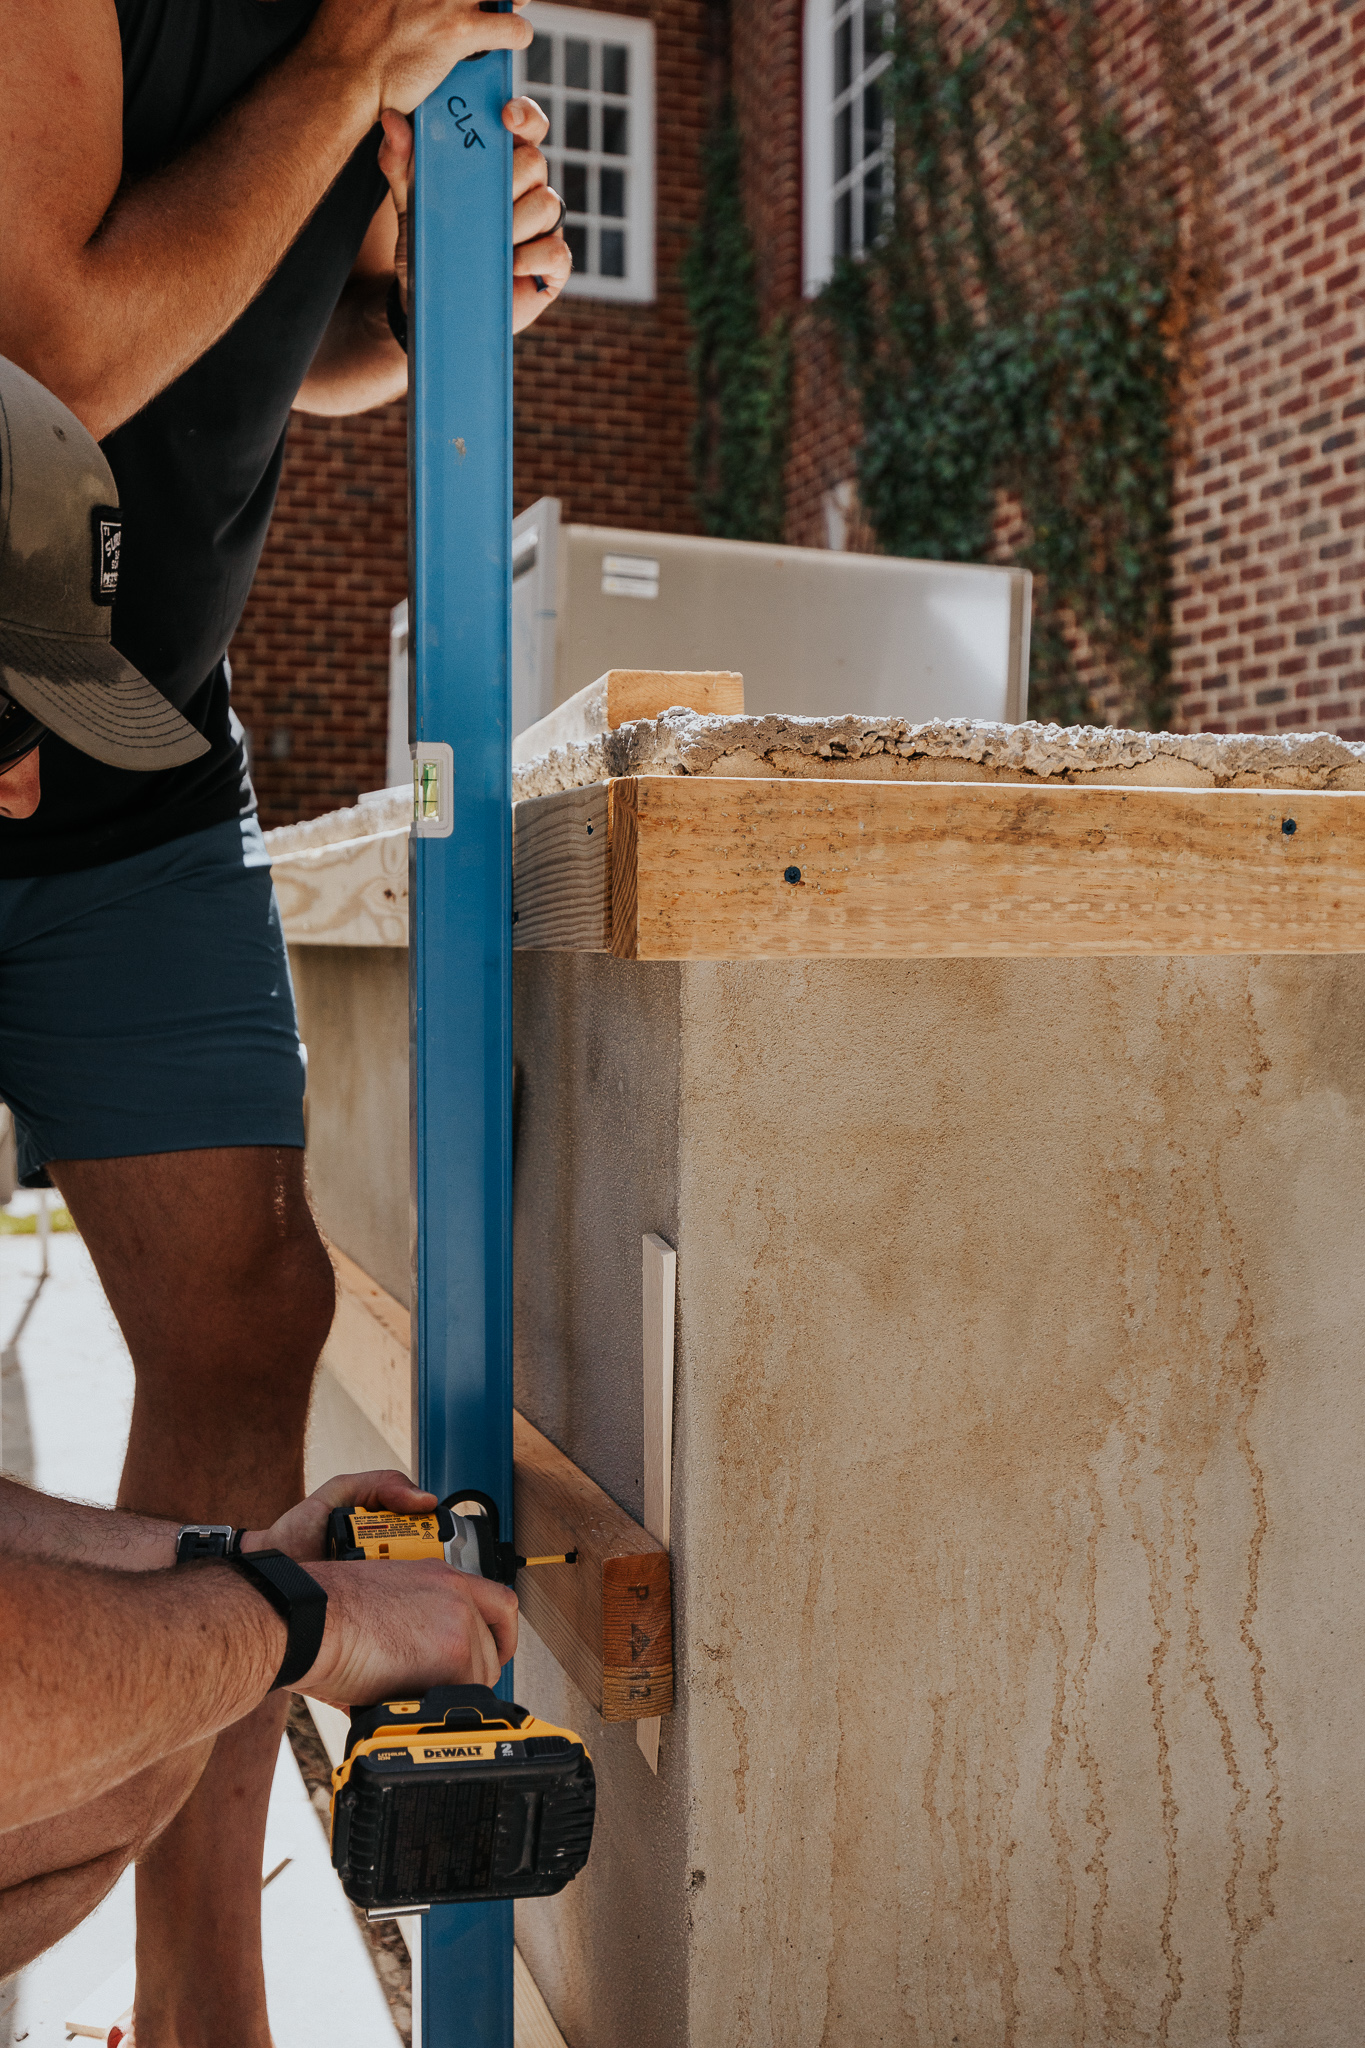
3. For the paneling, all it took was a little bit of wood glue and some brad nails. We used the leftover 1/8th tile spacers to get the spacing between each panel.
4. Although it would have been nice to be able to batch cut all the pieces, the ground actually slightly slopes for drainage so each piece measurement was slightly different. We mitered the corner pieces to make the joints nice and clean.
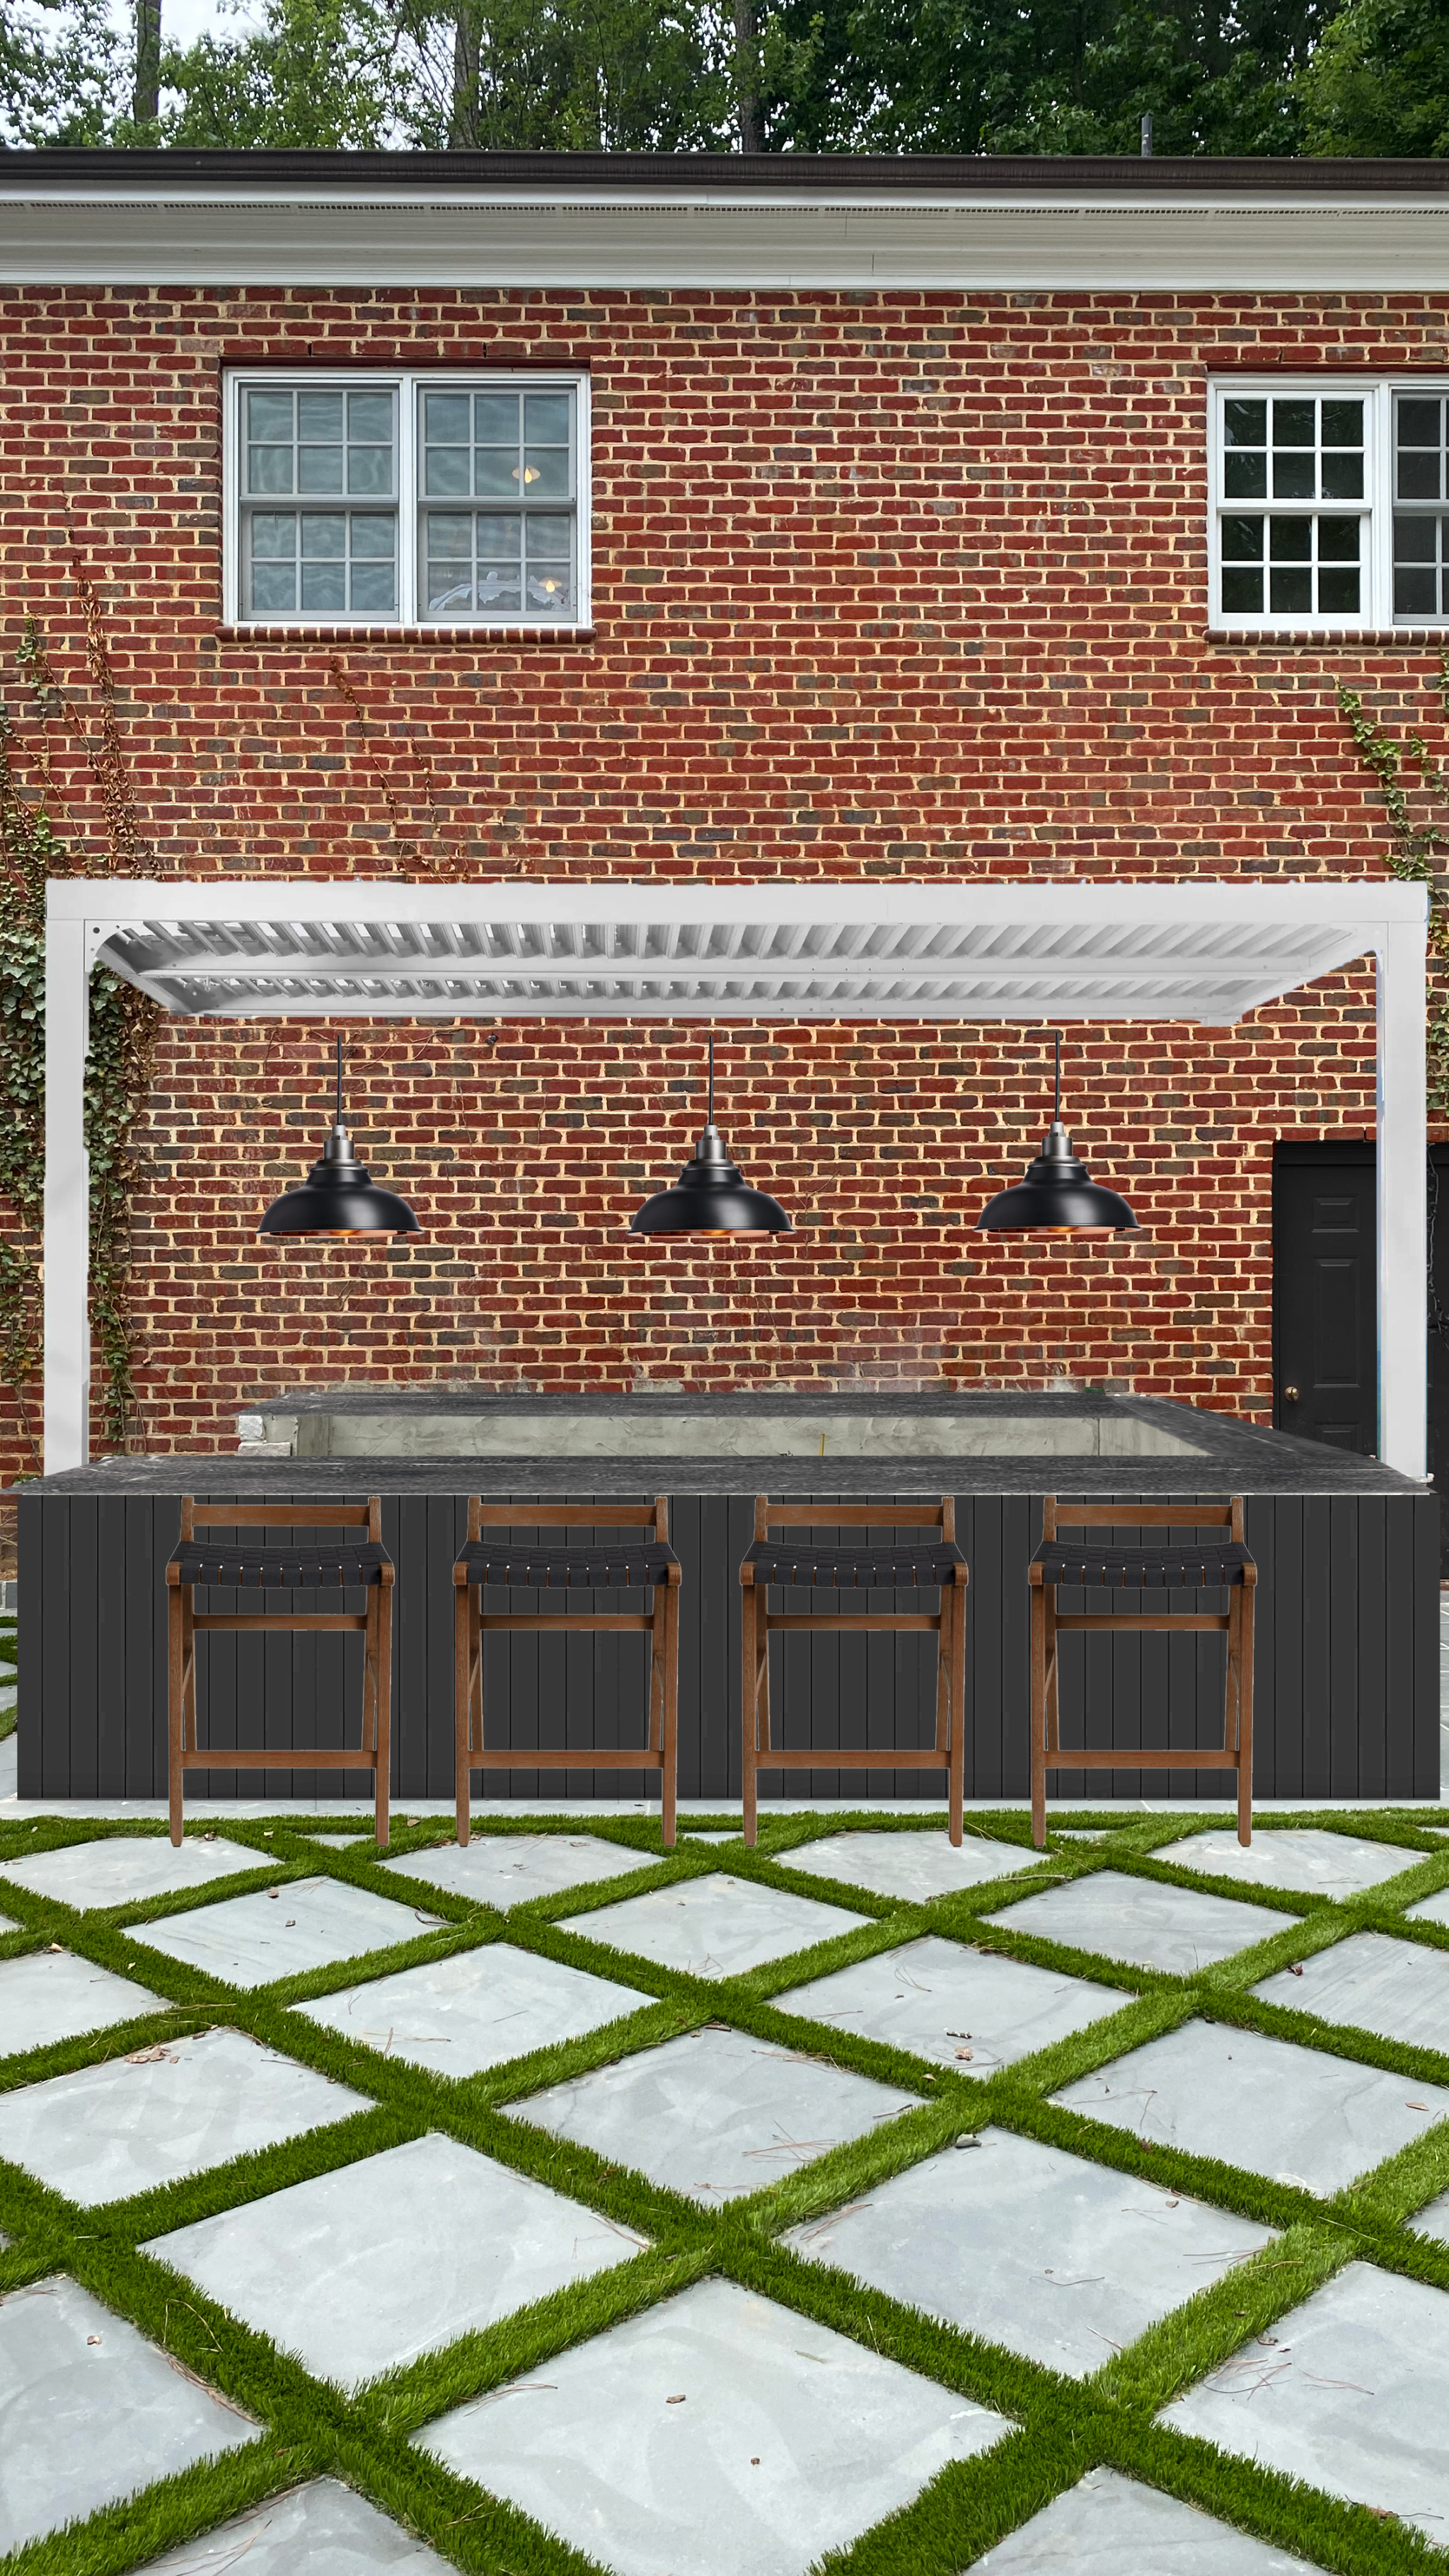
The Paint Color
Originally my heart was leaning towards black for the paneling, but thinking ahead I felt like we had black furniture, and we just painted the utility door black! I also have a hunch that the windows and trim may one day become black.
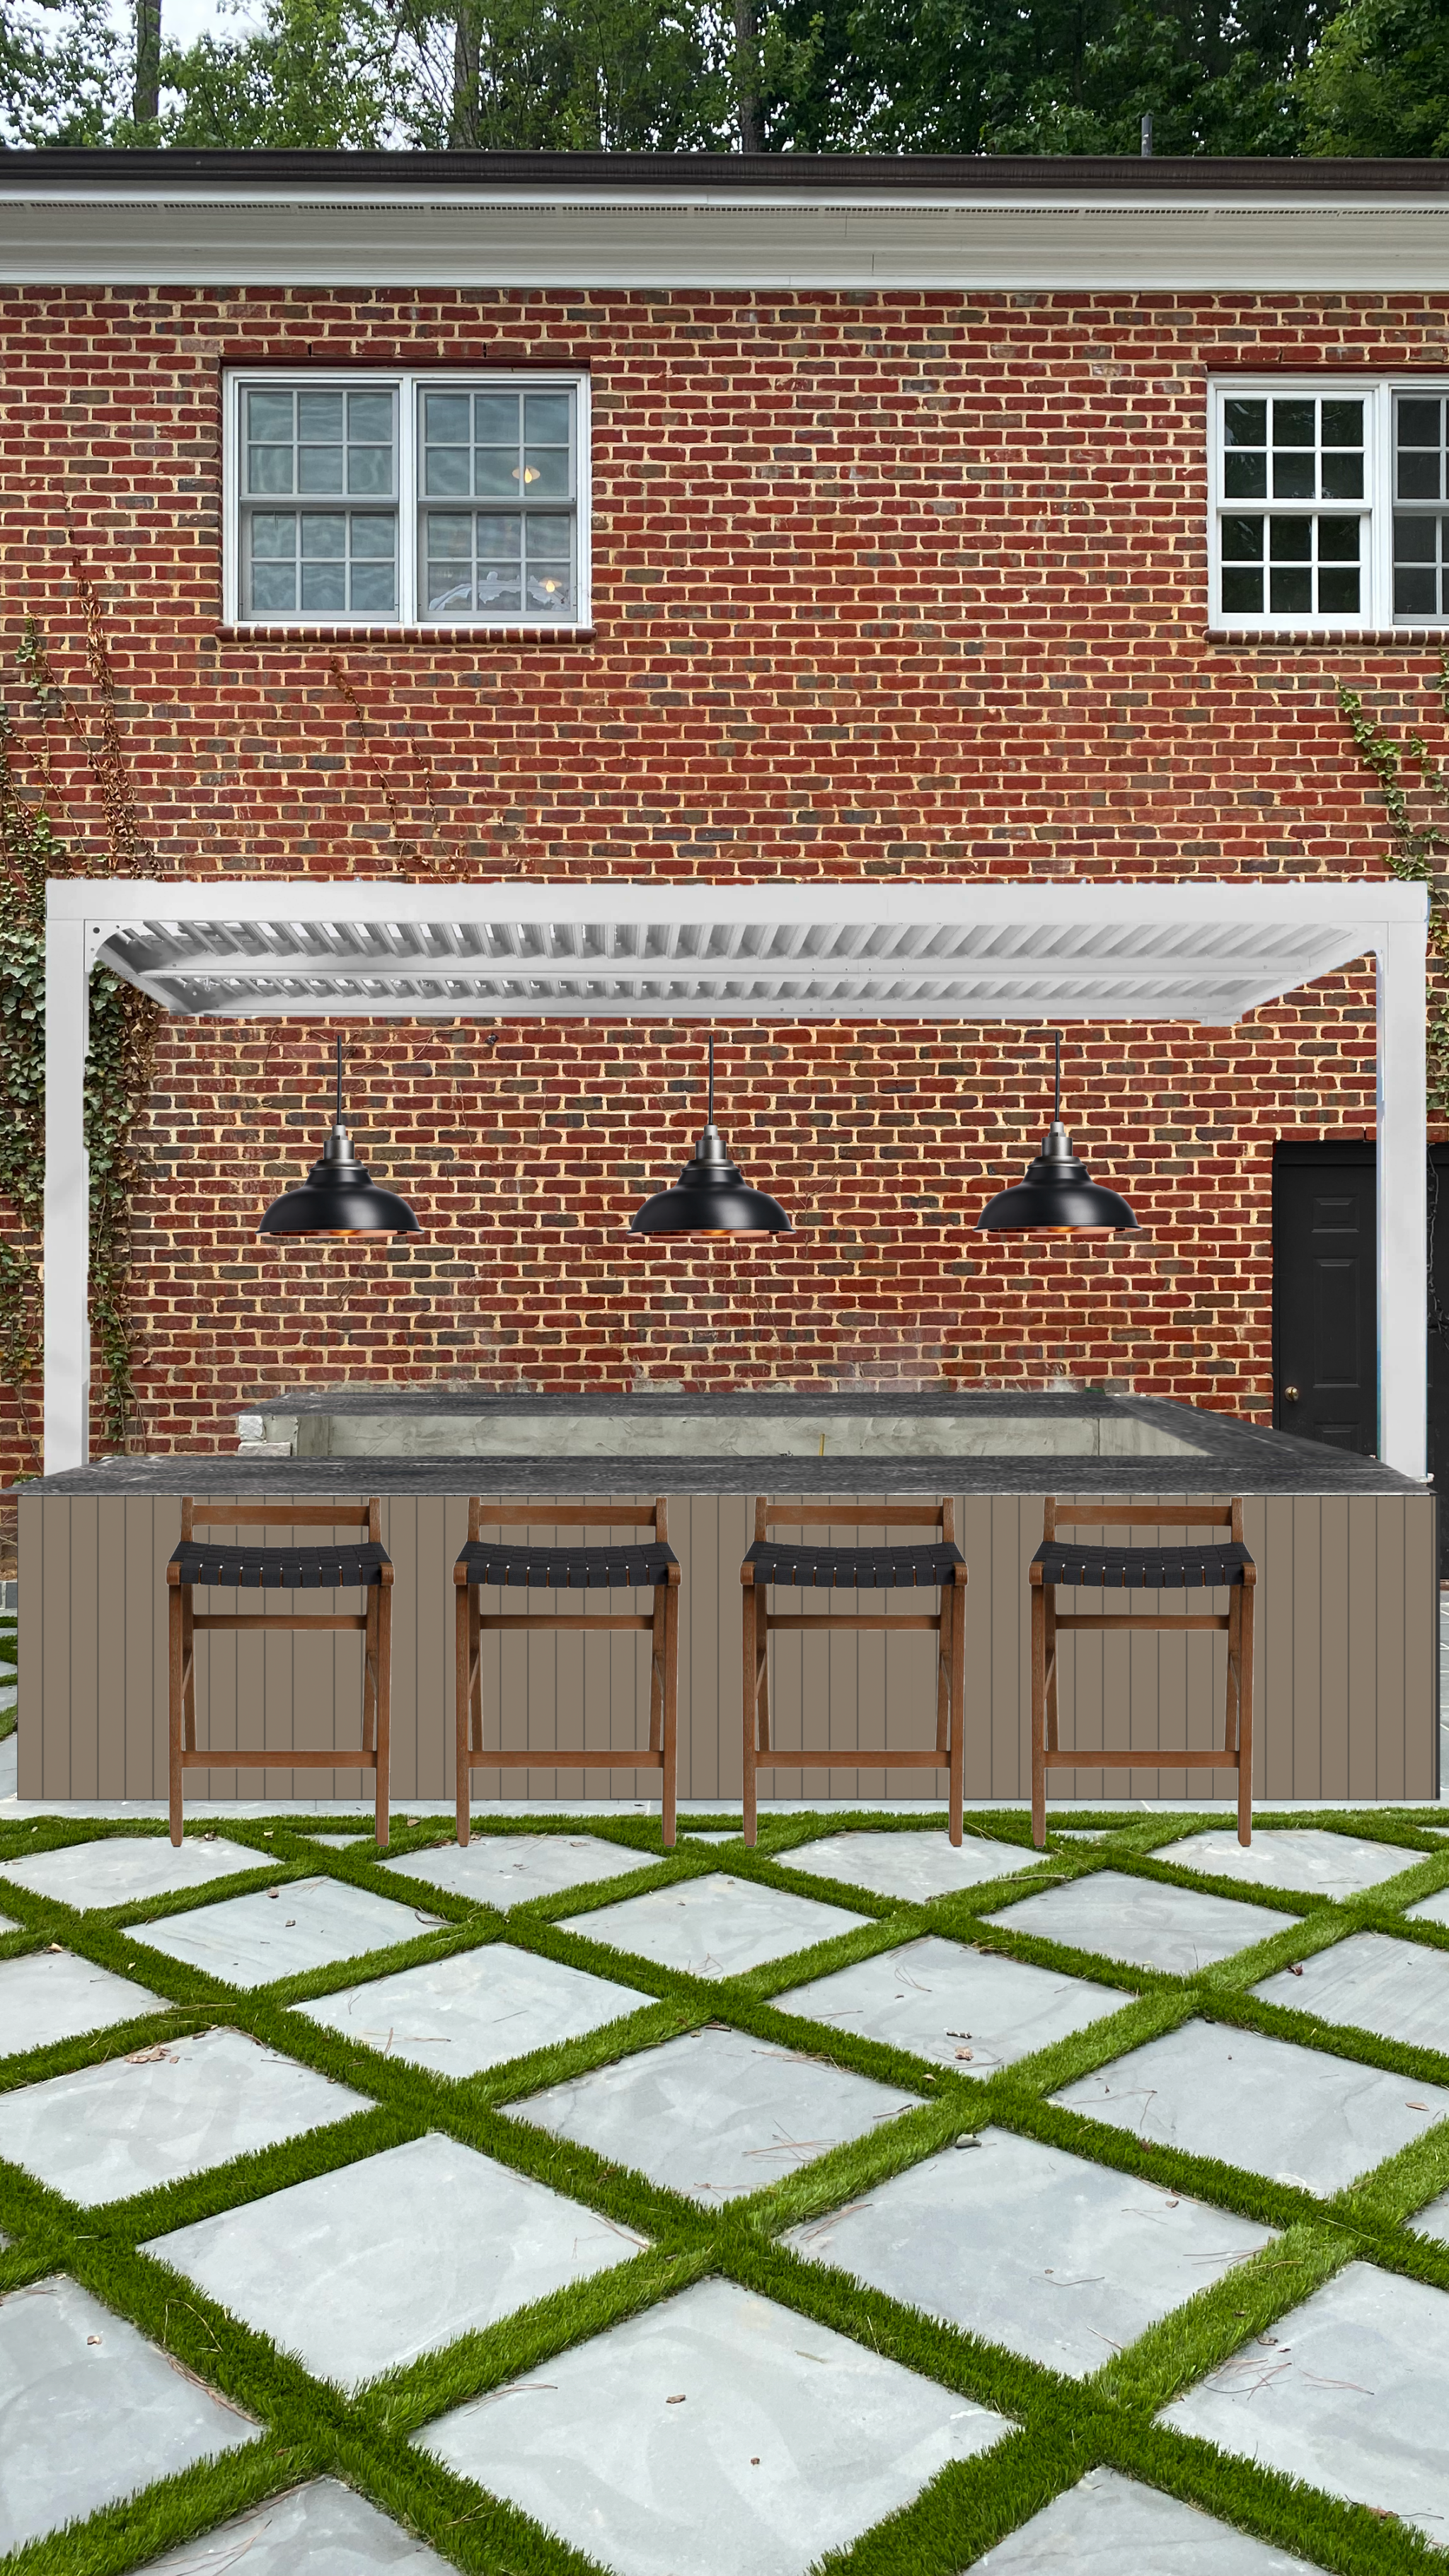
I really wanted the kitchen to be a separate thing, that way if I still want to paint the windows black down the road I won’t feel like it’s too dark, which I know is a little surprising for me to say. Love a beautiful dark exterior, but I think a more mushroom toned kitchen is the perfect touch.
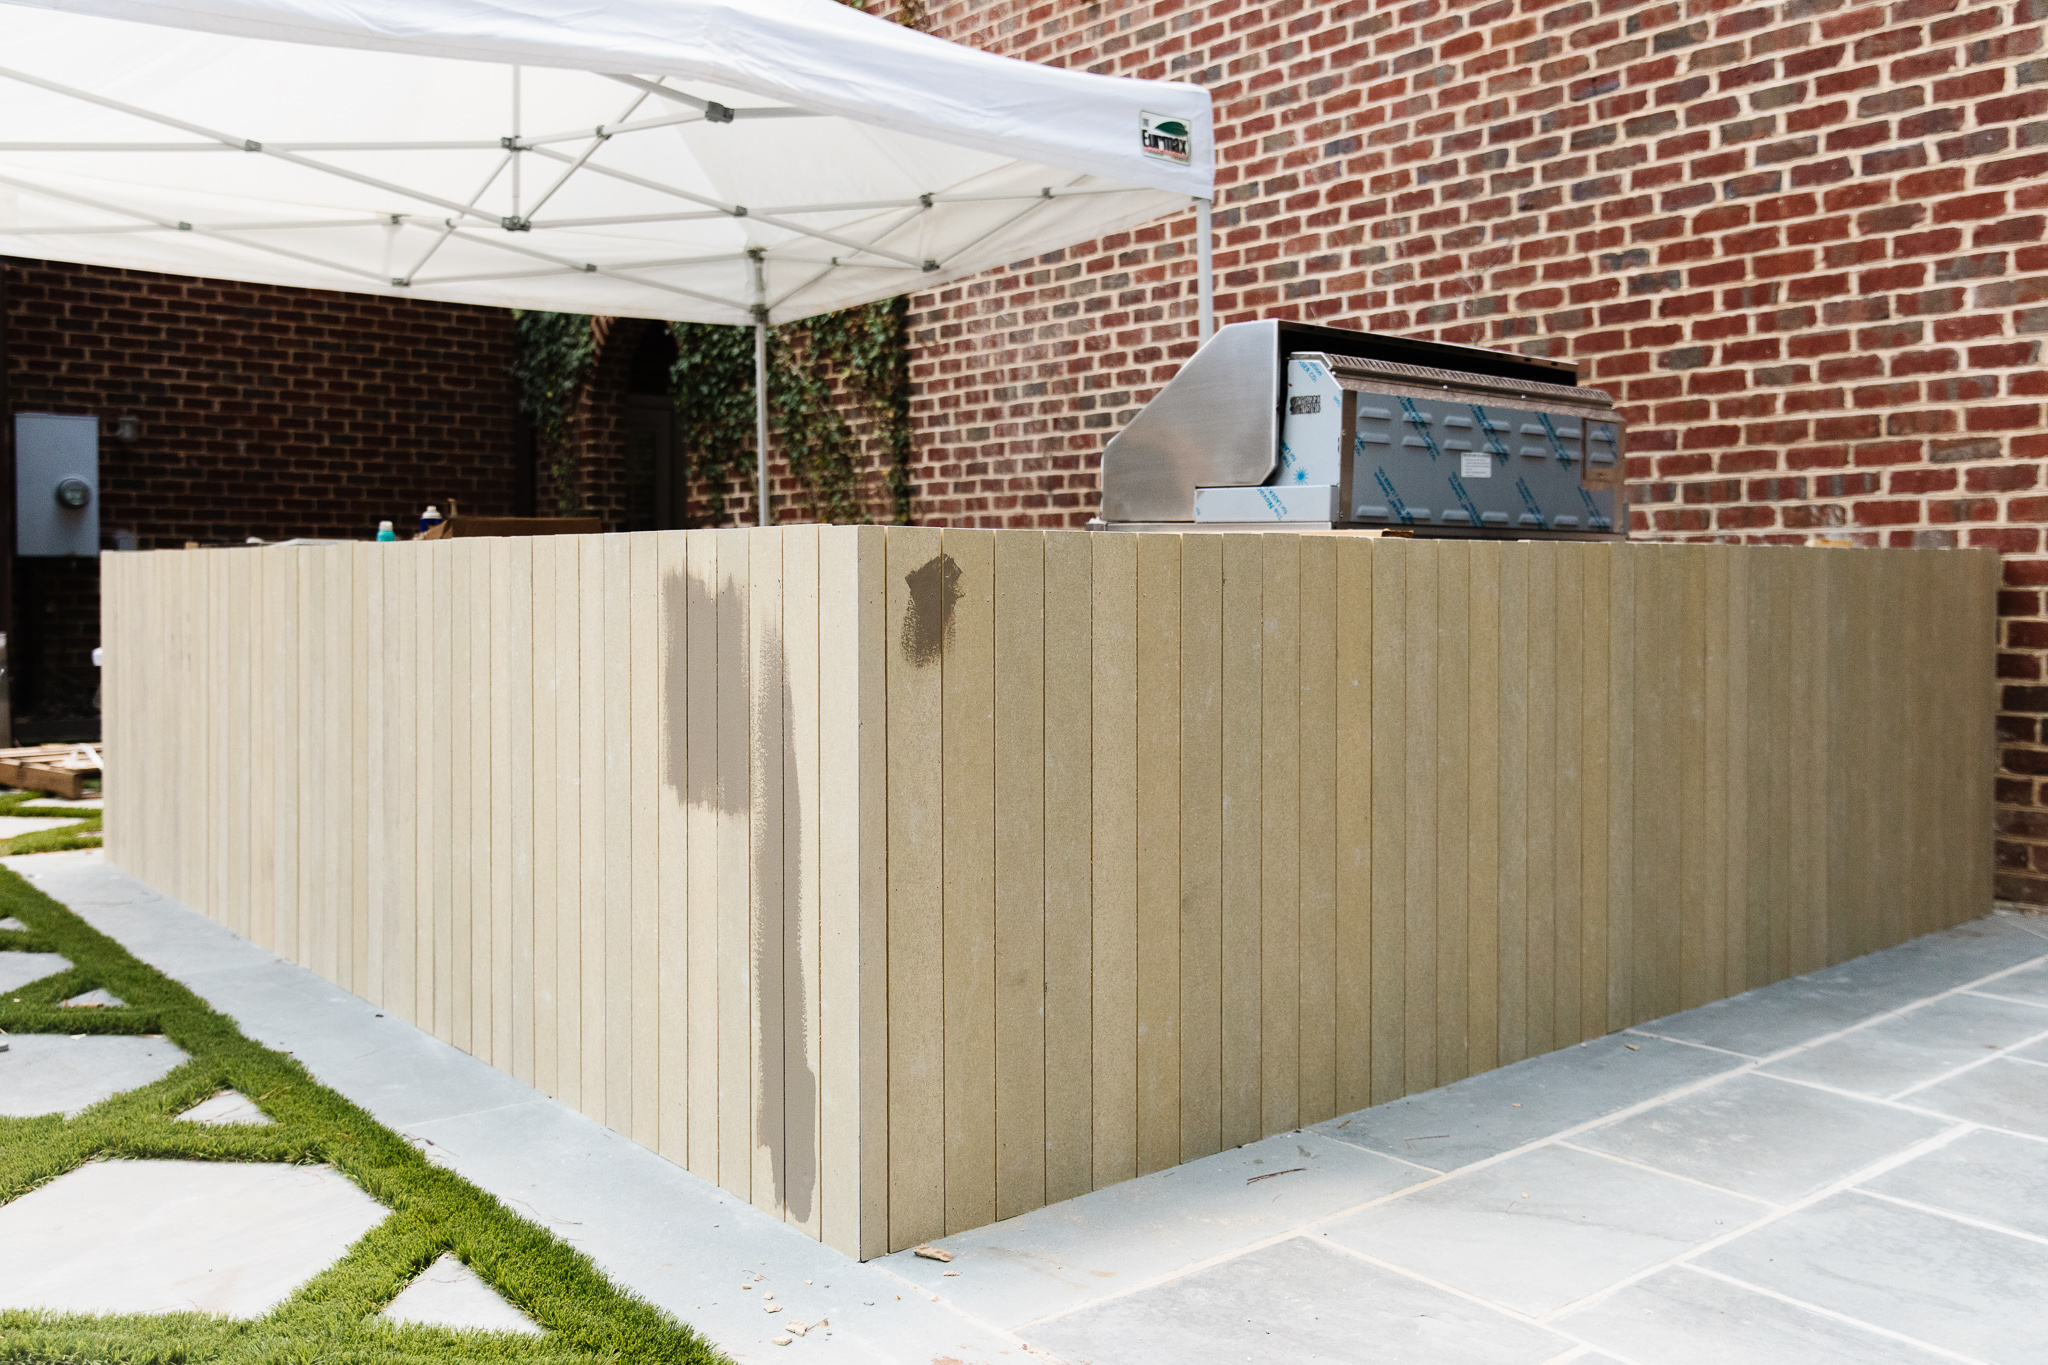
I relied on my trusty Farrow & Ball paint color deck and landed on Mouse’s Back in an Exterior Eggshell finish.
The moment the paint showed up at my door, I ran!
It’s the perfect mushroomy taupe color looks so classic with the red brick.
Next up! We have to pass inspection before the pergola can go up so fingers crossed. The pergola is in a box in the garage, ready to be painted in the same Mouse’s Back color as the paneling. Once that’s in, we can hang lights. Let me just say, it’s really hard to find lights that I like that are also wet-rated for outdoor use.
Overall, I’m so happy that instead of sticking with the stone I originally had planned, I still gave myself permission to pivot and change my mind. It can be so scary going back on a decision or questioning if something you thought you wanted even makes sense or not. Whether you just started a project, or it was a decision you made years ago, you’re allowed to change your mind and decide that it’s not actually what you wanted. And maybe instead of boxing yourself into something, you can free yourself to discover something even better. We all have to start over again and again in life, nothing is a guarantee no matter how long you envisioned it or researched it or saved for it. Things can get taken apart and something new can emerge.
Leave a Reply
What do you think?
Previous Post
Next Post


Semihandmade
Our wood grain Shaker cabinet fronts were designed for busy, high-traffic homes like ours. Clad with durable textured thermofoils, this line is compatible with Sektion, Akurum, Godmorgon, and Besta cabinets from IKEA. It's the perfect, practical way to add the warmth of wood to all the rooms of your home.
Collaborations
learn more

next
Loloi
We have teamed up with Loloi to create a line of rugs that are as affordable as they are beautiful. This collection houses a great mix of traditional and modern rugs, in cottage-y colorways, as well as vintage-inspired beauties that you’ll want to roll out in every room.
Collaborations
learn more

next
STUGA
We partnered with Stuga on a line of hardwood floors — The Ingrid is really livable, and the color is very neutral. It doesn’t lean warm or cool, it’s that just right in-between. We have really loved putting it everywhere in our house. It’s the best jumping-off point for design, no matter your interior style. In addition to being beautiful, Ingrid is really durable — we have three kids, and we always have a home construction project going on. Ingrid stands up to it all.
Collaborations
learn more

next


SHop all
What We're Right Now
What We're Right Now
Looking for our favorite things? A place to shop our home room by room, or just catch up on what Julia's wearing / loving right now? Browse the CLJ shop.
Loving


Portfolio


Design
Befores, afters, mood boards, plans, failures, wins. We’ve done a lot of projects, and they’re all here.
BROWSE BY CATEGORY
let's break this thing up
We have a long-standing relationship with DIY, and love rolling our sleeves up and making it happen.
Projects
Even when you don’t want to rip down a wall, you can make that space in your home better. Right now.
read more
read more
read more
02
01
03
looking for inspiration?
A reader recently asked me if I’m starting to fully embrace traditional style and whether we still consider our house to be a “modern Colonial” and why. It was a really great question and so timely — I had really just been thinking about my approach to this home and how my style has changed […]


SEARCH THE BLOG
We've been doing this since 2009 and we've posted a whopping 24145+ blog posts and counting. You might need a little help searching, huh?
looking for something?
find stuff like:
")
Can We Send You Our Love Letter?
Another way for us to stay in touch! Joining our weekly newsletter gives you access to exclusive content, never-before-seen photos, your questions answered, and our favorite DIYs. Sign up below!
Follow Along on Instagram
Welcome to our online community where we've posted home, DIY, style, renovations, and family since '09. Renovating our #cljmoderncottage in Idaho and headed for new adventures in Raleigh, NC. #cljfam #cljtransformations
@chrislovesjulia


Links
Get Around
Make yourself right at home
Portfolio
Design
Casual Friday
Projects
Lifestyle
Gift Guides
All Posts
Shop
Love where you live.
Social
RivrLinks
Links
Get Around
Make yourself right at home
Portfolio
Design
Casual Friday
Projects
Lifestyle
Gift Guides
All Posts
Shop
Love where you live.
Social
RivrLinks
Both options are lovely, but I don’t know if I would have been able to course correct after the stone was already done! I love that you have the guts to do that though!
The stone really is beautiful. Maybe not suitable for your purposes, but I like it a lot. Can you share what it is? It’s has that icy Fond du Lac dolomite look. I ask because we will be building a new home soon….style is very Christopher AI English cottage. We have three chimneys, one on the face of the house, to clad in stone and this stone looks very close to what I’m envisioning. And I do like the wood cladding much better for your outdoor kitchen. Good call!
I live in the South too (welcome!) and outdoor living is the best – I love it! I sit out on my back patio almost every night and enjoy the lake and the warmth, almost year round. Anyway, I’ve been following you since you moved and I just wanted to suggest for our outdoor kitchen area, be sure you put a solid roof over it, not a pergola with open slats. We have so many bugs and get so much rain and the sun is so hot, you will really limit the usefulness of your outdoor kitchen if you don’t have a solid roof. Plus the sun and rain will damage all that beautiful equipment very quickly. Been there, done that! The pool is gorgeous and your family will enjoy your backyard for years to come!
You have given me permission to change things that do not serve me or that I do not enjoy. I wish I had seen your posts 2 years ago when I bought my last house, I would have immediately had some light switches moved. (We sold that house already). I can’t wait to see this outdoor kitchen continue to progress!
For those having trouble with outdoor lighting, as your mentioned above, just wanted to recommend Northeast Lantern (https://www.northeastlantern.com/). They are handmade in NH and they let you totally customize your options, for example our fixtures are Dark Brass finish with an Antinque Brass Cluster (interior) and clear seedy glass. We have both a hanging lantern and 2 wall mounts in various places in our property. They are gorgeous and solid and age beautifully. Not inexpensive but just wanted to shout out this company for great outdoor options!
Sorry I mixed up my outdoor fixtures, yesh. Northeast Lantern are our barn lights (also amazing quality!). Genie House are the custom lanterns! https://www.geniehouse.com/
I’ve been eagerly awaiting this post! I love the paneling. Do you worry the 1/8” spacers will let water get in or leave the cement board vulnerable?