


Finish carpentry, though slow and enigmatic, is the definition of “craft.” It really makes a room special, and we knew from the very beginning of our life in this home that we wanted every room to have some kind of special trim, moulding, paneling etc. that makes it feel like more than just a space we’ve put stuff in. We wanted it all to be intentional.
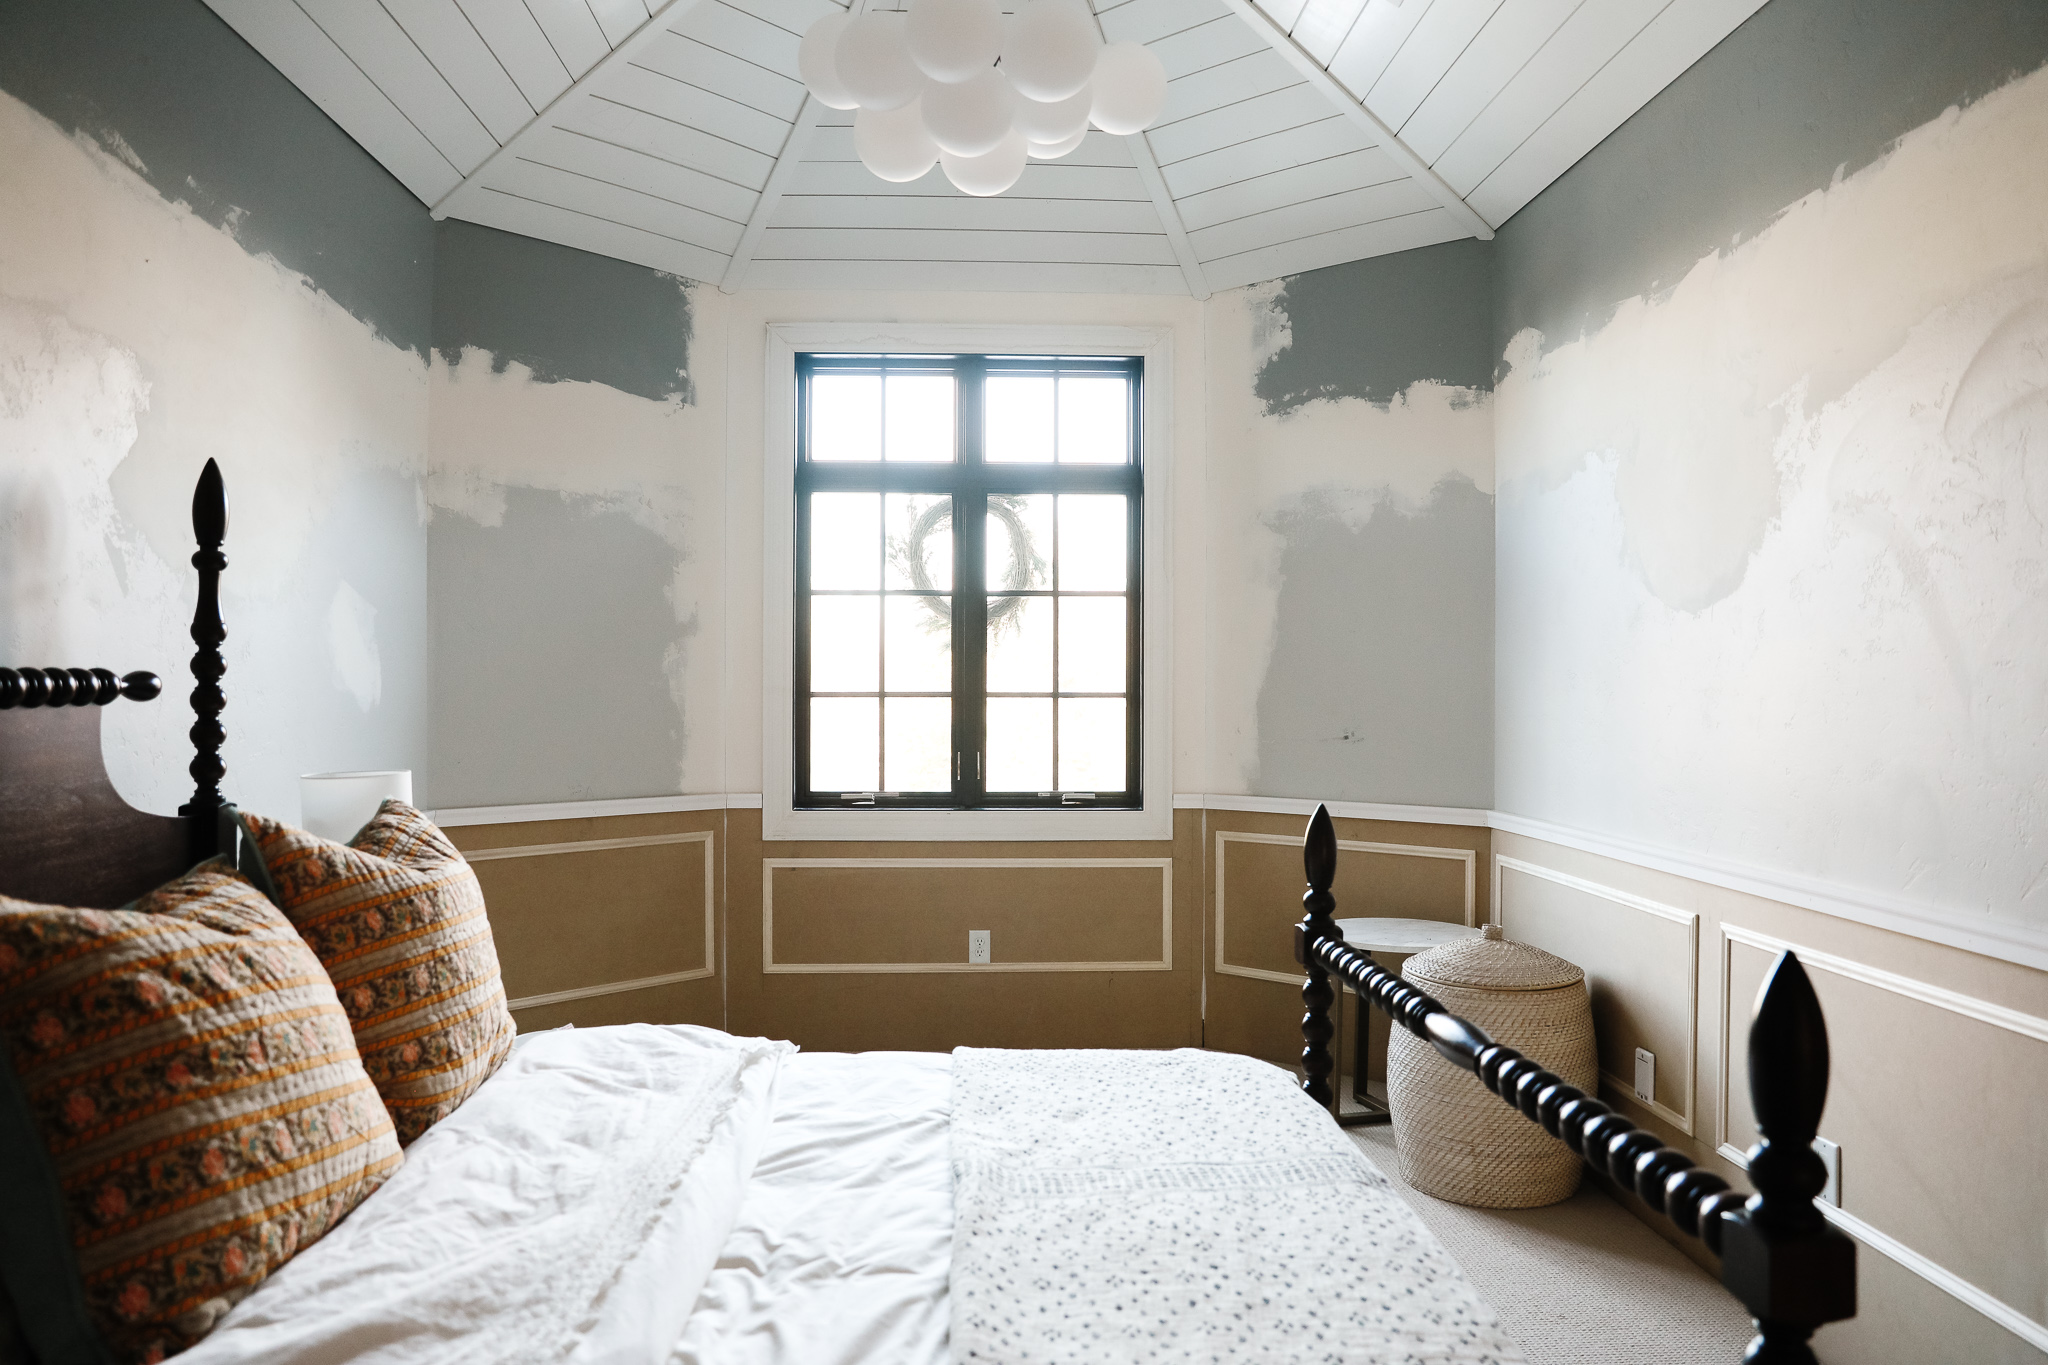
Faye’s room is probably one of the more ambitious finish carpentry jobs we’ve taken on, but it also made such an impact and will really sing once painted and paired with the wallpaper we have selected.
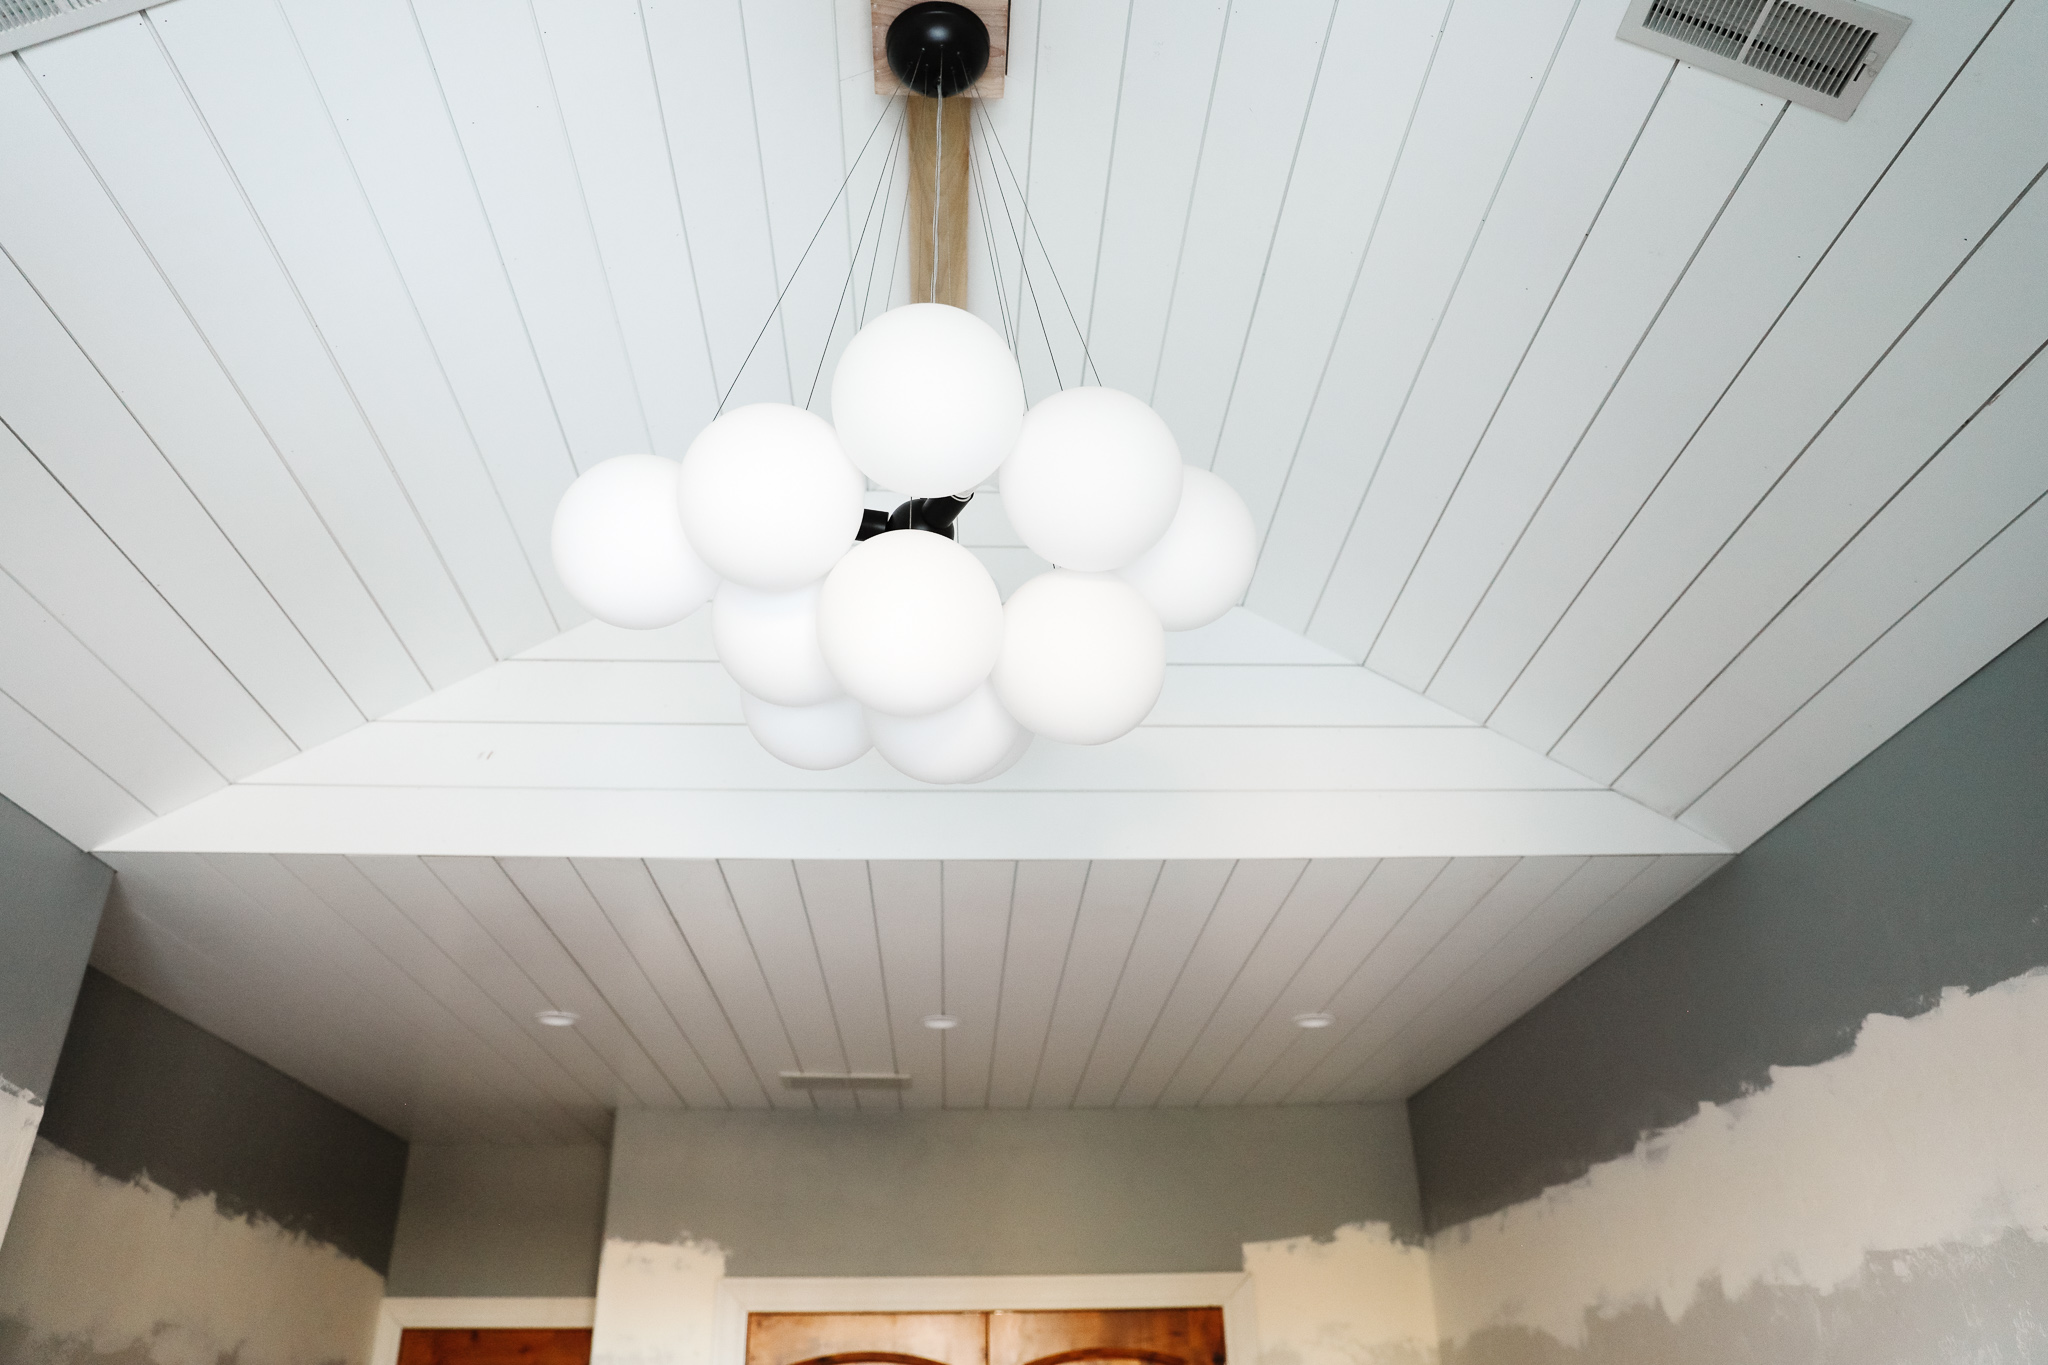
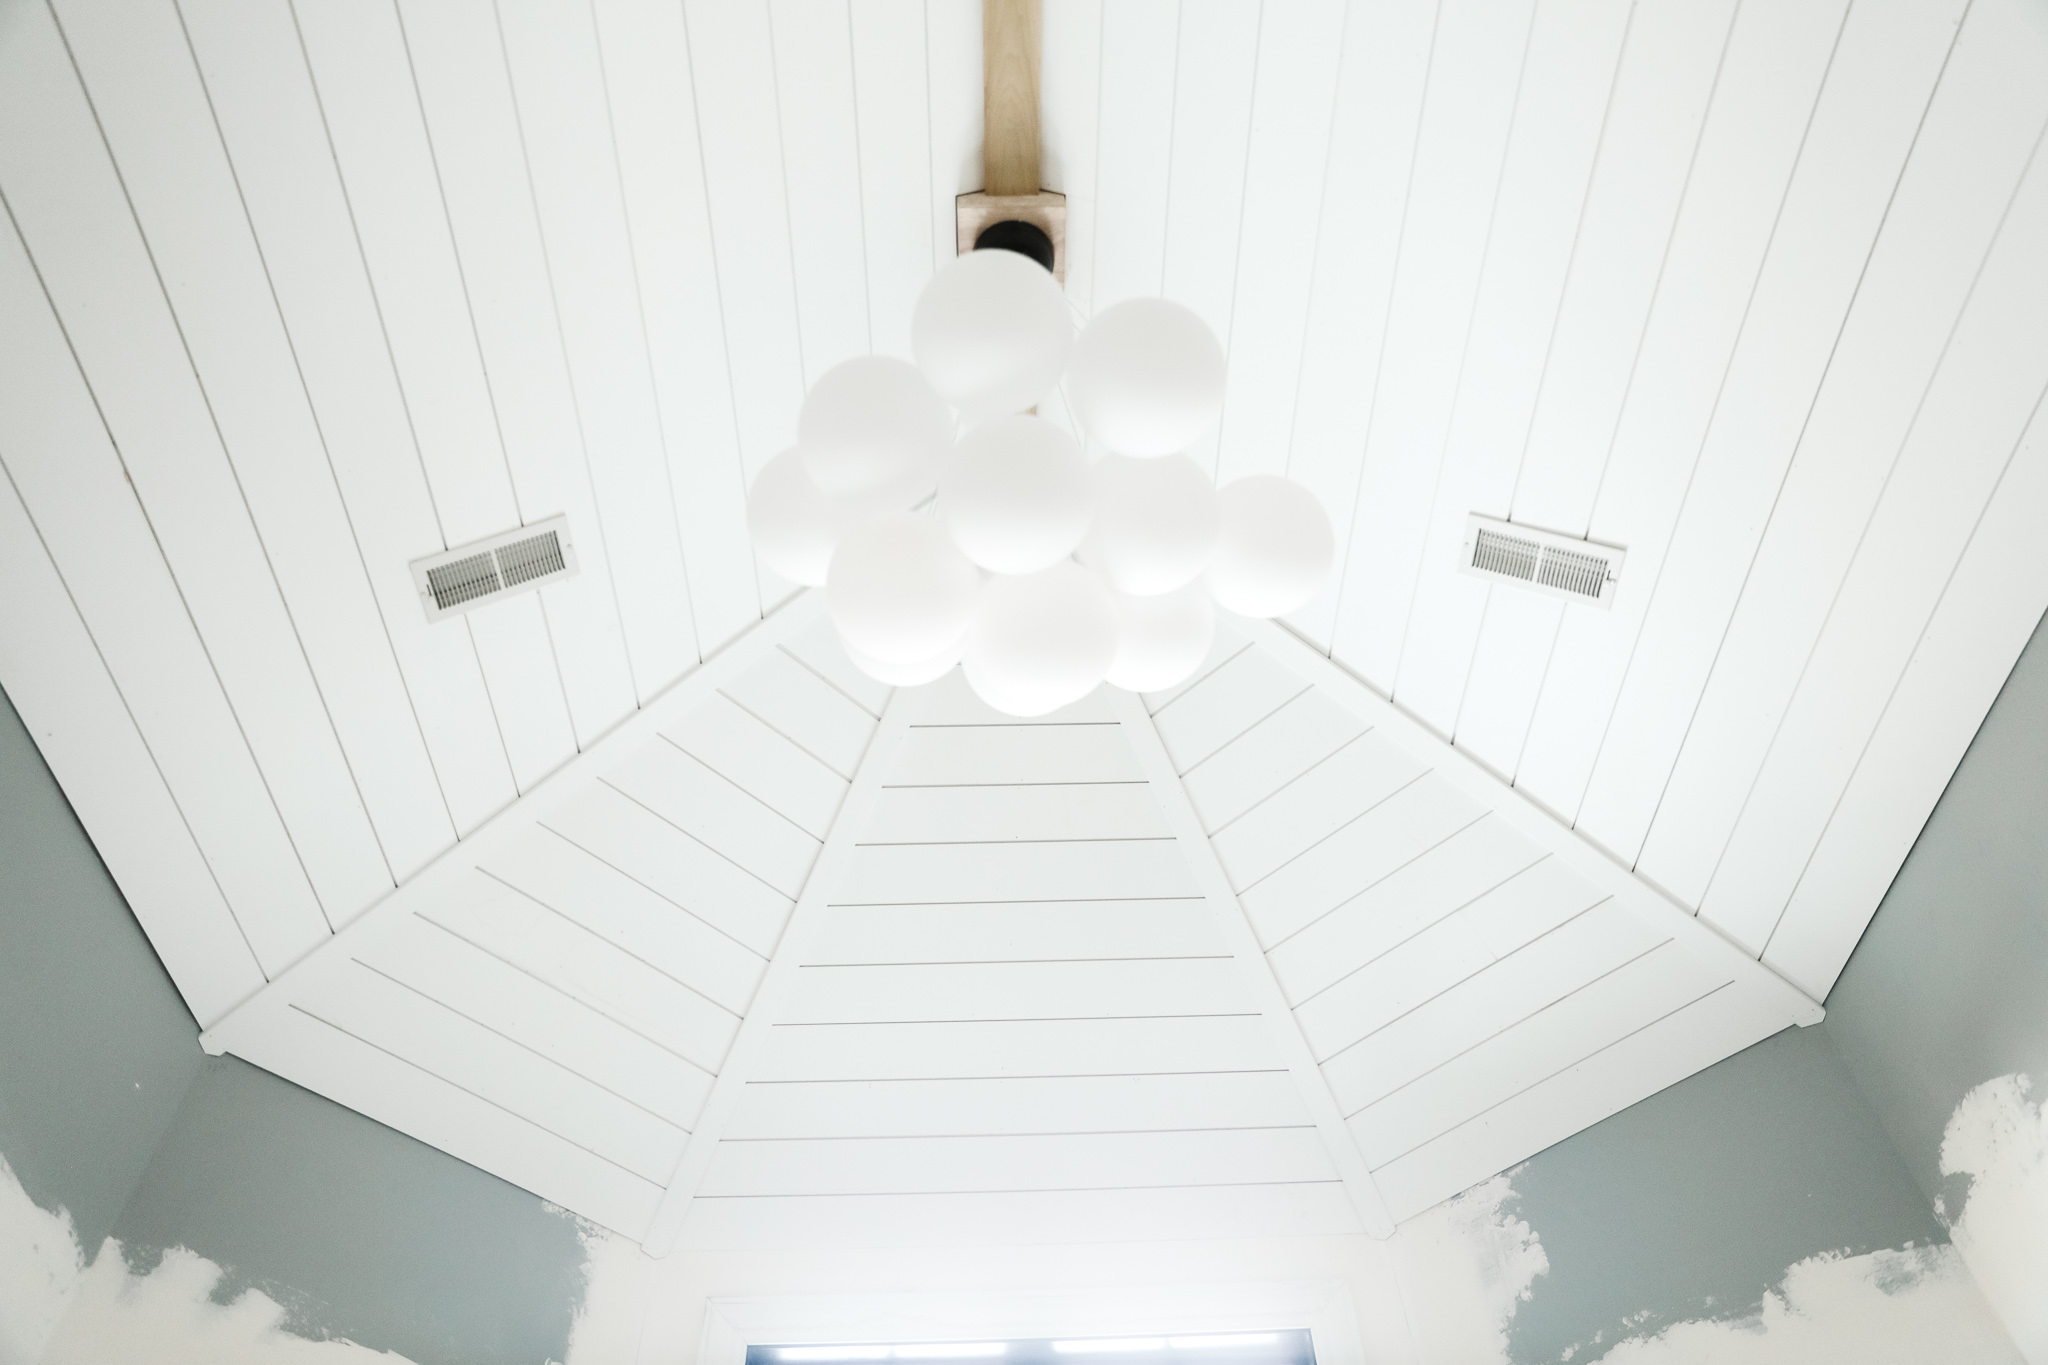
The ceiling the was the most difficult part, but only due to all the angles. We’ve used this same shiplap product in our closet and our bathroom, and it installs much faster when the surface is flat and squared off.
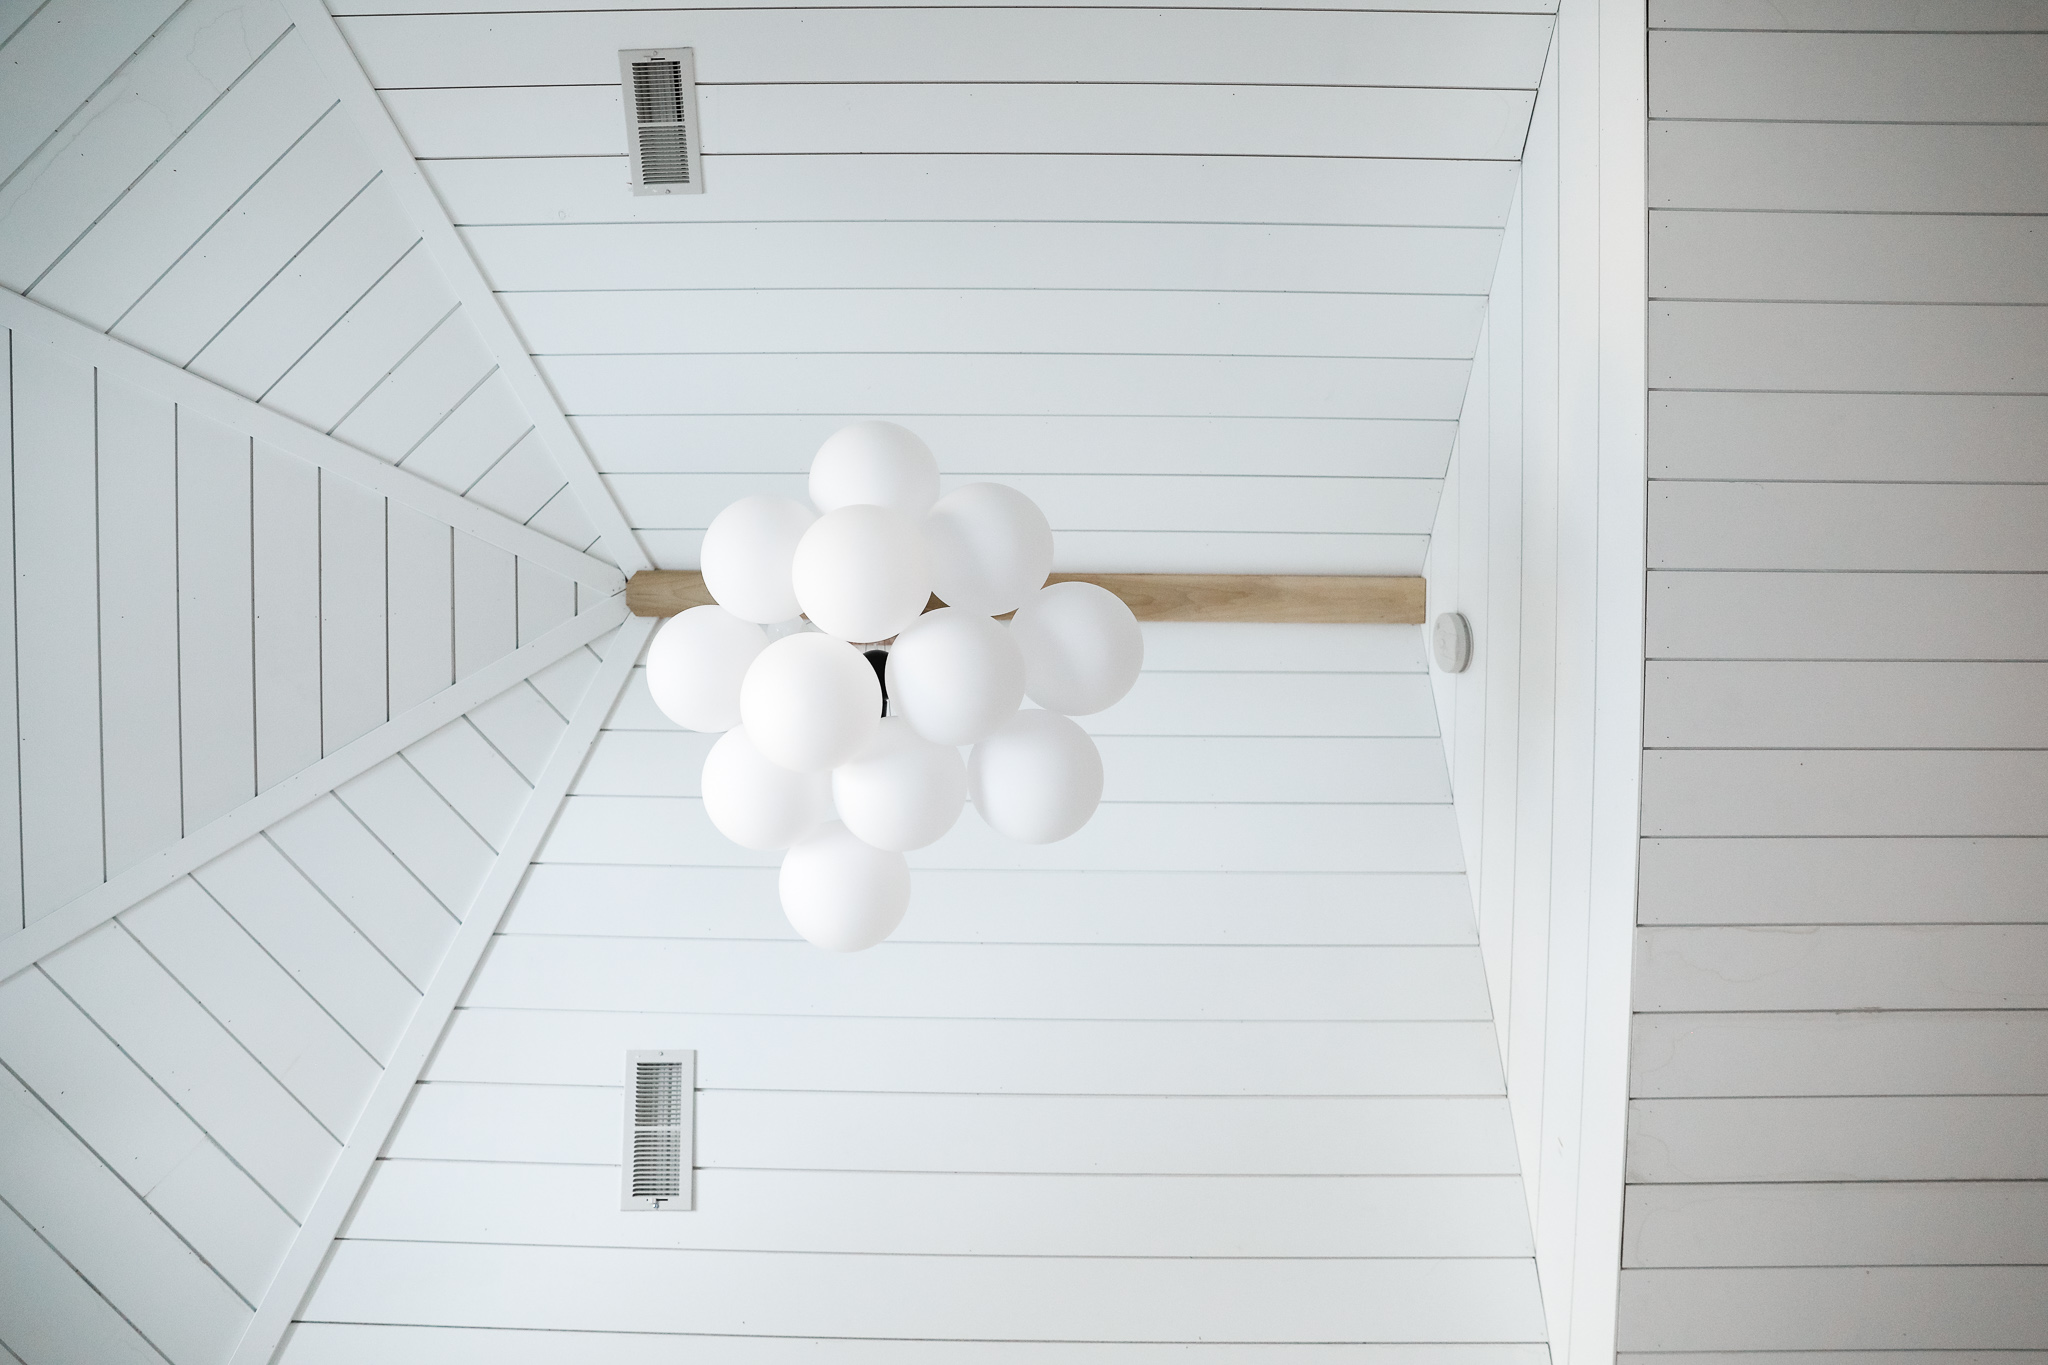
For this ceiling, every section was actually at a slightly varied angle from the section(s) next to it. The ceiling also waved slightly and where sections joined was jagged. This meant that we needed to install one board at a time and rip some of them down by 1/4-3/8 of an inch to keep the lines continuous around the room.

By taking small amounts off several boards in a row and using boards to cover the seams, visually all the boards appear perfectly lined up and consistent in size. If you let a gap go for too long, you’ll either end up with your boards not lined up or one board being cut down significantly so it visually looks out of place with the rest.

The seams for covered with a thin piece of MDF, and we used a finish-quality poplar 2×4 for the peak to give a bit of dimension. We couldn’t always count on hitting a ceiling joist with nails, so each board was glued with liquid nails and tacked in place with a brad nailer.
Materials used for this project:
• MDF Shiplap
• MDF Casing
• Poplar 2×4 (from a local lumber yard)
• Liquid Nails
Key tools used for this project:
• Brad Nailer
• Angle Tool (absolutely essential for getting all of our angles right)
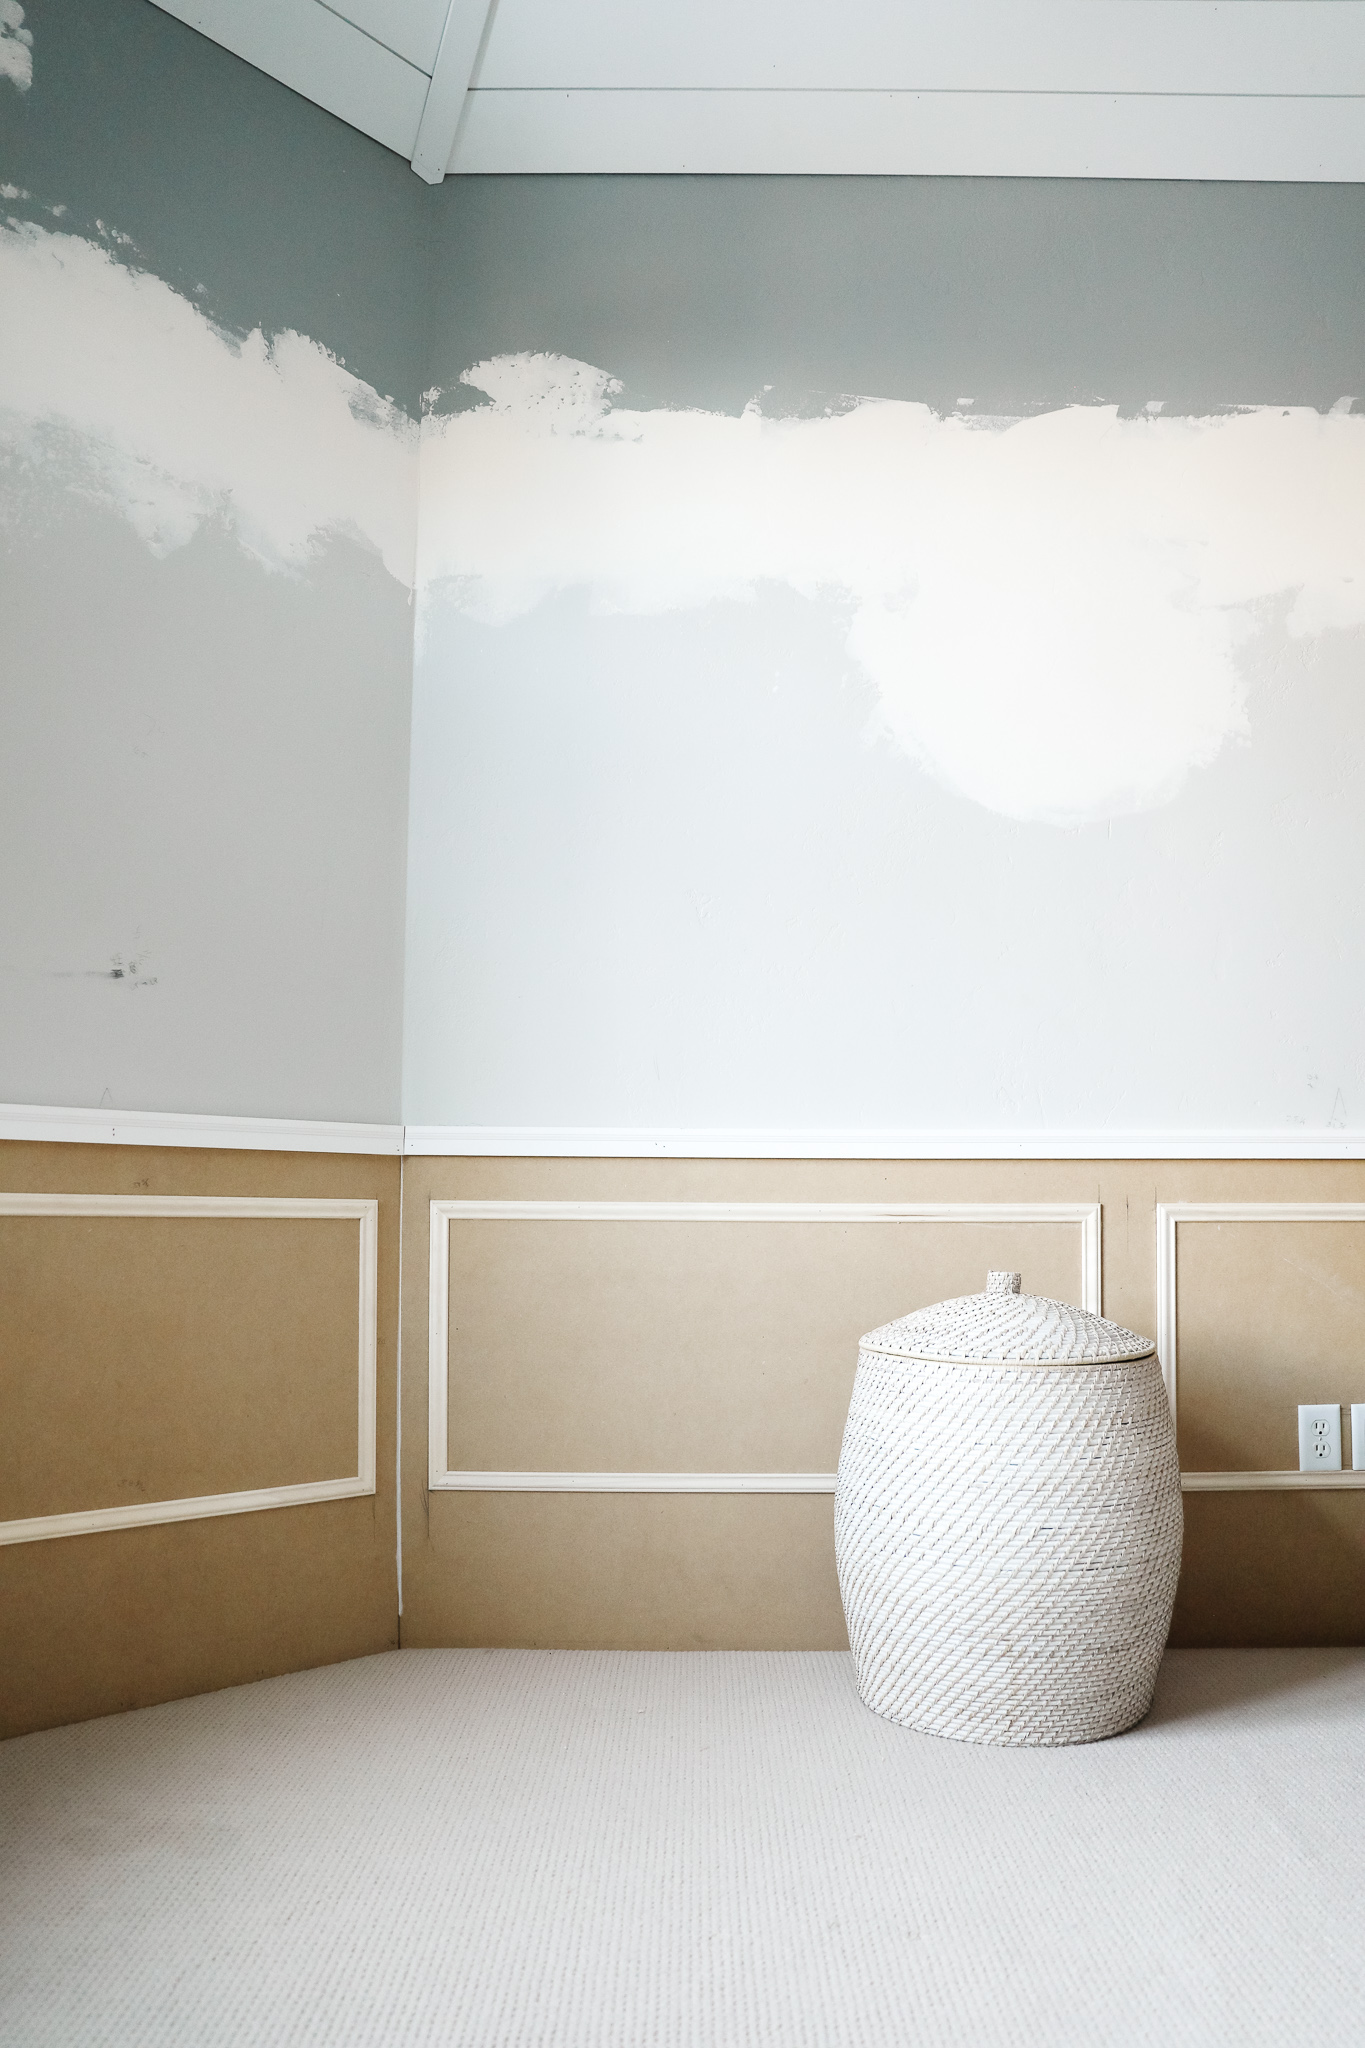
The wainscot was a bit more straight forward, though also time-consuming. We knew we wanted a smooth surface for the wall, and chose MDF simply because the alternative was lots of mud work – skimming, sanding, skimming, sanding, spongeing, sanding, priming. Opting for 1/2in MDF also allowed us to even out a lot of the waviness in our walls.
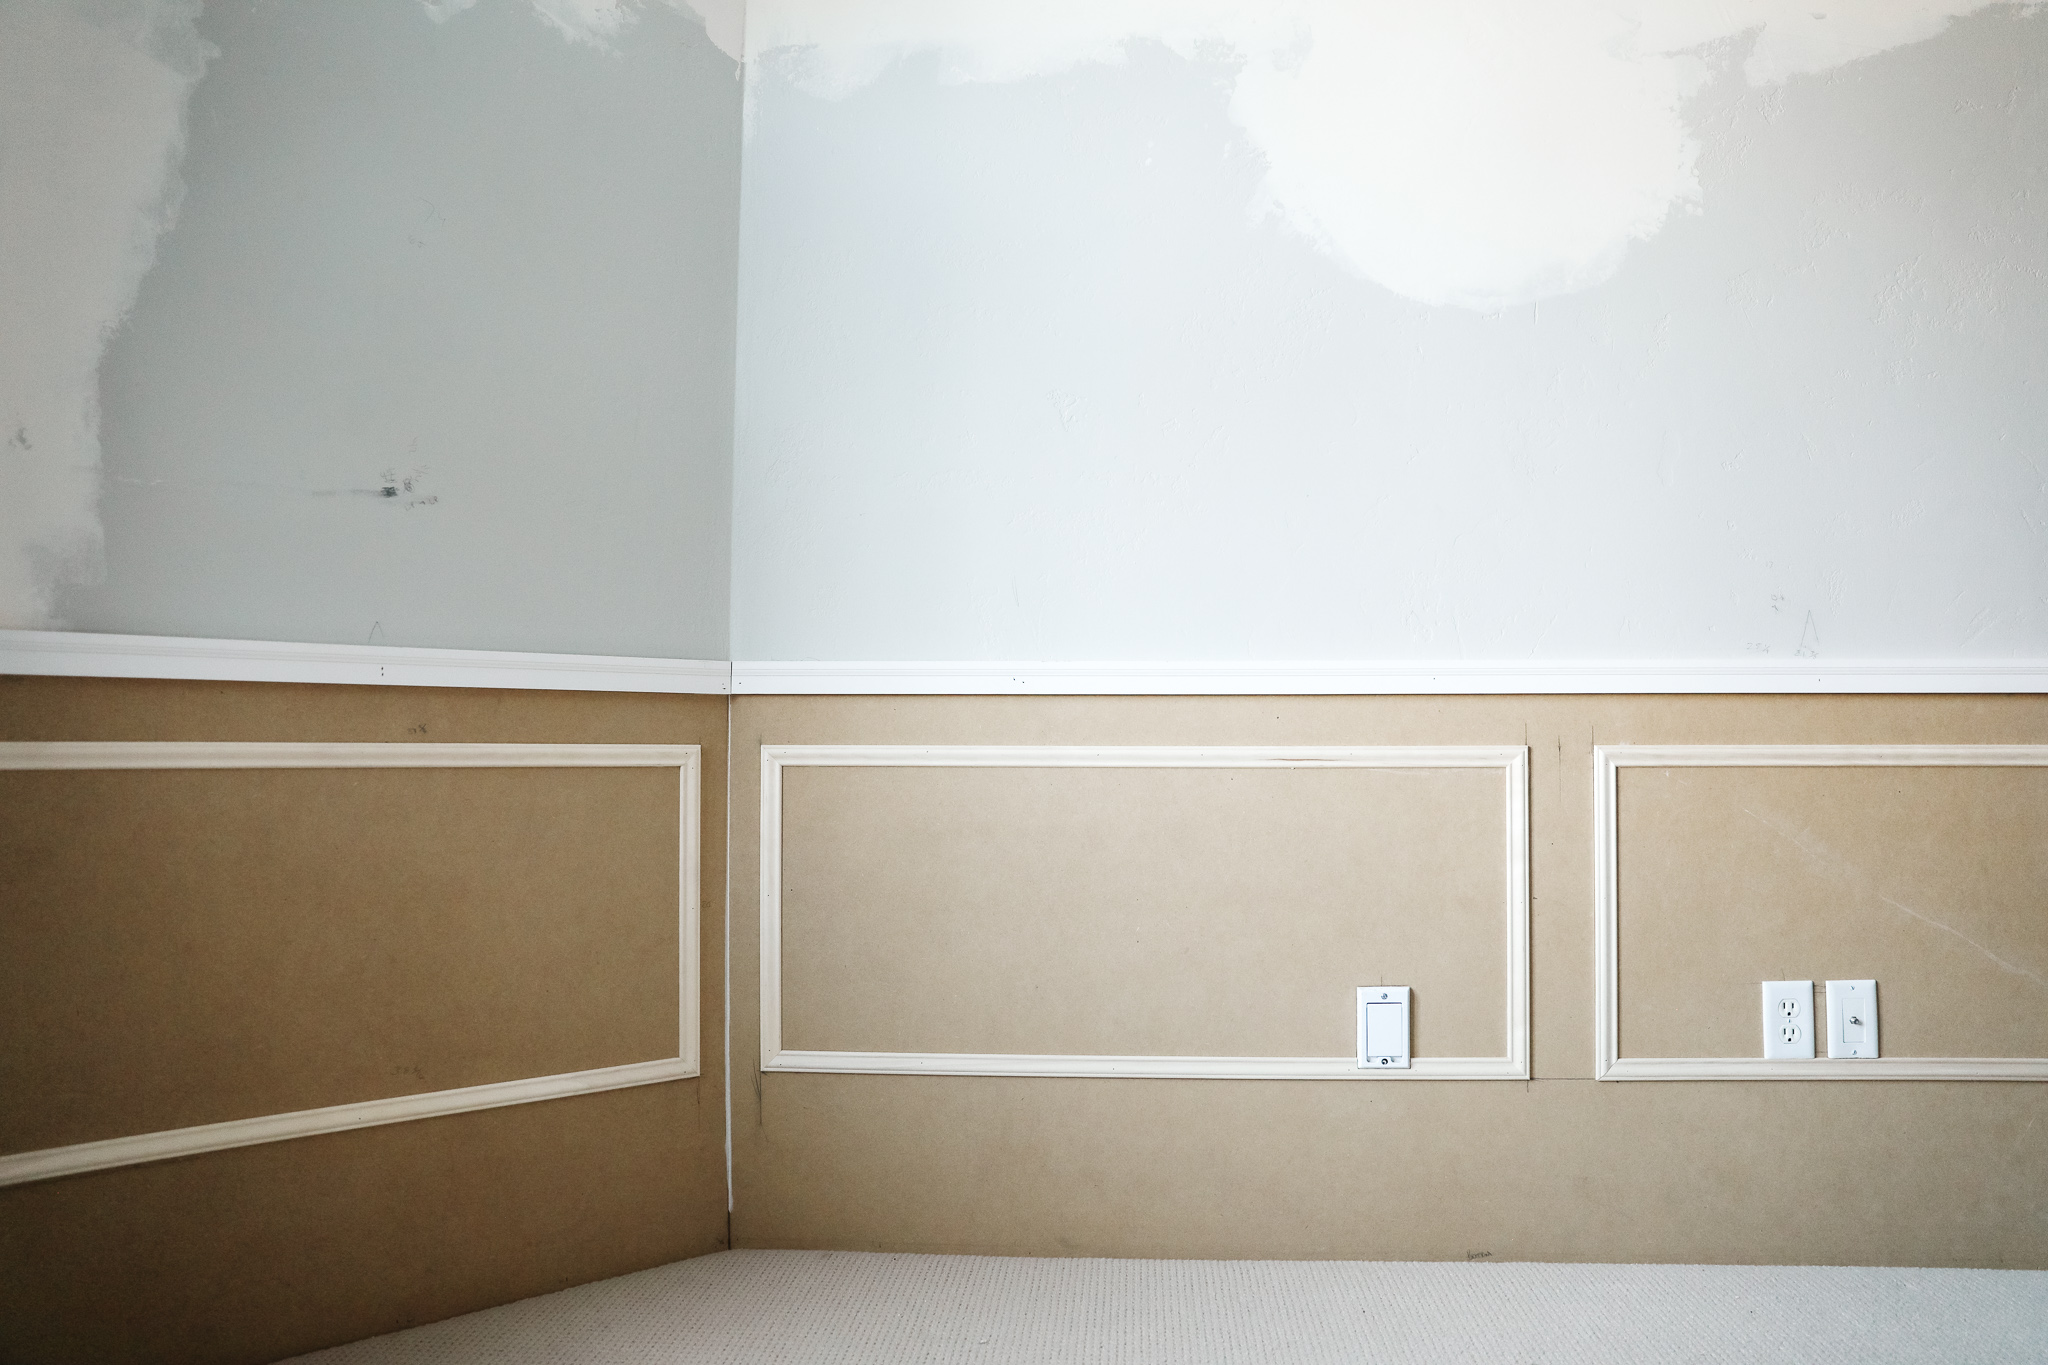
The “chair rail,” which is the trim that caps the wainscot, took a little more work and deliberation. Our door trim and baseboard is a little more substantial and clean-lined than most in-stock chair rail options we could find. So we actually decided to use a piece of brick moulding (used as trim on the exterior of doors) and ran it through the table saw to create a 1/2in notch so it could overlap the top of the MDF. It’s a much better complement to our door moulding and baseboard.
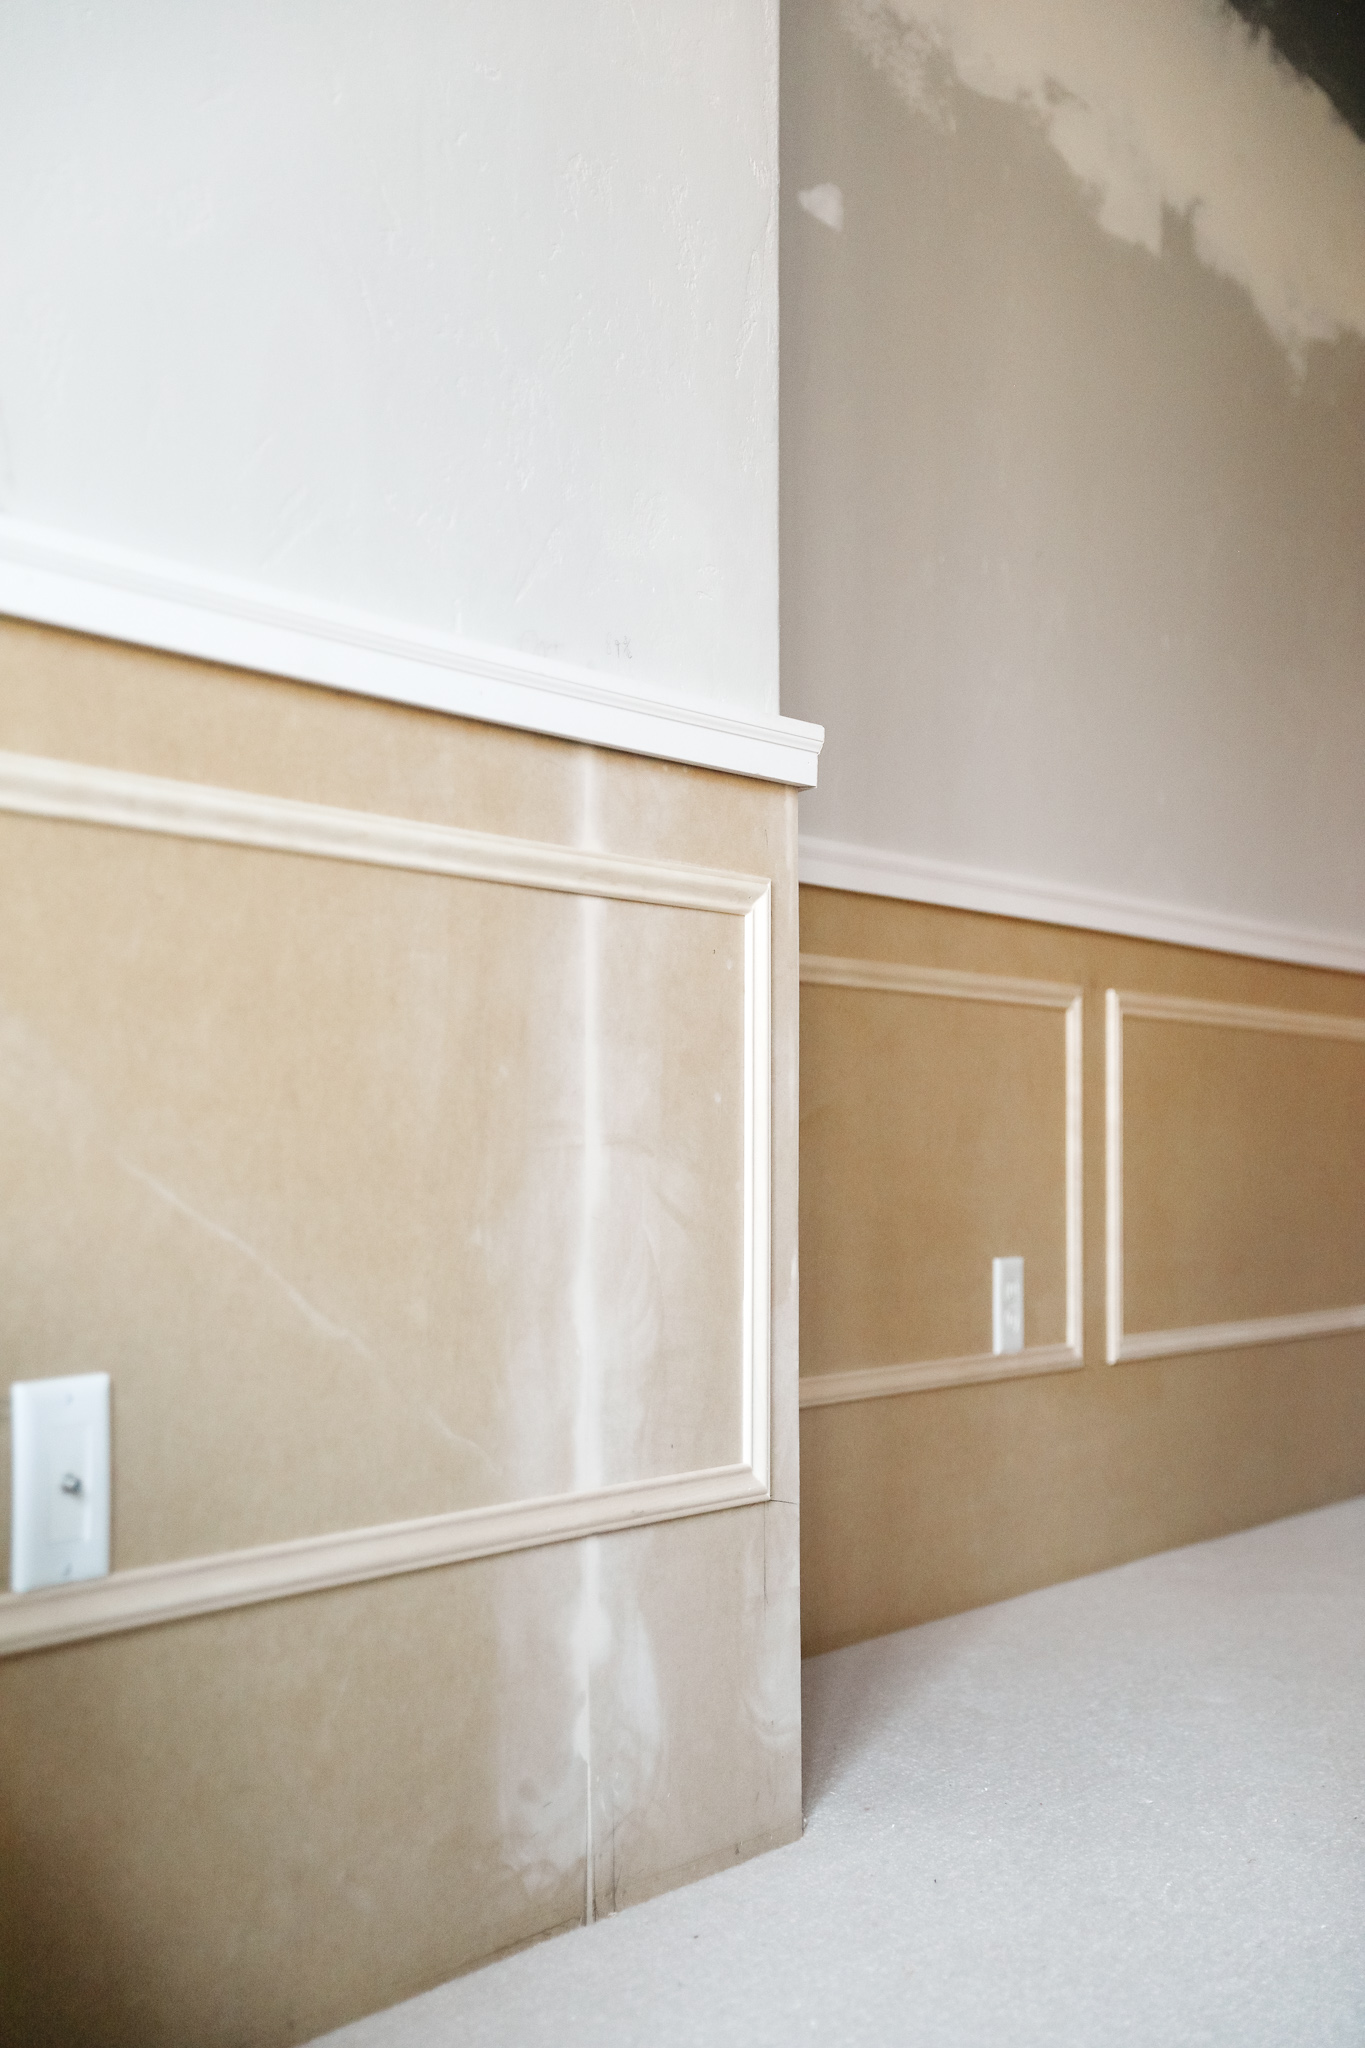
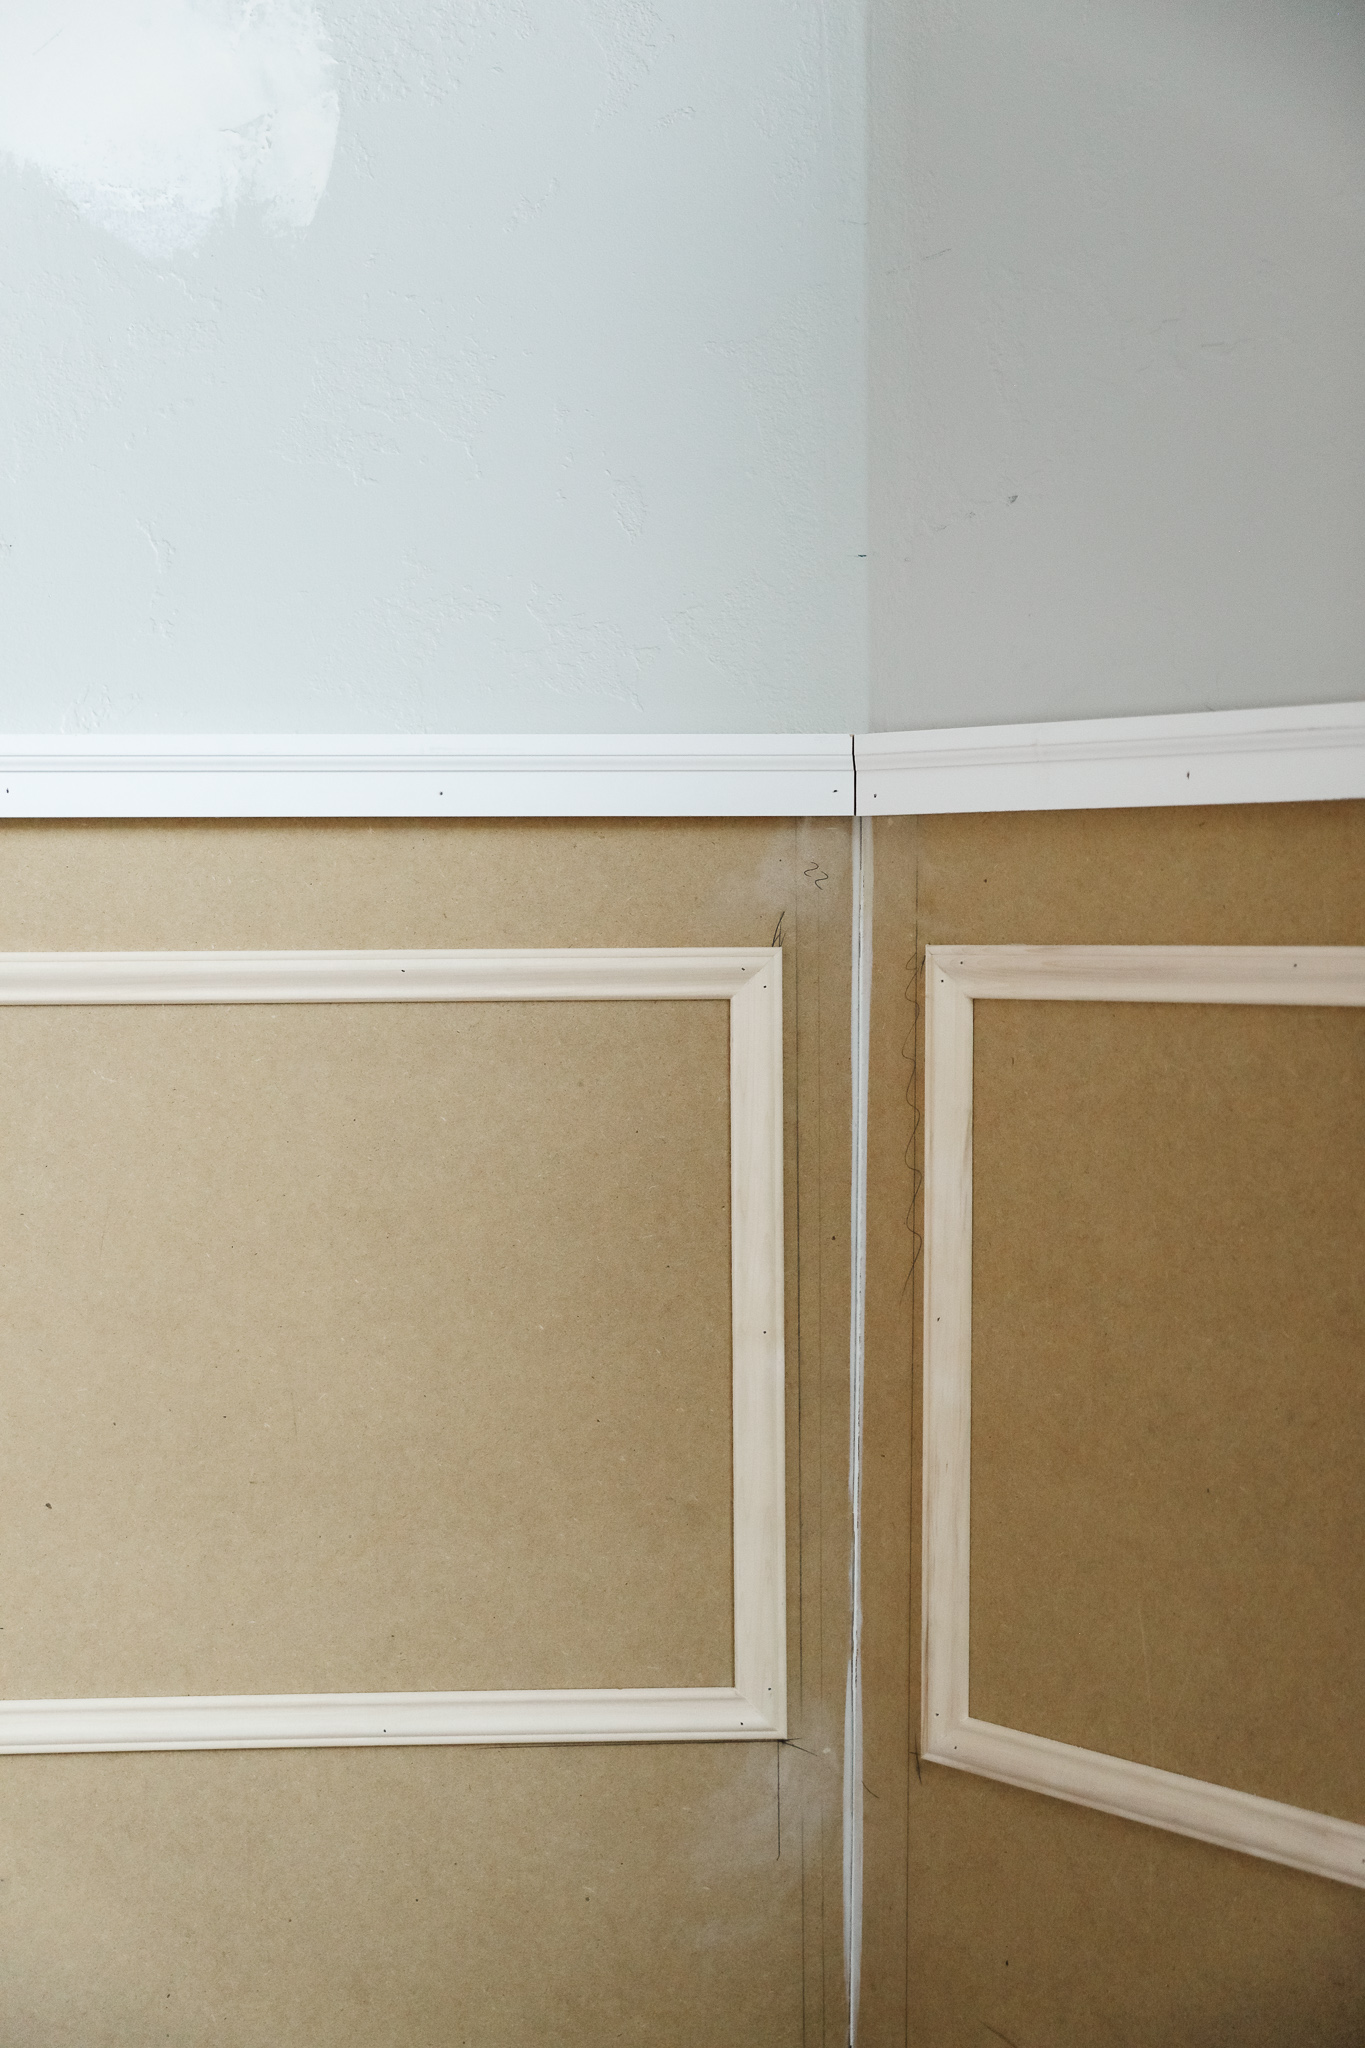
For the box detail we used rail moulding, spacing the boxes out 4 inches from each other, but only 2 inches from corners and walls.

We used a laser level to ensure the boxes looked consistent around the room, and used the back wall as a guide for general sizing. For the three segments on the back wall, we knew we only wanted one box on each of those. From there, we measured and divided up the adjacent walls so that the boxes were also rectangular and similar in length.
Materials used for this project:
• 1/2in MDF
• Brick Moulding
• Rail Moulding
• Liquid Nails
• Caulk
Key tools used for this project:
• Laser Level
• Table Saw
• Brad Nailer
Anyone who has tried to do any kind of DIY in the past few months knows that materials can be a bear to track down. Thus our lack of baseboards – been waiting on those for awhile now. But either way, painting starts Wednesday, with wallpaper going up next week, and we are so excited for Faye to have a room that reflects her personality so well.

Leave a Reply
What do you think?
Previous Post
Next Post


all the latest
Semihandmade
Our wood grain Shaker cabinet fronts were designed for busy, high-traffic homes like ours. Clad with durable textured thermofoils, this line is compatible with Sektion, Akurum, Godmorgon, and Besta cabinets from IKEA. It's the perfect, practical way to add the warmth of wood to all the rooms of your home.
Collaborations
learn more

next
Loloi
We have teamed up with Loloi to create a line of rugs that are as affordable as they are beautiful. This collection houses a great mix of traditional and modern rugs, in cottage-y colorways, as well as vintage-inspired beauties that you’ll want to roll out in every room.
Collaborations
learn more

next
STUGA
We partnered with Stuga on a line of hardwood floors — The Ingrid is really livable, and the color is very neutral. It doesn’t lean warm or cool, it’s that just right in-between. We have really loved putting it everywhere in our house. It’s the best jumping-off point for design, no matter your interior style. In addition to being beautiful, Ingrid is really durable — we have three kids, and we always have a home construction project going on. Ingrid stands up to it all.
Collaborations
learn more

next


SHop all
What We're Right Now
What We're Right Now
Looking for our favorite things? A place to shop our home room by room, or just catch up on what Julia's wearing / loving right now? Browse the CLJ shop.
Loving


Portfolio


Design
Befores, afters, mood boards, plans, failures, wins. We’ve done a lot of projects, and they’re all here.
BROWSE BY CATEGORY
let's break this thing up
We have a long-standing relationship with DIY, and love rolling our sleeves up and making it happen.
Projects
Even when you don’t want to rip down a wall, you can make that space in your home better. Right now.
read more
read more
read more
02
01
03
looking for inspiration?
A reader recently asked me if I’m starting to fully embrace traditional style and whether we still consider our house to be a “modern Colonial” and why. It was a really great question and so timely — I had really just been thinking about my approach to this home and how my style has changed […]


SEARCH THE BLOG
We've been doing this since 2009 and we've posted a whopping 24145+ blog posts and counting. You might need a little help searching, huh?
looking for something?
find stuff like:
")
Can We Send You Our Love Letter?
Another way for us to stay in touch! Joining our weekly newsletter gives you access to exclusive content, never-before-seen photos, your questions answered, and our favorite DIYs. Sign up below!
Follow Along on Instagram
Welcome to our online community where we've posted home, DIY, style, renovations, and family since '09. Renovating our #cljmoderncottage in Idaho and headed for new adventures in Raleigh, NC. #cljfam #cljtransformations
@chrislovesjulia


Links
Get Around
Make yourself right at home
Portfolio
Design
Casual Friday
Projects
Lifestyle
Gift Guides
All Posts
Shop
Love where you live.
Social
RivrLinks
Links
Get Around
Make yourself right at home
Portfolio
Design
Casual Friday
Projects
Lifestyle
Gift Guides
All Posts
Shop
Love where you live.
Social
RivrLinks
I’d love to see a picture of the paneling around the closet. I’m following your instructions for my daughters room and I’m feeling a little stuck around the closet! I love this so much!!!!
That light fixture! Amazing style. Would love to know about the carpet please.
That view of that photo shot straight up to the light fixture on the ceiling from directly below is amazing. If I recall correctly, you’re painting the ceiling a shade a blue and with that light fixture, it will look like clouds in the sky. So pretty! Your daugher is a lucky girl. :)
Light fixture looks like balloons… Will you be painting the lamp black pieces white? Is it paintable?
I am renovating a large 1886 Herbert Langford Warren Shingle style house myself (8 years in and still going, lol!). I relate to and appreciate every detail you are referring to and the work in this already stunning space is outstanding, Your daughter is going to love it!
Can you source the light fixture.
Here’s a link! https://rstyle.me/+DBKkv7U5_ufRnRiieYsk4w
That planking, wallpaper, and molding are all the details that are going to make this room so incredible- I can’t wait to see how it comes together! How fun to have a little girl who is so invested in the process, all boys over here and currently working on my littlest’s room and he could care less, haha!
I am so excited for this! Also, I know there will be wallpaper on the walls soon, but just wanted to say how I’ve grown to love the patches of white/gray-blue/gray on the walls because the current look reminds me of clouds and the sky!
Where is that gorg white basket from?!
Serena & Lily!
So pretty! I love how the light fixture looks like a cloud floating in her room when you look up at it!
Wow – this looks like a true labor of love. Did you all consider beefing up the piece that runs along the top away from the light fixture? Maybe matching the width of the square mount so it looks like one beam? Feel free to totally ignore my question too – hesitated to even ask/mention an alternative because it’s beautiful as is.
I’m sure you’ll share at some point, but I would LOVE to know where that light fixture is from!
It is this one! https://rstyle.me/+DBKkv7U5_ufRnRiieYsk4w
The ceiling combined with the light (which reminds me of looking at clouds as a child) is magical.
Excuse me while I stare at those ceiling lines all day **swoon**
WOW. This looks incredible. That ceiling! I cannot wait to see it all painted. What a dream!
That ceiling is AMAZING! What beautiful work. Can’t wait to see it all painted. Have you decided on a paint color for Polly’s room as well?
Not quite!
I love, love, love all of the details you added
to her room!! It was a beautiful room to begin with, and it’s all highlighted SO well. Great job!! ????
Details are everything! The ceiling was definitely a labor of love!