Alternate Title: Greta’s Butterflies
You see, Greta has a thing for butterflies. Her last room had a wall of butterflies above her bed and when we moved I packed them carefully back in the box to be used in her new room and I. cannot. find. that. box! Greta and I opened every unopened box from our move and still no luck. It’s hiding somewhere and I’m still on the hunt.

In the meantime, I needed a backup plan. She still really wanted butterflies in her new room and I wanted to give them to her. Taking inspiration from this piece, I ordered this butterfly specimen poster from Urban Outfitters for $24. The quality is really nice. The paper has an almost canvas feel to it. Greta’s eyes lit up when she saw it, “My butterflies!” She would be happy just having it taped up on her walls, but I, of course, had plans to add a vintage-looking frame before hanging it in her room.

Ta-da! Here’s what I did:

I gathered some 1.5″ thin pine for the back piece and used leftover white oak we had cut to the same size for the front slats. The oak was considerably denser and heavier and I didn’t want to risk ripping the poster (even though it is thick itself), so I used pine on the back. All four slats got a coat of walnut stain.


Then we pre-drilled just what would be the front pieces (the oak in our case) for 2 screws per slat that would connect the front and back pieces of wood once our poster was in between.

The last step before sandwiching the poster was attaching my hanging string. I found this cute red and white twine at my craft store. I just eyeballed a string length, tied a little knot and glue gunned it in place. Make sure you flatten that glue dot so your wood pieces will stick together flat, as well!

I put a line of glue to adhere the paper to the wood on both ends and when that was set, I also glued the wood together. Even though I was screwing the slats together as well, the glue gun was hot and I figured a little extra enforcement couldn’t hurt.

The last thing I adhered was a little label frame I spray painted gold and slid in an ivory card that I wrote “Greta’s Butterflies” on. I drove four screws into the front slats (2 on top and 2 on bottom) and that was it!


A “vintage” poster hanger in about an hour. Greta has her butterflies again (I think she likes these ones even better!). All is right in the world.
Have the best weekend, you guys!


Hey Julia, do you remember where you bought the label frame from? Trying to find something like the one you used but I cannot seem to locate one anywhere! Thanks!
-Colin
ohhh great idea….got a periodic chart at Paper Source for my daughter who is a chemical engineer and couldn’t decide how to frame or mount it….this is PERFECT! Thanks!!!
I was inspired by this post to decorate my office and purchased a couple of the Paper Source wrapping paper prints. I stained and cut a free yard stick (Culligan booth giveaway at a home and garden show) and attached clips. I have gotten complements from everyone that walks by! Best project under $10! Thank You!
Wow, your handwriting is amazing!
Thank you, Christiane! I always tell people to just write as fast as they can and it will turn out the best.
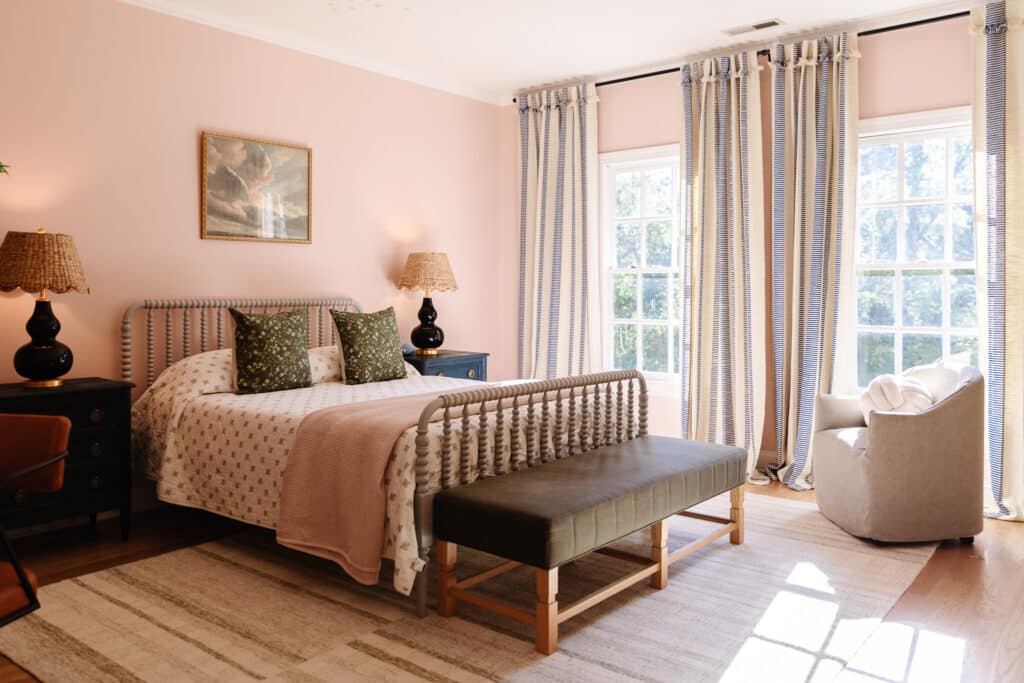
I know I should be patient for the big reveal, but I’ve been hunting for the right pink for my little girl’s room, and this is it! Any chance you can tell me what color that is?
Definitely! It’s Clark + Kensington’s Rose Quartz. You can see those details in this post: https://chrislovesjulia.com/2014/09/34-painted-pink-walls-in-gretas-room.html