
Back in 2019, I wrote a post call Look Up, Ceilings Matter. It was filled with inspiration and thoughts on how I wanted to stop neglecting our ceilings and really start incorporating them into my design plans for our spaces. Since then, we’ve wallpapered ceilings and painted them and planked them and added beams. And just this week–added beadboard to our bedroom. I used to forget about ceilings when thinking about adding architectural details to a room, but now it’s my favorite thing to do! It’s the fifth plane that often gets overlooked and since paying more attention to, I have found our spaces to feel so much more dynamic.
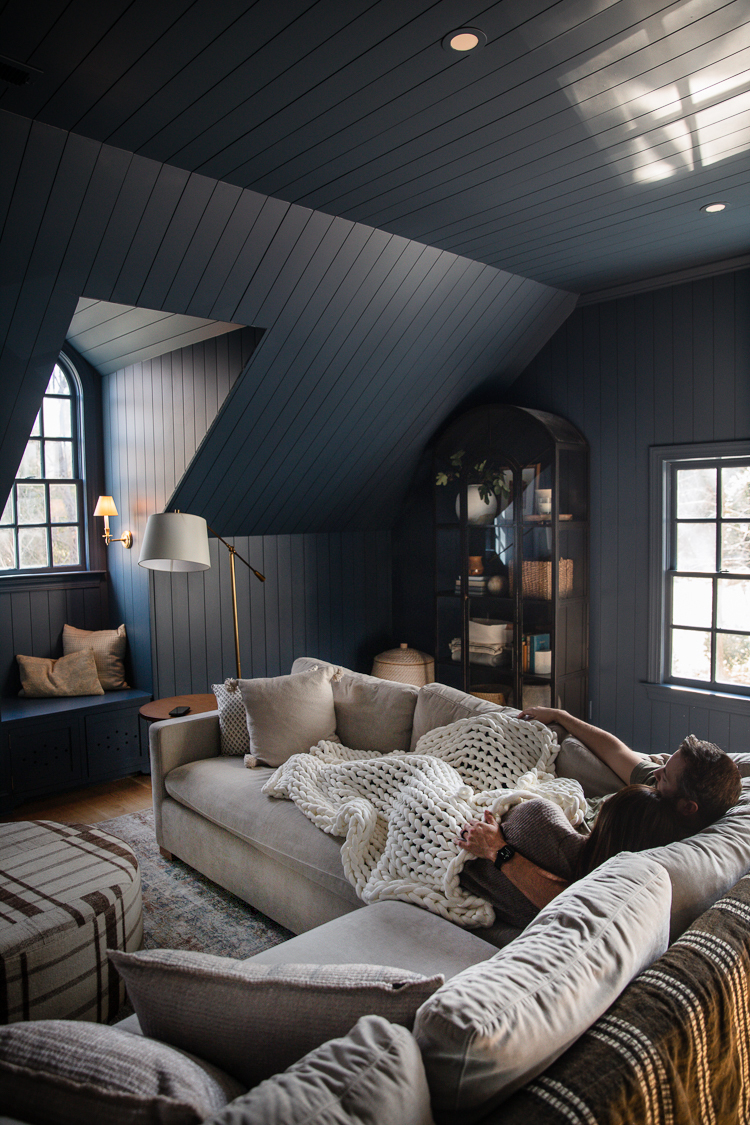
Charly Sectional | Rug | Floor Lamp | Side Table | Arch Cabinet | Sconce
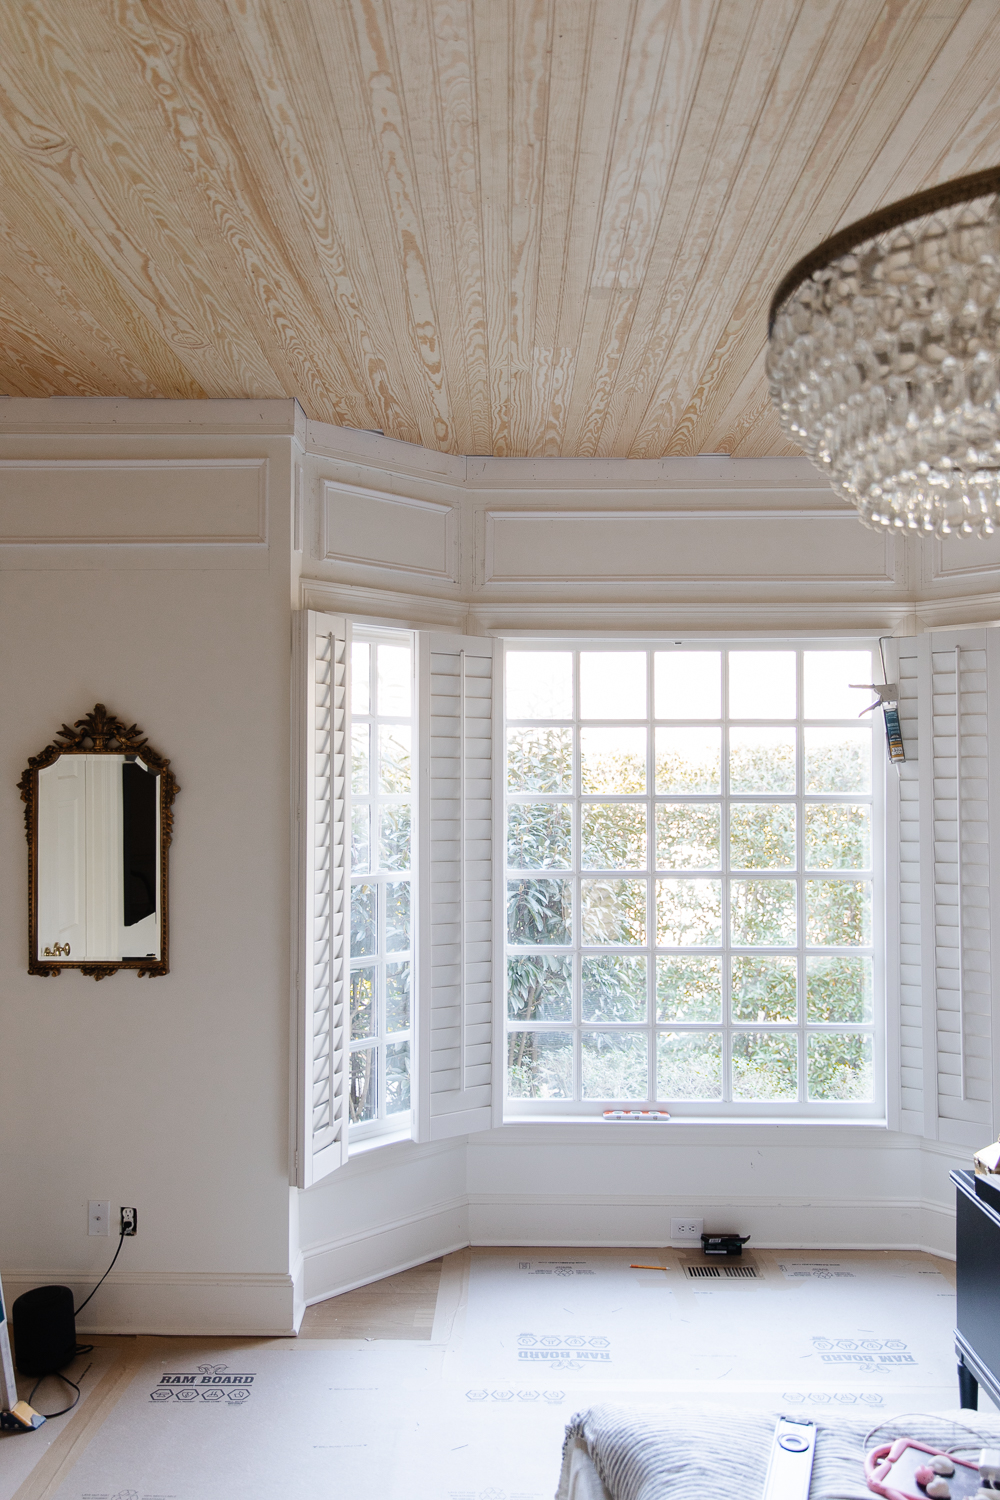
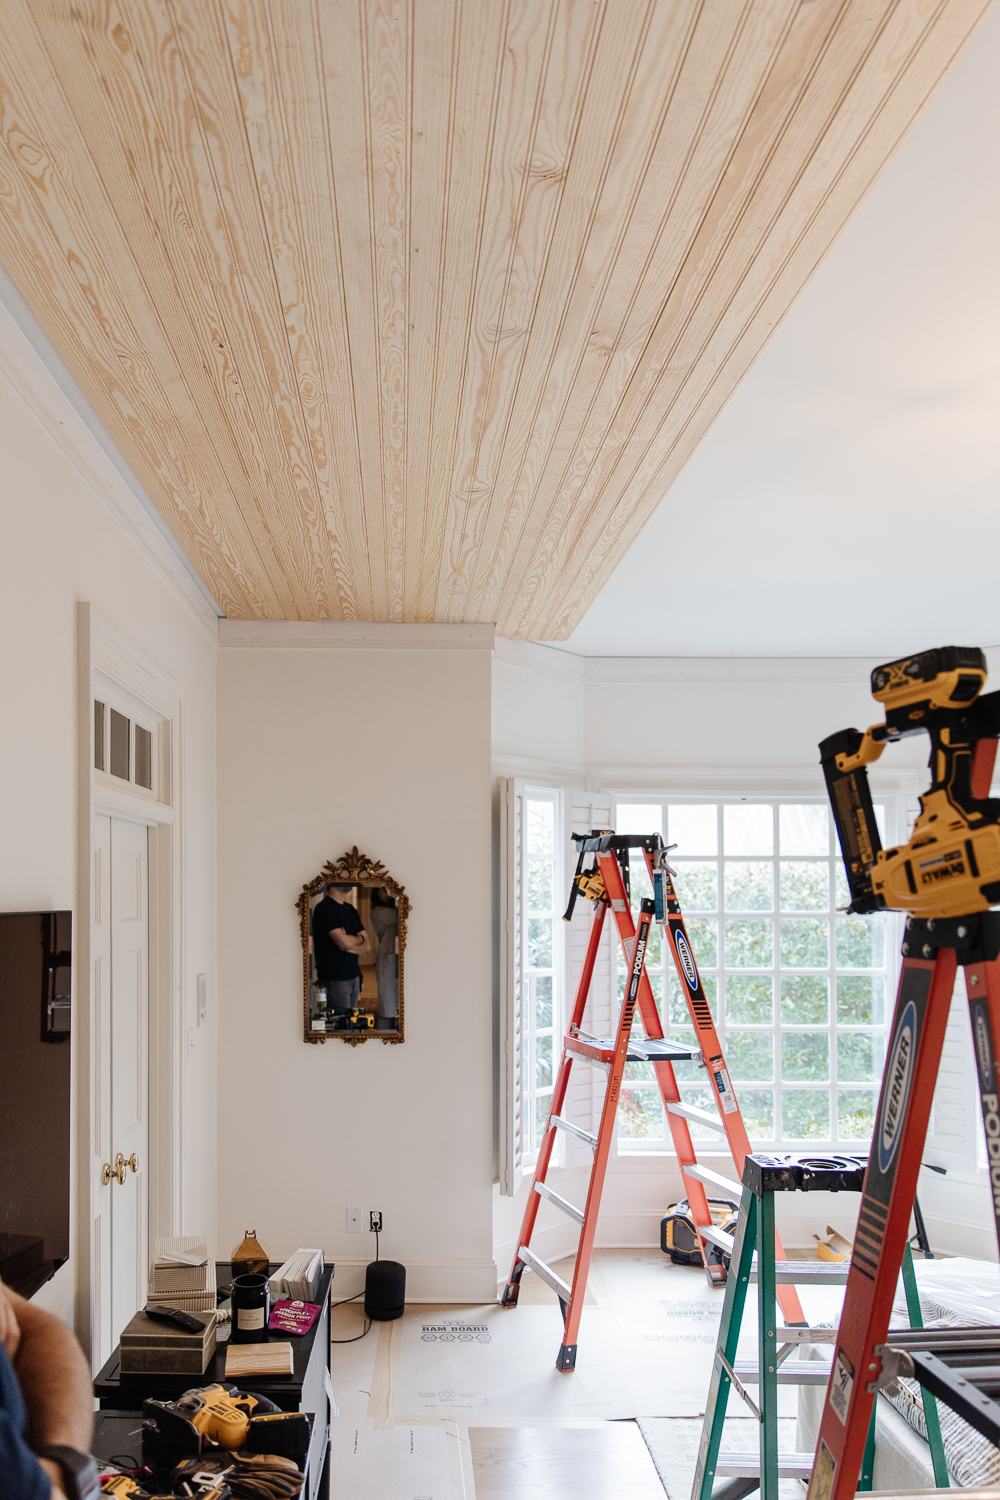
As we move into phase 2 of our bedroom renovation (phase one happened before moving in), we are making dimension a priority. In phase one, we painted everything white to give us a blank slate after we removed the tray ceiling and closed in the doorway leading to, what’s now known as, the study. Although we prefer the fresh white (SW White Flour) over the pale green color it used to be, it has felt like we’re living in a white box! We are craving dimension and character and warmth thought–let’s start with the 10 foot ceiling!

Rug | Bed | Bench | Art | Lumbar Pillow | Floor Mirror | Chandelier | Swivel Chair
Originally we considered adding the same 5″ planking that we’ve used so many times in our last house, and in the bonus room. Then I thought of using beadboard because of the extra traditional beaded detail it has to offer. A good rule of thumb any time you add a ceiling or wall treatment–any architectural or decorative element, really!– is to repeat it at least once throughout the house. It can feel disjointed if you don’t tie it in somewhere else, so I’m keeping this in my back pocket as something to repeat as we keep working on our home.
Installation was very similar to planking tutorial to the bonus room, but we did make a few adjustments.
Materials
- 16′ Beadboard (We ordered through BMC and they delivered all the material to the house!)
- Liquid Nails
- Brad Nails
- Bondo Wood Filler
- Wood Filler
- Paintable Caulk
Tools
Plan For Your Room
We did get some questions about deciding which way to run the material. Fortunately, you only have to make this decision once for your house! When thinking about what direction to lay these boards, we took into account all the rooms on the first floor and if we were to add boards or beams to those spaces, which way would they run. In the dining and living room, it made the most sense to run it parallel to the opening to the spaces so we laid these boards in that same orientation. This worked out well for the bedroom because the 16′ lengths meant a lot less seams on the ceilings. It can be done but it’s not ideal.
One thing to also consider is which way your ceiling joists run. If your beadboard runs perpendicular then during install you can just pop a brad nail into each board right on the joists. Ours were not running perpendicular, so we used glue (liquid nails) and shot a brad nail in at a diagonal to keep it in place.
Make Your Cuts

For this job, we didn’t make all the cuts up front, instead opting to cut as we go. We also mitered all the joints which disguises the seams better. Of course we’ll still fill the seams at the end but this step will make all the difference. This is something we did differently from the planking in the bonus room to avoid any blunt joints. You can also see that where the planks meet the wall, the cuts are pretty casual since this will get covered with the hunky crown we removed before adding the boards.
Install the Beadboard

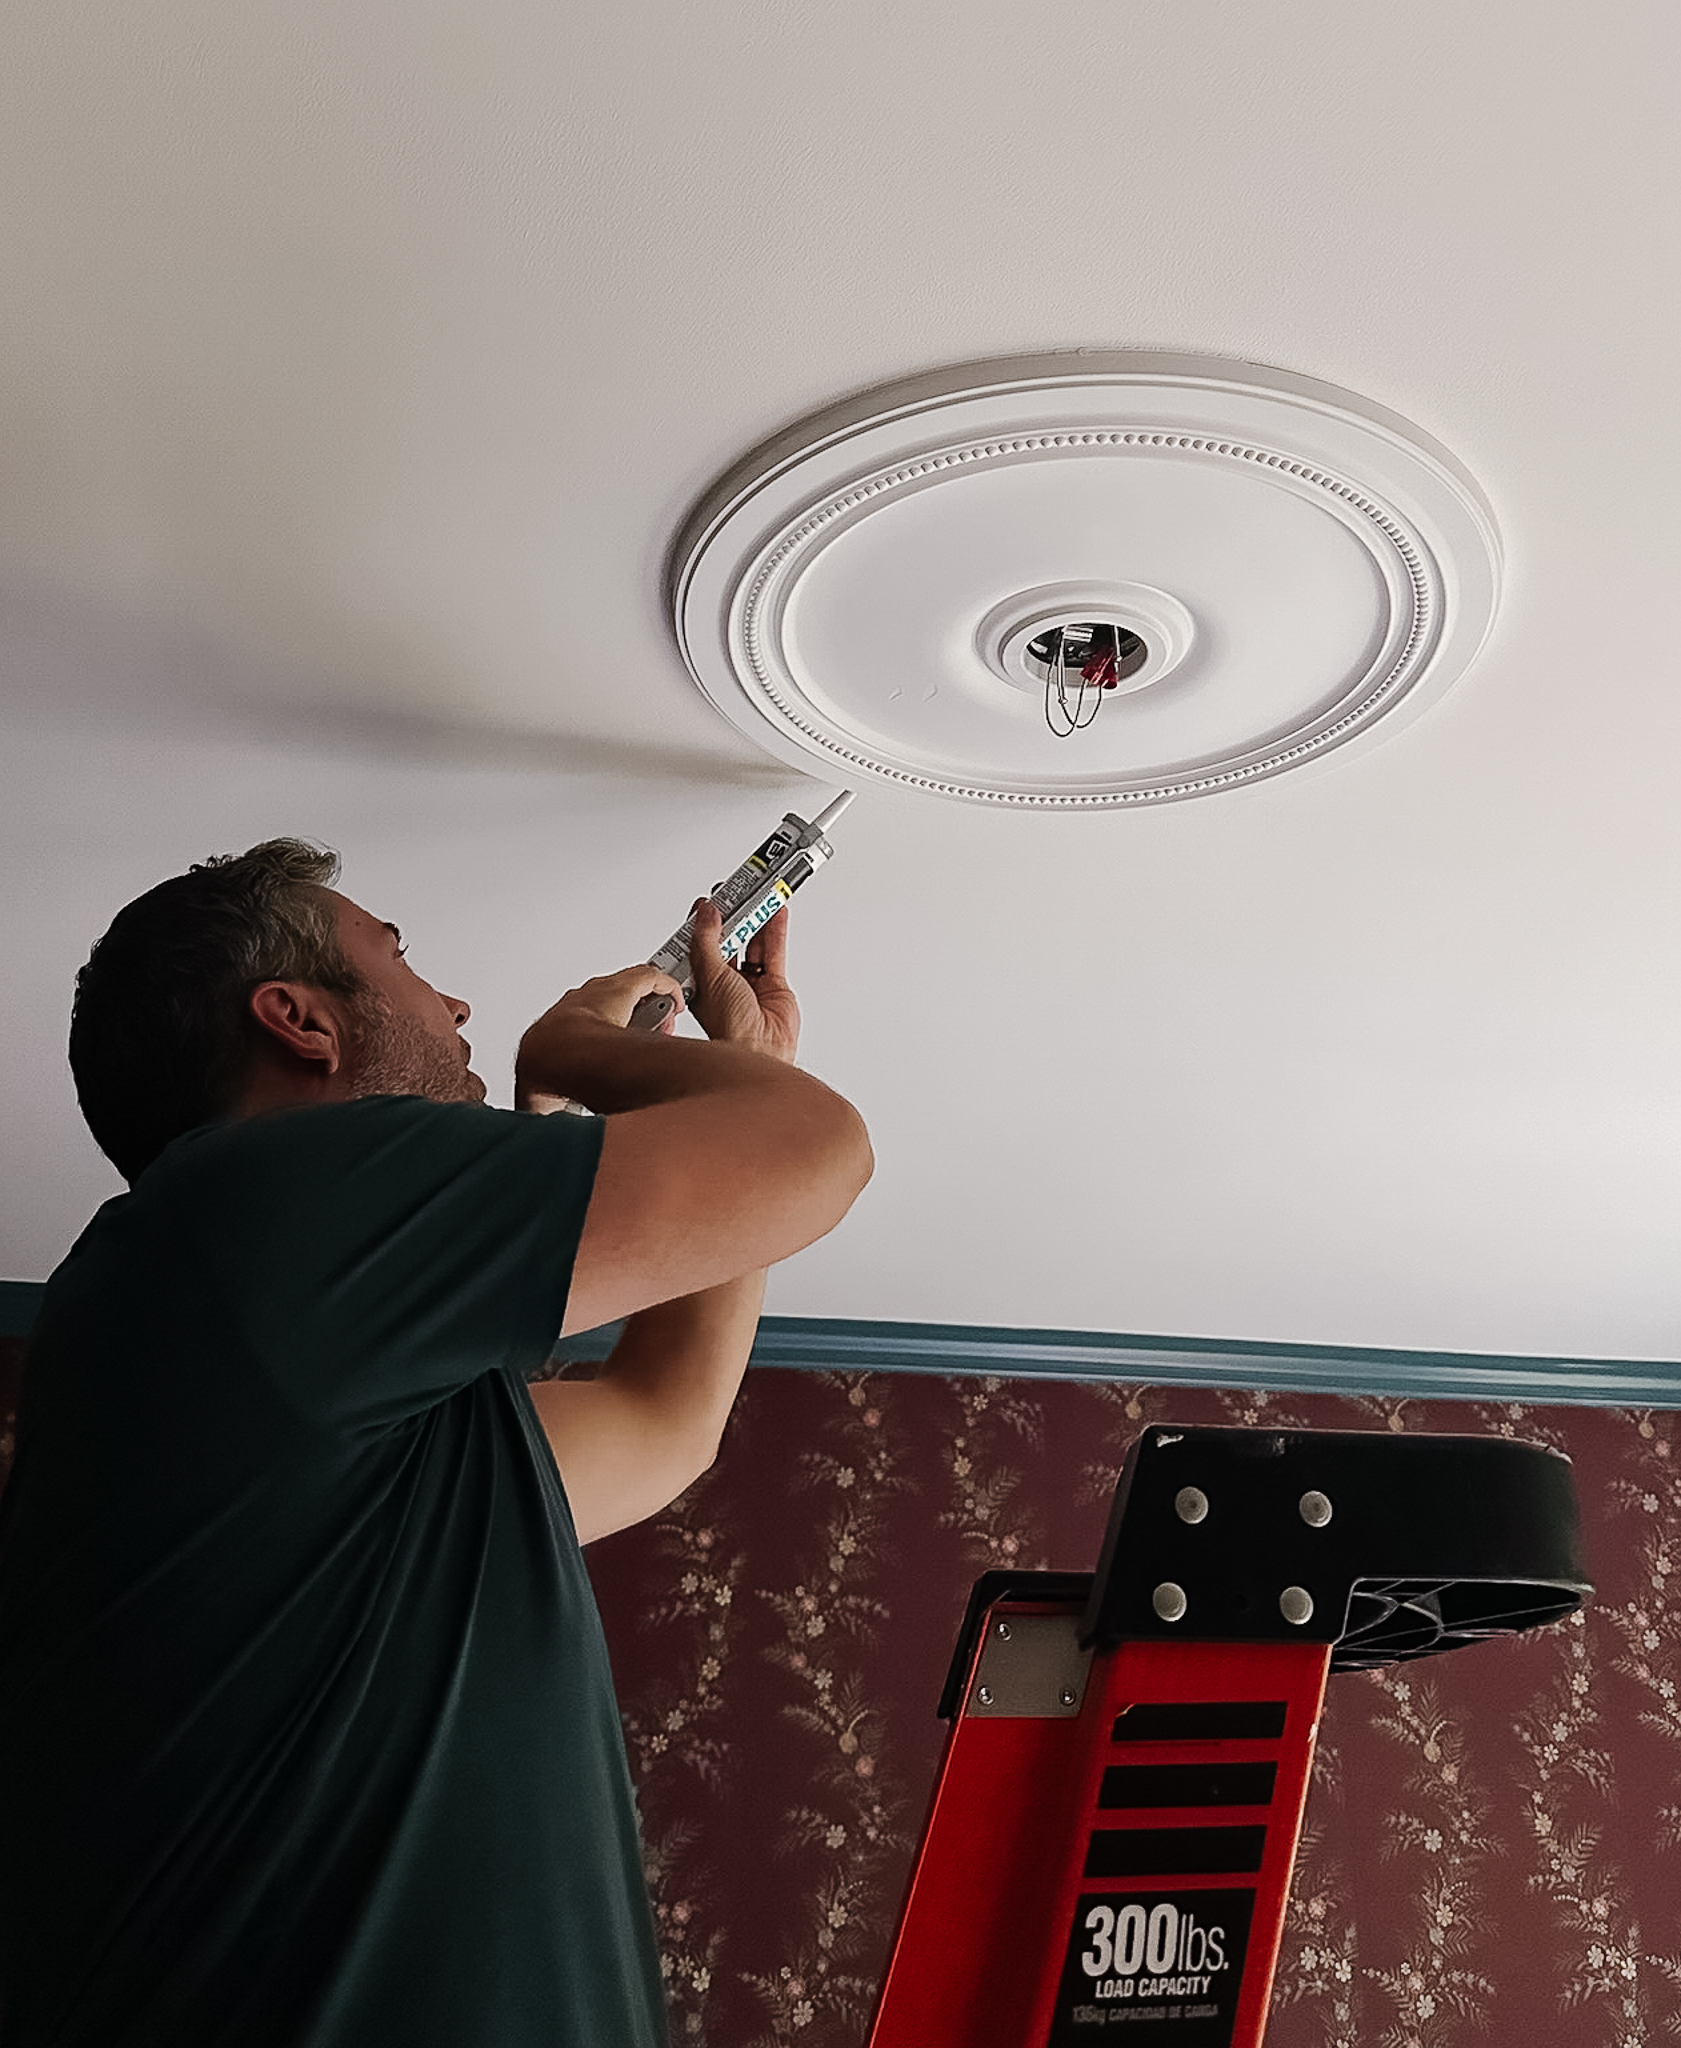
In our case the planks run parallel to the joists which requires applying a generous amount of liquid nails to the back of the boards. When it comes to using your brad nails, installing them at a diagonal will hold the boards in place when not put directly into a stud. We also recommend avoiding nailing in the little divots of the beadboard to make your life easier when it’s time to fill. The only cut-out we had to make for this ceiling was for the light fixture and for that we used a circular hole bit attached to the drill.
Fill and Caulk!
Time to fill all those pesky nail holes and seams with some wood filler! Apply, let dry, and sand down. Sounds simple enough, but for an entire ceiling it can get tiresome. Give yourself a few shoulder and back breaks! Once the crown is in, we’ll caulk the heck out of it to prep for paint! Here’s the finished look (before paint), and also sneak peak at the box trim we’ll share more of soon!

Now you’re ready for a beadboard install! Maybe on the ceiling as well?
Other Wall and Ceiling Treatments We’ve Installed
How to Add Planking to Any Wall or Room
DIY Custom Layered Wainscoting
Adding Planking and Crown to Our Closet Ceiling


This is absolutely gorgeous! I’m been looking for a way to cover my popcorn ceilings and I love this effect and seeing it with a chandelier. I do have a question, however. The bead board appears to be a light natural wood tone or perhaps whitewashed or stained white. You noted that it was the finished look (before paint) so I’m wondering if I wanted to replicate this as it appears in the photos, if using tung oil to seal the wood would be a good choice, or would you recommend a stain instead?
I absolutely love your beadboard installation. I live in New Mexico and am having trouble finding that product here. Is there any identifying number or manufacturer that you could share about that product? Thank you.