The Fullmer’s kitchen is d-o-n-e and I can’t wait to share all of the photos today! We’ve been sharing progress as we go, so in case you missed it, here are the past posts about…
All the before photos and mood board
Demoing the kitchen and the new layout
Finding asbestos and course correcting
The Ultimate Kitchen Space Planning Cheat Sheet
Things To Know When Planning an Ikea Kitchen
New Wood Floors are in!
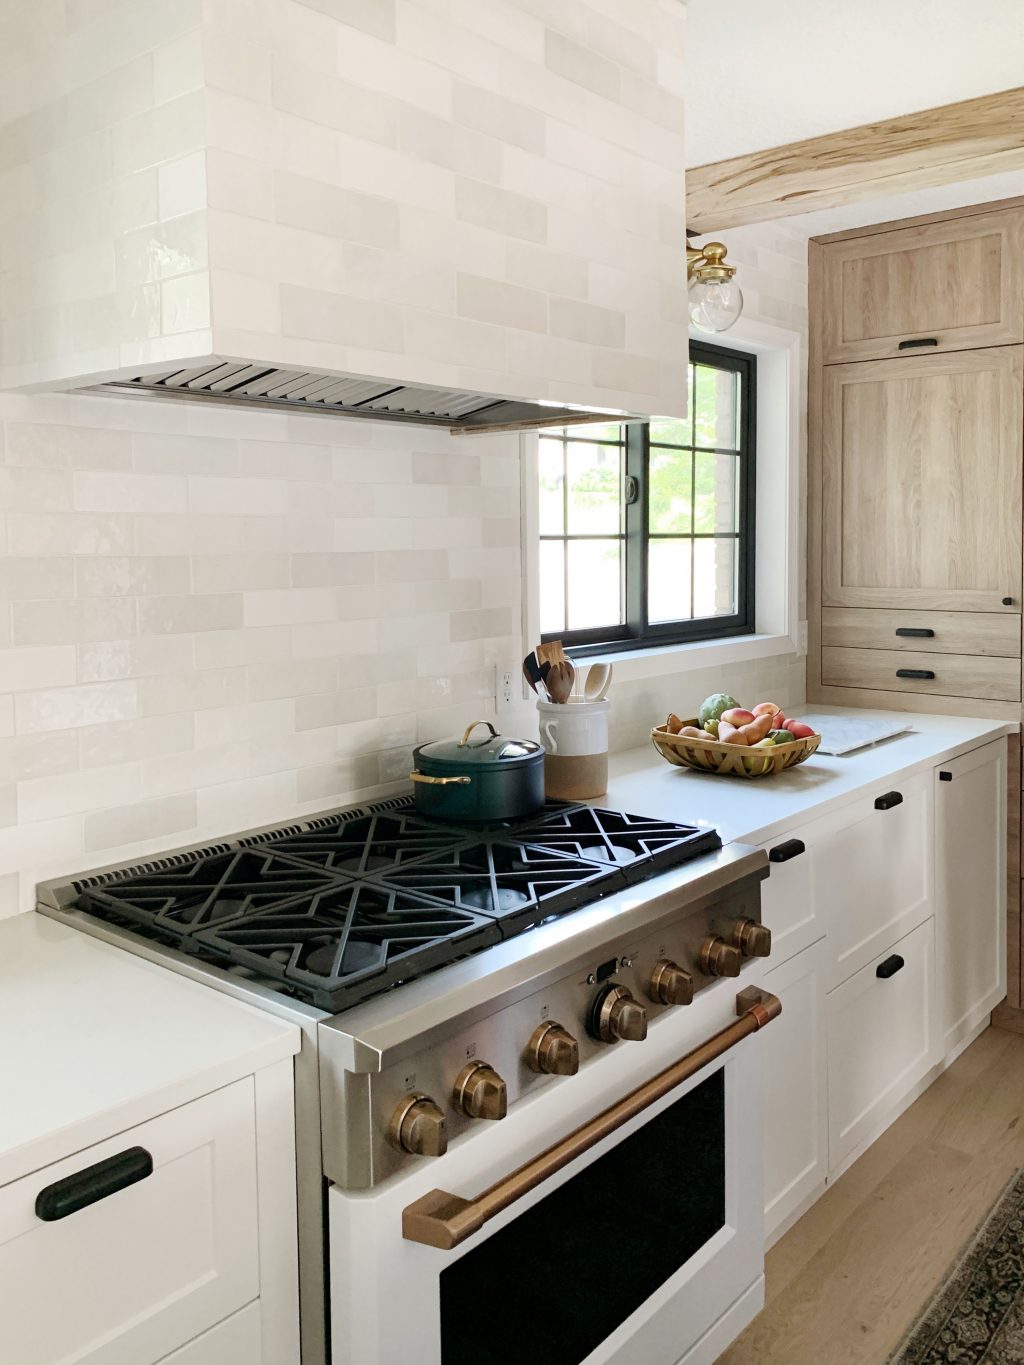
Building a Custom Tiled Range Hood
All About Those Gorgeous Appliances
Everything you need to know about using Semihandmade cabinet fronts with Ikea cabinets
Installing the sink and faucet
How we DIYed the open shelving
How we organized the cabinets and a video tour inside every one!
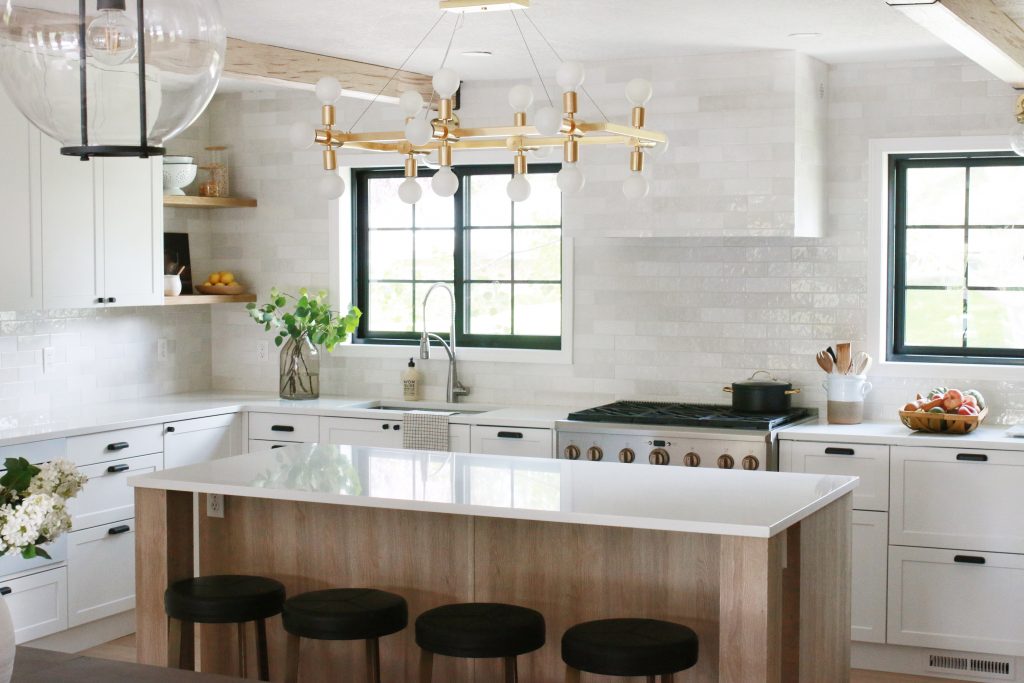
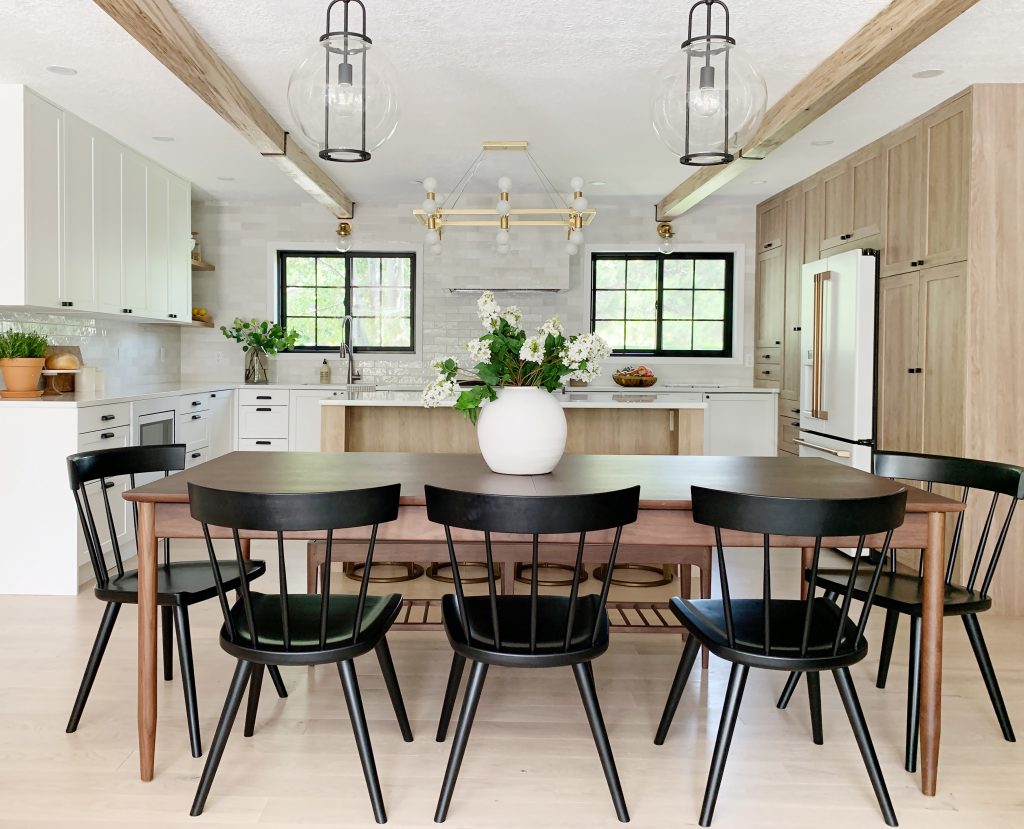
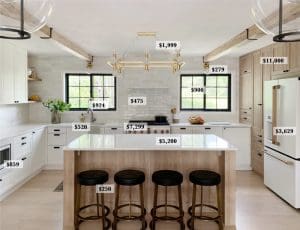
We still have a post coming for the beams but other than that–this brings us to today. We couldn’t be happier with the way this kitchen turned out. I would copy and paste it in our own house in a heartbeat. Here’s how the Fullmer kitchen looks now:
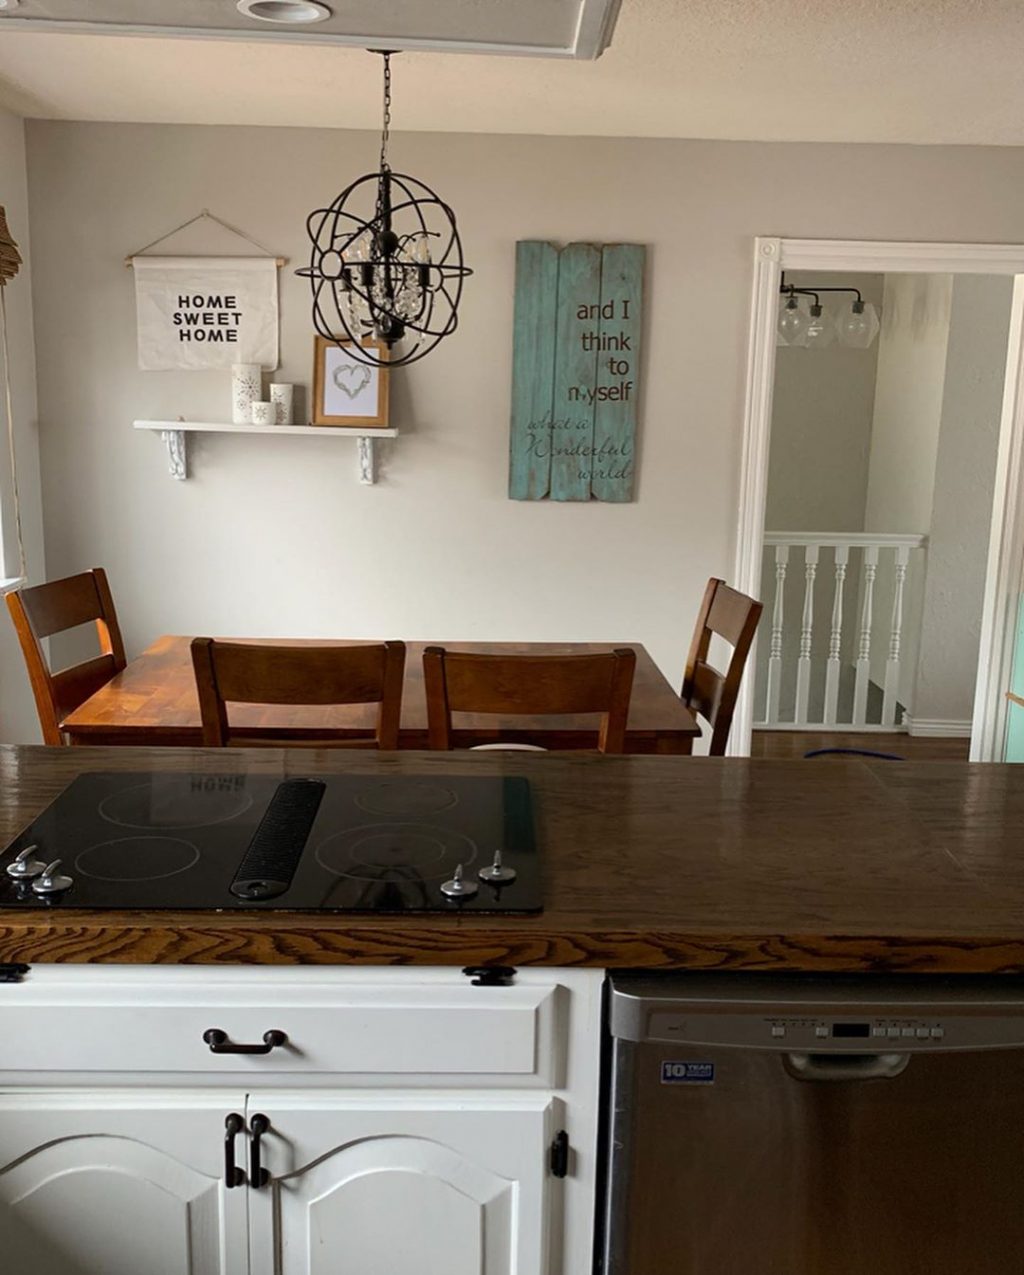
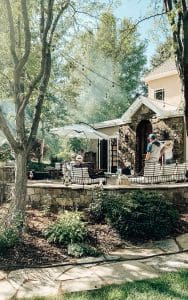
And here’s how it looked before we started:
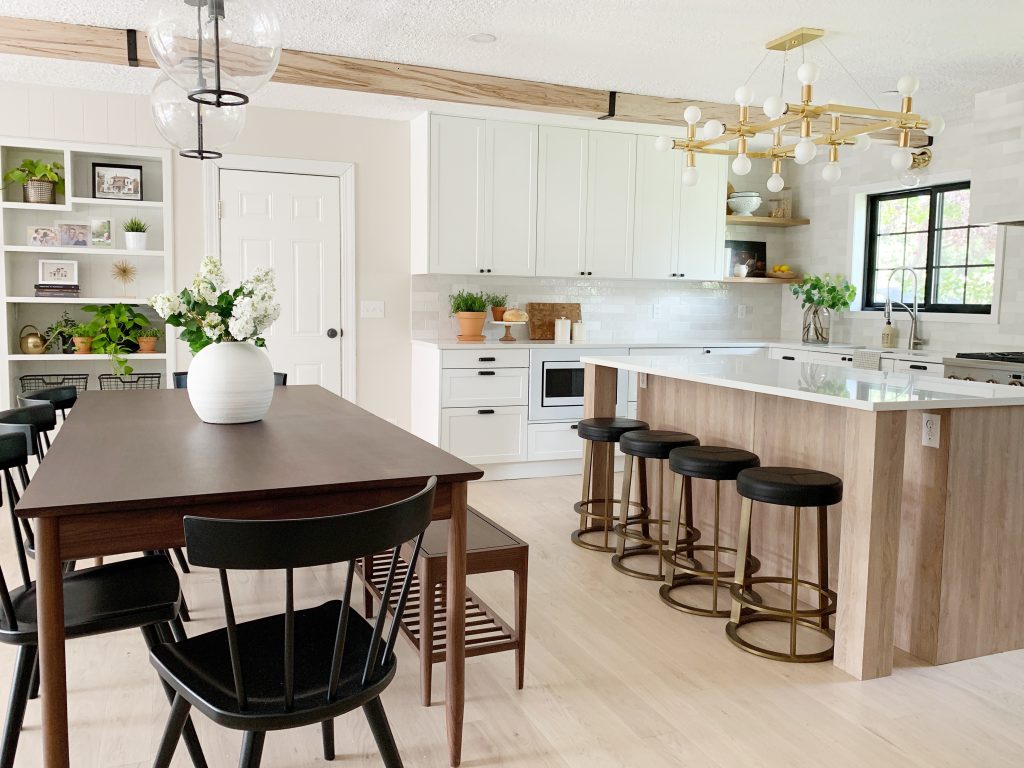
Before, the kitchen and dining room was crammed together on one side of a wall of cabinetry and the living room was on the other. We removed the wall and placed the dining table in the center which allowed us to extend the kitchen all the way into the previous dining space.
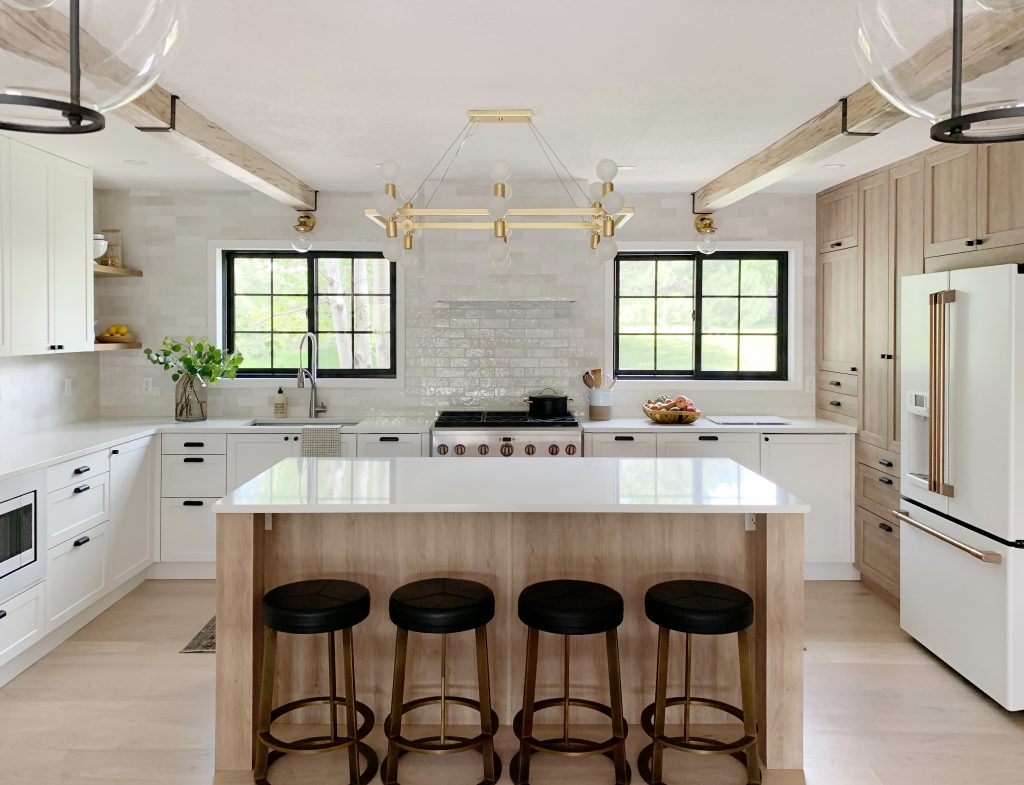
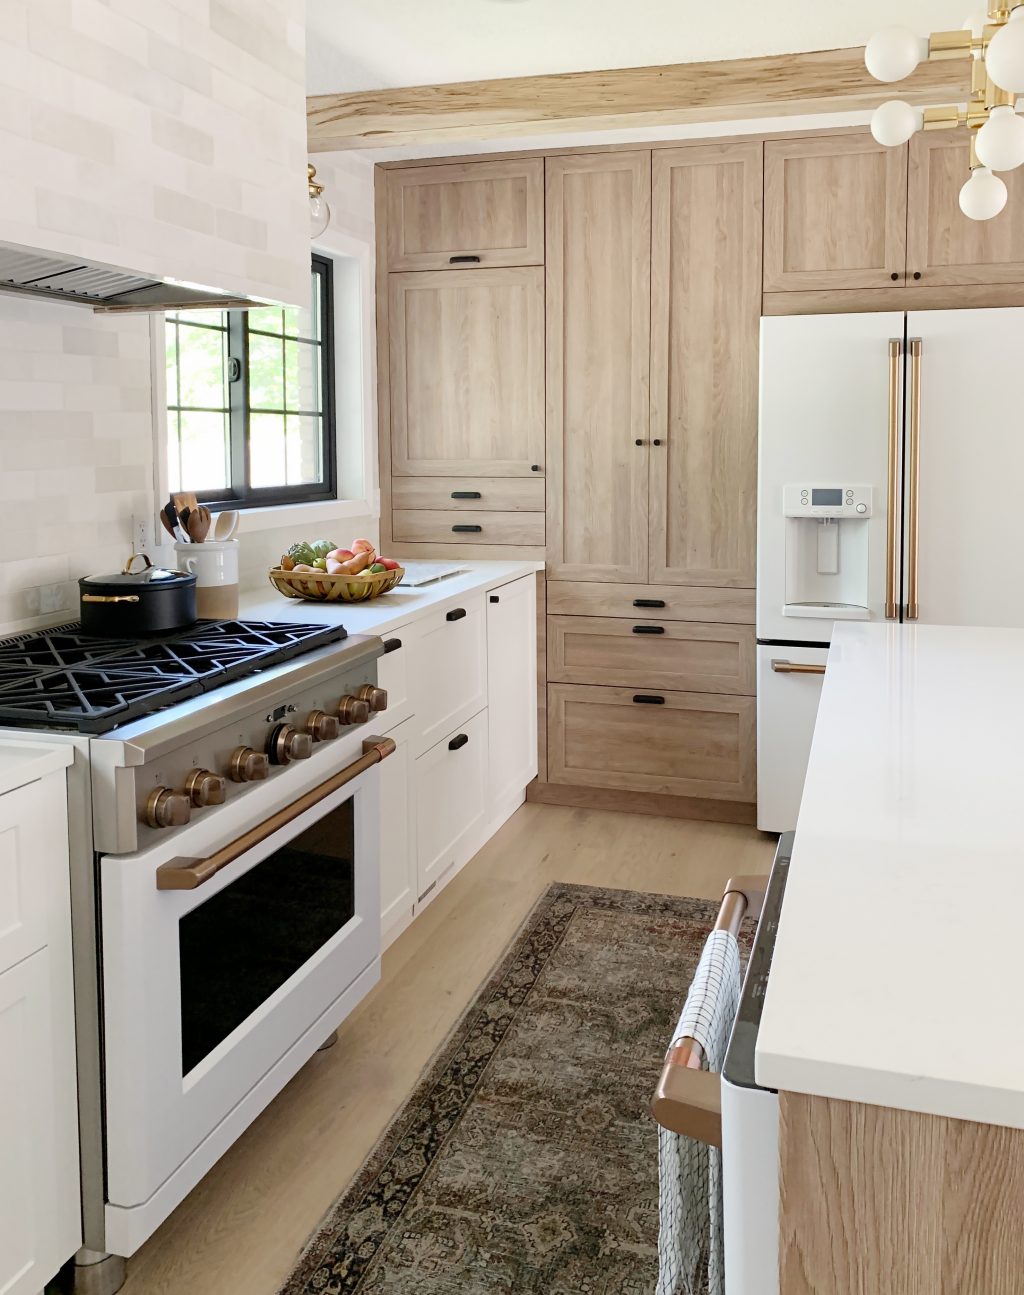
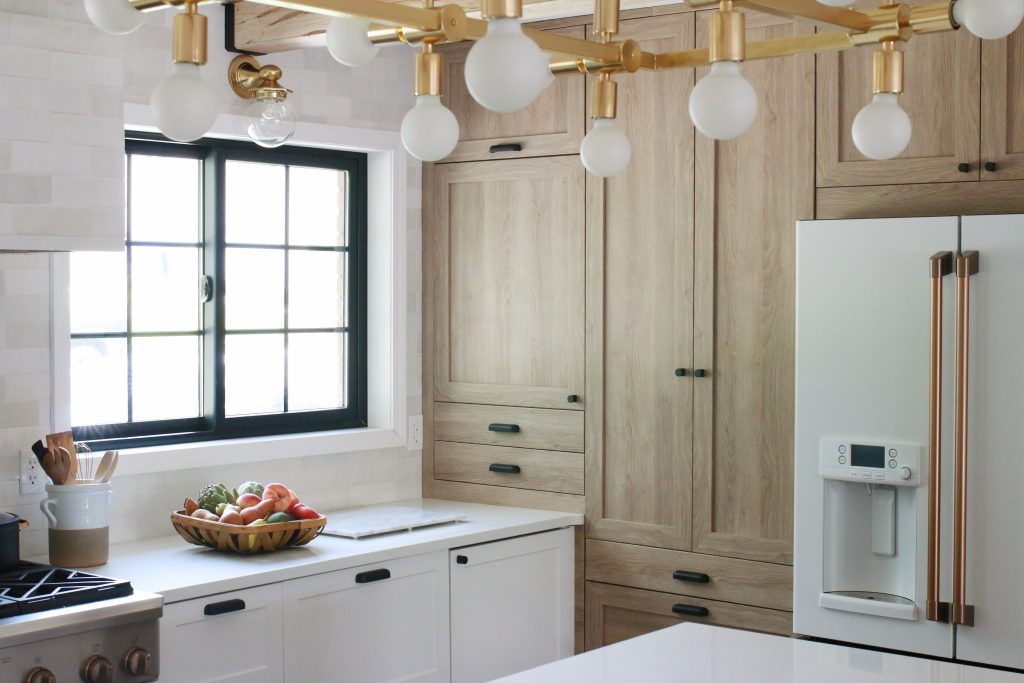
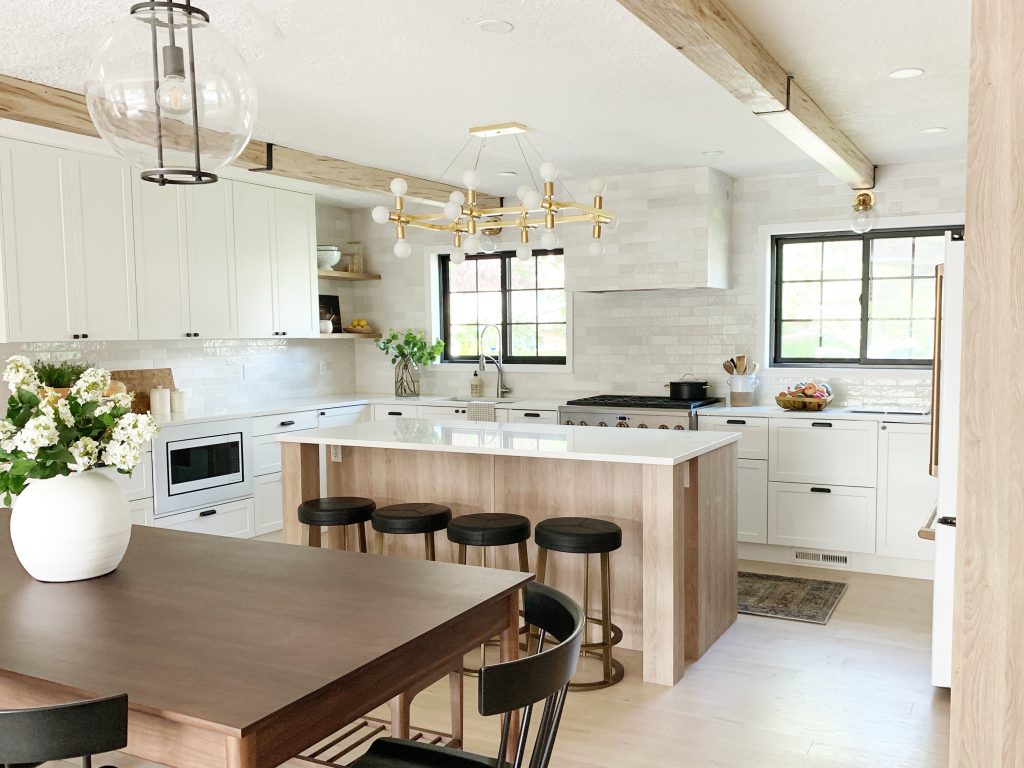
The left window remained the same size (although we did update the window!) and the right window was made slightly smaller to match and to fit cabinetry to the right and beneath. We used Ikea cabinetry with Semihandmade doors for the entire kitchen! It’s a great budget-friendly way to go, and we love the mix of fresh white (supermatte white doors from semihandmade) mixed with our own line of Semihandmade doors–here we used the Cove color which is a beautiful, durable light warm wood tone.
Here’s the before of the same angle:
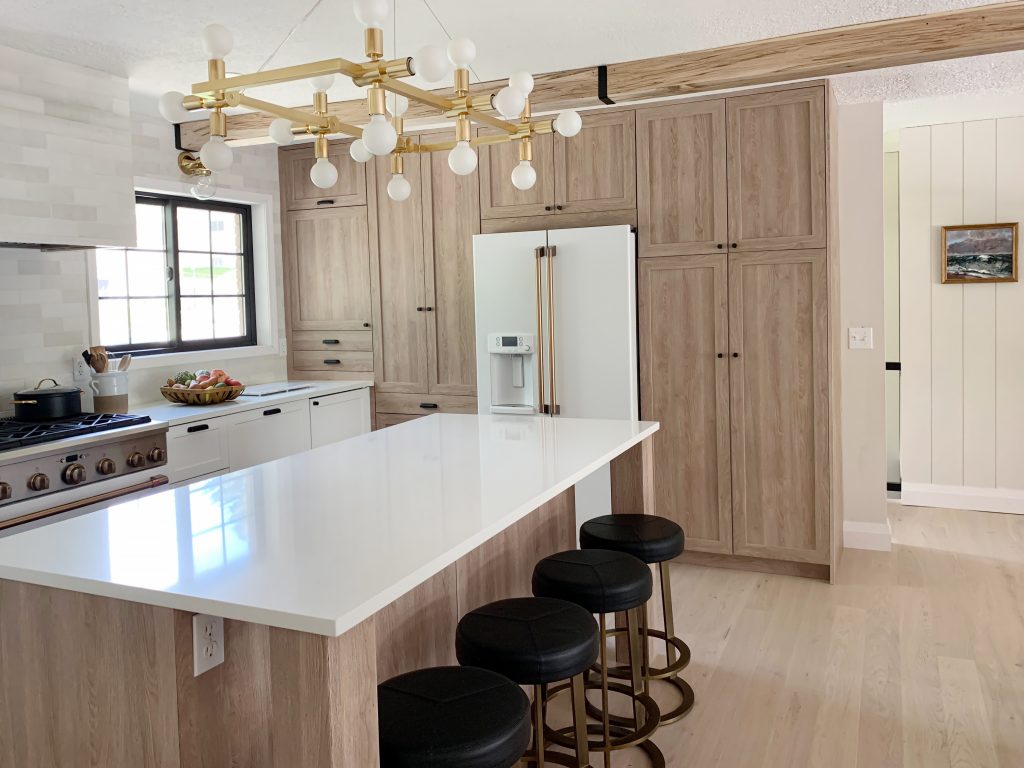
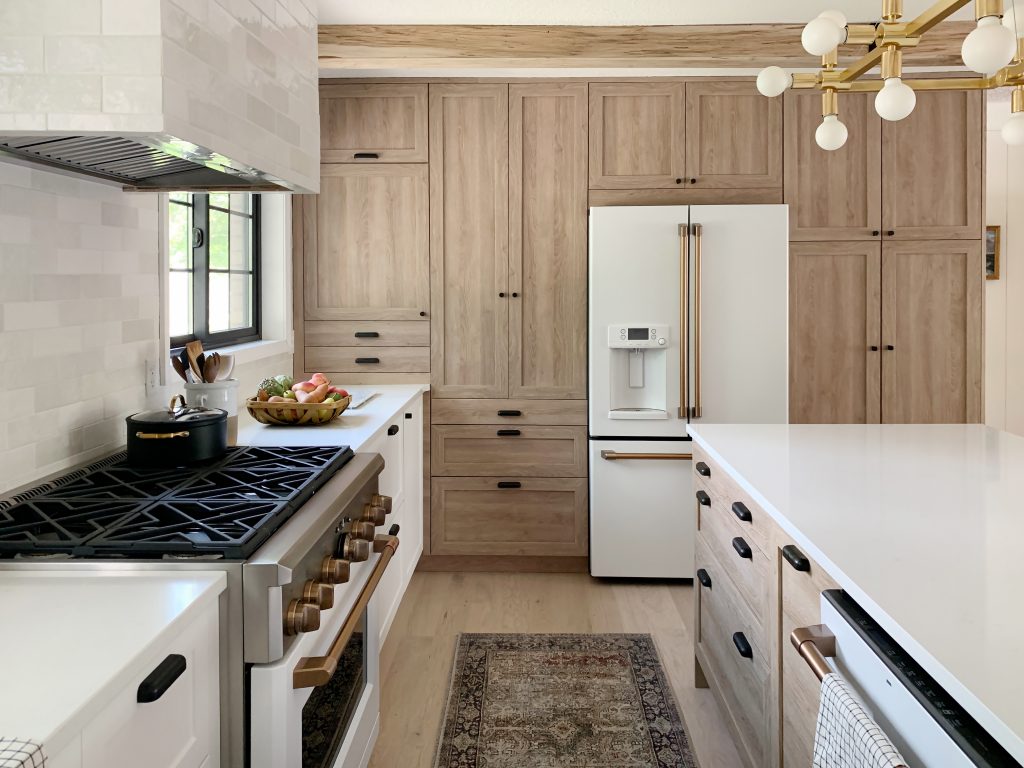
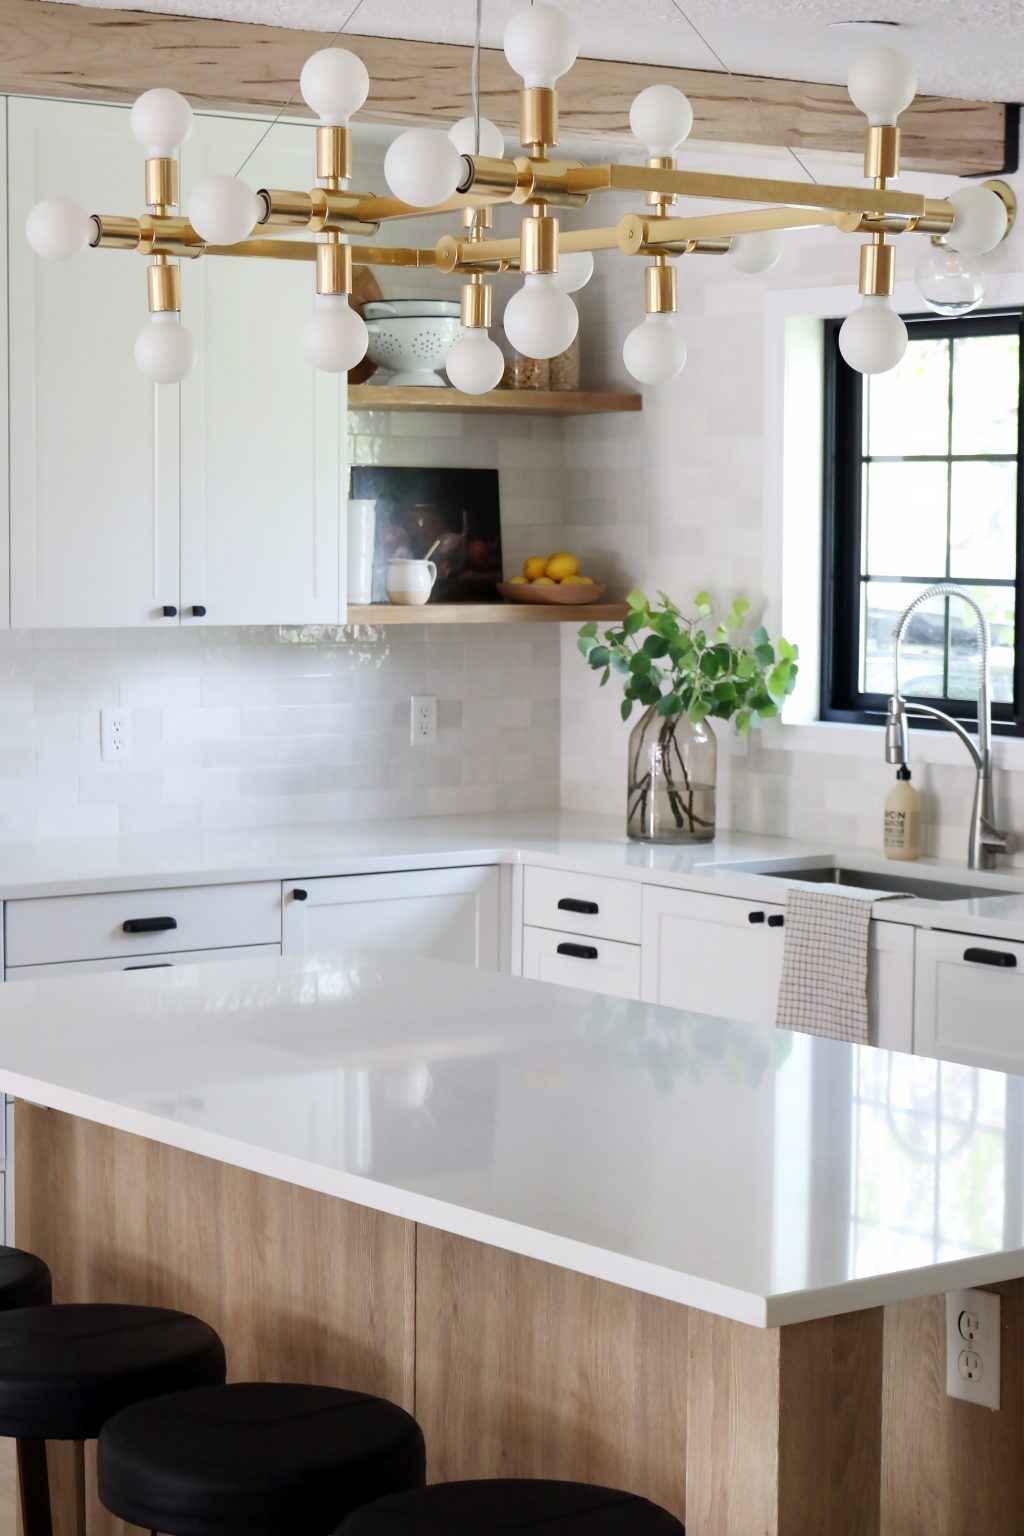
I’m absolutely biased since it’s our own line, but the Cove doors really make this kitchen something special. We carried the wood from the pantry wall, to the island and installed two opened shelves on the opposite side of the kitchen that we stained to match to unify the whole kitchen. (Linked all the sources at the very bottom of the post!)
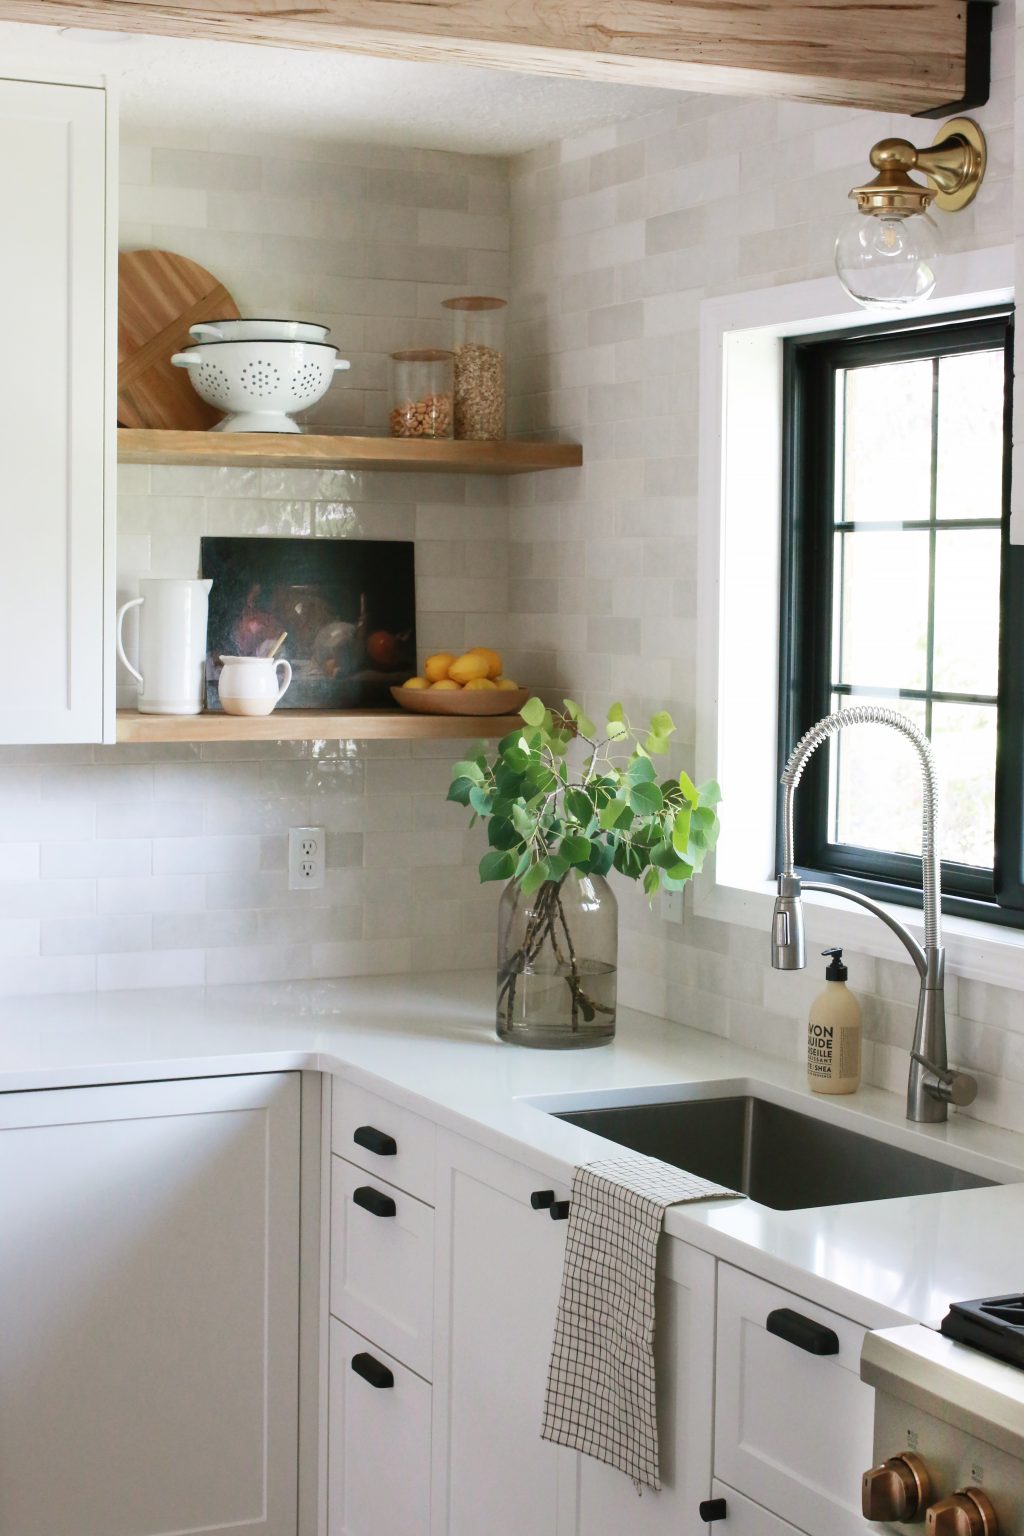
With a house full of young kids (and the sippy cups to go with it!) we were happy to give the Fullmers plenty of stylish, closed storage and upper cabinets. But it needed this breathable, open corner to balance it out. You can have both!
Another layer of interest that adds an understated, but important touch is the backsplash. It’s like your basic subway tile grew up. It’s varied and warm and soft and—ugh. I love it. We originally got it for the cabin kitchen, but were so happy to repurpose it here.
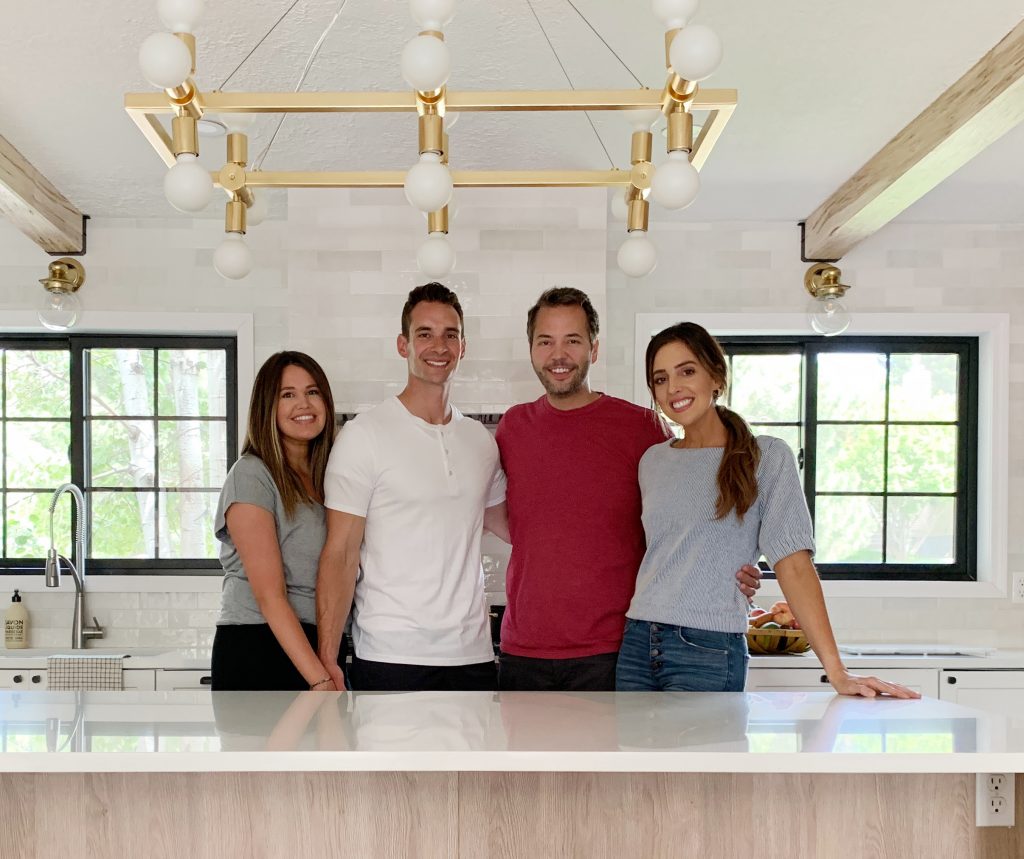
We took on this project shortly after the complete loss of our cabin to fire. Separately, but simultaneously, our friends were hiring out their kitchen renovation and I was answering their questions and advising them on the daily. Chris and I talked and thought, “Maybe a project would be good for us right now.” and we asked the Fullmers if we could do the renovation ourselves. They shared inspiration photos and I quickly got excited about the possibilities and drew up plans. We had the best time doing this kitchen and it helped lift our spirits and keep our minds occupied.
The tile sweeps over the whole backsplash and up to the ceiling where there are no cabinets. We even tiled the range hood which really helps everything blend in person so other things can stand out. A common mistake I see is trying to make everything a show piece. Supporting players in a room are just as important.
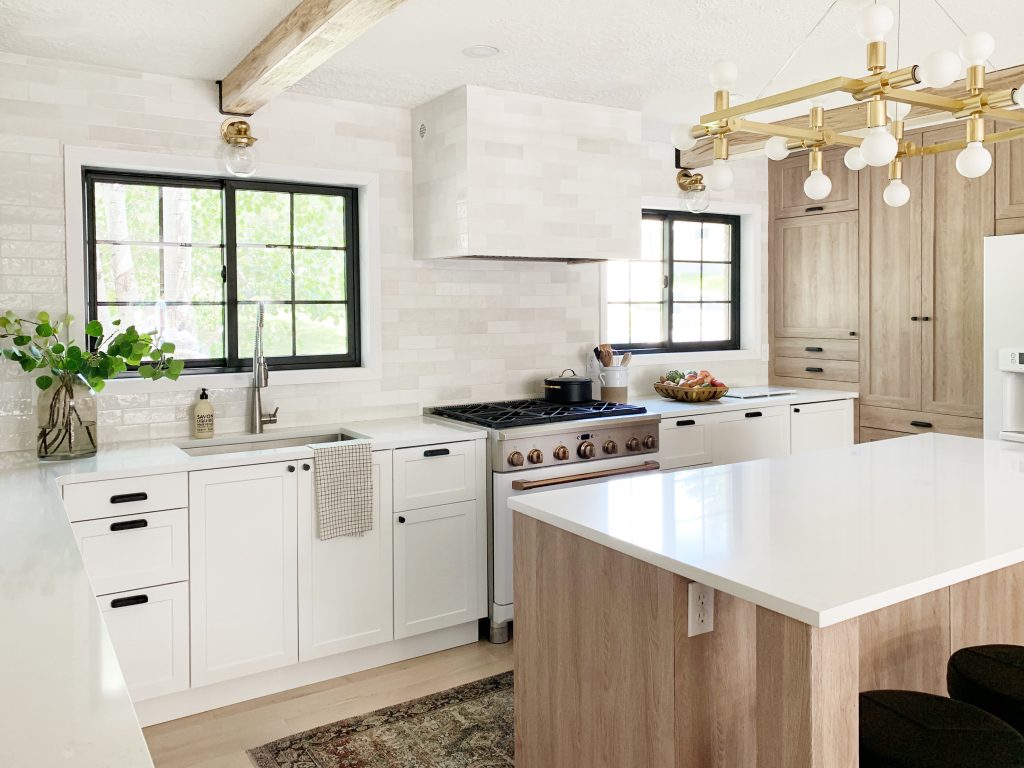
The Cove cabinets from our line with Semihandmade are definitely a statement piece. So are the White and Brushed Bronze Cafe Appliances. They are gorgeous and actually tie the wood and white together as well. Bonus, The Fullmers have been so happy with their performance too. Win win win.
The other show stopper is absolutely the chandelier over the island. It was a risk I wasn’t sure about until I unwrapped it and then have never been so sure of something. It’s common to put pendants over the island and a chandelier over a dining table but I just thought–let’s switch this up! And I’m so glad we did. It’s art, truly.
Here’s how the dining room looks with the kitchen.
One last before and after? Okay!
We came so far in this kitchen and we had the most fun doing it.
We still have a few more things to share in the coming days–that BEAM TUTORIAL (they changed everything) and how the whole space looks now. I’ll share EVERY LAST SOURCE below and will happily answer any questions in the comments!
Cabinets : Ikea Sektion boxes with Semihandmade X Chris Loves Julia Cove cabinet doors mixed with Semihandmade Supermatte White doors.
Countertops: Silestone Ariel Quartz
Cafe Appliances: Refrigerator, Range, Dishwasher, Microwave, Hood Insert
Tile –Bedrosians Cloe White
Grout
Sconces
Chandelier
Bin Pulls (4″)
Cabinet Knobs
Flooring :Stuga Studio Oak Muse
Runner
Sink
Faucet
Floating Shelves DIY : Cutting Board | Colander | Lidded Canisters | Pitcher | Creamer | Painting | Terracotta Bowl
Utensil Crock
Dining Table
Chairs
Bench
Dining Pendants
Windows: Pella
Hand Soap
Dish Towel
Marble cutting board
Black and Brass pot
White Vase and Faux Lilac stems
Produce Basket
Stools
Paint Color: Benjamin Moore Olympic Mountains
Faux Beams
Mounting Brackets for Beams
148 COMMENTS
Ron Laverdiere
3 months ago
My wife would lose her mind if we actually made one of the existing windows smaller like you did on the right side. It makes sense, and I would have done the same, but she would lose her mind!
Allison B
8 months ago
Obsessed with this kitchen and especially the backsplash! I’m ordering it for our kitchen now and I’m wondering what width you went with for the grout line? Thanks!!
Flo
9 months ago
What IKEA cabinets did you use on the far left of the cabinet wall? We have a similar layout, but can’t seem to find a cabinet deep enough to align with the depth of a high cabinet?
Ron Laverdiere
3 months ago
Then don’t put it the full depth. You can put blocks on the back side to push it out flush with the face of the deeper pantry cabinets.
Ana
1 year ago
Love this kitchen update!
Looking to do small DIY in our kitchen that will address the backsplash which is currently dated tan and brown color combo. Could we just paint it, ‘till we are ready to remodel next yr? Any info on this type of project would be amazing. Thank you!
Amelia
1 year ago
I am currently planning our kitchen with the Ikea Home Planner and am using this kitchen for a lot of inspiration. It’s gorgeous and looks really functional. One question, what cabinet size did you use above the GE cafe fridge? We have a GE cafe fridge and I really like how you built the cabinets above it. However, on the Ikea site I am not finding cabinets large enough to go above the fridge. Everything I’m trying leaves a huge amount of space above the fridge. Thank you!
Shawna Alexander
1 year ago
I’d love details on how the legs on the island were done.
Janine
1 year ago
I LOVE your work … and this kitchen!!!! We just remodeled our kitchen and are also using the Cloe tile in white for our backsplash. Can you tell me what color grout you used!!
Thanks, Janine
Julia
1 year ago
AUTHORIt’s called White! It’s a warm white from Lowe’s. Should be linked in the sources!
Camille
1 year ago
Did you select your own cabinet choices for the island or go with a pre laid out IKEA island?
Julia
1 year ago
AUTHORWe designed it!
Camille
1 year ago
Looks amazing! How did you add the electrical plug to the cabinets? Do you have an explanation somewhere I missed?
We are building our IKEA island (going to use the Semihandmade fronts in cove SO excited!) and we definitely want to have power to it like this lay out!
Chris
1 year ago
We attached boards to the back of the cabinet before installing, then mounted the junction box directly to that. Because that cabinet actually sits out from the wall a little bit we just ran a wire from a junction box nearby that was going to be covered (making sure all the wire connections were contained within a junction box) out to the new box.
Meghan
1 year ago
The kitchen looks gorgeous! What size grout lines do you use? I want the same look for our kitchen. Thank you!
Abby
1 year ago
Hi, we are having this tile backsplash installed tomorrow. We have a corner that sticks out toward you (not the typical corner you’d think of) under some of the cabinets — basically like the corner of the vent hood in this kitchen. Our tile guy told me I would need a corner piece since the edges of these tiles are not the same color. He said there is no way to hide the edge of the tile. But it looks like you guys somehow did it here on the hood… Would you mind telling me really quickly how you did that? I’d like to tell him to do that tomorrow!
Susan
1 year ago
Lovely! The countertops look white, without any veining but Silestone Ariel quartz does have veining, doesn’t it? I want to be sure because I might copy the same backsplash/countetop combo!
Julia
1 year ago
AUTHORIt’s very subtle, but yes!
julie mcfadden
1 year ago
This kitchen turned out so GREAT !! Lucky ducks neighbors.
If were doing a custom hood just like this one what keyword do I need to use in searching for vents ? I know we want it to vent outside but as far as not having the controls on the front side,of it.
Dan Baranowski
1 year ago
Kitchen looks AMAZING! Did you use spacers on the tiles?
April Jenkins
1 year ago
I am actually using the same time in my kitchen remodel and I was wondering how you treated the edge of the tile that is exposed. Did you simply use caulk or grout?
Julia
1 year ago
AUTHORThe edges of the tile are glazed so it finishes it nicely!
Courtney
2 years ago
Hi Julia, wondering what you all did with the edge of the tile? Does bedrosians make an edge piece that matches or how did you make that work? Thank you!
Victoria
2 years ago
Love love love this gorgeous renovation! I’m currently planning our Ikea / semihandmade x CLJ kitchen remodel and am wondering about the back corner? What cabinets did you use in the corner on the refrigerator wall to keep it flush with the rest of the pantry cabinets there? And what base cabinet corresponds? This would work perfectly for my refrigerator wall, but I can’t figure out what you used, and IKEA planners couldn’t help.
Again – such a gorgeous renovation! – Stunning!
Heather
2 years ago
Love this kitchen! Quick question, did you install the window trim over the tile? If so how? Thanks so much for any info!
Krista
2 years ago
How did you make the wall pantry? What ikea boxes did you use?
Grace
2 years ago
So gorgeous! Now, I’ve given it my best search, but I can’t seem to find those stools on cb2 and the link in this post goes to something similar but not quite the same. For me the perfect element about them is the round base so I am eagerly hunting for them!
Kate
2 years ago
Love this! Quick question on the Bedrosians Cloe White – do you feel it pulls the tones it’s surrounded by? It feels warm here, but I’m interested in using it paired with cool gray and black and not sure if the undertones will work or contrast. It’s not letting me order a sample online, so wanted to check before investing in a box!
P.S. Thank you for all your amazing IG & blog content lately – so inspired by your hard work and creative vision!
Janie
2 years ago
I love the ceiling beam brackets. What are they made out of? Source?
Julia
2 years ago
AUTHORWe have a post on those coming! They are faux beams that are a new product.
Lindsey
2 years ago
Can’t wait to see the post on those beams! Such a beautiful job!
Emily
2 years ago
Looks amazing!! We are about to use the same tile for our kitchen back splash and I’m wondering how you installed the tile so the variation worked out so well? Did you lay it out beforehand? Any tips on making sure the color variation looks good? Any other grout tips? Thanks so much!!
Julia
2 years ago
AUTHORMy tip is don’t lay it out actually! I just grabbed and laid and it looks random because it totally is.
Beth Joyce
2 years ago
Would you tell me the exact Pella window that you used? Metal or vinyl, etc. I am about to replace all windows in my house!
This reno is gorgeous!!
Julia
2 years ago
AUTHORI think they are vinyl
Bry
2 years ago
Beautiful! We just picked up some samples of the Cloe Tile in white for our backsplash and it’s reading pink. Have you noticed that? I don’t see it in any of your pictures, but in person it’s pretty noticeable. Did you guys see that? My husband is really pushing for it, but I’m not so sure. Any advice would be great.
Julia
2 years ago
AUTHOROurs didn’t read pink at all!
Holly
2 years ago
Wondering why you chose the posts on the island instead of support brackets underneath or something else? Was that a form or function decision?
Julia
2 years ago
AUTHORJust preferred the look for this kitchen.
Mia Zunic
2 years ago
What is the difference/advantage of going with semi handmade doors/fronts vs the ones from Ikea?
Julia
2 years ago
AUTHORMore customizable!
Desiee
2 years ago
Just found your blog. Love your stuff! Really beautifully done renovation. Would you mind sharing the dimensions of your kitchen island and how long your kitchen counters are. The proportions are perfect.
I have an L shaped kitchen and the builder changed the rectangular island to a 5×5 square. I worried the square will look off and we should go rectangular. Do you have a preference of the space allows?
Julia
2 years ago
AUTHORI always prefer the look of a rectangle but every kitchen is different.
emily
2 years ago
Goodness, it really is so beautiful and handsome and practical and welcoming all at the same time. Bravo you two!
Kathy
2 years ago
When you replaced the window with a smaller one, did you have any exterior work to do? I would love to update our windows, but I can’t bring myself to install different size windows on the front, but I’m not sure how much it adds to the project to change sizes.
Julia
2 years ago
AUTHORWe hired that out as part of the window expense.
Gabbie
2 years ago
This is kitchen is absolutely gorgeous! Interested in what paint you guys used to trim the windows?
Gia
2 years ago
Beautiful! Did the Fulmers give you free rein after you considered the inspiration pics that they chose? Or did you work with them step by step with layout and finishes? Or something in between? And I, too, would love to see before and after exterior pics of the windows!
Julia
2 years ago
AUTHORThey gave us free reign but we consulted with them on their needs.
Kala M.
2 years ago
Beautiful! It’s posts like this that make me want to move up our kitchen reno but I know we just can’t afford it now and have other things that should be done first.
Christina F
2 years ago
Love that you could do this work for and with friends! The kitchen radiates peace and welcoming warmth. I know you’re usually more consistent with this, but the quality/lighting/angles in the before pictures isn’t at the same level as the after pictures, which is slightly annoying. But wow, what an efficient use of the space — countertops for miles!
amanda
2 years ago
I love it so much! The only thing that I cannot get behind is the amount of mixed finishes. I see bright matte brass on the chandelier, black pulls, bronze/copper on the appliances, brushed nickel on the sink faucet, and stainless steel in the appliances – too much for me! I think it’s the bronze/copper appliances bugging me the most. Yes they’re gorgeous on their own but I can’t see them mixing with other metal finishes well. Good thing I could never afford them anyways, ha!
Beryl
2 years ago
What a BEAUTIFUL kitchen! I know you’ve shared the ultimate kitchen planning cheat sheet before, but can you please share the distance between the island to the 3 sides of it (refrigerator, stove, and the microwave perimeter)? Thank you!
Stacy
2 years ago
*jaw hits floor* This is absolutely wonderful, what an incredible space! It functioned as a kitchen before, it wasn’t terrible. But it shows what can be achieved with time, experience and budget. Congratulations! xx
Zali
2 years ago
Did you use a trim piece at the edge of the cloe tile where it ends by the cabinet? Or did you paint the edge of the tile to give it a finished look?
Julia
2 years ago
AUTHORWe used glazed edges. Most of the edges came glazed to be honest but we picked the best ones and put them on the edge
Jyll
1 year ago
Does that mean for the tiles you had to cut (in order to do the brick stack) you turned the cut edge in and had the glazed edge on the outside?
Rachel
2 years ago
Such a stunning design! I am remodeling my kitchen and I love the black framed windows in this kitchen. I’ve been wondering – Does it matter if none of the other windows in my house match? Or should I keep it the same?
Julia
2 years ago
AUTHORI’ve seen it both ways!
Jen
2 years ago
Amazing! The counter stools in the link are different than the ones you used. Is there any chance you have the original source?
Julia
2 years ago
AUTHORThey are from CB2 and keep redirecting to that one. I don’t see it on their site anymore (despite purchasing them just a few months ago) so they must have switched to a new style.
Theresa S.
1 year ago
I was bummed that I couldn’t find the stools either, but happened upon something pretty similar at Target no less! I haven’t received them but fingers crossed!
https://www.target.com/p/backless-24-counter-stool-metal-brown/-/A-18848610
Sarah H
2 years ago
Do you have any pictures of the exterior after they made the one window smaller? We have a large bay window in our kitchen that we need to make smaller to accommodate our new kitchen design but our exterior is brick. I’m a bit nervous about trying to match existing brick and mortar color and how it will look.
Julia
2 years ago
AUTHORI’ll have to show next time I’m up there. The brick matches perfect, the mortar is a little bit dark but will fade over time fingers crossed.
Candi
2 years ago
Love love love!! Come do my kitchen!!!
Seriously though, the dining pendants, do you know what length you got for their table? We have around the same heights ceilings and I love where theirs fell!!
Julia
2 years ago
AUTHORI want to say around 24″
Dayna Mailach
2 years ago
Guyyyysssssss I am DEAD. This looks so good. Congratulations! Amazing work!
Teri
2 years ago
Wonder if those outlet covers under the island could be switched to a faux wood to blend in better? I know I have seen some like that. Otherwise, very lovely. Could we get a total cost on this…I’m looking into your cabinets.
Mandy
2 years ago
I am in love with all the choices you made in this kitchen! I have a question about mixing metals. I am replacing my counters, sink and faucet and am looking to do something similar to what you’ve done in the Fullmer’s kitchen. My cabinet hardware is aged brass and my appliances are stainless steel. Can I do a polished chrome faucet as a stand-alone metal? It’s hard to tell in the photos what the finish is exactly on their faucet. I’m hoping to avoid anything brushed nickel or stainless steel.
Julia
2 years ago
AUTHORI usually recommend repeating a metal at least once in a room. Polished chrome could tie into the stainless though–that’s what we did in here
Mandy
2 years ago
Perfect! Thanks so much for your reply. From the pictures it looked like a brushed metal so I’m glad to know it is polished and looks great with the stainless. Thanks again!
KOKO
2 years ago
First of all, this is truly my favorite renovation you’ve done! It’s just SO beautiful in every way.
One comment/slight critique I have is about the dining table being parallel with the island…I feel like the island dwarfs the dining table a bit, despite the island seating fewer people. I don’t know if their space can accommodate a bigger table however. But on the other hand, I see a big plus in that the island can serve as overflow seating. Either way, still a gorgeous kitchen and space.
Now something I’m really curious about if you care to share, is if there was a previous kitchen plan the Fullmer’s had before you got involved. Just curious to see a mood board/or what other plans they may have had! And how that evolved over time. Think that could be helpful to us readers.
Liz
2 years ago
Is a picture coming of the view from the kitchen looking towards the table and (now open?) living room? The same angle as the first picture on the “before” post. Thank you!
Julia
2 years ago
AUTHORYes
Hayden Schulstad
2 years ago
This is a gorgeous kitchen! The gold and white is such a clean look to me. What are the dementions of this room? We are currently looking to remove a wall in our home to better open up our kitchen and I’d love to compare what y’all were able to do with what we have available. Thanks so much.
Julia
2 years ago
AUTHORThe WHOLE space is 18′ W 36′ Long into the living room. The kitchen is 18’Wx13′ to the dining area
Kathy Pilkenton
2 years ago
I just LOVE you two! Thank you for being real, sharing sources, inspiring others, and doing what you do (which, oh by the way, you make look easy and I am sure it is not!). We started a remodel (phase 2 after living in our home for 20 years) so I started reading blogs and following designers on instagram. Love, love you two, Becki Owens, Lisa Furey Interiors, Schilling and Company (local), Sarah Richardson (no one does fabric like she does), McGee and Co. and many more, but I can’t afford most of the furniture/products they use. Yes, I bought Rejuvenation mirrors and knobs on sale, but I also bought a wonderful Target mirror. So I love that you break down costs and sometimes try less expensive things (like your new bedroom rug!). Thank you for sharing your journey! Oh, and love the Fullmer kitchen – just beautiful!
Kelsie Young
2 years ago
I’m in AWE! The transformation is incredible. I love that you guys got to help friends while they also helped to heal you a bit! Such a win/win!
Sarah
2 years ago
IT LOOKS SO GOOD! I think I might’ve stopped breathing while reading….It’s just insanely gorgeous. I wish I had friends like you guys! :D
Jody
2 years ago
Beautiful job! Is it too soon for a review on that dining table? I’ve been eyeing it for a while, the finish is so lovely, just wondering if a water glass, for example, would leave a ring?
Julie S
2 years ago
I love, love your layout changes. The wall of pantry/storage is one of my favorite useful things I’ve been seeing in kitchens – we have a small wall clad with storage in our small kitchen and it’s great. Still not totally sure about the Cove color since it seems to pull pink, but I guess red oak is… red… so nbd. Great wood texture, though. And THE CHANDELIER. Sculptural is the word for it – great leap of faith that completely paid off!!
Ellie
2 years ago
SOs SO GOOD. Wow, it is just stunning all pulled together! I would really love a budget breakdown if the Fullmers don’t mind too much. I know it’s a bit invasive to get into the money aspect but to know how much this all cost would be so, so helpful as we’re trying to come up with a realistic budget for our own kitchen reno. Thanks for the beautiful content as always! <3
EP
2 years ago
I love it! So many smart choices here. Love how you reoriented the space and created symmetry with the new windows. I think I would have liked to use your panels on the refrigerator too — is that an option?
Julia
2 years ago
AUTHORI know that there are refrigerators that come panel ready and Semihandmade is absolutely equipped to accommodate those!
Rachel
2 years ago
Can I copy and paste it in our house as well?? This kitchen is a dream! So many beautiful things to look at, from top to bottom, left to right. We’re about to Reno our kitchen with IKEA cabinets and this post is such an inspiration! I’m sure the Fullmers are beyond happy! ❤️
Brie
2 years ago
I’m curious about your opinion on white appliances! We’re about to do a reno and I love them but I’m worried that they’re trendy?
Julia
2 years ago
AUTHORI think they’re classic and beautiful!
Julie
2 years ago
Gorgeous! Question about the windows–is the window above the sink a tiny bit off center from the sink? It’s hard to tell if it’s just the angle or if the window is slightly left-set. I’m in the planning stages of a kitchen renovation and am having the HARDEST time with the layout of windows, the sink, and the range. If the range is centered between windows, the sink is slightly offset. If the sink is centered in the window, the range is slightly off center between the windows. OR I could make the windows different sizes… It’s driving me crazy!! But maybe in real life, it doesn’t matter if something is off center by a few inches?
Julia
2 years ago
AUTHORIt’s ever so slightly offset but we needed it to be to retain overall symmetry. It’s undetectable in person.
Amy
2 years ago
It is so beautiful!!!!!!!!
Kaylee
2 years ago
“A hard deadline of May 4th”.
L.O.L.
Julia
2 years ago
AUTHORSeriously. I will say it was FUNCTIONING then, but they added a lot more to the project after we started which added to the time.
Sarah
2 years ago
I remember from your kitchen tour video that you put the toaster in the Cove Cabinets, but I don’t remember where you put the coffee maker? I love that the counter-tops are clear for the most part, but a coffee maker is an every morning thing, so does that also go in a cabinet or do you recommend just leaving it on the counter?
Julia
2 years ago
AUTHORThey don’t drink coffee.
amanda sejnowski
2 years ago
they’re mormons lol so no coffee
Rachel Szczepanik
2 years ago
What color grout did you use?! I love your look. My house is mostly creams and a bright white stands out in a bad way. I’m installing the Cloe tile in white tomorrow (as you know it’s not a bright white, esp not always). If you used bright white is there something warmer you would recommend? You guys INSPIRED ME and helped me bring out the beauty in my home. I started by accepting who this house was meant to be instead of who I wished it was. It’s becoming so wonderful.
Angela
2 years ago
Wow–what was the cost/budget?
Meg Shannon
2 years ago
The kitchen is stunning. So inspiring. I am pinning half the pics for my kitchen Reno.
But can we please talk about how Mr. Fullmer has the world’s longest arm?! 😆😉
Julia
2 years ago
AUTHORHahahaha
Miranda S
2 years ago
Gorgeous kitchen and open concept! Can you share what the dimensions of the whole space are? We are currently opening up a wall at our home and knowing the dimensions of the kitchen/dining/living all together will help me plan our space. Thanks! Great job again. As always!
Kaley Moore
2 years ago
This is just beautiful!! You all did a wonderful job!! Is there any way to learn about the dimensions of the full space including from front of house (I assume living room by the post?) to the back kitchen wall as well as the width of the kitchen? We have a similar layout as well but I have had a hard time envisioning the depth needed if we put a dining table in between our kitchen and living. I absolutely love what you did here! Looking forward to following your journey with your new home :)
Jamie Marabillas
2 years ago
This looks amazing! How tall are the ceilings in the kitchen?
Julia
2 years ago
AUTHOR8 ft!
Erin Tarvin
2 years ago
Loooooooooove! We have an ikea kitchen and I would LOVE to switch out the fronts for something from the semi-homemade line. One question I didn’t see sourced and am curious about— the faux beams. Where from (I think you mentioned Lowe’s before) and would you recommend?
Julia
2 years ago
AUTHORYes! They are from Lowe’s. Whole post coming about them soon. It’s a new product so we are waiting for them to get the links on their site.
Bryanna Dow
2 years ago
Wow the various finishes on the hardware blend so so beautifully! Maybe we can use this kitchen to help Faye decide her favorite metal hehe :)
Julia
2 years ago
AUTHORHahahaha
Susan
2 years ago
Stunning remodel!! I’m sure they are thrilled! Would you mind sharing the dimensions of the island and how the legs were finished? Thank you!!
Julia
2 years ago
AUTHORThe island is about 82″x 36″ and we wrapped 4×4 posts with mitered semihandmade cover panels.
Shannon
2 years ago
The kitchen looks so beautiful! How do the Fullmers like having the dishwasher behind them? From the pictures of their old kitchen it looks like the DW was in a REALLY inconvenient spot, so anything is an improvement, but I still just imagine water dripping on the floor as dishes are transferred behind them. We’re so used to dishwashers being to the right or left of the sink that considering an alternate location could add flexibility to the layout, so I’d love to know how it’s working in that location .
Julia
2 years ago
AUTHORThey actually really love it! Like you said, previously it was in a really awkward position. When it’s open, there’s only about a foot of space and it’s been great. They also love having it in the island so they can just load up the plates that were used right there
Jenna
2 years ago
I was wondering this too! I actually scrolled back through all the pictures looking for the dishwasher after I realized it wasn’t beside the sink! Interesting location! Glad it’s working out as it makes the range wall much more clean without side-by-side appliances!
Kiera Chambers
2 years ago
Totally random range hood question….how do you turn on the hood fan? I don’t see a switch anywhere.
Julia
2 years ago
AUTHORAll of the controls are underneath and it also has A REMOTE!!!!
Jess
2 years ago
Such a beautiful space. You guys rocked it and inspired me to use that beautiful cloe tile for our upcoming kitchen reno. Can you share the dimensions of the island!
Julia
2 years ago
AUTHORIt’s approximately 82×36
Shawnee B
2 years ago
The Kitchen is beautiful! I love the Chloe Tile also. I Would like to use it my remodel. The samples I have are warmer without grey. I see a lot of grey in your photos. Would it work with warm colors.? Thanks
Julia
2 years ago
AUTHORYes absolutely! It’s the prettiest tile.
Kerry
2 years ago
Beautiful kitchen. I love how much brighter the space is now that it’s opened up. We should all have friends like you! Question: are the Fullmers planning on replacing all of their windows to match the great paned ones you put in the new kitchen?
Julia
2 years ago
AUTHORThey replaced all of the windows on the front of the house with these.
Kate
2 years ago
Beautiful!! Do you mind sharing total cost breakdown? Or did I miss that somewhere? You guys are good!
Rachael
2 years ago
I second that! Would love to know the cost of everything all in!
Patricia
2 years ago
I was wondering why the hood was so plain until I saw the chandelier over the island and it clicked. The hood is the neutral backdrop for that stunner. This totally works and only makes me more excited for the journey you’re taking us on with your new home.
Jessica Garvin
2 years ago
You guys did such an amazing job!!! This is making me want to tackle another room in our house so soon. So happy for the Fullmers!
Katie
2 years ago
I LOVE this kitchen!! Really specific question to start: I’ve been staring at pictures of the cabinet wall for WEEKS, and I just need to ask..are the tall cabinets on either side of the refrigerator 24″ or 30″? I’m doing a full cabinet wall in the house we’re building (super similar to this!) and trying to decide between three sets of 24″ wide tall cabinets, or two 30″ + one 12″ (thinking that would be the tall cabinet with wire baskets for produce). The 24″ provides more symmetry, but the 30″ perhaps more function. What are these?
Julia
2 years ago
AUTHOR24″
Sally
2 years ago
SUCH a lovely result – light, bright and clean and yet warm at the same time. Truly a job well done. There should also be a mention for choosing to use a bench as part of the dining table seating as this really helps to avoid the potential cluttered look that you’d get with all chairs (particularly as they back on to the stools).
Will you be giving a budget breakdown/total spend? (I know that you’re in a position to have probably got some deals, but I think that an idea of what it would cost someone else to replicate this would always be informative).
Julia
2 years ago
AUTHORBecause it wasn’t our budget, I’m not sure how tactful that would be.
Stephanie Zuckerberg
2 years ago
Gorgeous!!!! Great job! A couple of questions. On the side where the refrigerator is, did you move the opening to the hallway more to the right? Also, I saw in stories when you were putting up the backsplash. Do you have a how-to on how to do backsplash? I looked on your sight but didn’t find one? Do you have a tutorial on how to do the floating shelves?
Julia
2 years ago
AUTHORYes we did! Here’s the floating shelves tutorial.
Brandi
2 years ago
Can you share before/after pics of their stairway/entryway area? Excited to see that too!
Julia
2 years ago
AUTHORYes! That’s coming too!
Michelle | Birds of Berwick
2 years ago
so SO gorgeous!
Melody
2 years ago
I have been in love with the backsplash tile from the moment I saw it being installed!! I am actually considering it for our kitchen and was wondering if you might be able to share how you did the edge where there is no cabinets or windows. Did you use a pencil tile? Thanks!
Julia
2 years ago
AUTHORWe just used glazed edges for that. Keeps it really clean
Ronna
2 years ago
Love it all! Question – how did you end the backsplash tile on the wall by potted plant? Shluter strip? I have a whole wall I need to do and don’t want to use a Shluter strip. 😬It all looks great!
Julia
2 years ago
AUTHORWe just used glazed edges.
Sara
2 years ago
Oh my goodness! What a stunning space! I might have let my toddlers fling Cheerios around my dining room so I could drool over those photos! And how very special that bringing the space to life helped you heal a bit. ❤️
Veronica
2 years ago
Beautiful! I think we are going to hack Sektion cabs for our bathroom so we can use Cove! I’d love to make a future blog post request on moving and changing windows in a house and what that entails (like how do they match the exterior). I’m considering making a window smaller in my kitchen but it seems overwhelming and I can’t find much info.
Bay Kenish
2 years ago
Is that product listed under “grout” what you used on top of the backsplash tiles to make them a more uniform and softer white?
Julia
2 years ago
AUTHORYes!
Betsy Farmer
1 year ago
Is the color grout you used white though? Or did you use a different Mapei color? I’ve used white on our in a small area and it’s making the grey tiles looks almost blue. Granted it’s right under our hood vent where the LED lights are…but still. I want it to be warmer toned than grey tone.
Julia
1 year ago
AUTHORThis was white
Keri
2 years ago
Beautiful! Am I missing the source for the vase and greenery by the open shelves? I looked and looked but it’s 2:30am so maybe I’m missing it.
Julia
2 years ago
AUTHORThat vase is from Target awhile back and the greens I clipped from their yard.
Keri
2 years ago
Thanks! They look like ginkgo leaves and I was hoping you found some faux leaves. This kitchen really is just so beautiful.
Leah
2 years ago
I’m in love with this kitchen Reno! You guys did a fantastic job. We have a similar before layout- would it be possible to see a breakdown of cost for the kitchen? Sorta like you did for your master bathroom at your last home?
Julia
2 years ago
AUTHORI’m not certain we’ll be sharing a cost breakdown since it wasn’t our budget or money that paid for everything.