Projects

The Doors+Drawers, Hardware and What’s Left To Do in the Kitchen

September 2, 2015

We believe we should all love where we live.

We’re a couple of homebodies, working to uncover the home our home wants to be. And we’re so happy to have you here. 

Portfolio

Projects

Design

We're Chris + Julia

read more

What we're                   right now

Loving

browse the shop

Befores, afters, mood boards, plans, failures, wins. We’ve done a lot of projects, and they’re all here. 

We have a long-standing relationship with DIY, and love rolling our sleeves up and making it happen. 

Even when you don’t want to rip down a wall, you can make that space in your home better. Right now.

browse all

browse all

browse all

02

01

03

Popular Posts

1.

2.

3.

Top Categories

This past weekend, we tackled putting together all the drawers, attaching the 32 drawers and 8 doors to the cabinet boxes followed up by adding shiny new hardware.

IMG_7331

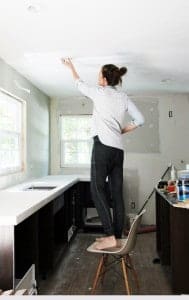
The drawers weren’t hard to put together, but there were so many, both of our hands had blisters on them before we were finished Saturday night–which is when most of these photos were taken so I apologize about the lighting. But the blisters (and back aches) were the only downside to the project. Truly, it was such a rewarding turning point in the kitchen; We have real usable cabinets!

Like most projects, Chris and I come up with a system that works well for us. In this case, I put together the drawers and he attached all the doors and drawer rails to the cabinet boxes. Over and over and over again. When it came time for hardware, he marked and drilled little pilot holes (this tool is a must have for attaching hardware!) and then we both screwed in the hardware by hand.

IMG_7278

Just like in the laundry room, we used these 4″ mission bin pulls from Rejuvenation in unlacquered brass on all the doors and drawers alike. On the doors, we mounted them in the same place we would the drawers and I love how everything looks uniform. One particularly wide set of 36″ drawers, we added two pulls to each drawer and it completely transformed the budget Ikea cabinets into something much more high end.

IMG_7342

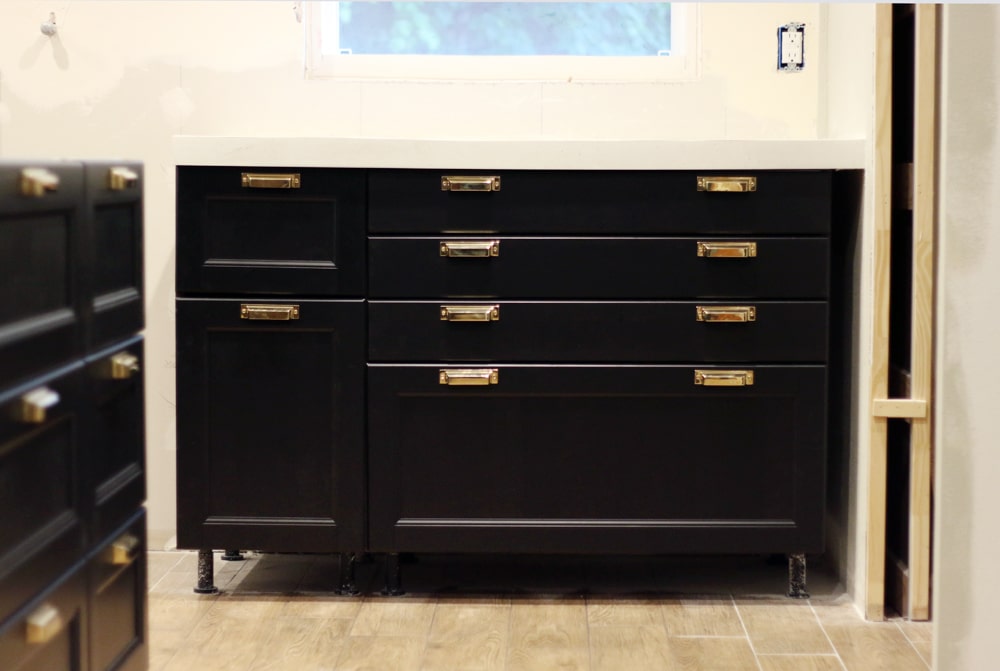
Spending a few hundred dollars on hardware will really make even Ikea cabinets shine. Hardware is a great thing to splurge on, in my opinion.

IMG_7343 IMG_7287

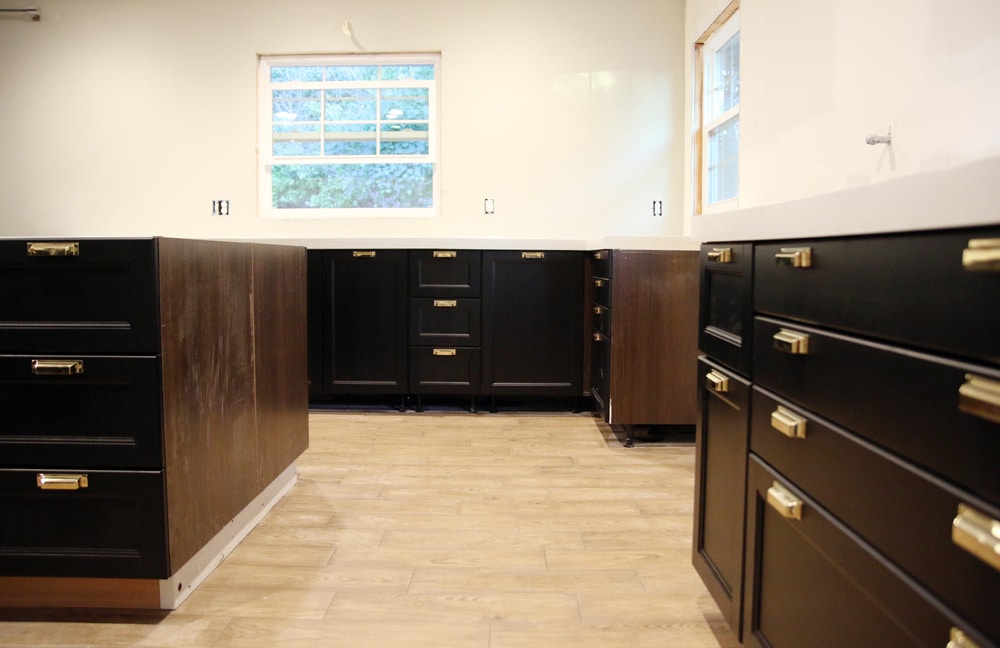
We didn’t get to the cover panels or toe kicks this weekend, so all of the brown cabinet boxes and legs you’re seeing will be covered eventually–hopefully before the week’s up! One change to the kitchen’s layout we haven’t talked about much, but is finally becoming apparent in photos is the island and island seating specifically. We still wanted a place to casually sit in the kitchen and island stools are so great for that, but in the former kitchen, the seating was on the right side of the counter making that portion an unusable work space. Since we moved our fridge (and microwave) to that side of the room, we really wanted to keep the adjacent countertop accessible and functional for prep. So, the walnut countertop will extend out toward the dining room leaving an overhang in that direction for tucked in stools. The solution not only makes the kitchen feel larger, the workspace is more functional and we gained extra cabinetry on the right side.

IMG_7351

With all of this, a few of you have expressed that it seems like we’re about done. Yes and no. We have come so far and most of the dirty work is done, so I can see how it must feel like there should be a reveal, like, tomorrow!–especially now that all the cabinets are in and usable. But, there’s still quite a bit to do and we don’t want to lose momentum in the final stretch. This weekend, we even thought about loading up the cabinets, but we fear that if we don’t finish 100% before “moving in”, we might never finish lots of little things.

We still need to:

-Finish dyeing the tile grout (you can see it started on the left side but not on the right)
-Sand, seal and install the walnut countertop on island
-Build island support legs
-Install toe kicks, cover panels and trim (including window, crown and baseboards)
-Tile and grout the backsplash (we’ve been working on this the past two nights!)
-Seal the countertops
-Stain/Install the pocket door
-Install accent lights including island lighting and sconces
-Order stools for the island
-Order runner(s)
-Install all appliances (next week!)
-Hang open shelves on either side of the window
-Design and build the range hood cover
-Design the pantry shelves

We’d still, ideally, like to be done by the end of next week but we’re taking it a day at a time and still crossing our fingers everything continues to go smoothly.

Leave a Reply

Your email address will not be published. Required fields are marked *

This site uses Akismet to reduce spam. Learn how your comment data is processed.

What do you think?

  1. philip martin says:

    I love your black ikea kitchen and planning on following your style and would like to know where you got your kitchen hardware from. I love those handles and that you placed two on each long draw . Stunning!
    Kind regards
    Philip from Adelaide Australia

  2. We just purchased our IKEA Laxarby kitchen last night and I have ordered some brass knobs that will will use for both doors and drawers. I am trying to decide if the 30″ drawers will need 1 or 2 knobs on them, similar to what you have done on the 36″ drawer. Do you have any 30″ drawers? Do you feel one pull is sufficient? our knobs are about 1 1/2″ square.

  3. Becky says:

    Hello! I LOVE the hardware and the uniformed look – do you find the pulls on the doors annoying as it’s not obvious which way they open?
    Thanks!

  4. You guys have totally sold me on Ikea cabinets!!! I am thinking Laxarby fronts for the bottom cabinets, with Hittarp glass fronts for the top. I am wondering how you think white bases would look with Lax panels (rather than the brown bases)…would it brighten up the interior of the cabinets? I would of course cover the exterior of the bases with Laxarby cover panels, I am just wondering about the interior of the cabinets. Thanks!!

    • Julia says:

      They used to only make white interior cabinets. The brown is an update with the new Sektion line. As much as I don’t love the look, Dana over at HouseTweaking.com has black base cabinet doors with white interior boxes (the old Akrum line) and I remember her saying that she can see slivers of white through the cabinet doors and it bothers her. But I agree, it would be much brighter.

  5. Julianne says:

    Just amazed by you guys. You’ve got your hands full with two kids, a job, diy projects and you are still putting out free content for us to read, and commenting back! It’s seriously amazing what you are doing and I need a nap just thinking about it.

  6. Wow, I like this a lot! I also like your decision to put the cabinet pulls in the middle for uniformity. Can you please share how wide your cabinets and drawers are, and how you decided what width pulls was the best to get?

    Thanks!

    • Julia says:

      We have cabinets and drawers ranging from 15″ to 36″. The 36″ drawers are the only ones that we decided to double up on hardware just because they are so wide. Even our 30″ drawers, one 4″ pull feels just right. When deciding on a size, we pick a style we like FIRST. We knew we wanted to go with the mission bin pull from Rejuvenation to tie in to the adjacent laundry room cabinets, but cutting pieces of tape into the available sizes and sticking them on the cabinets fronts will also give you a good visual.

  7. Christie says:

    Any chance you’ll share a pocket door tutorial? PLEASE! :)

  8. Elizabeth says:

    This is coming together so beautifully! I LOVE your style. Thank you for continuing to inspire AND sharing your home with the world!

  9. Isn’t it nuts how much hardware can change the entire look and feel of a space? I am loving all of this so much!

  10. Meggan S. says:

    LOVE. It’s as simple as that!

  11. Alexis says:

    Oh wow, this looks so gorgeous and makes me so completely jealous that we don’t have Ikea here. I’ve had a look at the DIY cabinets available locally and sadly DIY = lowest possible spec (think plain white melamine and the cheapest, nastiest hinges and runners). The only way to get nice cabinets is to have them installed by a contractor or kitchen shop, or build them from scratch, and I am so not up to that!

  12. Phoebe says:

    This looks so gorgeous! It’s making me think that replacing out old cabinets with ikea cabinets could be doable (and beautiful!). I have a question for you about the toe kick/legs that go under the cabinets. Do you have to run your flooring underneath the cabinets? Because the cabinets hang on the rail from the wall (right?) and then you just add the legs and then cover the gap with a toe kick does it really matter what flooring is underneath? The reason I ask is because we installed new hardwood floors in our house when we moved in (but not under the existing cabinets), so I’m wondering if we ripped out our cabinets and replaced them with ikea ones if we would need to extend the new flooring underneath…

    • Julia says:

      I think it is advised NOT to run hardwood under cabinets. It expands and contracts and if there is any sort of leak, it would be disastrous. We only ran the tile underneath, not because it would be seen (it won’t at all) but as an extra barrier in case of rogue leaks and also, to keep the floors level. Sounds like you’re golden. :)

    • Chris says:

      Hi Phoebe,

      Great question, and the answer is no, you don’t necessarily have to run the floor where you take out the old cabinets. The Ikea legs extend up and down, so you’d just extend them up a bit and make sure they sit far enough forward where the toe kick will sit on the flooring and cover the unfloored (not a word) parts. Hope that made sense! :)

      • Phoebe says:

        Thanks so much guys for the info! That totally makes sense, I forgot that your floors are tile, so makes much more sense in your case. That makes me feel much better about the amount of work we would have to do to replace our cabinets! :)

  13. Brooke says:

    BEAUTIFUL!!!! I LOVE that you used Ikea cabinetry. All your posts about that process will be so helpful someday when we redo our kitchen!

    I remember back when you started talking about dying the grout lines and I wondered if it seemed necessary because it would be so tedious but I have to say, it really does make a huge difference seeing it side by side in the kitchen. I love the left!

    Amazing work out of you and Chris. I love it all so far!

  14. BeccaS says:

    It is already beautiful and not even finished yet! Can’t wait to see the final reveal! I am curious if the depth of the new Ikea upper cabinets had any impact on your choice for open shelving? My kitchen is more galley style and I worry that the 3 extra inches will feel a bit more in your face and crowded. I love open shelving but functionally it would not work for our entire kitchen.

    • Julia says:

      15″ depth definitely felt a little in-your-face to us. We have rather large dishware, so even our open shelves we have planned at 12″ depth felt a little out there, but we love the lightness, openness and ease of shelving so much, that really was the incentive to nix uppers.

  15. Lilly says:

    So excited to see the kitchen coming together! I love the contrast between the white concrete counter tops and the black cabinets. I totally agree that hardware is always worth the splurge! Can’t wait to see it all come together in the end.

  16. Beatiz says:

    Unbelievably gorgeous!! Can’t wait to see the grand reveal. It’s going to be amazing!

  17. Danielle says:

    This looks so amazing! Your reno with Ikea cabinets has us looking at using them for our kitchen reno. What kind of cabinet did you use in the corner? We have 3 corners, but the large corner cabinets seem like such a space waste.

  18. Oh my! Oh my! Oh my! Those cabinets look sooooooo lush that they moved me to write this pointless comment!

  19. Stephanie says:

    That hardware on ikea cabinets is awesome! I seriously think I can reno my kitchen now! I have been nervous to take the plunge. My husband is going to hate me.

  20. Are you kidding me???? This is so beautiful. I love watching it all come together!

  21. Emily says:

    This all seems to be going so fast! I’m very impressed. One thing I think that is never really discussed on blogs is the permitting process and inspections? I know it varies greatly from area to area – but can you touch on that a little? My own kitchen reno was held up for quite some time because of an inspector’s schedule.

    Just curious is all.

    • Julia says:

      Sure! I replied to a couple comments on it, but never really addressed it because it is SO different in every area. For instance, we live in a small city in a rural area that is mainly concerned about permitting for adding basements, attics, or major additions and large decks. We did have the city come check on the gas lines we ran to the kitchen though. :)

all the latest

We believe we should all love where we live.

We’re a couple of homebodies, working to uncover the home our home wants to be. And we’re so happy to have you here. 

HI! We're Chris + Julia

read more

Load More

Reader Faves

SHop all

What We're                     Right Now

What We're                 Right Now

Looking for our favorite things? A place to shop our home room by room, or just catch up on what Julia's wearing / loving right now? Browse the CLJ shop. 

Loving

looking for inspiration? 

A reader recently asked me if I’m starting to fully embrace traditional style and whether we still consider our house to be a “modern Colonial” and why. It was a really great question and so timely — I had really just been thinking about my approach to this home and how my style has changed […]

Can We Send You Our Love Letter?

Another way for us to stay in touch! Joining our weekly newsletter gives you access to exclusive content, never-before-seen photos, your questions answered, and our favorite DIYs. Sign up below!

Follow Along on Instagram

Welcome to our online community where we've posted home, DIY, style, renovations, and family since '09. Renovating our #cljmoderncottage in Idaho and headed for new adventures in Raleigh, NC. #cljfam #cljtransformations

@chrislovesjulia