Good news, our Bonneville Peel & Stick Floor Tiles are restocked! It’s been almost ten months since the first launch broke their website and sold out within minutes, and they’ve done a few small restocks between then and now, but we’re hoping they’ll last longer this go-around! We had a couple of boxes left from installing them in our home gym, and thankfully so, because we recently had this staircase removed, it left us with some flooring that needed patching.
Before removing the staircase

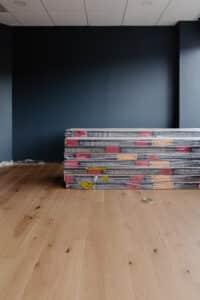
The floor that needs patching

We first applied the FloorPops on top of the cork flooring that was already there. So when the staircase was removed, we were left with just concrete, which needed to be leveled before patching and filling in with FloorPops. I’ll let Chris explain how he did it!
Materials Used
Prep & Level the Floor
Since we previously laid the floor tiles over cork flooring, we needed to lay down some cement board to bring the level of this area up before applying the peel & stick floor tile. Essentially we prepped the floor as though we would be laying any other type of floor, including sweeping, scraping, and scrubbing any debris that would interfere with the levelness of the floor. This includes plaster bits, thick paint drips, dirt, etc.

Lay the New Substrate Material
I measured the thickness of the previous substrate and found that it was just over 1/2in thick. So I used 1/2in cement board with a layer of tile adhesive underneath. Cement board is pretty easy to work with because most cuts can be done with a razor blade knife equipped with a carbide tip.

Once all the pieces were measured and cut, I dry-laid them in place to ensure a good fit.

Then I used a large-notch trowel to apply the adhesive before laying down the cement board.


After the cement board was in place, I used mesh tape and a putty knife to cover the gaps and create a seamless surface on which to add the floor tile.

And that’s all it takes to level the flooring! I put a fan in the room and let it dry for at least 8 hours before sanding the seams and sweeping the floor. Then I did a wipe down with a damp cloth before the next step. Not a wet cloth, only damp.

Apply the Peel & Stick Floor Tiles
After removing any partially cut FloorPops, I began laying them in their place from left to right, making sure to alternate patterns and directions.

The floor tiles are super easily to cut by scoring with a razor blade knife a couple of times (with medium/light pressure) and then popping them along the score mark.

The full project took about 2 hours – one hour to patch the substrate and another hour to lay the tile (with 8-24 hours in between for drying). The hardest part was honestly taking up the previously laid FlooPops, which I guess is exactly what you want – these tiles stick really, really well. Here’s the finished patch job!

Before
After

I can’t tell you what it’s like to feel see our product lines in your homes. We’re obviously overjoyed but also just so grateful and honored that you would bring a piece of us into the walls of your homes. Here are some of your photos of our FloorPops that we’ve been tagged in and wanted to feature here on the blog. Truly inspiring. -Julia
Our FloorPops in Your Homes


Shop our Bonneville Peel & Stick Floor Tiles here!


Out of stock already! I love seeing them used in other peoples’ spaces. I’ve used floorpops in a bathroom and have problems with them peeling up, even when we used the recommended floor prep adhesive helper. I’m still scheming how I can use yours, maybe with a different sub floor materials will keep them down.
These are so good! I’ve been stalking them for months in hopes of a restock and now am struggling to decide where they should live in our house. We absolutely could use these in our bathroom, but we have a screened in porch with sight lines from our living room. I think they’d be gorgeous there. What are you suggestions for porch use? Do you think they’d hold up? We don’t get a ton of sunlight but when there’s a heavy storm, precipitation does blow through the screens. Any advice is much appreciated!