DIY

The Finished Reading Nook at the A-Frame!

May 21, 2018

We believe we should all love where we live.

We’re a couple of homebodies, working to uncover the home our home wants to be. And we’re so happy to have you here. 

Portfolio

Projects

Design

We're Chris + Julia

read more

What we're                   right now

Loving

browse the shop

Befores, afters, mood boards, plans, failures, wins. We’ve done a lot of projects, and they’re all here. 

We have a long-standing relationship with DIY, and love rolling our sleeves up and making it happen. 

Even when you don’t want to rip down a wall, you can make that space in your home better. Right now.

browse all

browse all

browse all

02

01

03

Popular Posts

1.

2.

3.

Top Categories

This project is in partnership with FrogTape®. They allowed us to choose a small space to makeover and provided us with painting supplies and $1000 to execute our vision. Vote for your favorite here

We’re so excited to share the after photos of our cabin reading nook today, as well as the budget breakdown and how you can win $1000 to kickstart your own room redo, too! The beautiful, raw, warm wood (part of which was a complete surprise to us!) really ended up being the star here, I think.

We taped off all the trim and ceilings and were left with this incredible contrast between painted wood and raw wood with sharp paint lines thanks to FrogTape®.

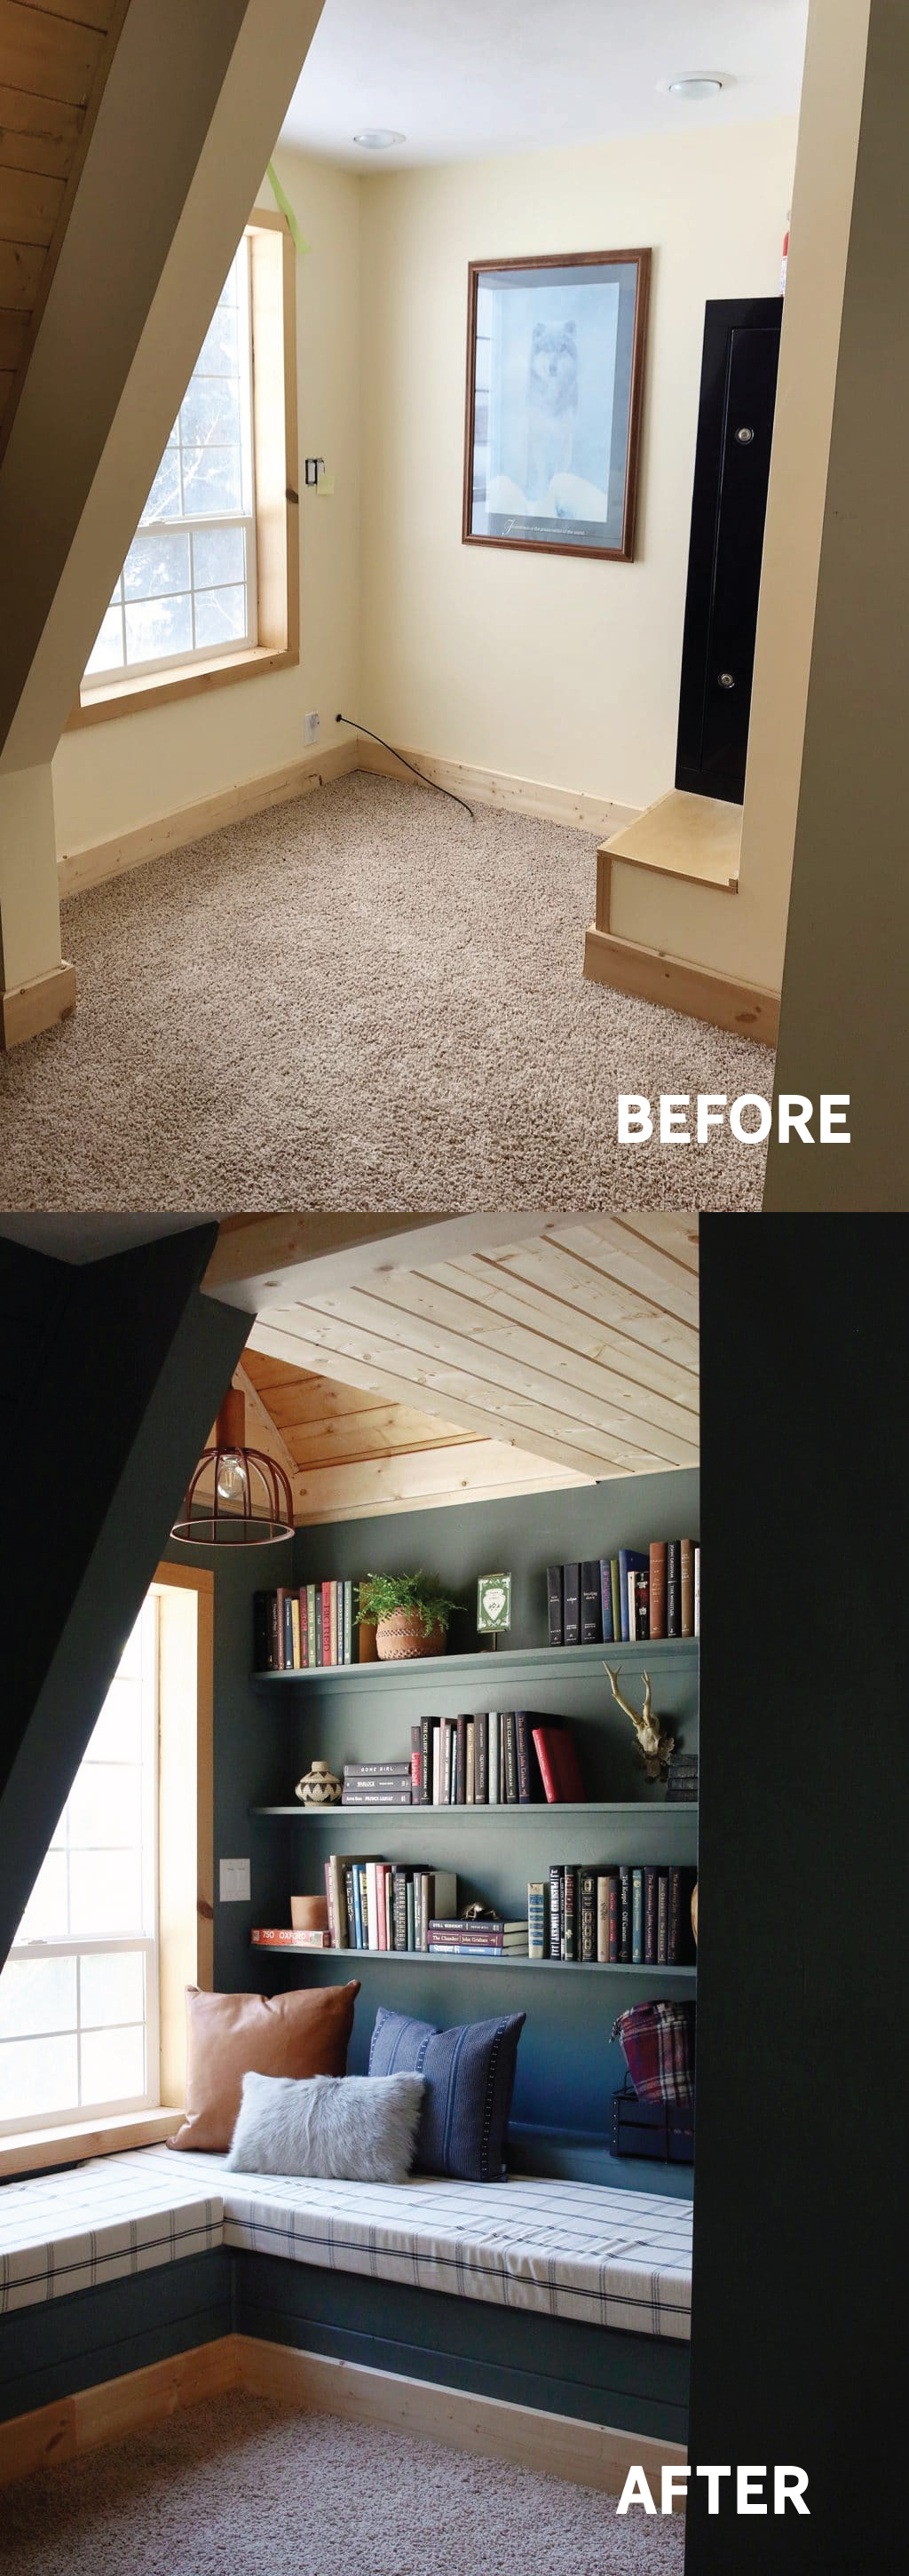
Now the nook looks like this!

As a reminder, it used to look like this!

Here’s a gif to save you a scroll:

When we started this project, we wanted to give this space a cozy feel, but also a purpose and a function. Now we can imagine ourselves and our guests curling up with a good book, or bird/bear watching for hours from right here. And that ceiling! Gah. Read more about that discovery here. This has really been the perfect project to kick off our cabin renovation.

Here’s another before and after straight on:

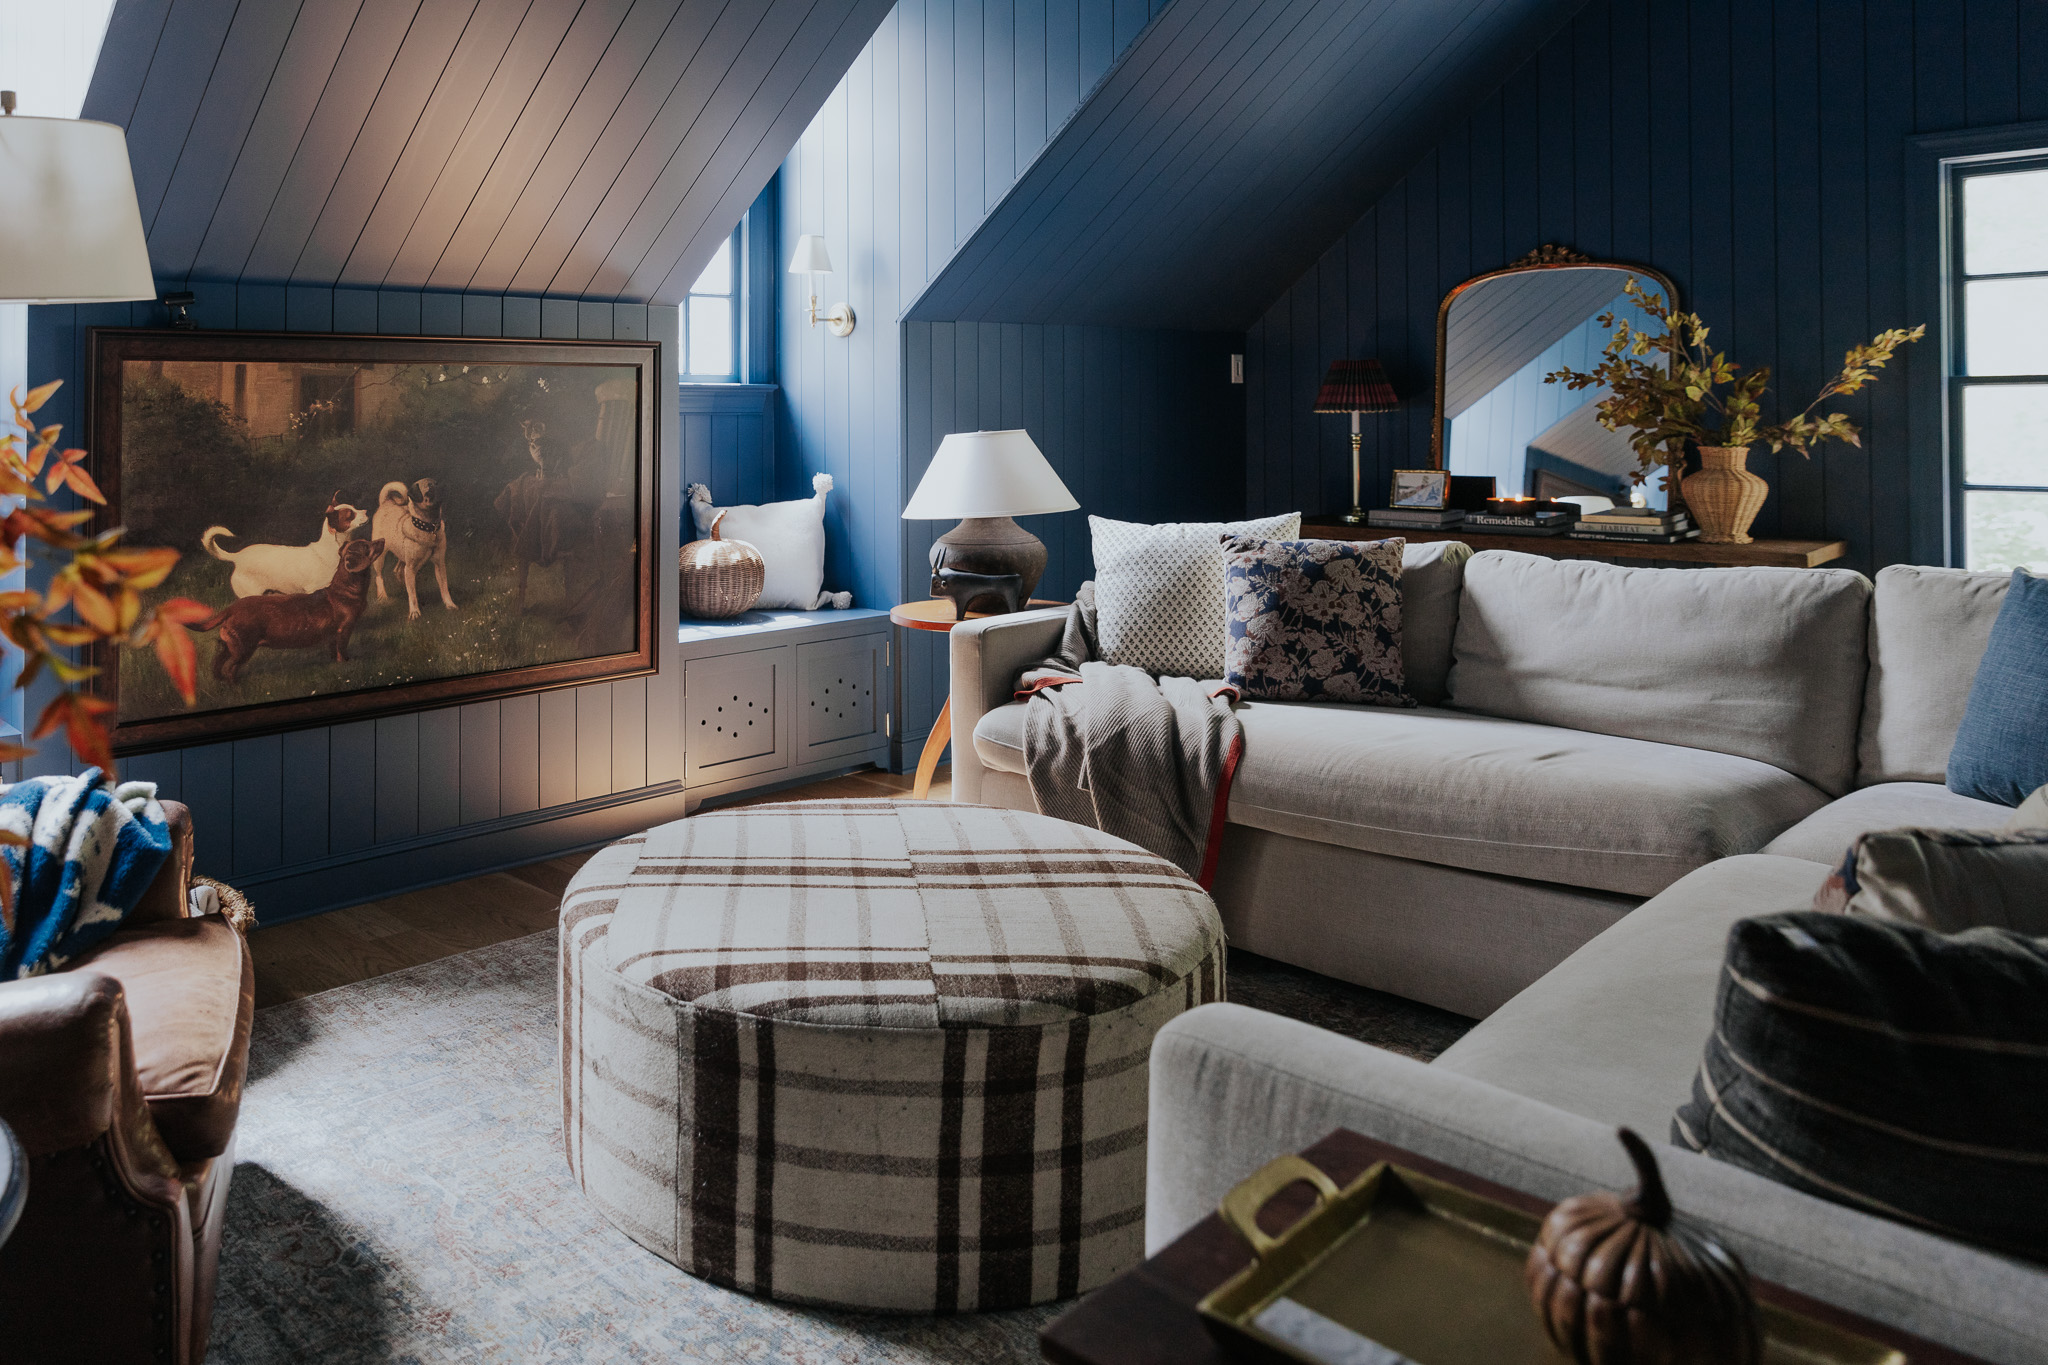
The other eyesore that we wanted to address when tackling this space was the the breaker box. To conceal it, we painted it with a few light coats to match the walls. And then hung this macrame wall hanging from Urban Outfitters I ordered to decorate our intern’s dorm and they accidentally sent two (and told me to just keep it! score!). It really adds interest to this wall, conceals the breaker box and is easily removed if we need to access it.

We’ll definitely share the rest of the room with you soon. Paint is magic, truly. And I love the mix of this color (Valspar’s Victorian Tapestry) with all the wood throughout the room.

Here’s how the $1000 budget we received from FrogTape® breaks down:

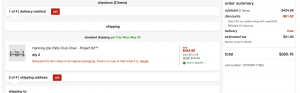
pendant light: $109 (with 15% off coupon)
5 yards of fabric for bench cushions*: $59 (with 20% off coupon)
5″ foam for bench cushions: $79 (with 40% off coupon)
pine tongue and groove for ceiling: $90
lumber for shelves: $60
2x4s and Plywood for building bench and framing out portions of the ceiling: $68
paint (Valspar’s Victorian Tapestry): $40
pillows (leather + indigo) $383: (splurge!)
mini resin antlers: $38
terra cotta planter: $20

TOTAL: $946!!

*If you follow me on Instagram, you may have seen that I was DIYing my own fabric very similar to this! It came back in stock at a good price and I thought, for the bench cushion, it would be nice to have something perfect, but I plan to use the fabric I made for curtains on the other side of the room. I’ll share more on that soon!

Obviously the pillows were a big splurge, but we were so under budget that we could swing it. (I had the gray faux fur one in my stash. along with a lot of the little decor pieces I lined the shelves with.)

Now for the fun part! FrogTape® has turned this into a friendly, charitable competition among the 6 bloggers participating in the FrogTape Paintover Challenge®, with perks for you, too! You can vote for your favorite makeover (fingers crossed it’s ours!) every day through June 1st. When you vote, you’ll be entered to win FrogTape® product and a $1000 Visa gift card to kickstart your own room makeover. And whichever blogger’s room wins–gets $10,000 to donate to the charity of their choosing! (We have chosen the Dave Thomas Foundation, if you’re curious). Vote right here!

Missed a part of the process? Check out:

• All the before photos and mood board here.
• How we found that cool ceiling and exposed it here.
• Painting and how we built the shelves here.
• A video tour of the A-frame here.

SaveSave

SaveSave

SaveSave

SaveSave

Leave a Reply

Your email address will not be published. Required fields are marked *

This site uses Akismet to reduce spam. Learn how your comment data is processed.

What do you think?

  1. Grace says:

    Love this space! Where did you buy the foam cushion from? The source wasn’t linked. Thank you!

  2. Shanae says:

    This transformation is incredible! Am I wrong or was the ceiling raised closer to the window? How did you manage that?

  3. Kristina says:

    I love this look! Can you share what type of wood you used for the shelves, and how wide that span is? I am looking to do something very similar in my home but I am having a tough time figuring out the proper wood to use to prevent any sagging in the shelves. This space looks to be approximately the same size as mine. Thanks!

    • Chris says:

      The boards we used are linked in this post. This span is about 70in or so, but with the support all along the back wall it helps keep it stable. But you also need to be aware of the load you add to the shelves – we try to spread out the weight a bit.

  4. Jess says:

    This is such a beautiful and inviting space. I could spend all day in that little nook reading.

  5. Jessica says:

    What paint sheen did you use to paint the shelves? Whenever I paint shelves in the past I have used semi gloss but it always seems to peel off when I put books and baskets on the shelves. It peels off fairly quickly!

  6. Erica says:

    You’ve been my favourite blog to read and favourite bloggers for a looong time, I’m so impressed with what you do! But that much money on cushions is ????????. Can’t wrap my head around that choice?
    A lot left in the budget = something you could have done a lot with

    • Julia says:

      We really wanted to keep the base of the project super affordable and something anyone can do with a couple hundred dollars. And accessorize as you wish!

  7. Such a tiny space but this is one of my favourite makeovers ever! I love it so much! xx

  8. Lauren says:

    Bravo! What an incredible job! You guys always pull a thoughtfully composed design together. Thank you for the journey. One question; will the exposed bulb be too harsh for reading? I know you love your bulbs, you probably thought this through. Fingers crossed that you win.

  9. Julie says:

    I love your blog! I’ve just discovered it and spent the last two weeks reading through all the archives . I have so many ideas for my house. I’m sad that I’ve caught up and have to wait for new posts now, but keep up the good work! :)

  10. STAHP! This is too good. Love every single thing. Even the old wolf print!

  11. Sam says:

    So cozy. The paint color just transforms this space!

    Are the books from your own collection? Sometimes I feel like going to a thrift store and just buying books based on how they would look on my bookshelf lol! Any tips for finding inexpensive books/statement pieces?

    Thanks :)

    • Chris says:

      We had a lot of these, but have purchased some from the Thrift Store in the past. You can often find a lot of classic stories from Thrift Stores, and they often look good as well.

  12. Liz says:

    I checked the other projects and I think yours is the best. It is the most dramatic change in the room. Four of the six projects went dark in their paint choices, which is interesting.

    By the way, we can vote daily until June 1st at noon. So – you need to have a reminder link at the top of each daily post to remind us to vote for you guys!!

  13. Johanna says:

    It’s very pretty! I don’t understand the use of frog taped though, I think you told us (maybe on the podcast?) that you never use tape while painting?

    • Chris says:

      Painting around pine is very unforgiving. If you get even a drop on the wood, it soaks the paint in and then you have to sand it down. Whereas paint over paint can be fixed. We needed to be exact as possible, to avoid having to sand and do it again.

  14. Laura Fox says:

    What a transformation! This space turned out so delightfully warm and cozy. I absolutely love it! Thanks for sharing!

  15. Jen says:

    I love it! So pretty

  16. Keltie says:

    As an adoptive mama, thank you so much for selecting the Dave Thomas Foundation!

  17. Stacey Soden says:

    This space looks amazing! Curious: I noticed that you included a link to the cushion fabric. Julia, didn’t you DIY a version of this pattern a few weeks ago using fabric markers? Or did that design just not make the cut?

    • Julia says:

      I explained that right under the budget breakdown. I found the fabric just as I was waiting for more markers to come in so I could finish mine and I thought the fabric I made would make better curtains than a bench cushion (benches you see ALLLLLL the inconsistencies).

  18. Julie S says:

    This is truly beautiful! I love your dark painted library at home and this reading nook channels the same vibe. There will be some corner of my house that gets a moody treatment too, though most of it gets lots of sun (my favorite, and yet everybody needs a little contrast).

    Question in all curiosity – where do you lean against when you want to settle in there? Seems like there is not much of a place to rest your back what with the windows and the shelving?? I pinned many reading nook pix when I was making one in my house and most of them seemed like yours, either windows or shelves on the walls and no place to lean back against! It was one of those things I thought was great for photos but less practical in real life usage.

    • Julia says:

      Both of the benches back into walls so that’s the natural place to sit back and relax and the longer cushion is even long enough to prop my legs up completely!

  19. Caitlin says:

    Ok, I feel so dumb….but everytime I see the before pics I’m confused what the black cabinet is on the right side? It looks built in….where did it go?? ????????????

  20. Stephanie says:

    Looks amazing! Did you sew the cushions? Can they be washed? I’m working on a similar window seat reading book in my playroom right now and I’m not sure how to go about dealing with the cushions. Thanks!!

    • Chris says:

      We had a seamstress friend of ours sew the cushions for us, and we treated them with Scotchguard. They can be washed if needed, as well.

  21. abby says:

    This is SO beautiful! I love the wall color, especially when paired with the cushion pattern. You guys did a wonderful job! I have a practical question, though. It doesn’t look like there is an easy way to lean back if you were to actually read in this area. I guess I was imagining being able to lean your back against the wall as you sat on the cushion, but, between the window on one wall and the bottom shelf on the other wall, I’m trying to figure out how you will actually lounge in here aside from straight up laying down on the cushion only. I’m sure I’m just not seeing it quite right, so I truly am just curious. Thanks for letting us know!

    • Julia says:

      Great question! So, each cushion backs into a wall and it’s really natural to rest against it with your feet up.

      • abby says:

        I see that, but when you sit up, doesn’t your back hit the thin bottom shelf? Where you can’t lean your entire back against the wall or anything else? That’s the part I’m not understanding…

  22. morgan says:

    Honestly Julia, it looks great, but I can’t believe that you didn’t keep the wolf poster ;)

  23. It looks SO good. Wow. Definitely voted for you guys! Out of curiosity (because we’ve recently installed some cedar raw paneling in our house, too): are you worried about the ceiling yellowing or aging over time, since it’s raw wood? I presume since you said it was raw that you didn’t treat it at all.

    • Julia says:

      Thanks so much! We added some new planks to the existing ones that were already there. The existing ones are a little darker, so we’re excited to see the others age.

  24. Katie McCleery says:

    Love it! Great job.

  25. Kim W says:

    You splurge on what you want to splurge on! In fact, it’s more refreshing that the bulk of the room was done on the cheap–much more attainable for readers like me planning for renos!

  26. Molly says:

    I Loooooove this! It’s so cozy and woodsy and the perfect fit for the cabin. The wall color with the wood paneling is divine!

    Unrelated: On your Friday post you mentioned there would be a post on Saturday, did I miss it? I can’t find it!)

  27. Sabine says:

    $383 for two pillows?? Yikes!

  28. Ginger says:

    Wow, this is absolutely gorgeous. Exactly the look I have been trying to do in my sons bedroom. Do you recommend this color in a small bedroom with one window? I just don’t want anything to feel too dark but this little nook of yours just looks cozy. I’m wondering if you have a lot of light coming from the other side of the wall?

  29. Blu says:

    You have such a knack for picking amazing colors! This is something I would typically shy away from and now I’m like where can I put this in my new home?? love it! And best of luck on the challenge! I’ll be voting for yall :)

    http://www.liveloveblu.com

  30. I love the contrast and you guys did not disappoint on this one, not that I expected you too! I love how you added in the pops of terracotta along with the leather pillow. So gorgeous!!!

  31. Lindsay says:

    Absolutely amazing, what a transformation!! You guys are so talented and creative. What a beautiful space to enjoy, so easy on the eyes!

  32. Kate says:

    Gorgeous. I tried to vote, but maybe the voting isn’t open yet? I can’t seem to figure out how to do it!

  33. KT says:

    Looks great! I couldn’t figure out where to actually vote on their website though? Also, they have your names as “Chris loves Julie”

  34. Shuchi says:

    Can you give more info on how you put together that bench cushion? Where did you get the foam from? I’m building a similar reading nook and have no idea how to tackle the cushion!

    • Chris says:

      We bought the foam from Joanne’s, and had it trimmed to our cushion sizes. We then had a seamstress friend of ours sew the fabric to create the covers.

  35. Debbie Ricks says:

    Okay… That is just beautiful!! Like Seriously, you totally nailed the look you were trying to achieve.

all the latest

We believe we should all love where we live.

We’re a couple of homebodies, working to uncover the home our home wants to be. And we’re so happy to have you here. 

HI! We're Chris + Julia

read more

Load More

Reader Faves

SHop all

What We're                     Right Now

What We're                 Right Now

Looking for our favorite things? A place to shop our home room by room, or just catch up on what Julia's wearing / loving right now? Browse the CLJ shop. 

Loving

looking for inspiration? 

A reader recently asked me if I’m starting to fully embrace traditional style and whether we still consider our house to be a “modern Colonial” and why. It was a really great question and so timely — I had really just been thinking about my approach to this home and how my style has changed […]

Can We Send You Our Love Letter?

Another way for us to stay in touch! Joining our weekly newsletter gives you access to exclusive content, never-before-seen photos, your questions answered, and our favorite DIYs. Sign up below!

Follow Along on Instagram

Welcome to our online community where we've posted home, DIY, style, renovations, and family since '09. Renovating our #cljmoderncottage in Idaho and headed for new adventures in Raleigh, NC. #cljfam #cljtransformations

@chrislovesjulia