This post has been a long time coming. Saber Grills sent us one of their 4-burner Elite grills two years ago. Shortly after it arrived, I hurt my back and the project was postponed. Winter rolled in and the grill, along with cabinets, drawers and doors (no longer available in the exact specs at Saber but similar here), sat in our garage for months. Then last summer we had to fix a few things with the foundation of our deck (don’t hire cheap labor for home improvement) and didn’t end up building the grill area until September – just in time for our photo shoot with DIY Magazine (for real, they showed up the same day we installed the countertop and grill).
And since the magazine wanted to show the outdoor area first, we’ve just been sitting on this project for the past 10 months! But finally, we can share with you how we built this:

First, disclaimers. And I wish I didn’t have to, but that’s the world we live in and we have to cover our bases.
A. I can’t encourage you to build your outdoor area the way we built ours. Every state has their own building codes when it comes to something that could catch your house on fire, so study the recommendations of the grill you buy, the code for your state, and adjust according to your circumstances. We consulted with a couple builders and took our plan to our local zoning office, but just because we did it like this doesn’t mean you can or should.
B. I am not going to share measurements. The measurements of our grilling area are completely irrelevant to you, because our space is not the same size as your space. Our grill likely doesn’t have the same dimensions as your grill (unless you buy the one we have). I’m going to share our process so you can know how we did it, and if you choose on your own accord to do something similar (that falls within building code and is safe for your home) then hopefully this will be helpful.
C. There is no “C”. But a list with only two items seems underwhelming, so this item has been added for effect. Let’s get started.
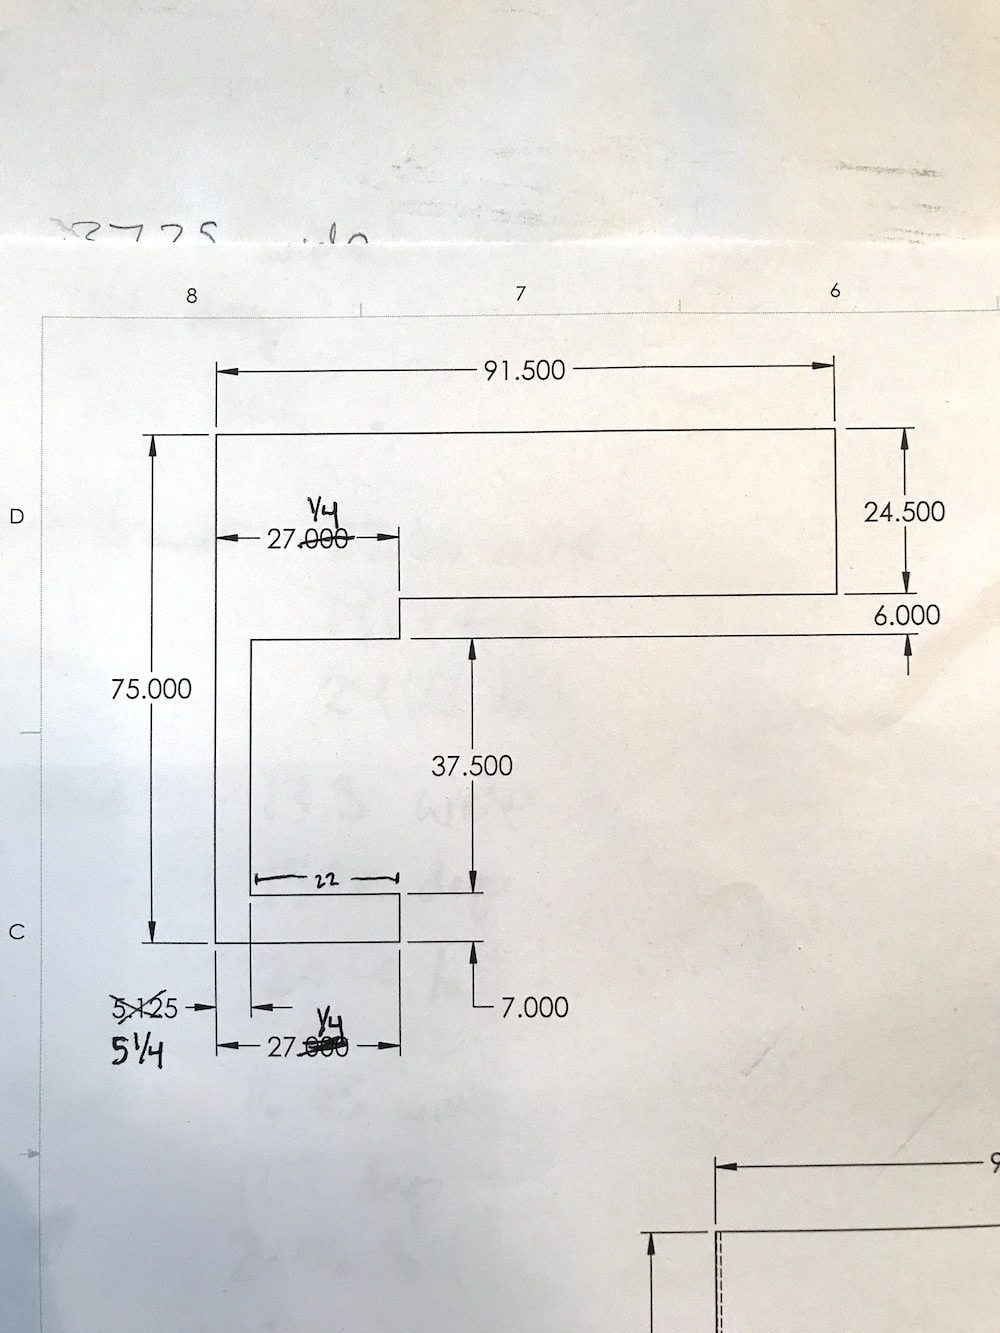
1. Planned the design and sketched it out, along with exact measurements

It’s clear by the image above that Jules is the artistic one, but having the plans drawn out, with exact measurements and dimensions, helps a lot in keeping your bearings through a project. Refer to it often, and make sure to plan for things like:
• cutouts for cabinets
• thickness of materials like 2x4s (which are not 2inx4in), concrete board, brick or stucco work etc.
• fuel lines
• sufficient heat barrier
For example, if you want a space to be 39in wide when all is said and done, you need to plan your framing to include a layer of concrete board, so if you’re using 5/8in concrete board, you would widen the entire area by 1 1/4in (5/8 on each side). And you need to plan for that on every dimension.
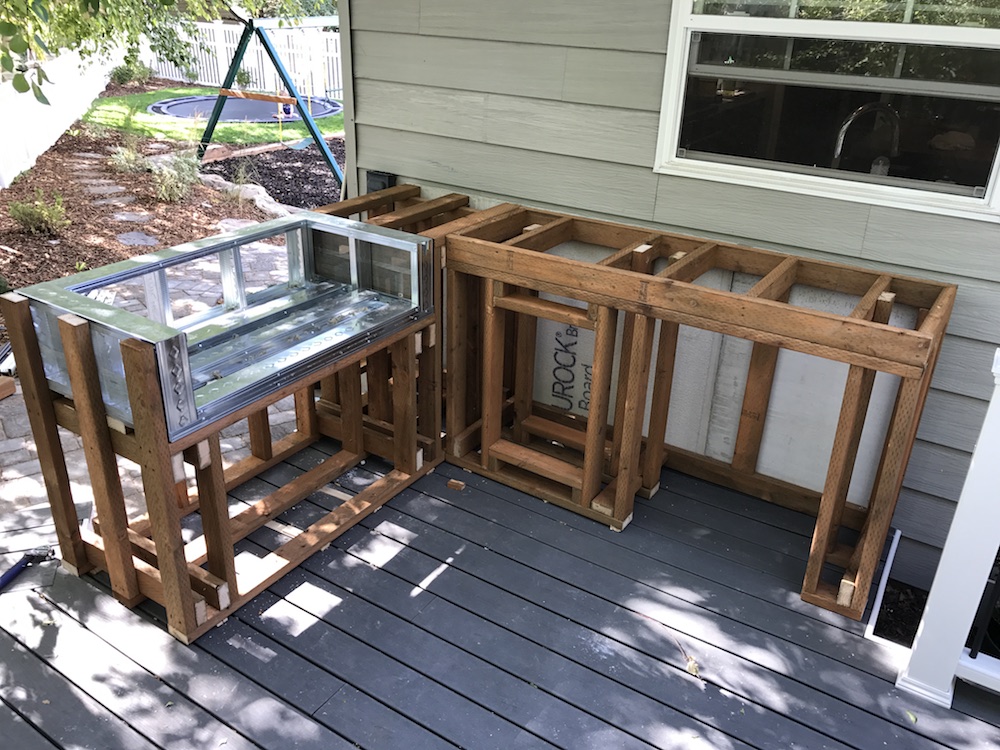
2. Framed out the first section using pressure treated lumber
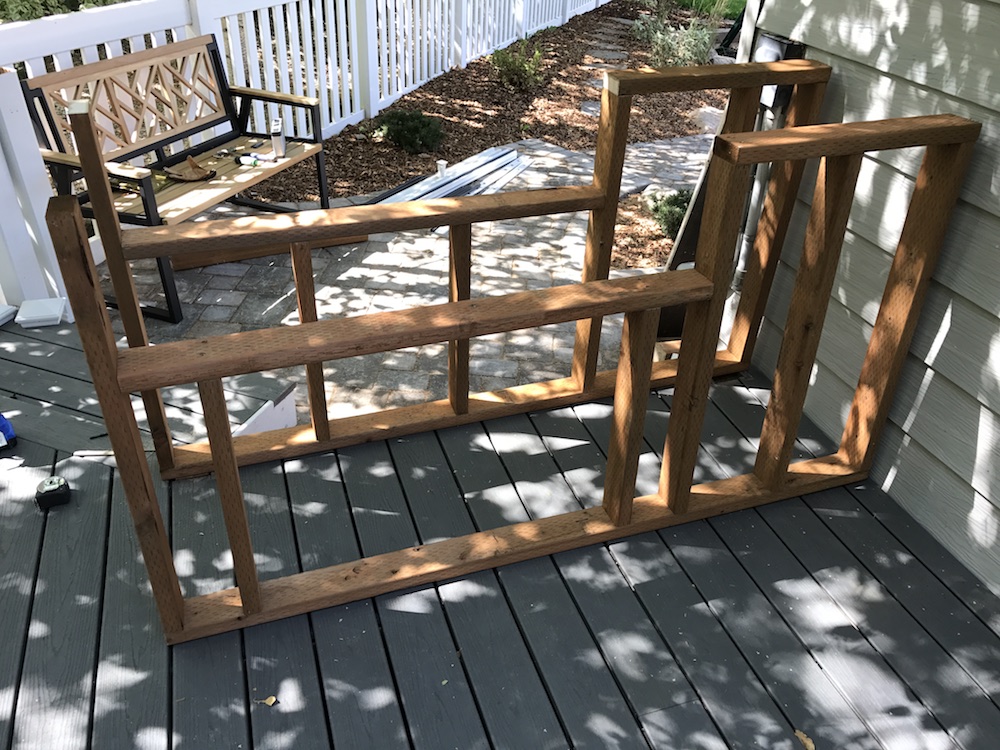
Since the grill is outdoor, we used pressure treated lumber. Not only will it handle the elements better, but it’s also a tad more heat resistant than regular lumber. But don’t lean on that too hard – it will definitely catch fire if you don’t build in a proper barrier.
You can see in the above that we built each section of the frame independent from the others. Since they won’t all be the same (you can see the front one has a cutout for the cabinet/door) it helped to take one at a time. Then we connected them together.
Before we secured the first section down, we attached concrete board to the back side, facing the house. Even though that won’t be seen, we wanted to make sure it was all enclosed and we wouldn’t be able to do that once it’s in place.
3. Added wire mesh for insulation

In the center of our heat barrier we wanted to add a layer of fire retardant insulation. We added wire mesh between the supports around the entire grill area to keep the insulation in place.

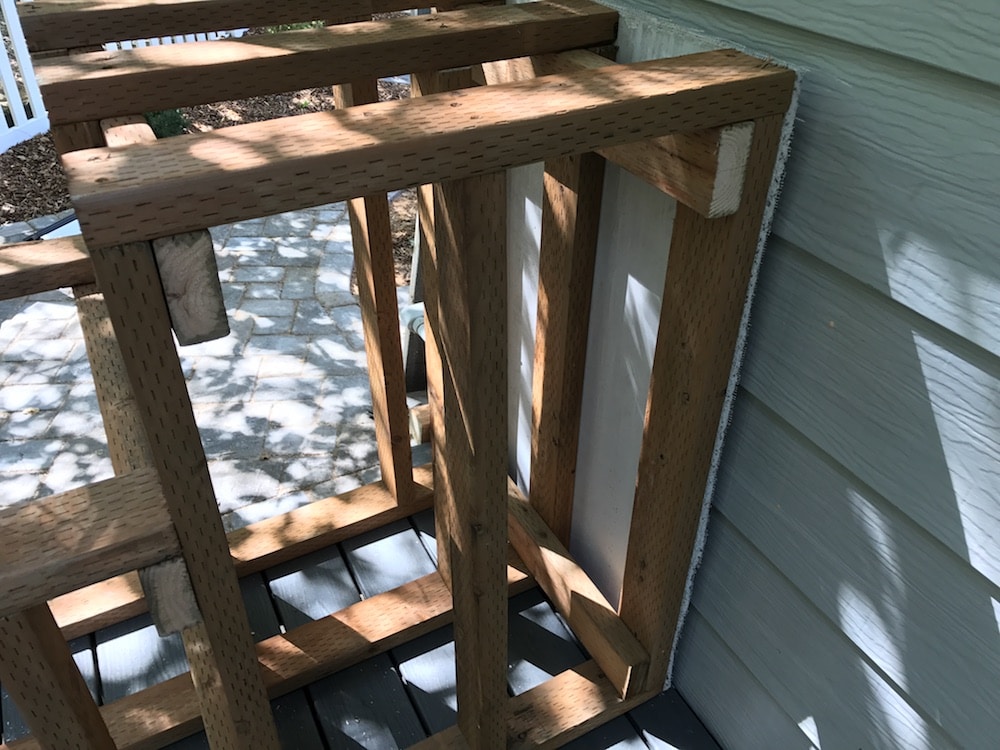
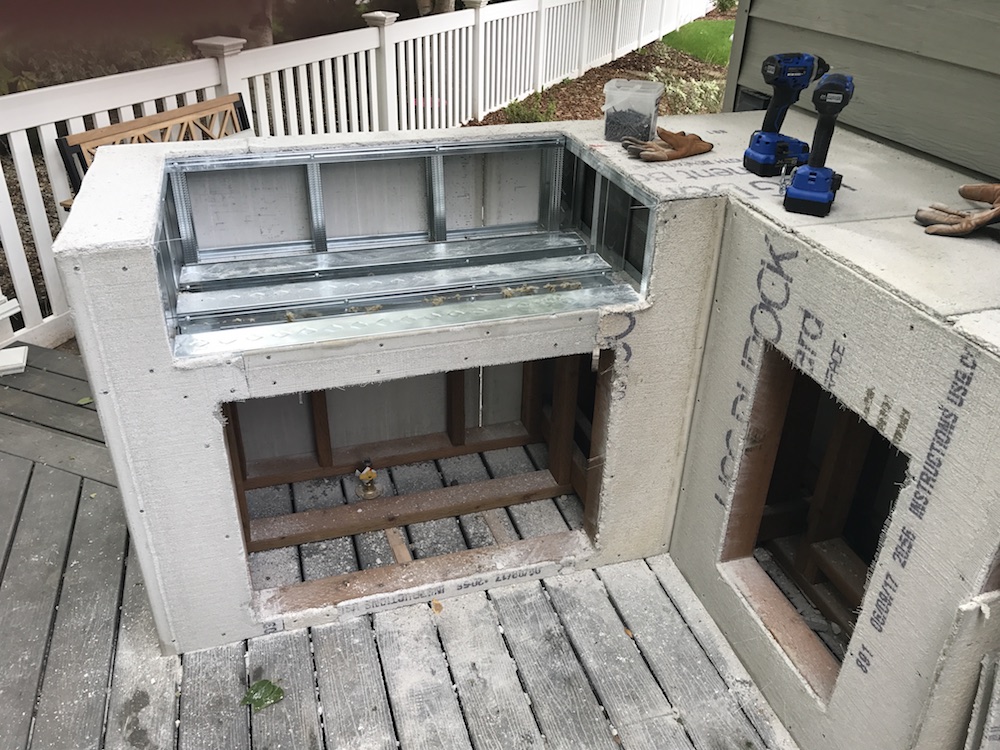
4. Framed around the grill area with metal 2x4s

We used metal 2x4s directly around the grill area because they would help us achieve a solid heat barrier between the grill and the flammable building materials. Framing with metal is a bit of a bear, so wear gloves and invest in a good pair of tin snips. And follow standard framing guidelines – no more than 16in apart on center. For the two middle sections I added pressure treated 2×4 supports directly underneath them, spanning across, so help with stability and load.
5. Added fire retardant insulation inside the metal supports
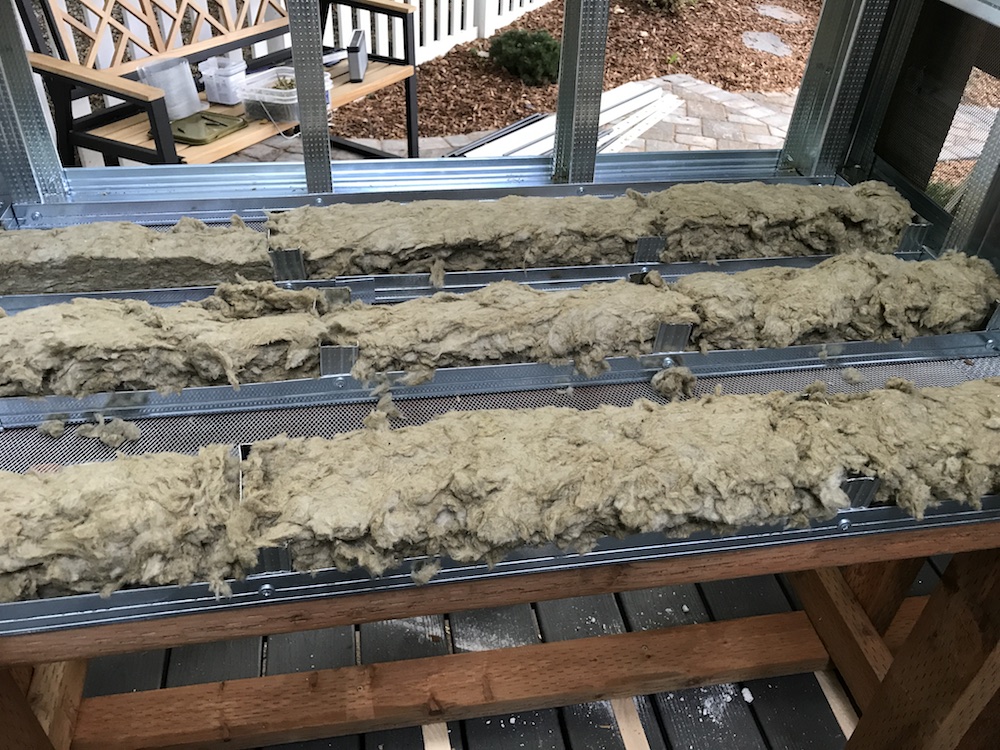
To ensure we had a solid heat barrier, we added insulation inside the metal studs. Once the top pieces were added and secured in place, the metal framing was complete.

6. Framed out the second section with pressure treated lumber

This section, like the first, was built in pieces and connected together. We also added concrete board to the back before putting it in place.
You’ll notice that we used shims numbering not a few. That was part of the issue we had to sure up before building this, but it still left the deck a bit uneven. We used a level spanning between the two sections to square everything up, shimmed it and secured it to the deck with wood screws.
7. Covered the outside surfaces with concrete board

Durock is a great product for applications like this, because it’s fire resistant and holds up well in all kinds of weather. If you really wanted to get crazy with it you could cover the entire thing with a coat of Redgard, but we felt comfortable with the concrete board itself.
8. Added venting for the grill
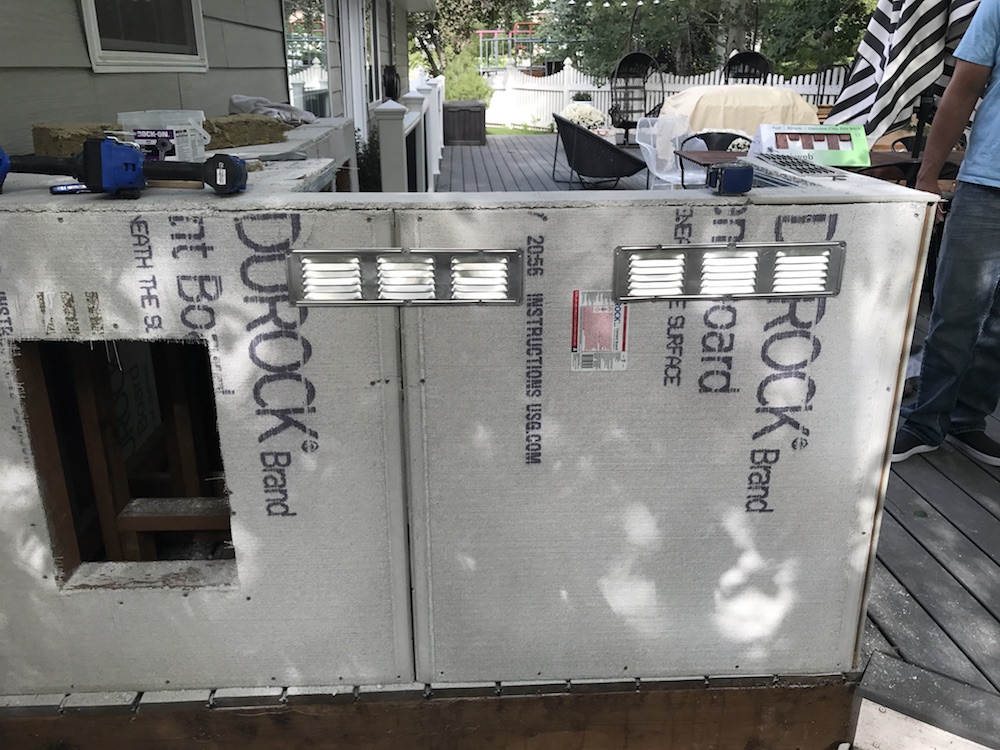
We went to Lowe’s and picked up a couple vents that had a wire mesh layer on back (to help with bugs). The reason for this is, our grill has vents on the back side, below the visible area. These vents are both for output and intake. Fire needs to breath, so these vents allow the grill to take inhale and keep the fire burning hot, as well as exhale any dangerous fumes that could otherwise build up and combust. Proper ventilation is key to a safe outdoor cooking area.
9. Added more insulation to the grill area before adding concrete board there
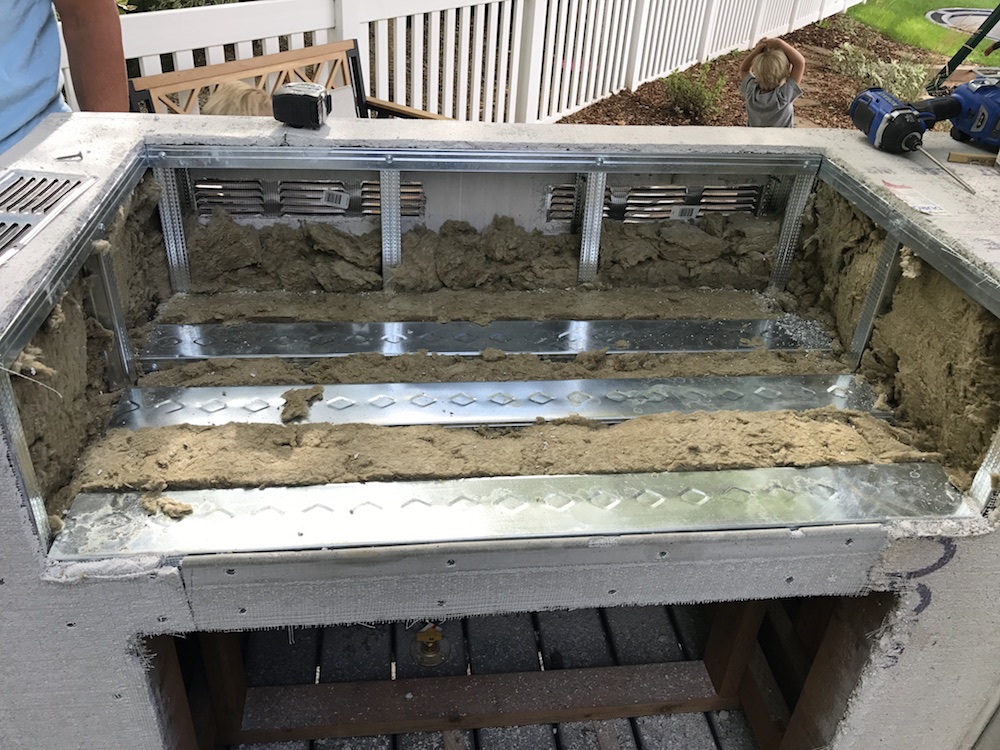
We put another layer of concrete board around the inside of the grill area, but before that we filled all the gaps with fire retardant insulation. Except, of course, the back area where we added our vents. That was kept open, for reasons explained in the previous paragraph.
10. Added brick veneer facing

Where we were dealing with limited space, and didn’t want to put too much load on the deck itself, we opted for brick veneer from Lowe’s as opposed to real brick. It’s also a lot easier to install since it cuts just like tile. Actually it cuts a lot easier than tile and was really nice to work with. (you can also see in the image above the grill area covered with concrete board)

Though we had a natural gas line run for the grill, I still use a propane tank for my turkey fryer when I do shrimp boils or fry turkeys on Thanksgiving and stuff. The image above shows the space where we put the propane tank cabinet – on the back side.
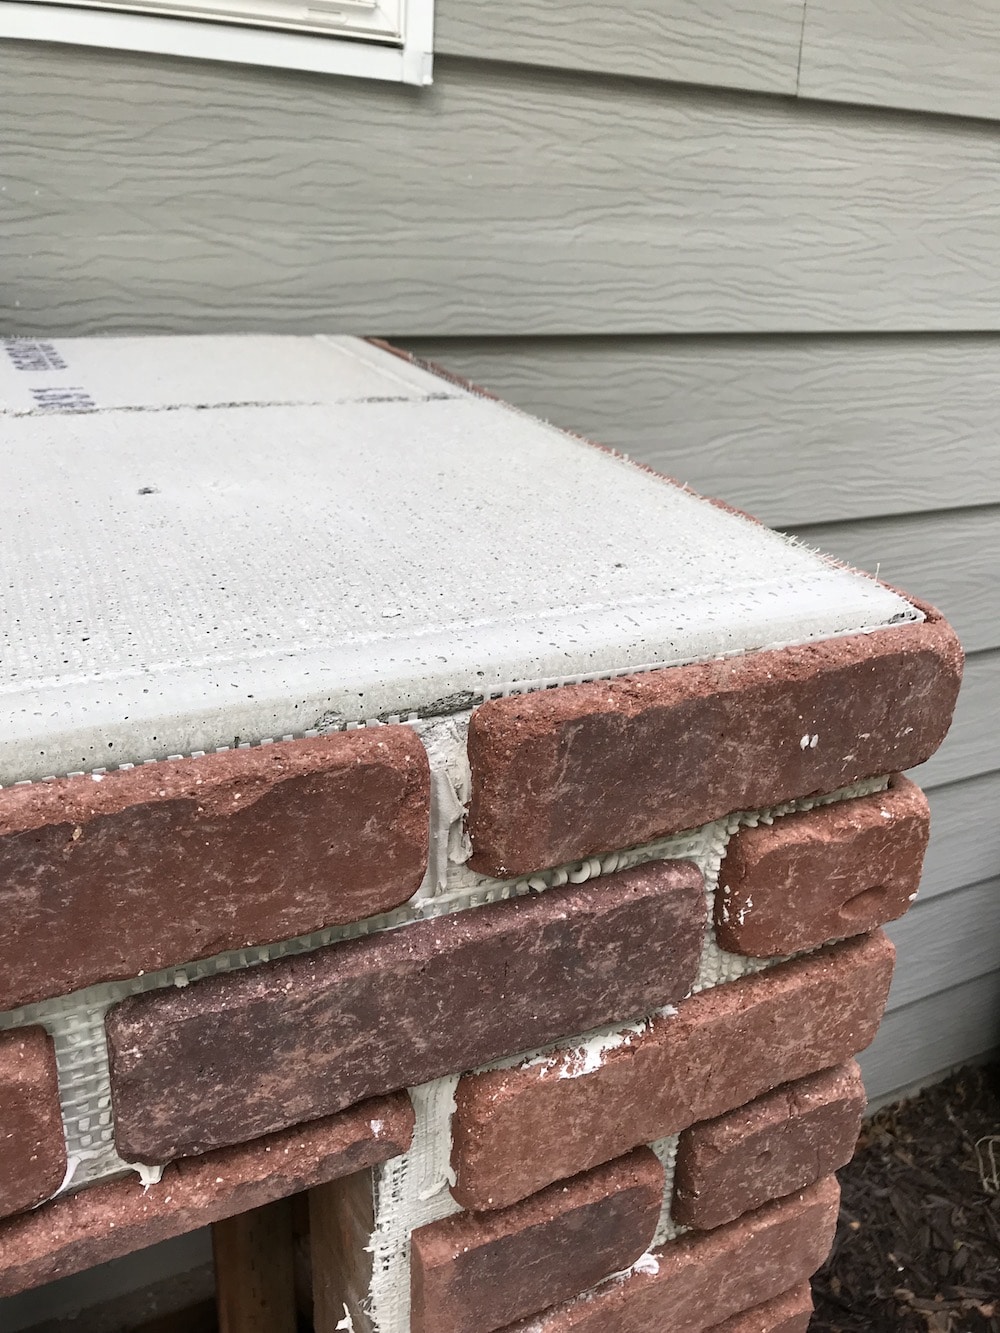
Once the mortar dried, instead of using grout like you would on tile, we used legit brick mortar in a similar fashion in between each brick. We put it into piping bags and piped it into the spaces, then ran along it with our gloved fingers.
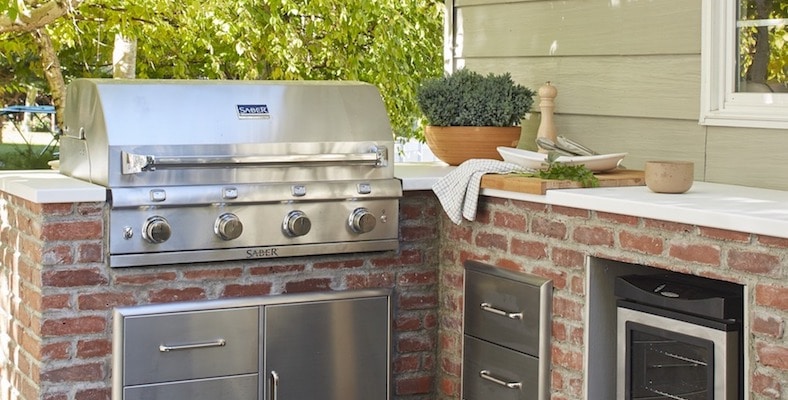
11. Added the powder coated steel countertops
We were a bit stumped on countertops. Even though we saved a lot of weight with the brick veneer, we didn’t want to add thick concrete countertops, but we also wanted something easy to clean and low maintenance.
We visited a local metal fabricator who came out, took measurements, and created custom steel countertops that weighed less than 80lbs. The white powder coat finish looks great with the brick and against the house, and is super easy to clean. Wipes right up.
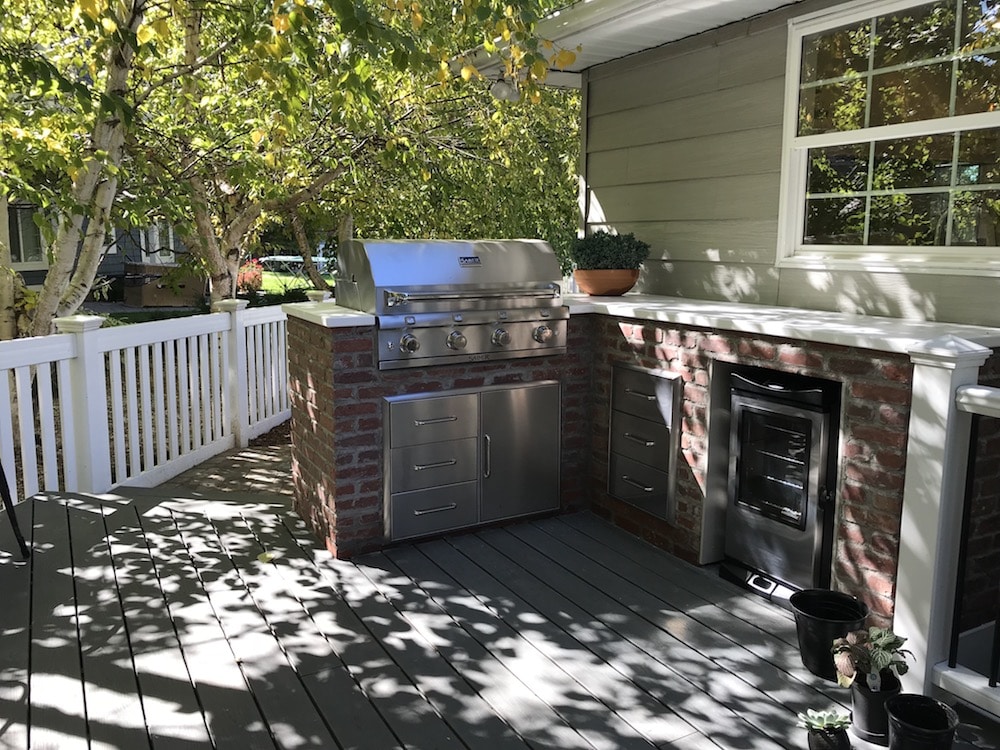
We put the grill in place first, then set the countertops down on top of them, securing them in place with Liquid Nails. We set buckets of rocks on top to keep them down while the adhesive dried. And of course that picture was taken with my phone, as the sun speckled across every surface. Here’s a reminder of what it looks like when a professional takes the photo:
So now I’ve been using this Saber Grills grill in our outdoor semi-kitchen for almost a year (if you’re unfamiliar with Saber, they’re the high end line of Char-Broil – they use the same infrared technology I’ve praised in the Char-Broil grills I’ve had, with higher quality construction and even better performance). We absolutely love it and couldn’t be happier with how this whole area turned out, and how much it adds to our deck.


Hi!
Would you mind sharing what brand the stainless steel drawers/doors are from? Thank you!
They’re also from Saber: https://www.sabergrills.com/outdoor-kitchen.
Very helpful I will be using this information as I build my grill Island
Wow, I really like the design.
Island looks good, I am building a similar one & using some of your ideas.
If you are using LP gas, I see a problem. Google vent placement for LP gas. Your vent s may help the flame on your grill, but you need bottom vents for LP gas. LP gas is heavy & will drop to the bottom of your island.
Ours is natural gas, not LP. There’s also ventilation below the grill.
Fantastic work! How’s the powder coated steel worktop held up? Such a great idea for a lightweight option. Any recent photos? Any regrets i.e. wish you’d gone for stone or concrete instead? I’m in the planning phase of building my own outdoor kitchen. Well done guys. John