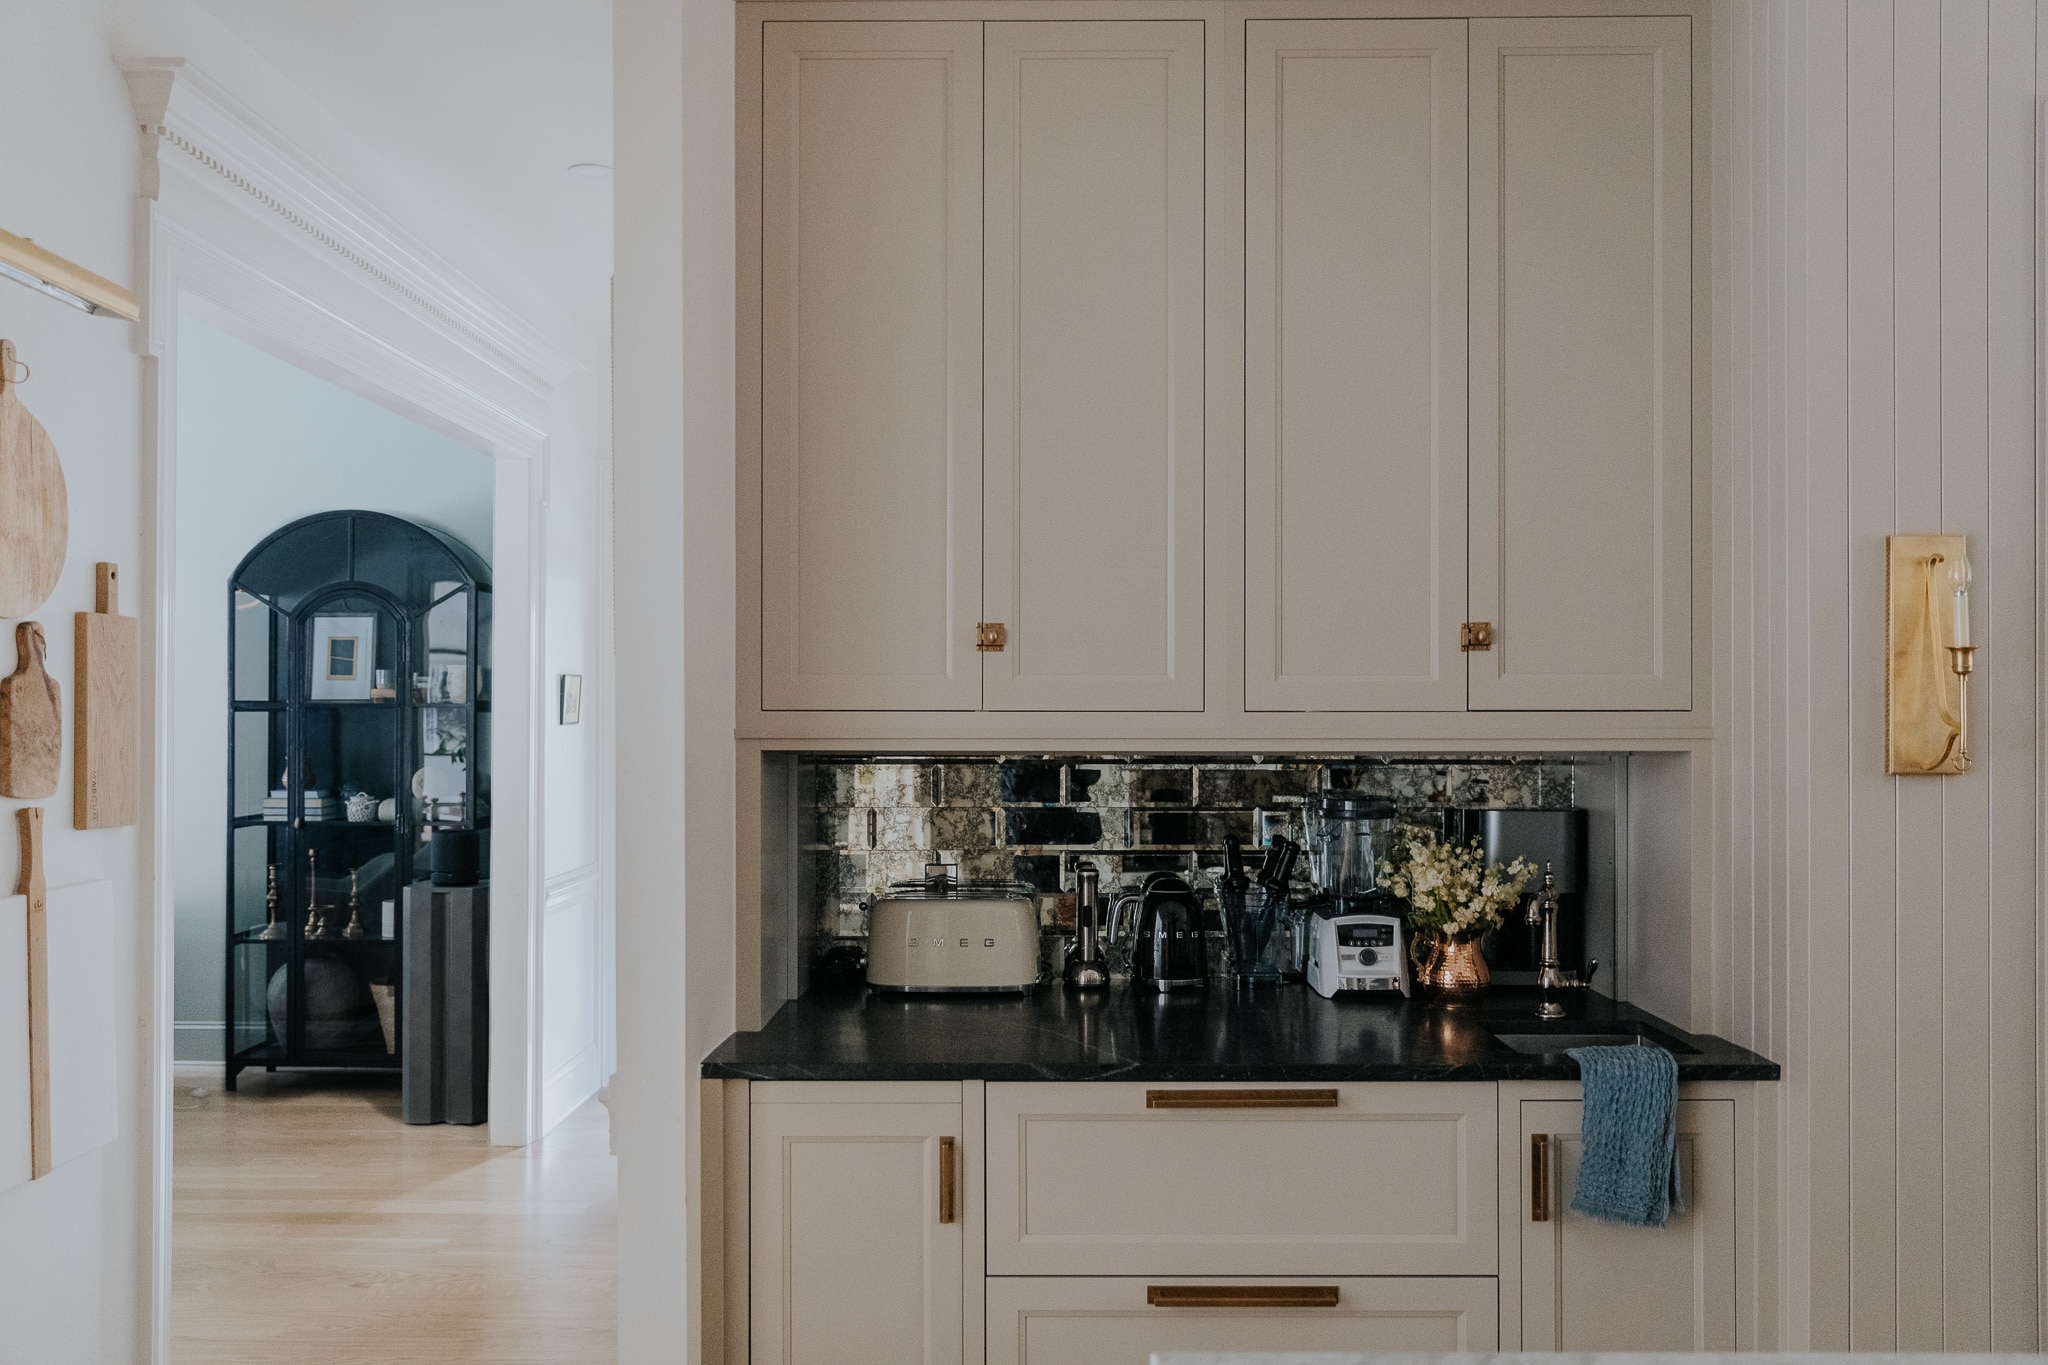
We’ve been living with our appliance garage for over 7 months–7 magical months! This is the thing in our kitchen that blows everyone’s minds whenever we show it on Instagram and for good reason! At first glance, it’s a paneled backsplash. But lift the handle up and reveal a garage that houses all of our commonly used small appliances. It’s magic! The one thing about it that’s been keeping me up at night (dramatic I know) has been the plain white wall within the garage. Nothing a mirrored tile backsplash can’t solve.
Cutting Board Gallery Wall | Arch Cabinet | Pendant | Sconce | Cabinet Hardware | Faucet
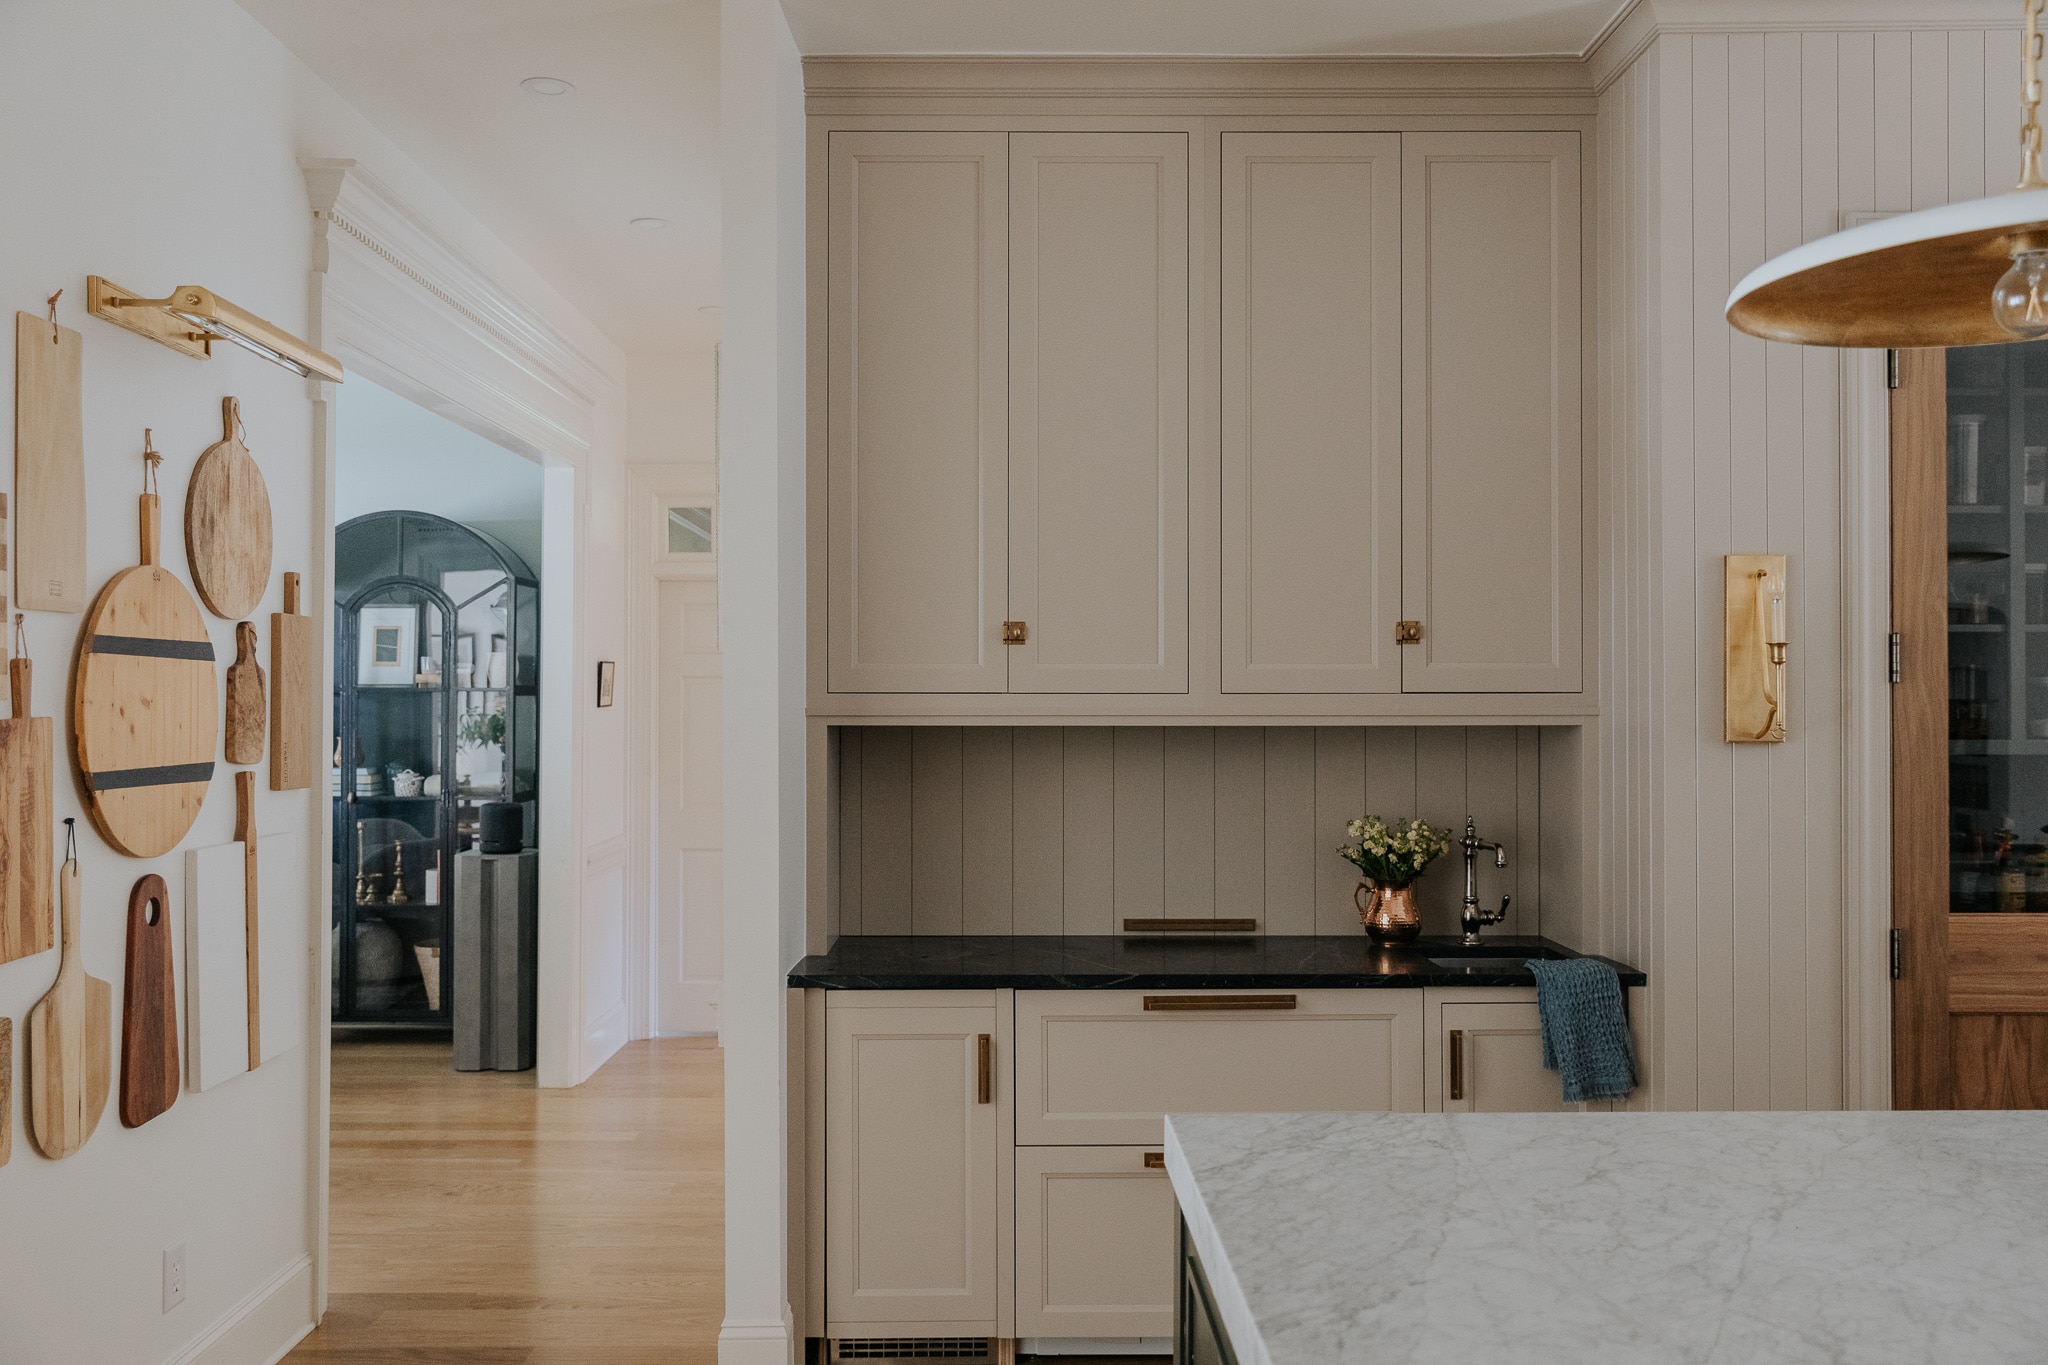
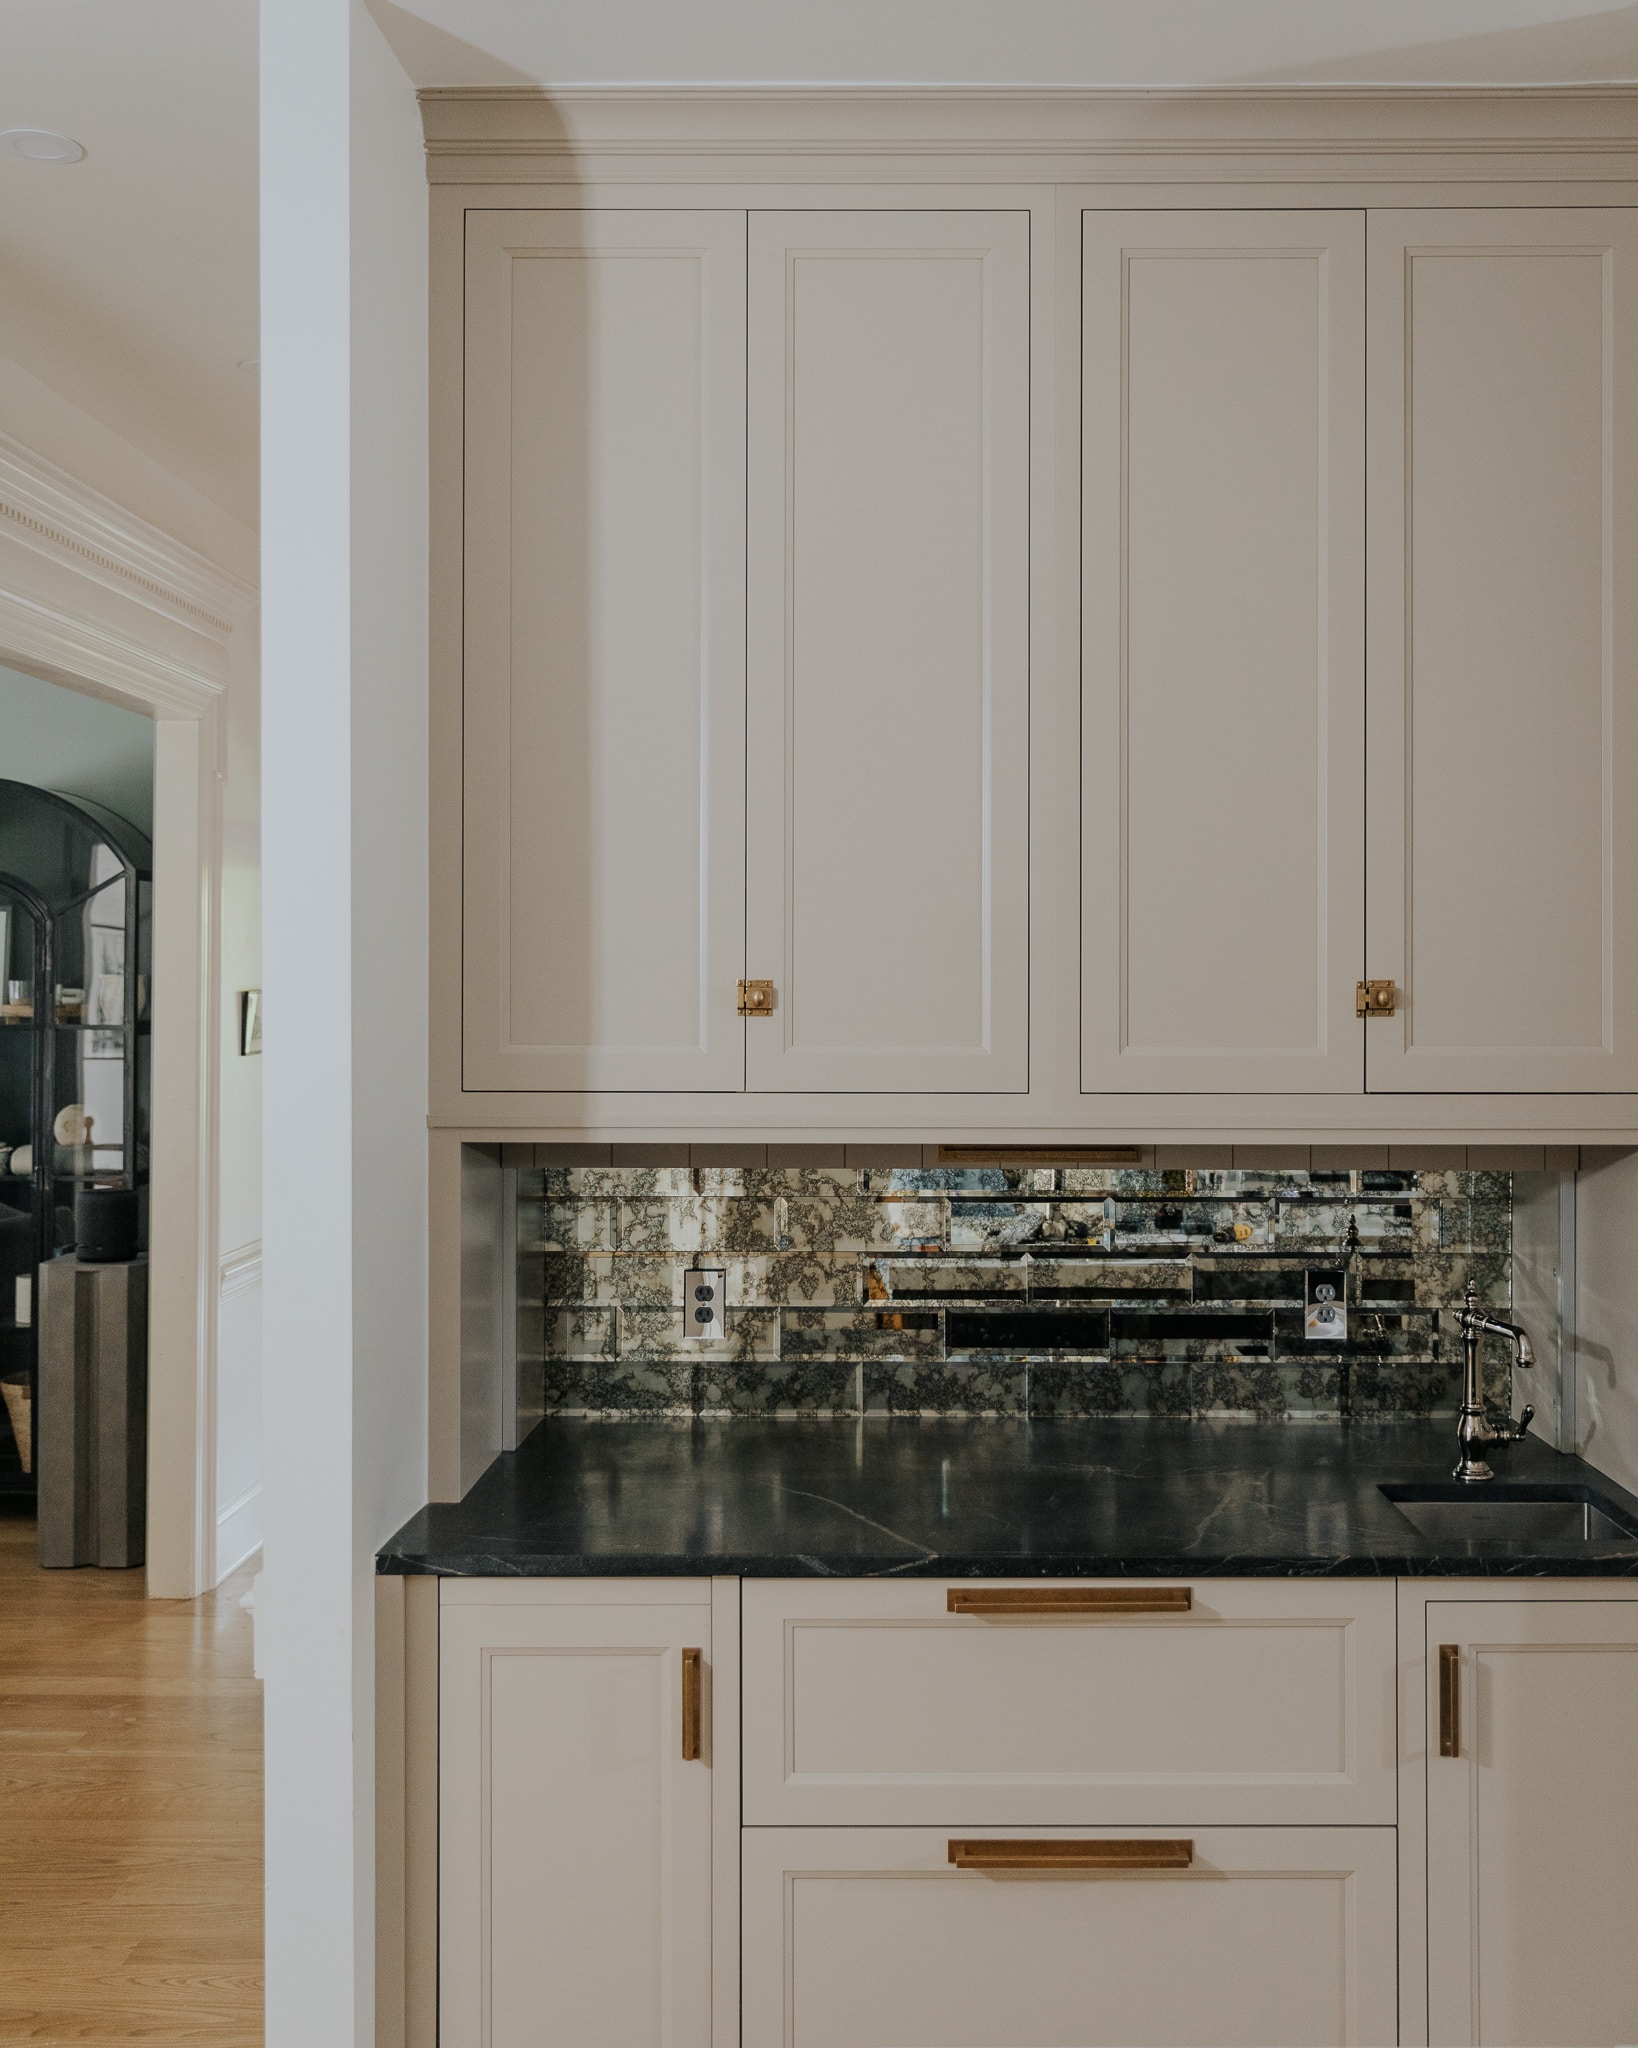
When you opened up the garage “backsplash” before, all of our appliances were against a white wall and it felt a little lackluster in contrast to the magic of the gliding backsplash. It’s such a cool feature in our kitchen and I really wanted to show it off more so I had the idea to add a tiled backsplash. At one point I considered doing a black subway tile but I’ve seen it done before and I was really curious about doing a mirrored tile backsplash. Or better yet, an antique mirrored tile backsplash. I hoped the tile would provide this misdirection moment and somehow camouflage the appliances.
Before
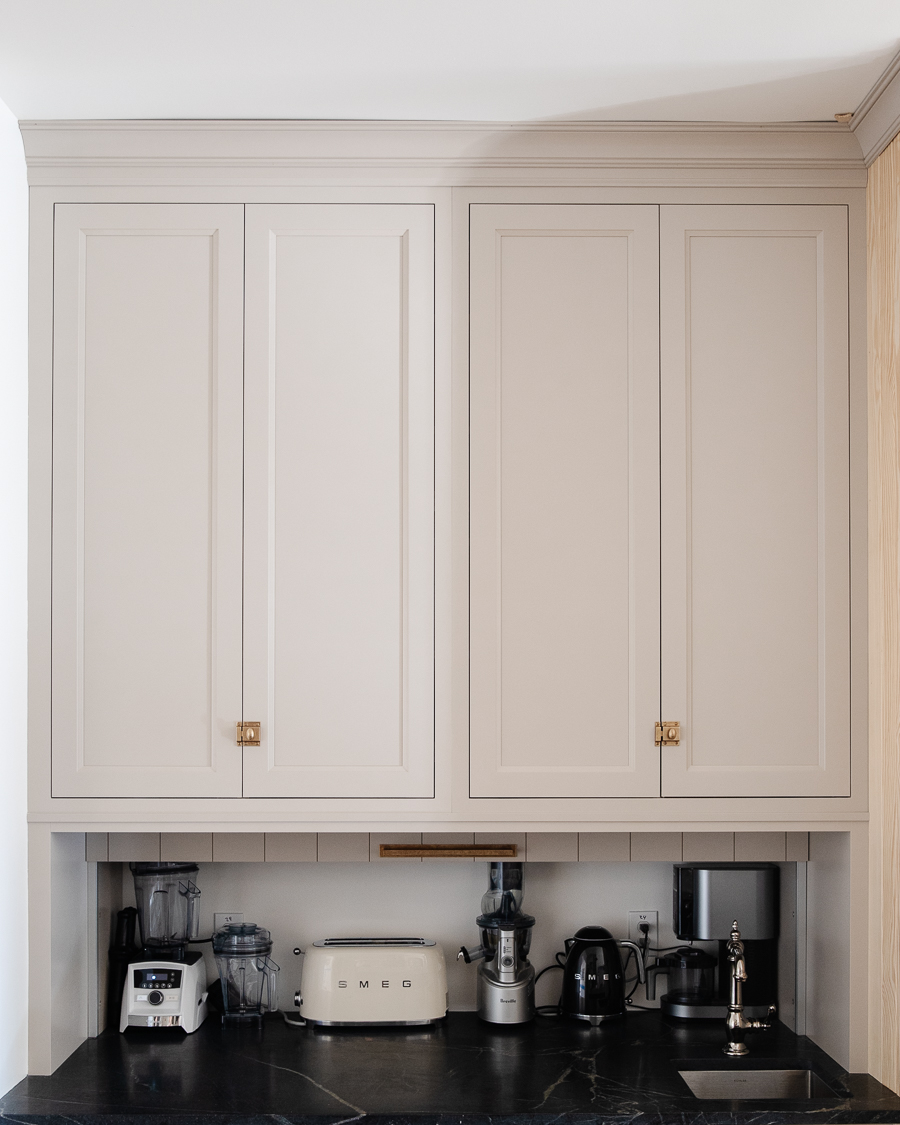
Blender | Toaster | Juicer | Electric Tea Kettle | Ninja CREAMi
Now when you open it, it’s like opening a little jewel box, rather than a bread box ya know?
After

Shop Our Appliance Garage

I expected to really love it. I did not expect to love it so much that I want to do it somewhere else in my house. I’m finding myself leaving the door open more. It’s so elegant and charming. It’s also reflective, but the antique element makes it so that you can’t really see yourself in it when you walk by. Very muddled and not distracting.
This was our first time using a glass tile like this and so it was definitely a learning process. Once we figured out the best way to cut it, laying it all was a breeze. Here’s exactly how we did it.
Tools and Materials
4×12 Antique Mirror Tile
Construction adhesive
Caulk gun
Anvil tile cutter
Diamond blade (for cutting around the outlets)
Glass cutter
Plugs
Mirrored wallplate
Install using an adhesive
Just like any tiling job, you’re going to want to mark the middle and start from the center out. Since you won’t really see the top of the backsplash, we started laying the bottom row first, knowing that the excess tile up top would be cut and hidden.
For mirrored tile, you can’t use a normal tile thin-set because the chemicals will strip the mirror backing. We used this construction adhesive that is rated for mirror use and it worked like a dream.
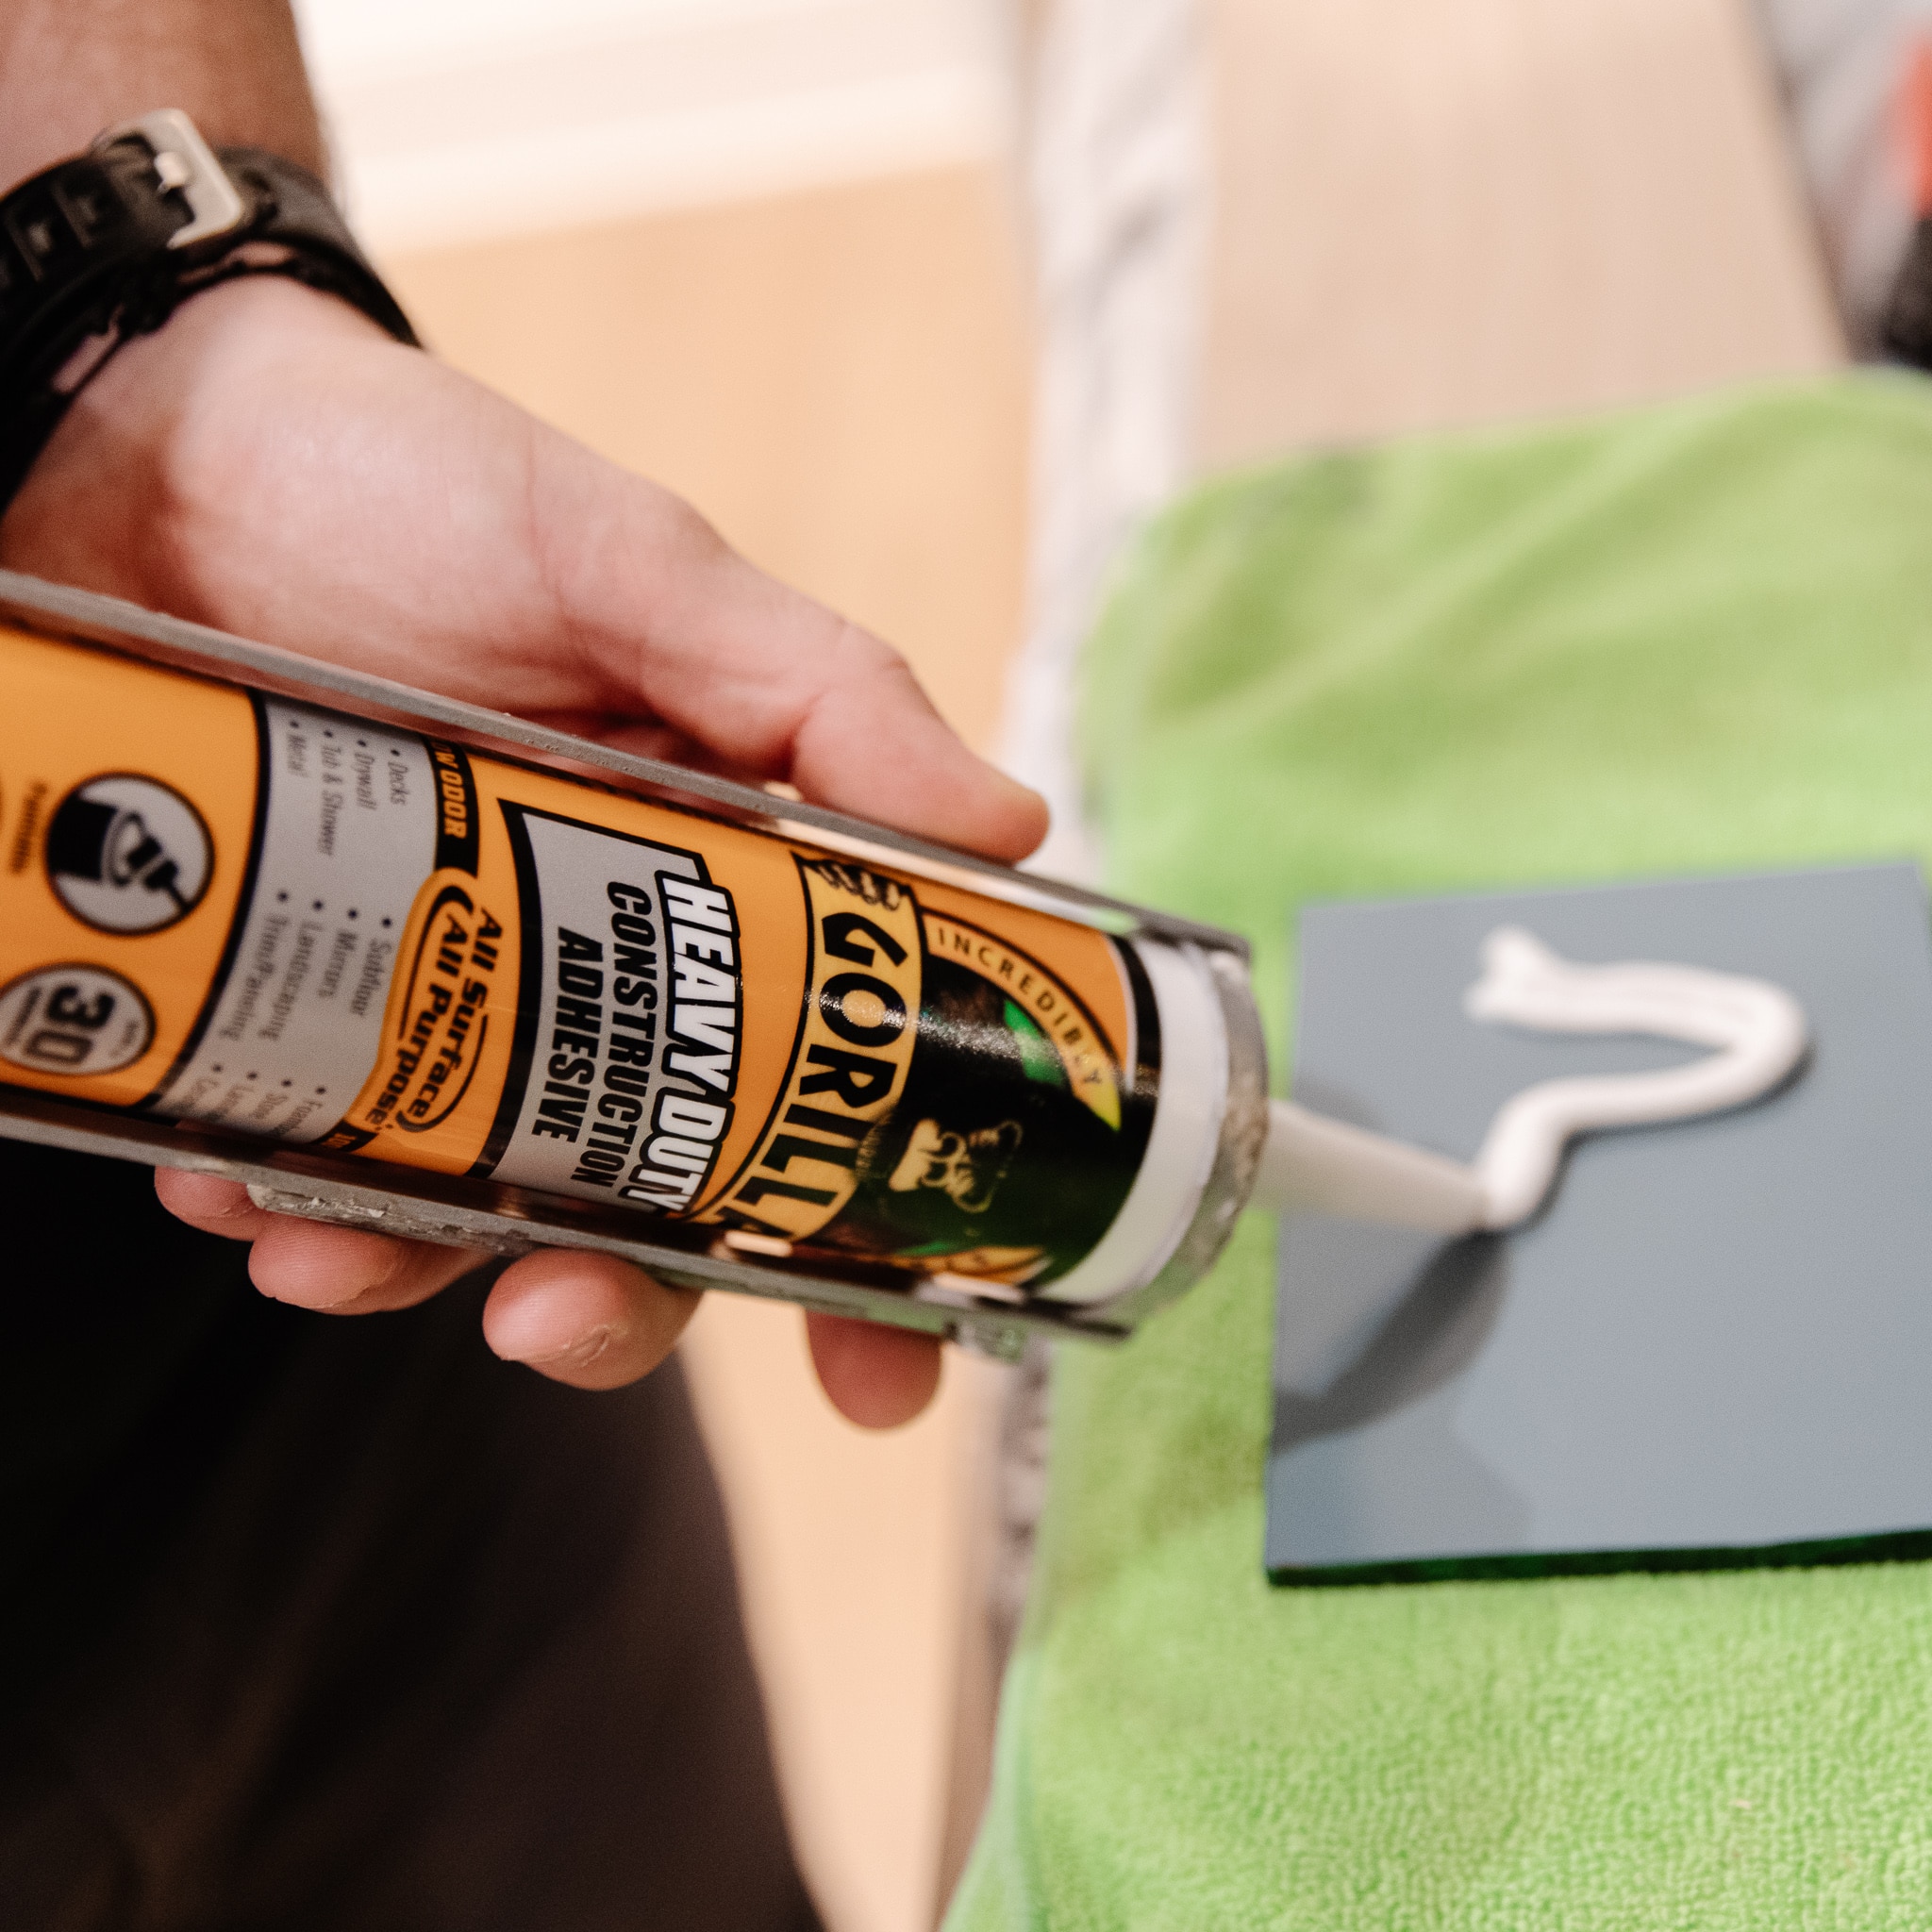
Apply a good amount of adhesive on the back, but avoid too much so it doesn’t squish out the sides. Hold the tile in place for 20 seconds and move on to the next tile! We decided to lay these in a brick pattern.
Cutting mirrored tile
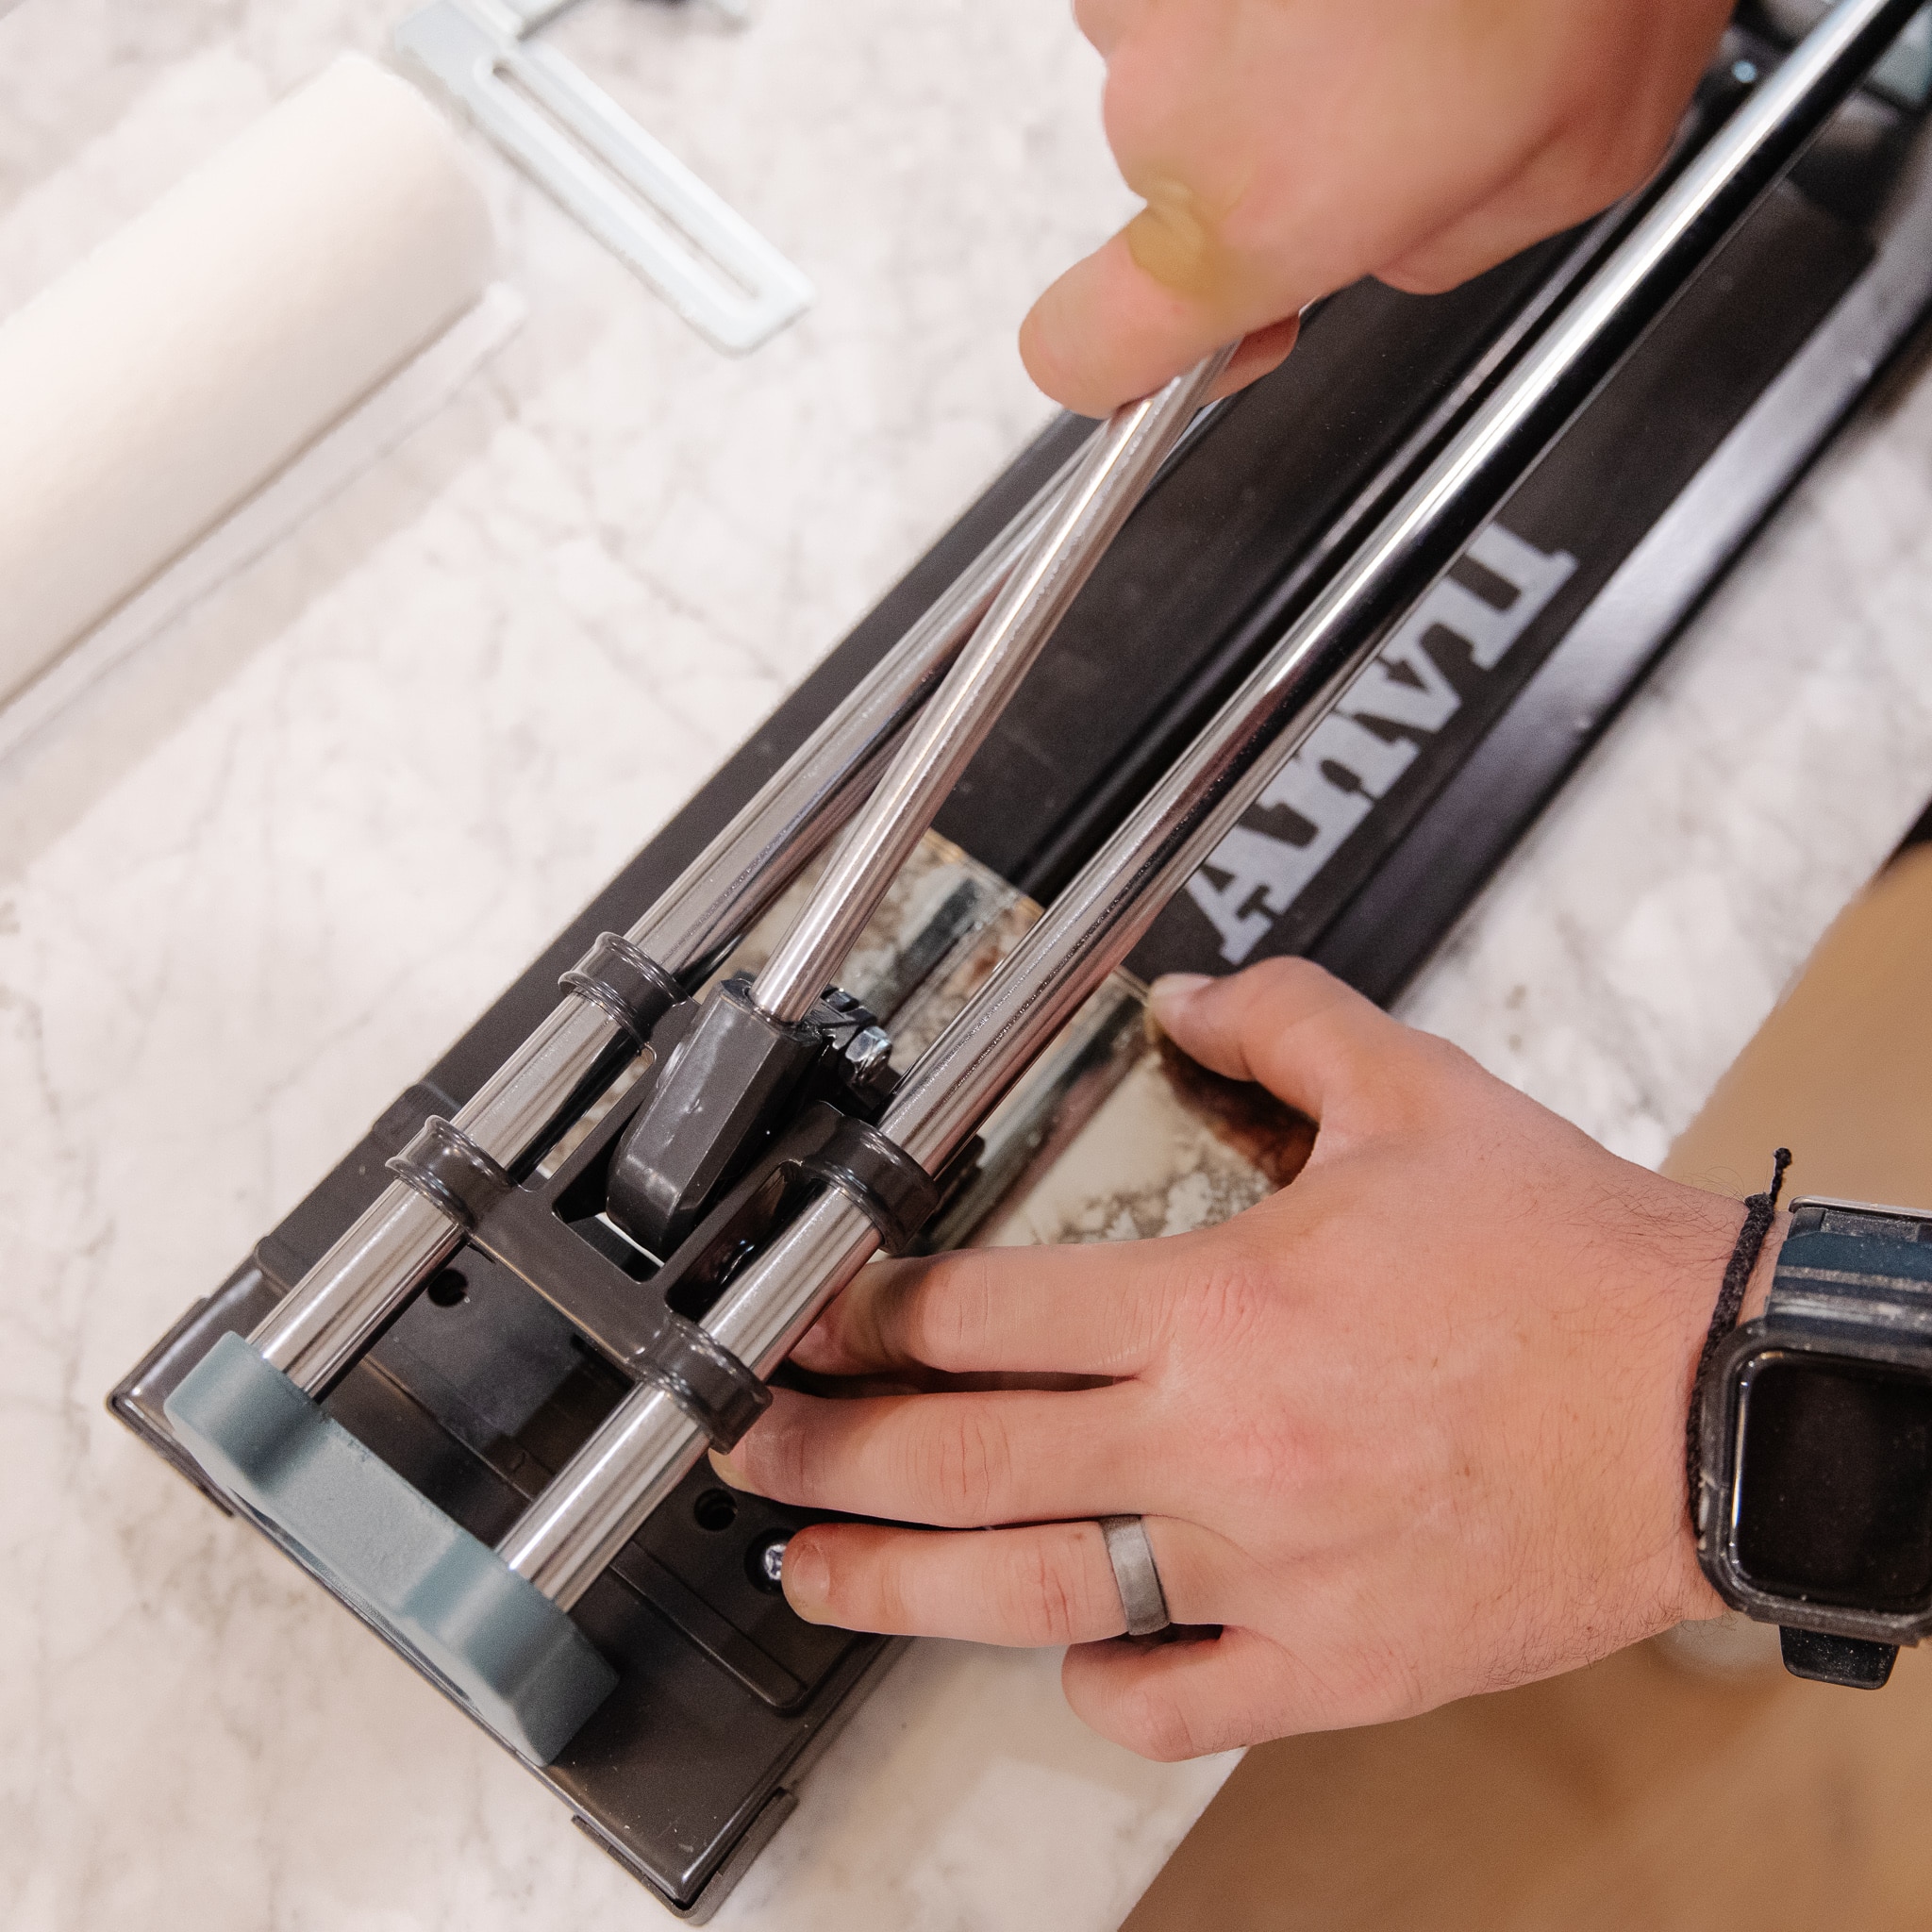
We experimented with a few different cutting methods and by far the best way was using this anvil tile cutter. It’s a $29 tool and a total necessity if you’re working with any mirrored or glass tile. You simply make your mark then set the mirror against the guide, score it, and apply pressure to snap the glass. Even a beginner DIY-er could do it.

And then you just work your way up, laying in a brick pattern, leaving no space in between.
To work around the outlets we used a diamond blade to cut into the tile, and a glass cutter to snap the shape out.

Once we got the right tool to cut the tile, this install took only 3 hours and I could not be more obsessed.
We replaced the white outlets with these gray ones, and I couldn’t find any antique mirrored outlet covers I liked, but I think these mirrored plates work beautifully. What do you think?
If you’re wanting to get the same look, here’s a bunch of antique mirrored tile you could use at every price point. I can’t wait to see what you do! We’re going to share the full before and after of this beverage center later this week because it’s FINALLY FINISHED!!
Mirrored Tile Round-Up
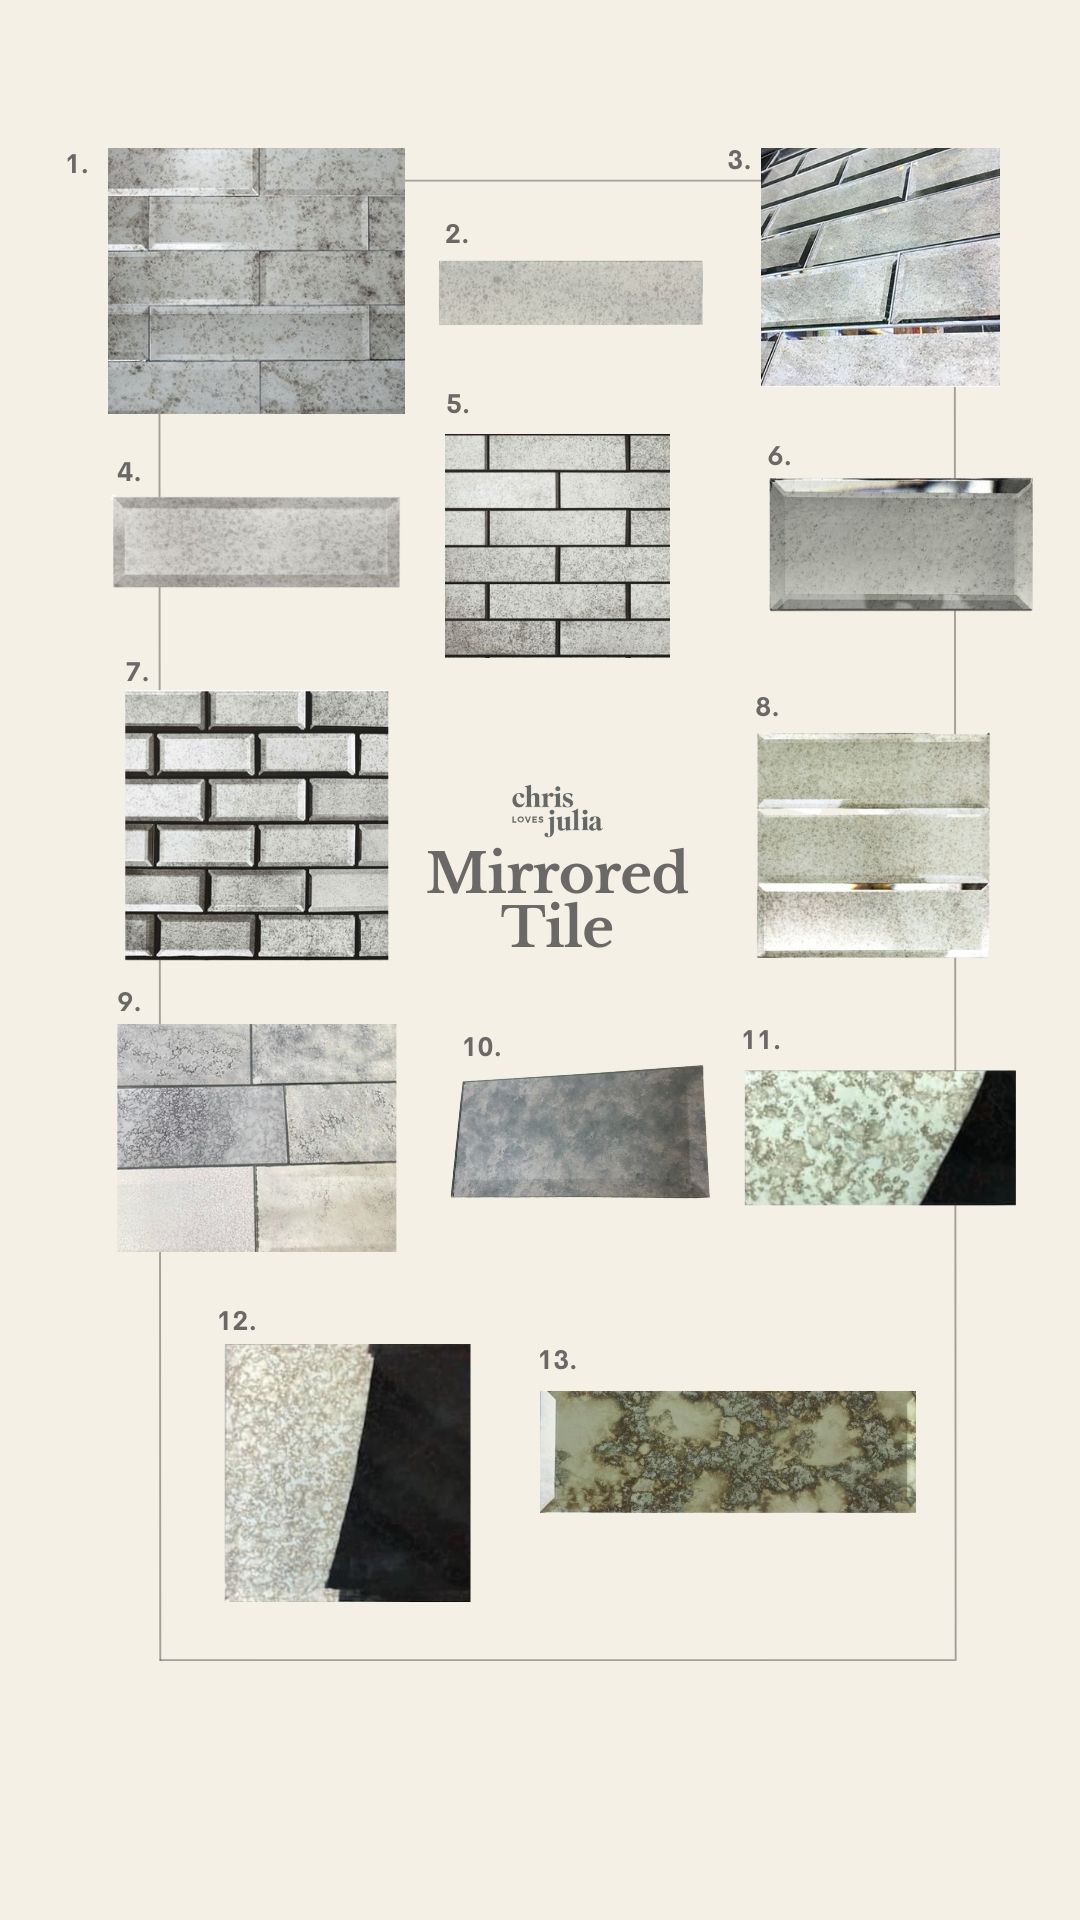
1. 3×12 Beveled Antique Mirror Subway Tile $12/sq. ft.
2. 3×12 Mirrored Glass Subway Wall Tile $13.67/sq. ft.
3. 4×12 Beveled Subway Antique Mirror Tile $15/sq. ft.
4. 3×9 Satori Obsidian Antique Silver Mirrored Glass Subway Tile $15.24/sq. ft.
5. 2.5×10 Imperial Wall Tile in Dutchess $23.39/sq. ft.
6. 3×6 Vintage Mirror Subway Tile $27.69/sq. ft.
7. 2.5×6 Imperial Wall Tile in Dutchess $25.29/sq. ft.
8. 4×12 Mirror Glass Subway Wall Tile $26.39/sq. ft.
9. 3×6 Hand Silvered Glass Subway Tiles Beveled $45/box of 30
10. 3×6 Venetian Antique Glass Vintage Beveled Subway Wall Tile $52/sq. ft.
11. 3×6 Reflections Antique Silver Peel & Stick $249/case
12. 8×8 Reflections Antique Silver Peel & Stick $398/case
13. 4×12 Distressed Antique Mirror Glass Beveled Subway Tile $5/tile
Shop Mirror Tile


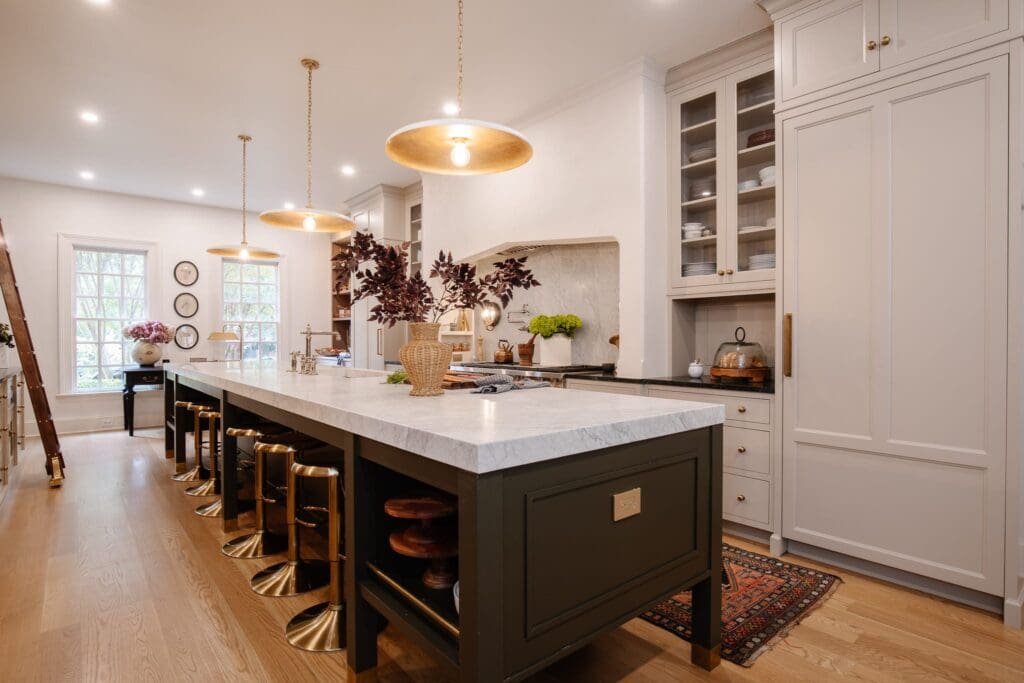


Beautiful house!! In love with your kitchen. May I know the color used for your kitchen cabinets?
The perimeter cabinets are Bromley Taupe and the island cabinets are Plymouth Green both from Stoffer Home Cabinetry.
So fun and it turned out so great!!
I love this! My house has a corner nook with shelves that I’m thinking about making into a bar area, and this backsplash would be perfect. Thank you for the inspiration (and the vote of confidence for this beginner DIY-er.)
Really pretty!
Great job!! I admit I was skeptical…wouldn’t a mirrored backsplash just double the appearance of the appliances? But the magic is in the antique finish, and I can’t believe how that actually minimized the appliances instead. I’m so impressed!!