Counter Stools | Pendant | Sconce | Faucet | Sink | Drawer Pulls | Knobs
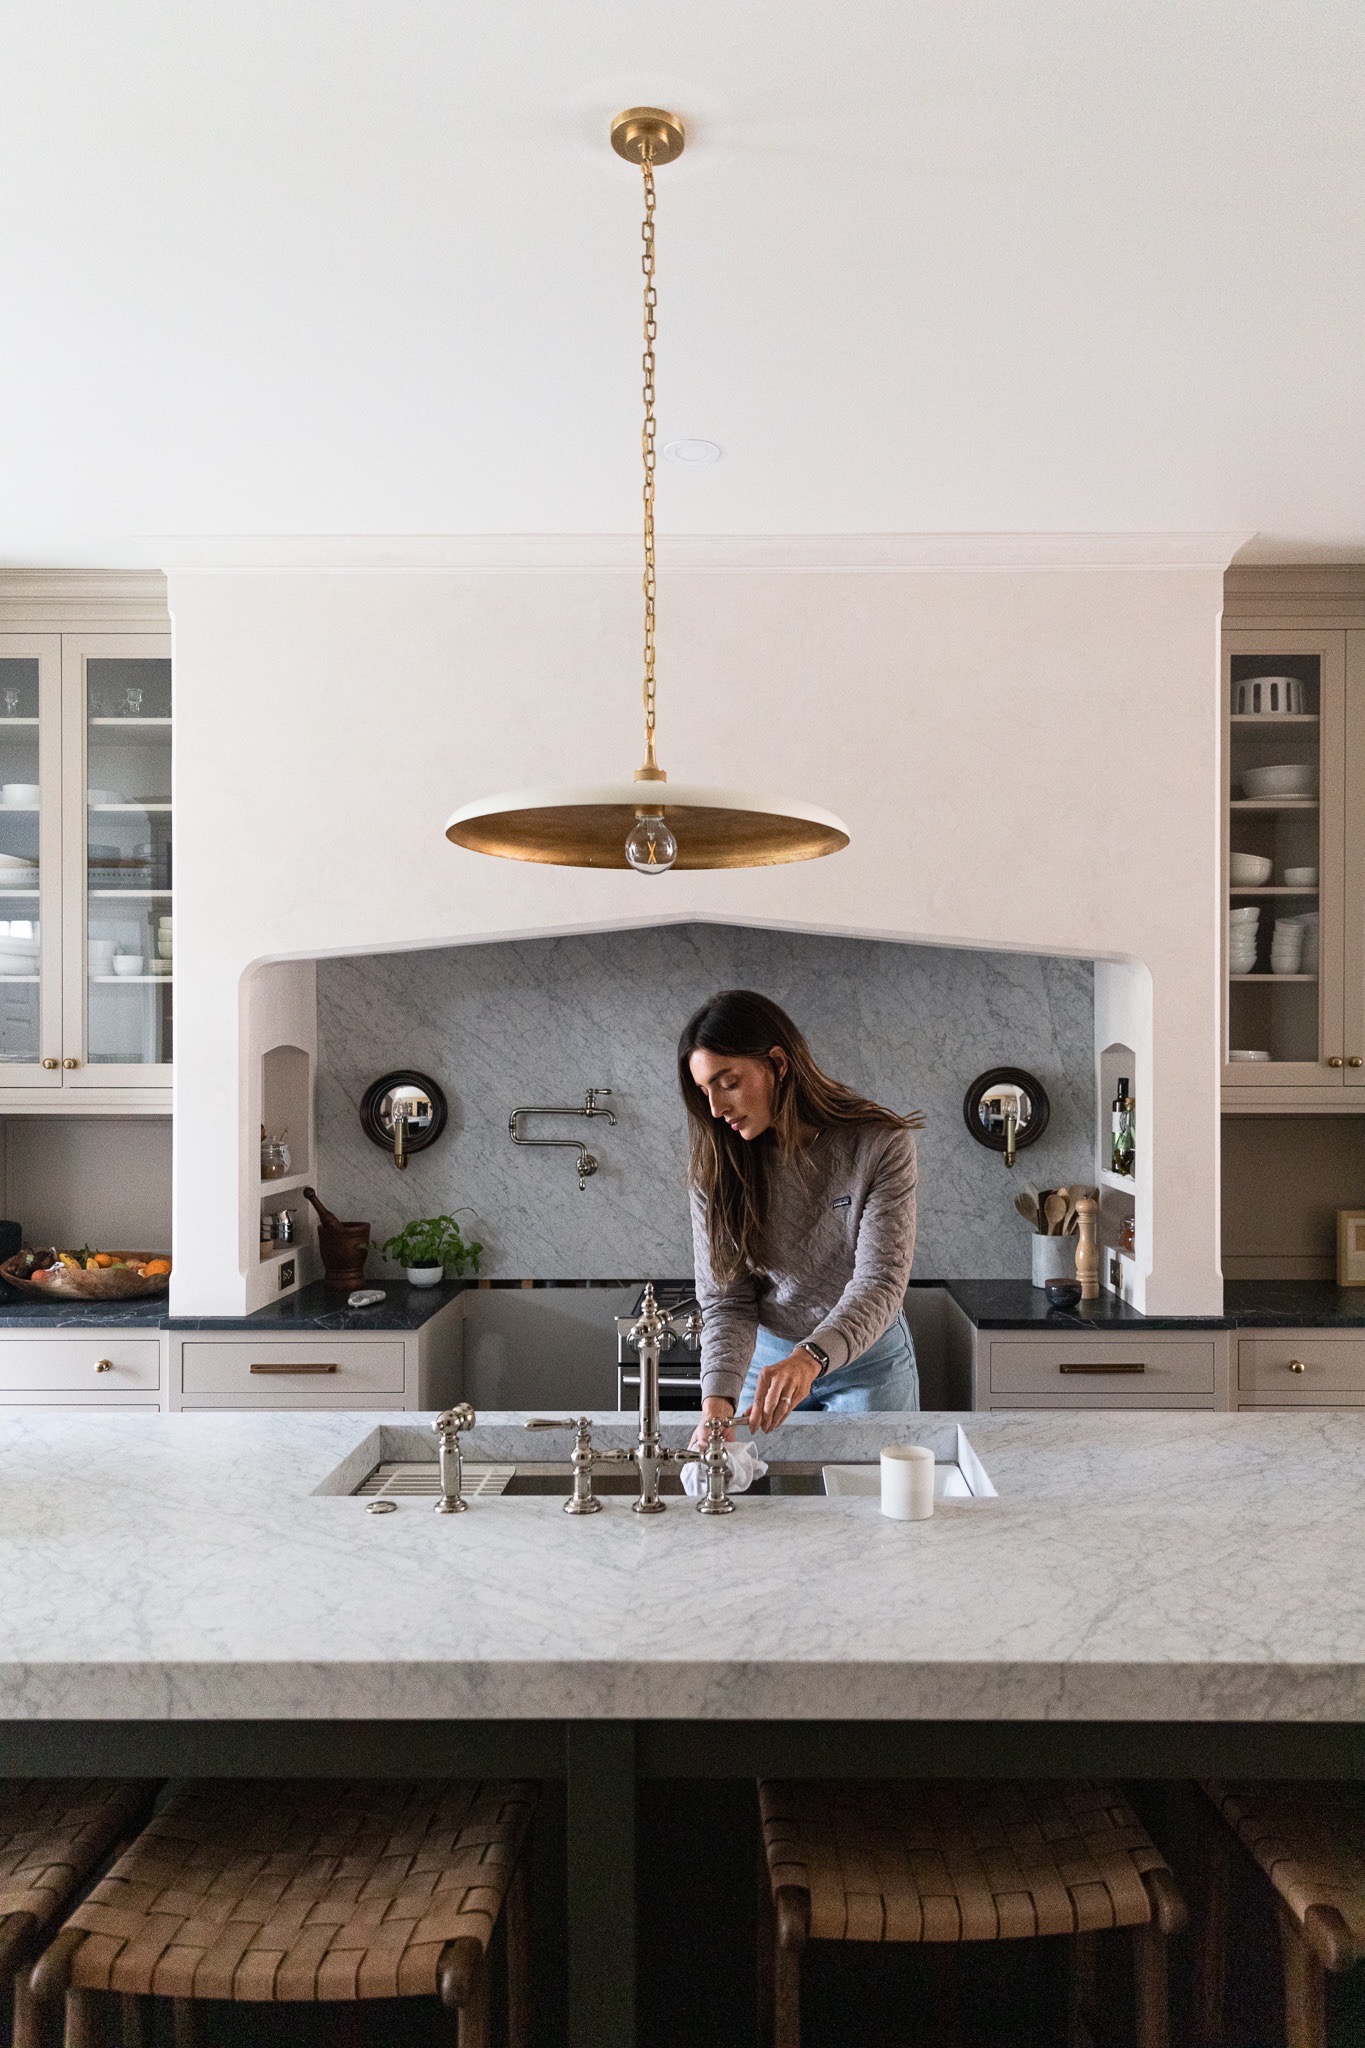
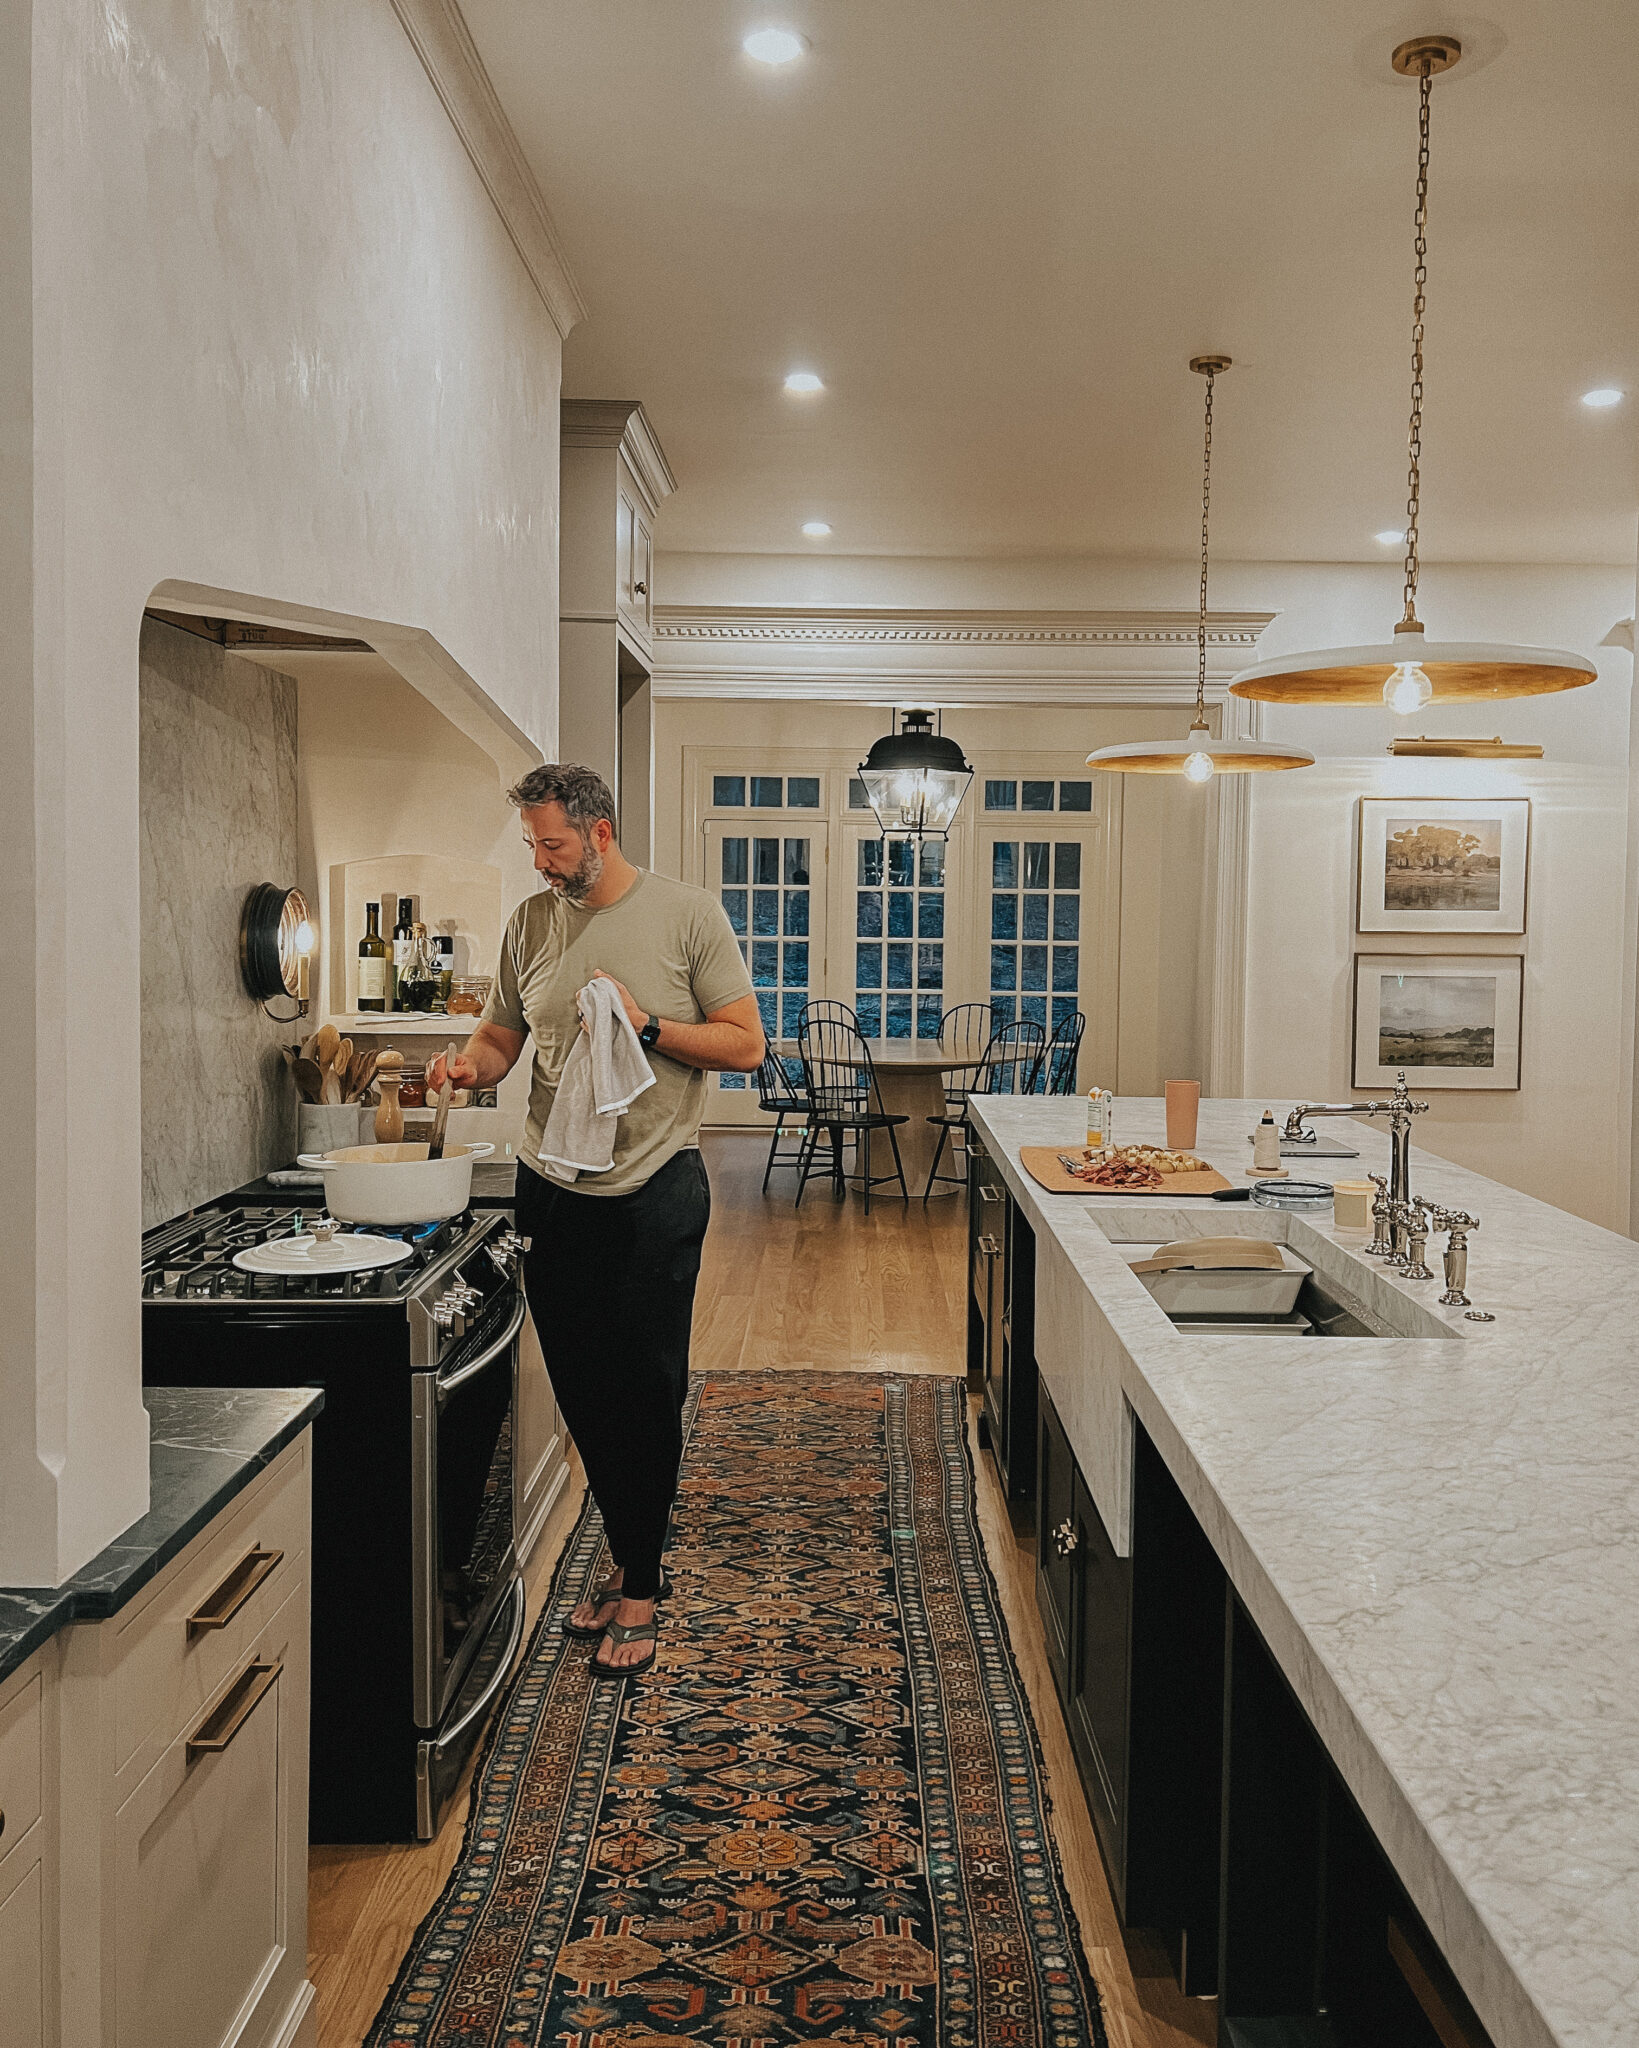
The custom range hood was intended to be a massive design element in the kitchen. The show-stopper and also a sort of resting place in the kitchen. Also, it’s massive in size too! Notice the size of our temporary 30in range in the photo above for scale. Our 60” wolf range should be here this month—fingers crossed. With the amount of cooking Chris does (a lot), we wanted a hood that felt spacious while still stunning. I shared an inspiration picture in our kitchen plans, and Jean designed the most incredible plastered range hood with crown and a chamfered edge.
Of course, I always love going back to the start:
This was the kitchen the day we bought it. When this photo was taken, we actually didn’t have plans of renovating the kitchen yet. It wasn’t until the next day, when we met with our contractors, that we decided to open up the entire space and make it happen. (pst, for context, where the fridge is in the above, is where the new hallway opening is in the photo below).
You’ll recall that one major reason we did all this was because we were doing the floors through the entire house. And since there was a wall we wanted to take out for the kitchen, this was the time to do it so the floors could be seamless through the space. And even though the cabinetry and many details were out several months from when we started, our contractors began putting in place everything they could, starting with the range hood.
We knew this hood was going to be a tricky one. The first approach taken was to frame the entire hood in with dimensional lumber and OSB, covering it all with drywall and finishing with plaster.
But the chamfer on the edges couldn’t be achieved properly this way, so the cabinet installer faced the entire structure with MDF, using a router to create the chamfer precisely.
Because there aren’t MDF sheets large enough to cover the entire hood, they used two sheets, using a biscuit jointer and wood glue to connect the two and sanding smooth.
Unfortunately, we did run into some issues with the seam still showing after a day or so. The contractors screwed the MDF into the framing a few inches apart all along both sides of the seam, it was sanded down, refilled and sanded and plastered again.
Our Plaster Master, Jerry, used an Italian plaster product that is completely wipeable and stain resistant! Incredible. I wanted a color that would be somewhere in-between the white flour paint color on the walls, and the taupe cabinet color to give some contrast but not make it too shocking. I had Jerry tint the plaster to Sherwin William’s Downy.
Here’s the actual product used:
We were able to choose the amount of variation and texture we wanted. And any color in a paint deck to have it tinted to, but it would never be a solid color. That tone would likely be the darkest on the hood and and then lighten up from there as Jerry buffed it. He even applied plaster to the crown to match! It has such a beautiful sheen to it with the perfect amount of movement, really illustrated below.
Of course we love it so much, and wish we could say it’s perfect. Unfortunately, if you look closely you might be able to detect a subtle hairline joint where the MDF sheets meet together. Though it’s improved so much, there is still some cracking happening and we’re talking with our contractor about the next steps we should take. The current thought is to route out a shallow channel about 3 inches wide across the seam, span it with seam tape and use Bondo to create a smooth transition that shouldn’t crack with the changing seasons. In the meantime, Chris has been using his new workspace to its full potential, and every step just gets better and better.
Our wood grain Shaker cabinet fronts were designed for busy, high-traffic homes like ours. Clad with durable textured thermofoils, this line is compatible with Sektion, Akurum, Godmorgon, and Besta cabinets from IKEA. It's the perfect, practical way to add the warmth of wood to all the rooms of your home.
We have teamed up with Loloi to create a line of rugs that are as affordable as they are beautiful. This collection houses a great mix of traditional and modern rugs, in cottage-y colorways, as well as vintage-inspired beauties that you’ll want to roll out in every room.
We partnered with Stuga on a line of hardwood floors — The Ingrid is really livable, and the color is very neutral. It doesn’t lean warm or cool, it’s that just right in-between. We have really loved putting it everywhere in our house. It’s the best jumping-off point for design, no matter your interior style. In addition to being beautiful, Ingrid is really durable — we have three kids, and we always have a home construction project going on. Ingrid stands up to it all.
SHop all
Looking for our favorite things? A place to shop our home room by room, or just catch up on what Julia's wearing / loving right now? Browse the CLJ shop.
Befores, afters, mood boards, plans, failures, wins. We’ve done a lot of projects, and they’re all here.
We have a long-standing relationship with DIY, and love rolling our sleeves up and making it happen.
Even when you don’t want to rip down a wall, you can make that space in your home better. Right now.
The next project we’re checking off our 2023 project list is the mudroom! This used to be the laundry room until we built out a much bigger, better laundry room upstairs. So, in the meantime, this space has been exclusively Cricket’s room. Cricket will still have a special space here, but we’re transforming this dingy […]
We've been doing this since 2009 and we've posted a whopping 24145+ blog posts and counting. You might need a little help searching, huh?
Another way for us to stay in touch! Joining our weekly newsletter gives you access to exclusive content, never-before-seen photos, your questions answered, and our favorite DIYs. Sign up below!
Welcome to our online community where we've posted home, DIY, style, renovations, and family since '09. Renovating our #cljmoderncottage in Idaho and headed for new adventures in Raleigh, NC. #cljfam #cljtransformations
Links
Get Around
Make yourself right at home
Portfolio
Design
Casual Friday
Projects
Lifestyle
Gift Guides
All Posts
Shop
It’s all stunning!! If a filler seems like a good option I suggest the Abatron wood filler epoxy vs the bondo. I’d talk to them about your application and see what they think. Their products are great and also extremely sandable like bondo. Good luck!
So perfect. I imagine the Bondo will be the perfect answer to the seam’s reawakening as it’s so strong.
Plasterer here! MDF just isn’t the right surface for plastering. I appreciate you used it to achieve the chamfered edge but cracking is always a risk with plaster anyway and I simply wouldn’t plaster onto MDF in the first place because you’re always going to have a problem with it on that surface. However I want to say that your kitchen looks amazingly beautiful! I love the hood – I love all of it – and it makes me want to completely redo my own kitchen!
Can you please link the plaster? I am having a hard time finding it.
The kitchen is AMAZING! Perfect!
We didn’t purchase the plaster ourselves, so unfortunately I don’t have a link
Here ya go, pal.
https://oleaspecialtyproducts.com/products/marmorino-ks
I am wondering if it bothers you not to have a larger amount of space to the left and right of the range. Are you comfortable always turning to do prep and then lifting from the island to the stove. I am considering a similar set up, that is , the range hood surround coming all the way down to the counter top.
I follow Mapperton, American Viscountess on YouTube and they have almost the exact same range hood in their estate home. Gorgeous!!
Even your inspiration pictures have seams! I think the idea with plaster is to embrace the imperfections. Love how your new kitchen has shaped up.
You’re probably right!
We had our hood professionally plastered in Italian plaster as well in November during our remodel and the final step was the application of a clear wax. This was supposed to make it extra stain resistant as well. Unfortunately, the clear wax comes off very easily when painters tape comes near it (used when sealing the surrounding marble counters and backsplash) and now I’m terrified to wipe the plaster. We chose a texture almost identical to yours (without knowing obviously) and I was so excited to have a feature plaster range hood in my kitchen, but honestly, my husband and I both think it just looks like drywall. For the cost, the end result was underwhelming. I wish I would have had more texture in the finish. Anyway, so fascinating to read about your experience after just going through it ourselves!
could you still have it buffed to reveal some more movement and color??? I think that’s where the magic lies.
I can’t see the crack either but the hood is magnificent. Excited to see the final result.
Please share how far your range area is from the island. Thanks!
It’s 46″!
I love your hood so much and want to do this to my large plain hood. Do you think this is DIY-able? After watching Jerry, would you have the confidence to try?
I’ve seen other people use a plaster-like paint or lime wash. The buffing he did and the process where he made it completely stain resistant would definitely require some research, but I bet with care you could achieve a similar look!
Out of curiosity, why did they use MDF rather than cement board or something similar that doesn’t expand and contract? I hope the seam tape fixes the issue – it’s a beautiful piece and, for what’s it’s worth, the crack isn’t visible in the photos.
It’s BARELY visible in real life now, but still something we’re aware of and want a solution for. The chamfered edge was routed out of the mdf (would be near impossible with cement board)
Thank you SO MUCH for being transparent and sharing about the crack. I feel like so many of us have issues like that and it feels so defeating (I myself have had many, and because we DIY, most are still not and likely never will be fixed), so it’s really refreshing to hear that it’s not just us. It looks gorgeous, and I hope they’re able to fix it to your satifaction.
As someone with an older house that has plaster walls and plaster ceilings, I am very familiar with cracks and seams. We gave up filling them in long ago, because in our experience, they just come back. It’s just part of the territory, we have been told! If you do end up finding a resolution for this, I’m sure I’m not the only one who would love for you to share! P.S. your kitchen looks absolutely beautiful.
I love those little niches! Such a smart way to have easy access to oils and whatnot, yet it’s completely out of the way and not cluttering your countertops. And a great place for the outlets!
I personally would have plastered in the same color as the taupe cabinets, but that’s just me. I feel like there’s a lot of contrast in the space and that would have helped calm it down a bit while still being a showstopper. Can’t wait to see it with the full sized range!
Can you tell me (iIapologize if i missed it) what color is on the cabinets?
It is Bromley Taupe from Stoffer Home Cabinetry!