This post is sponsored by Boll & Branch
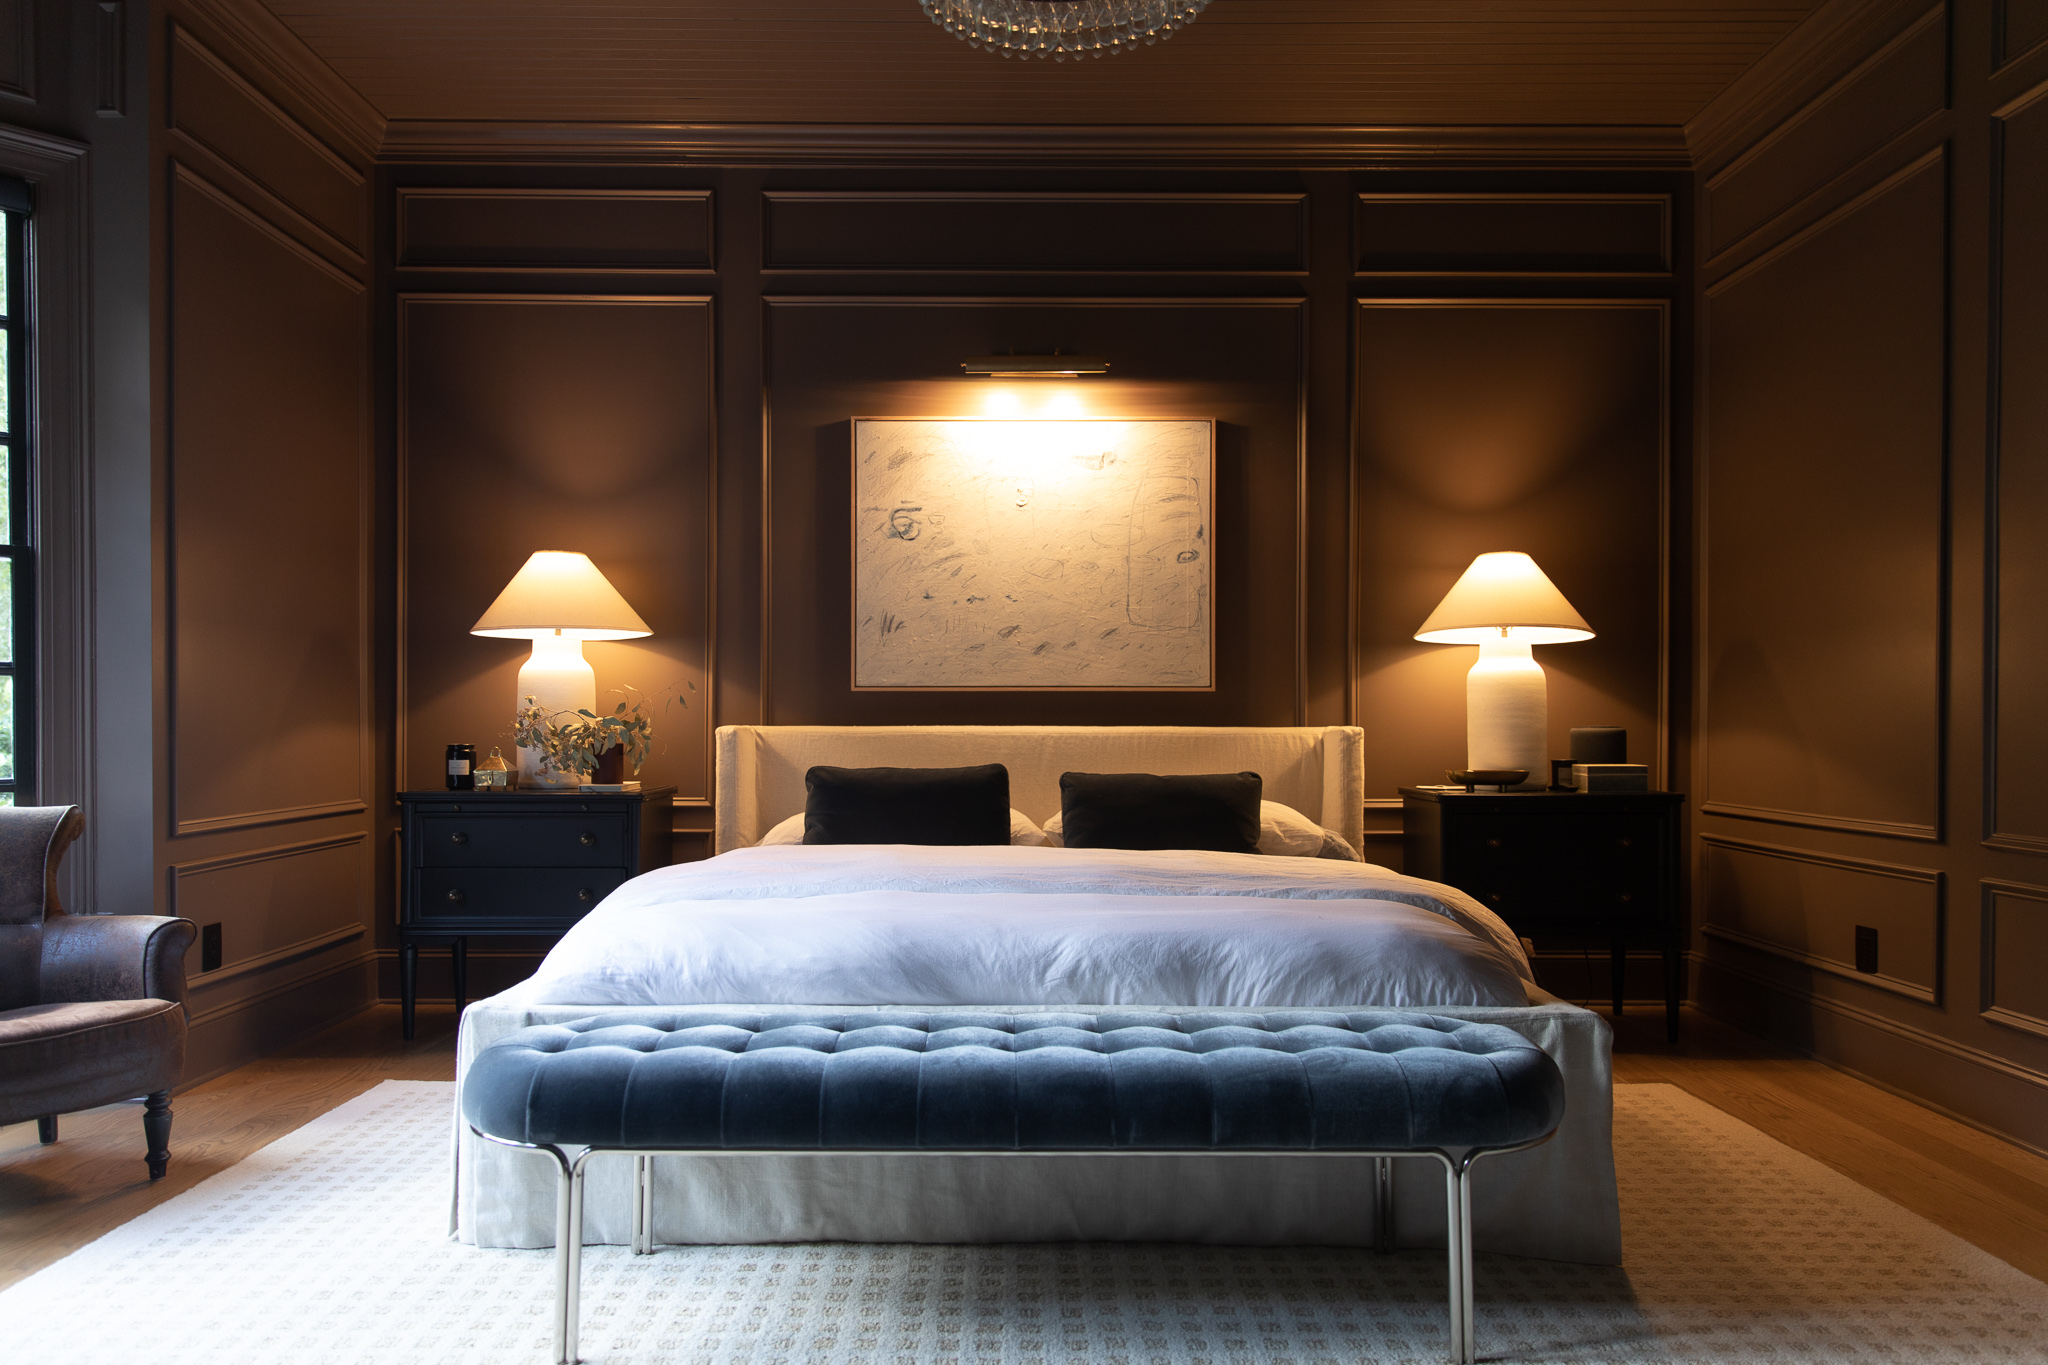
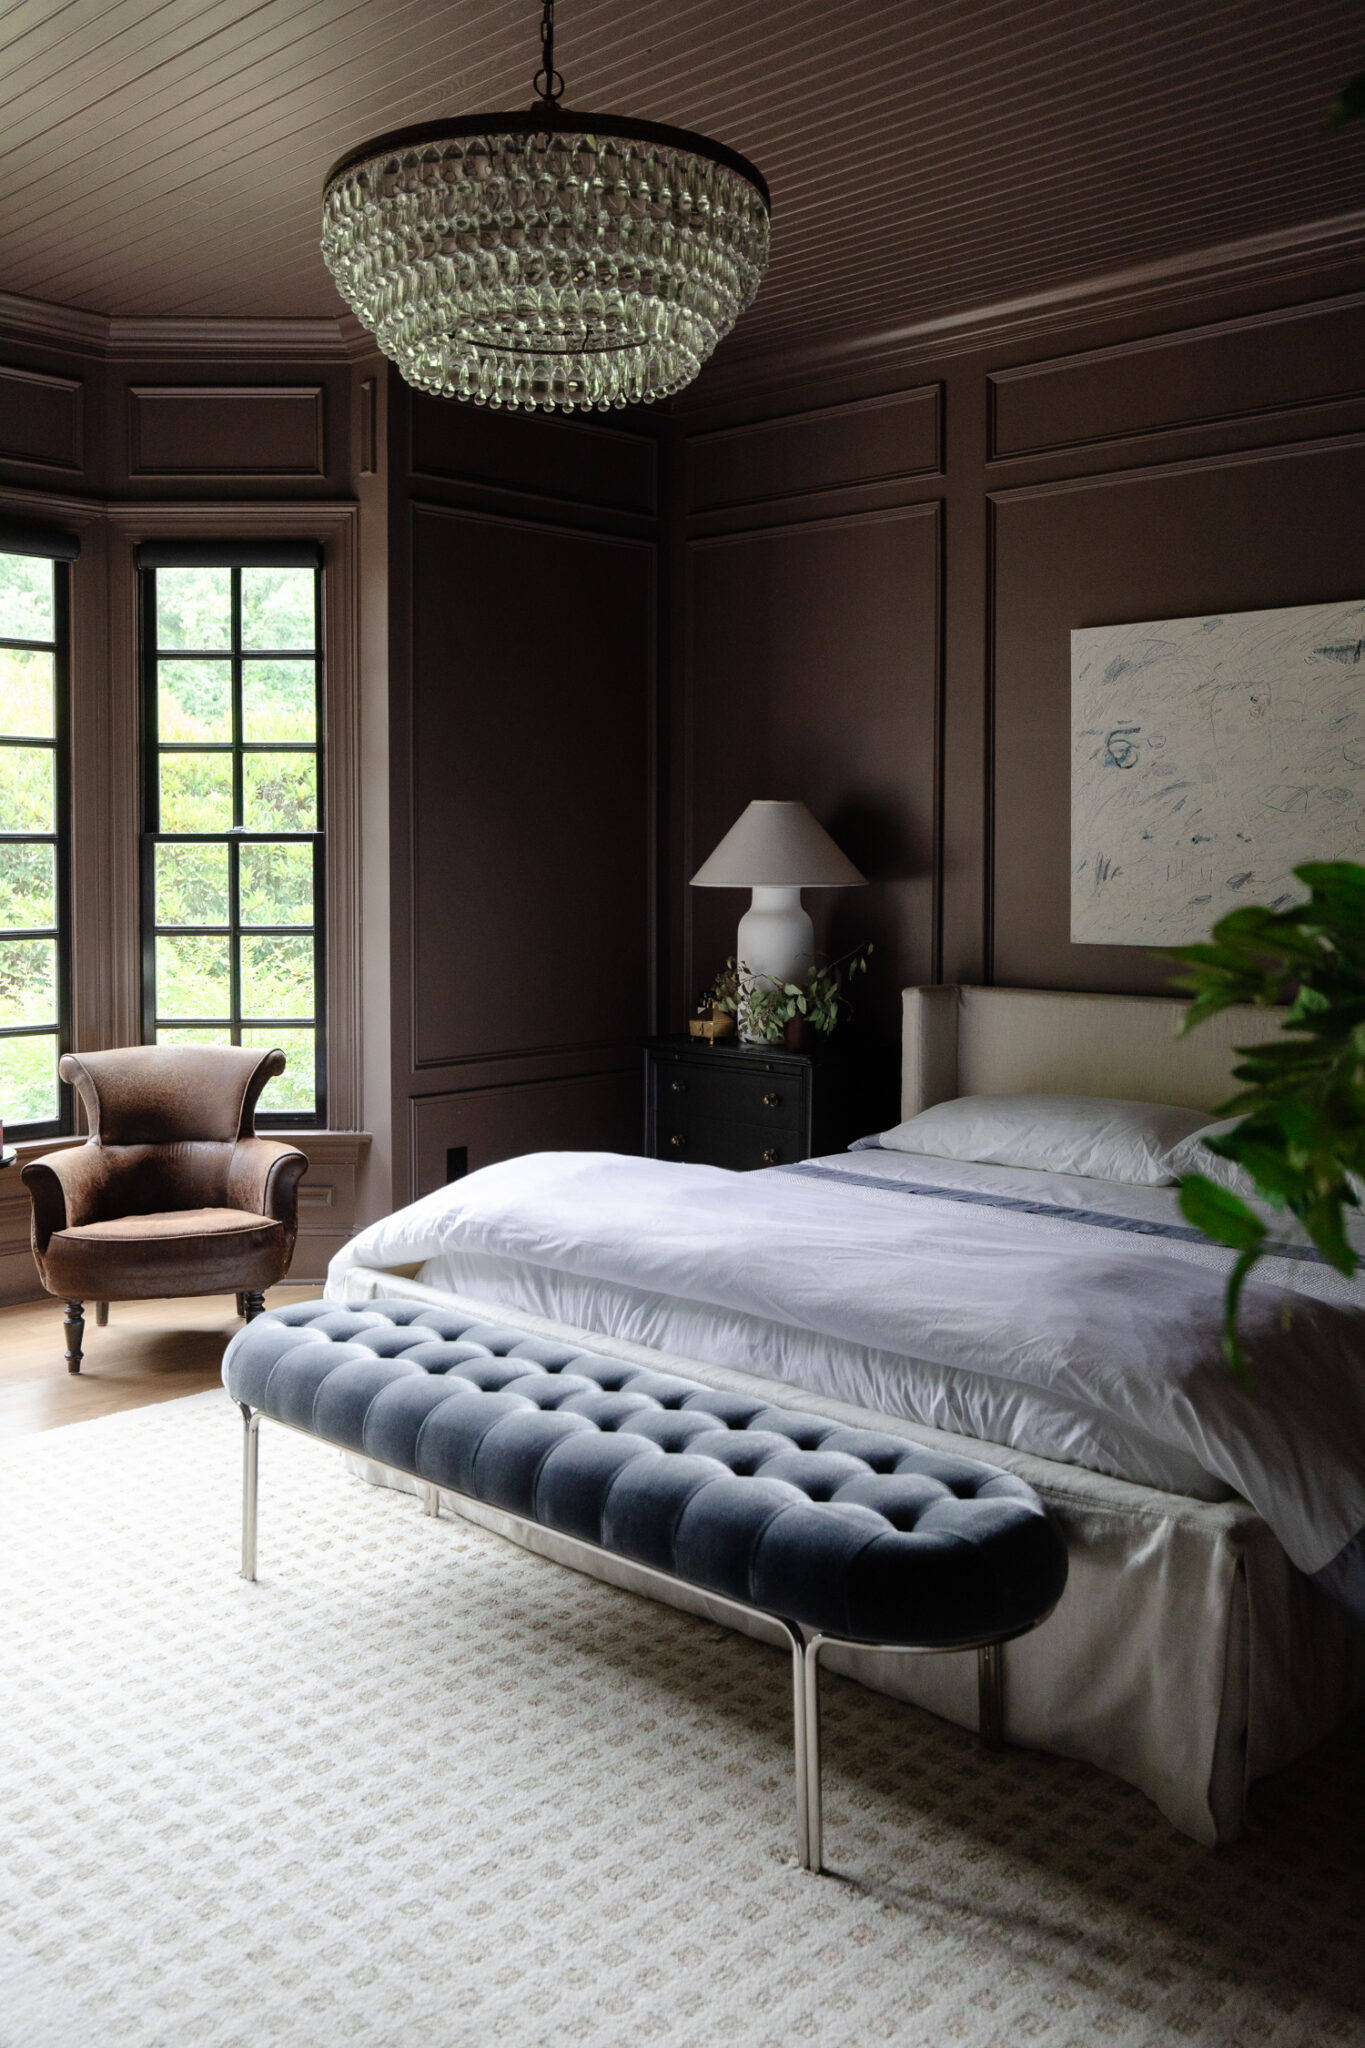
A lot of trial and error goes into learning how to make the perfect bed. It can feel like a journey figuring out what works best and what is “fluff” that you don’t need. Throughout the years, I have experimented with several different ways of making a bed as I began curating my personal proven method–what’s going to make me make it every day!
I have tried it all: hospital corners, oversized duvets, top sheets, and figuring out the ideal amount of pillows. I slowly took away what I found works and looks the best, creating my own signature perfectly made bed. It is a delicate balance between looking both inviting and aesthetically pleasing. But I have accumulated several tips and tricks that look good (which I learned is a motivation for me in making it daily) and are also inviting enough that you are genuinely excited to climb in at the end of the day.
So, want to know the anatomy of how to make the perfect bed my way with the help of Boll & Branch’s luxurious products? Then take my hand and scroll down as I dish all my best-kept secrets (until now!) about how I make a bed.
How to make the perfect bed
Step 1: Wash and dry the fitted sheet before putting it on your mattress. Also, treat yourself to freshly washed sheets weekly. Nothing feels better than crawling into cool, clean sheets.
Step 2: Put the fitted sheet on.
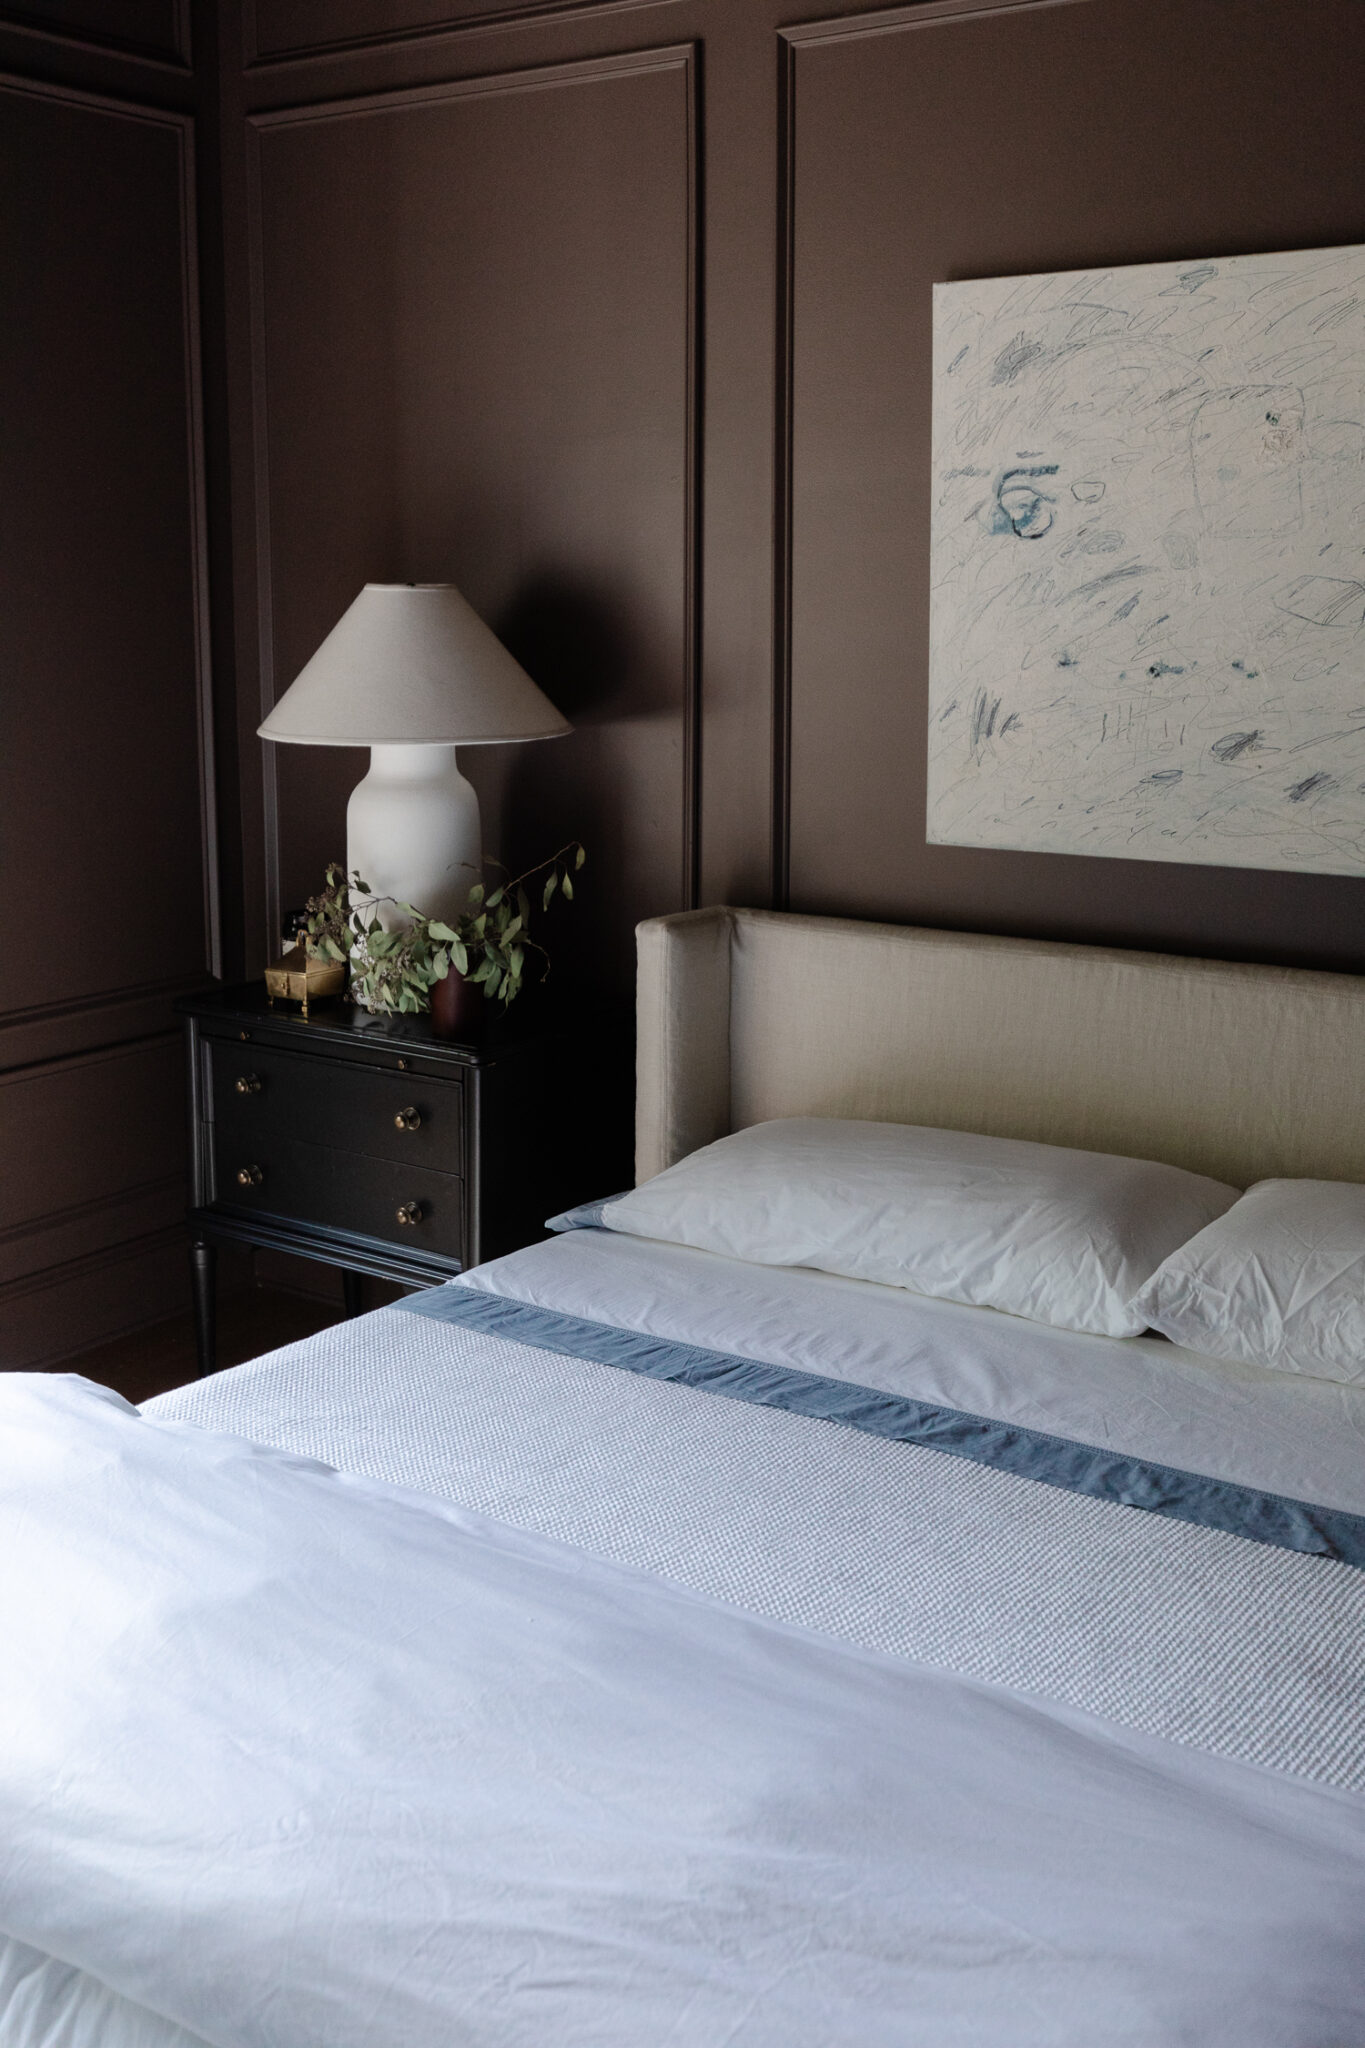
Step 3: Lay the flat sheet over the fitted sheet. I like to pull it all the way to the top of the mattress so it’s nice and straight. (I know not everyone enjoys a top sheet because it can feel like your feet are trapped underneath. But don’t worry — I have a trick for that.)
Step 4: Next up, lay the Waffle Bed Blanket above the flat sheet all the way at the top of the mattress. And make sure it is also completely flat.
Step 5: Fold the flat sheet and blanket together down one third of the bed.
Step 6: Tuck all of that into the bed frame. Because of our bed frame, we can tuck the edges into the frame instead of lifting up the mattress, which is so lovely and convenient. I don’t even bother with hospital corners anymore. And without having anything tucked in under the mattress, nothing constricts your feet too. I love an all-around win-win.
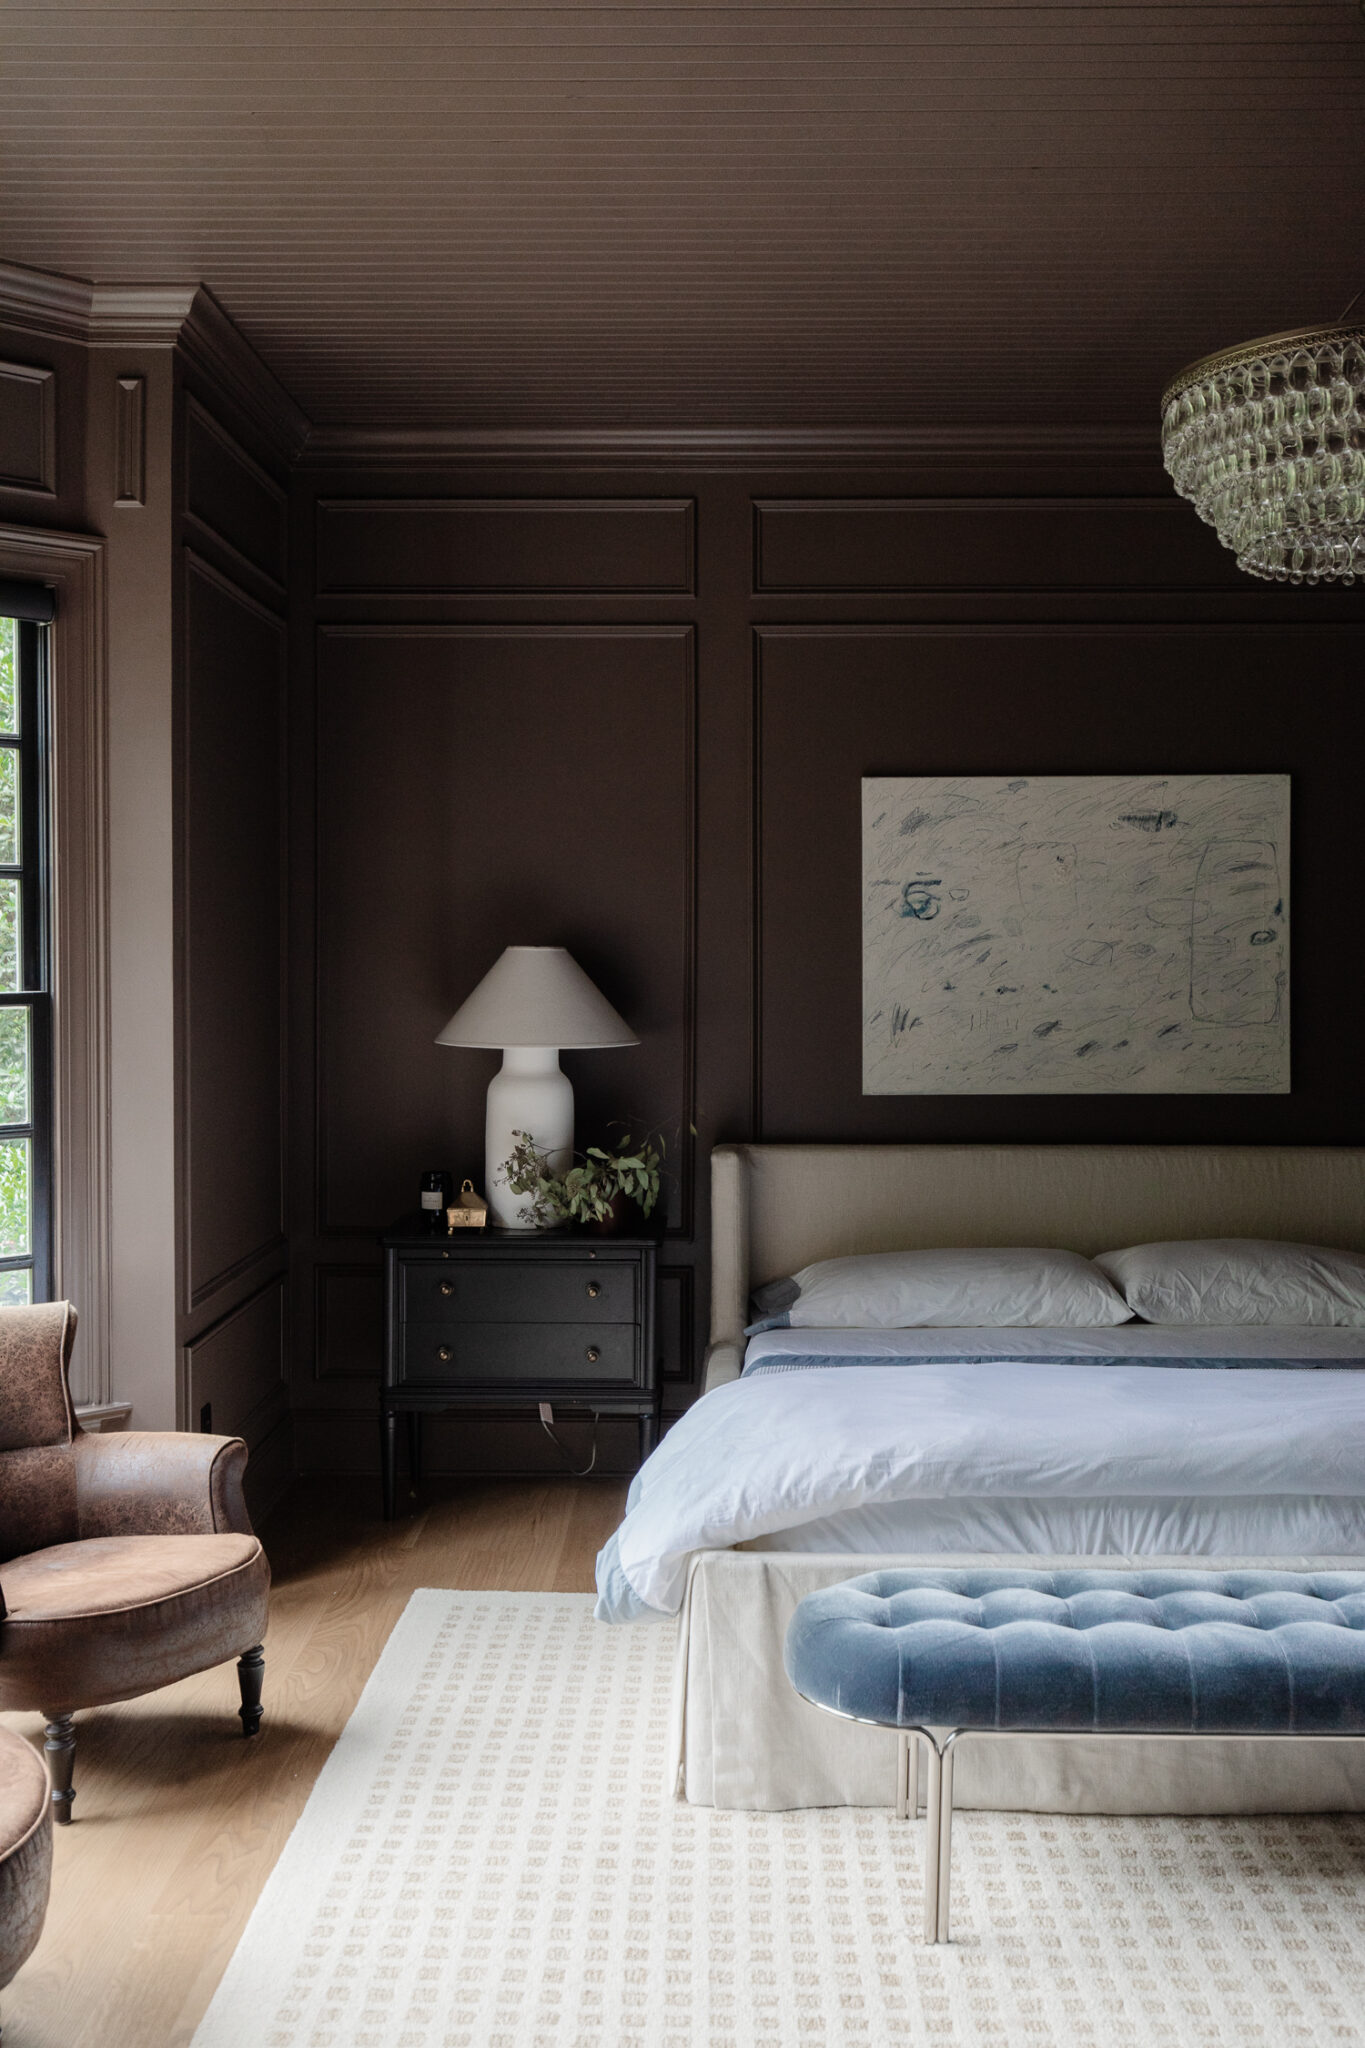
Step 7: Next, I put on the duvet. This also gets pulled up all the way to the top of the mattress. Then I fold it all the way down past the bottom of the bed 2/3, and back on itself for the last 1/3. So it’s nice and fluffy and the top is ready to be pulled on at night as needed. (See the photo below!)
Step 8: I then tuck the duvet into my bed frame except for the part that is folded over itself. So, the sides and bottom are all tucked in while the top, which is folded over itself, is cascading down the bed frame.
*Pro-tip: If you have a king-size bed, you really don’t need to go up a size for your duvet. However, if you have a queen-sized bed, especially if your bed is taller, then going up a size and getting a king will give you such a luxurious look.
Step 9: They say to use three Signature Hemmed Euro Shams for a king, but I honestly love the look of two. I like a flat stack of pillows (however many you actually sleep with!) right on top of each other, then I sometimes put the euro sham in front of each. (The euro pillows are the only ones we don’t use when we sleep.)
And that’s it! Pretty simple, eh? Especially once you get the hang of it. Is there anything you still need so you can make my perfect bed?
Don’t miss the anatomic graphic below that has all the pieces listed that I use to make my signature bed and head to Boll & Branch to get all my favorite bedding!
What is included in my perfectly made bed
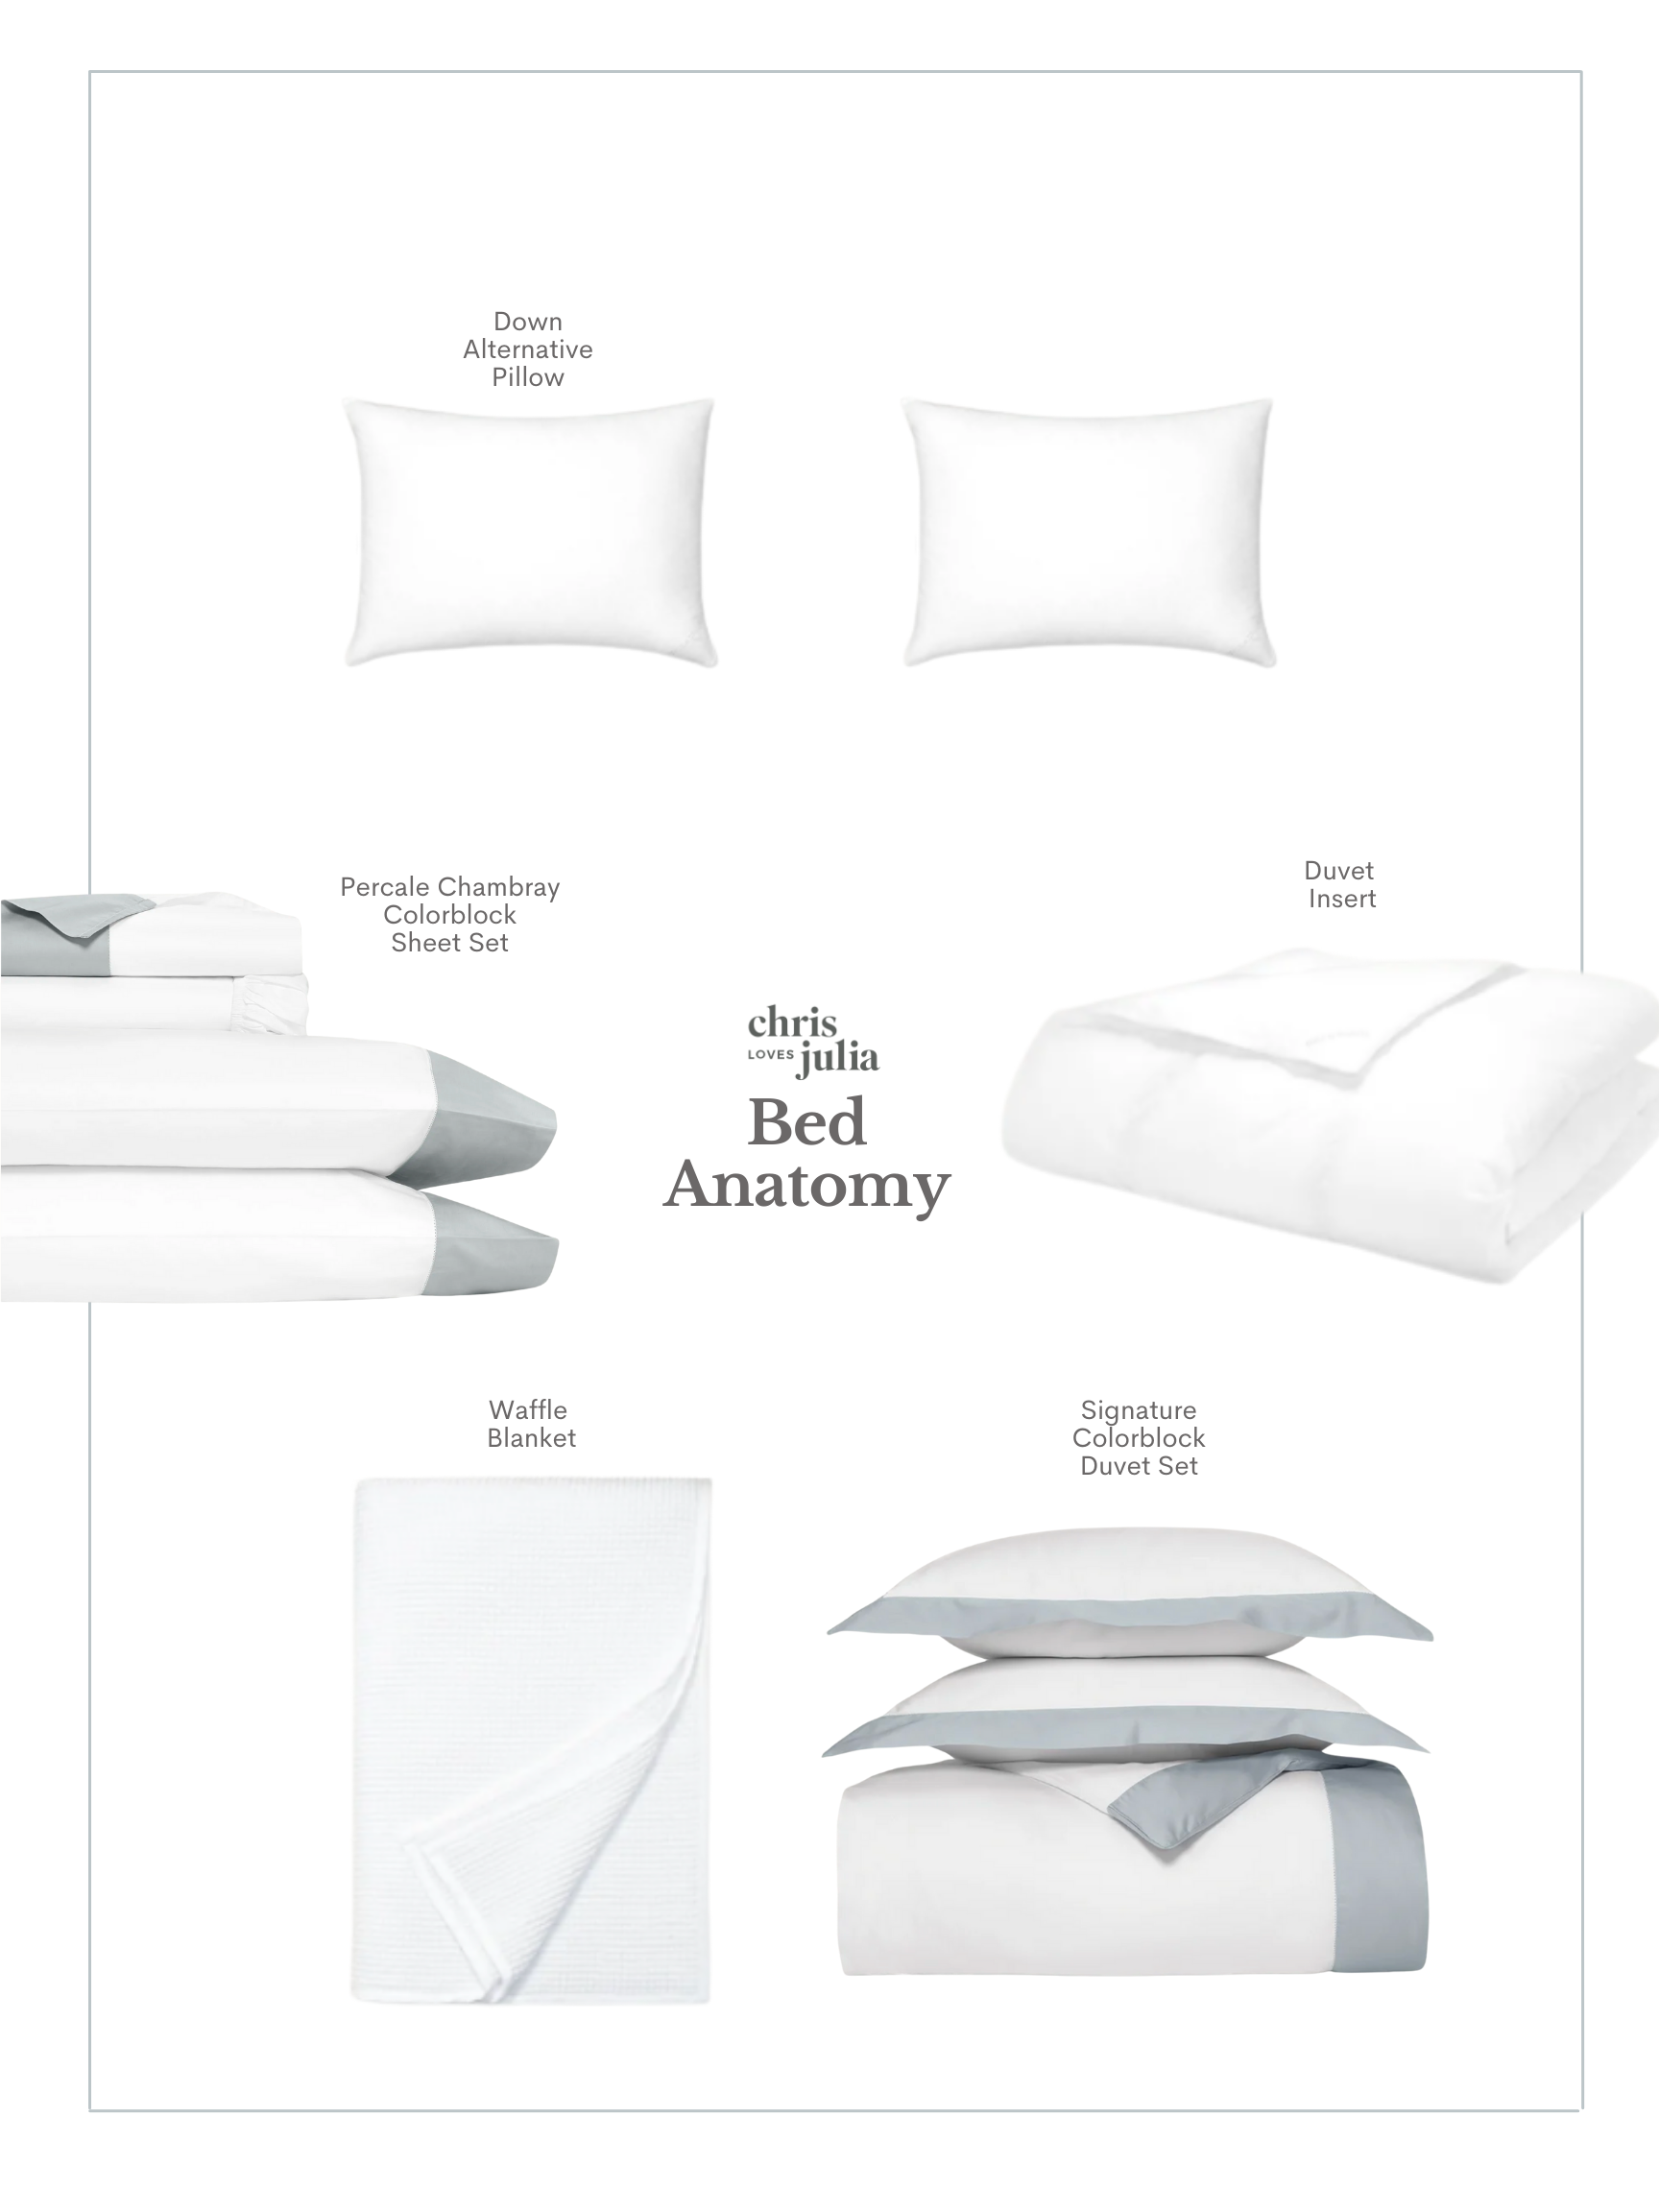
Down Alternative Pillow
Signature Colorblock Duvet Set
Duvet Insert
Waffle Blanket
Percale Chambray Colorblock Sheet Set


Love everything about the room from the ceiling to the floor. Could you please share if the walls are a paneling or wall paper with the trim and what color is used on the walls and ceiling. Enjoyed the breakdown of making the perfect bed.
The walls are panelled with custom box trim and we used Farrow & Ball London Clay paint on the walls and ceiling.
Thank you! I love having a blanket, but I put it on top of the doona (sorry duvet – Australian here) and it has just never looked or felt right. I’m giving this a go.
This is so helpful! I know you mentioned washing your sheets weekly. How often do you wash your duvet cover and mattress pad?!
Hi Chris Loves Julia Team,
I love this breakdown, for whatever reason my bedding sometimes stumps me. This is so helpful.
I have a separate question for you, how are the wall Pops floor tiles wearing in your home gym?? I’m interested in them and want to use for a similar application.
Good as new!!!
So fresh and lovely! I just have a metal platform bed, no actual frame. We are still looking for a headboard we both like (total opposites in taste and style). We will figure it out.