Some textures on walls and ceiling are pretty aggressive. This can especially be a problem if you want to put wallpaper over the texture, like we’re planning in Greta’s room. We have wallpapered over a slight orange peel texture in our last house with no issue but anything more than that, you’ll want to smooth it out before wallpapering. The ceiling in here isn’t the craziest texture we’ve ever seen, but it’s definitely enough to clearly show through any wallpaper we apply, and ruin the look and adhesion. So if you have a similar situation, all you need is a few simple tools and a bit of time to smooth that texture out before you put your wallpaper on.

Tools Needed
• Taping knife (I like a nice wide one to keep the texture as even as possible – 14in)
• Drywall mud pan
• Joint compound
• Smaller taping knife (for scooping out the joint compound)
• Sanding Block
How to smooth out a textured wall or ceiling
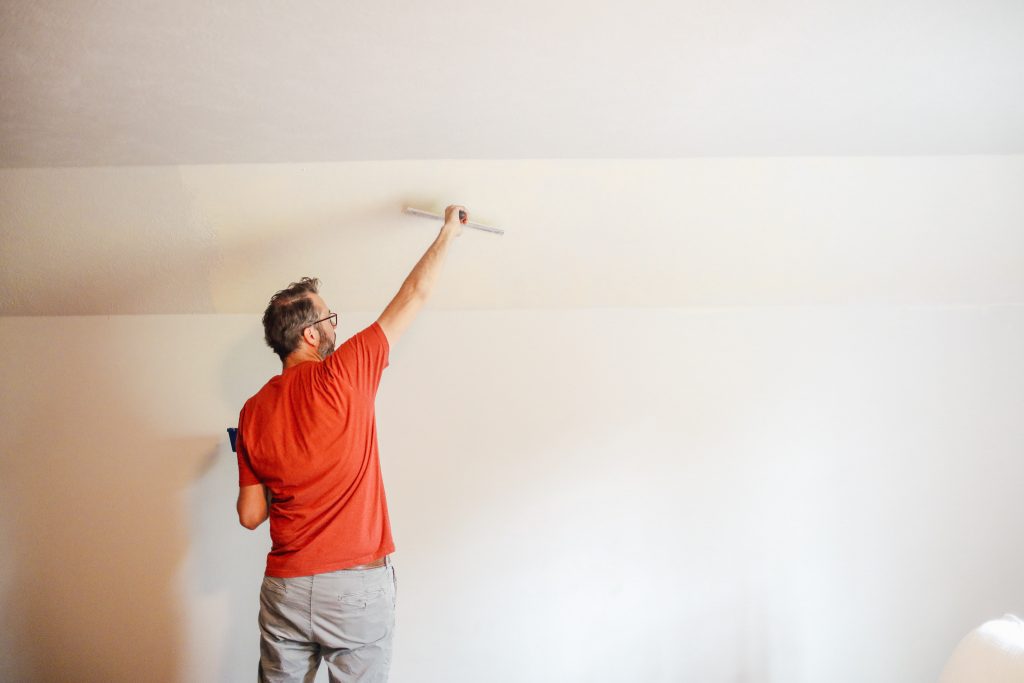
1. Scrape your taping knife across the entire surface
Any wall or ceiling texture will leave behind little jagged points. Some of these are worse than others, but if you scrape your taping knife along the surface you can knock off these points and make the surface a little more smooth, which will help the joint compound go on easier.

Some textured surfaces will be too aggressive for this and may require sanding. If this is your case, goggles, a respirator, and an orbital sander will make this go a lot quicker.
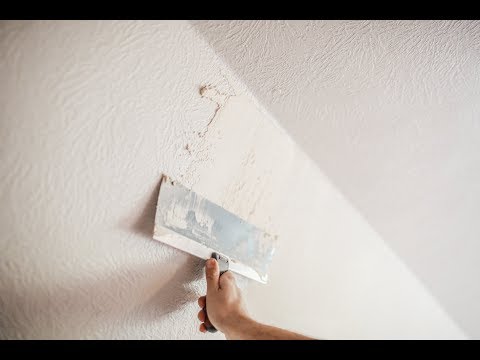
2. Apply a thin layer of joint compound across the surface
Using a small taping knife, scoop your joint compound out of the box and put it in the mud pan. Use the long taping knife to apply an even layer across the entire textured surface, working in areas about 2ftx2ft. Scrape any excess off to get the surface as smooth as you can. Do this across the entire area and allow to dry for 4-8 hours.

3. Sand and reapply if needed
Once the joint compound has dried, use a medium grit sanding block to sand the surface. Run your hand along it to ensure uniform texture. If needed, add some joint compound to any areas that may not have been covered the first time.

4. Prime
Before you apply wallpaper, you’ll want to paint a coat of primer onto your newly smooth area. This will help the wallpaper adhere better to the surface.
With that little task out of the way, we’re ready to get this wallpaper up! Hopefully in the next week or two, so stay tuned for that! And in case you wanted a little more detail on the de-texturing, we recorded a little video you can watch below. Can’t wait to show you more as we work on this great space!

I think it is important to note that popcorn ceilings in older homes may contain asbestos, so before scraping or sanding a textured ceiling at all, it is wise to test for asbestos.
Thank you for sharing this information. At the beginning of the post, you said that you wallpapered orange peel walls. Did it work well? I have orange peel texture and I’m wondering if I need to go through all this process before I wallpaper. Thank you!
Will Kiltz work for primer?
Pro tip: Adding a little water to your joint compound to thin it to the consistency of cake icing will work MUCH easier on the wall for taping, floating and skimming. If you’re filling nail or screw holes then straight of out the box is recommended.
I’m curious to know how Faye’s room is coming along with the new bed installed. Will you show more updates on her room as well in the near future?
We’ll be sure to share more as things happen but we aren’t actively working on her room right now.