


This post is sponsored by Lowe’s.
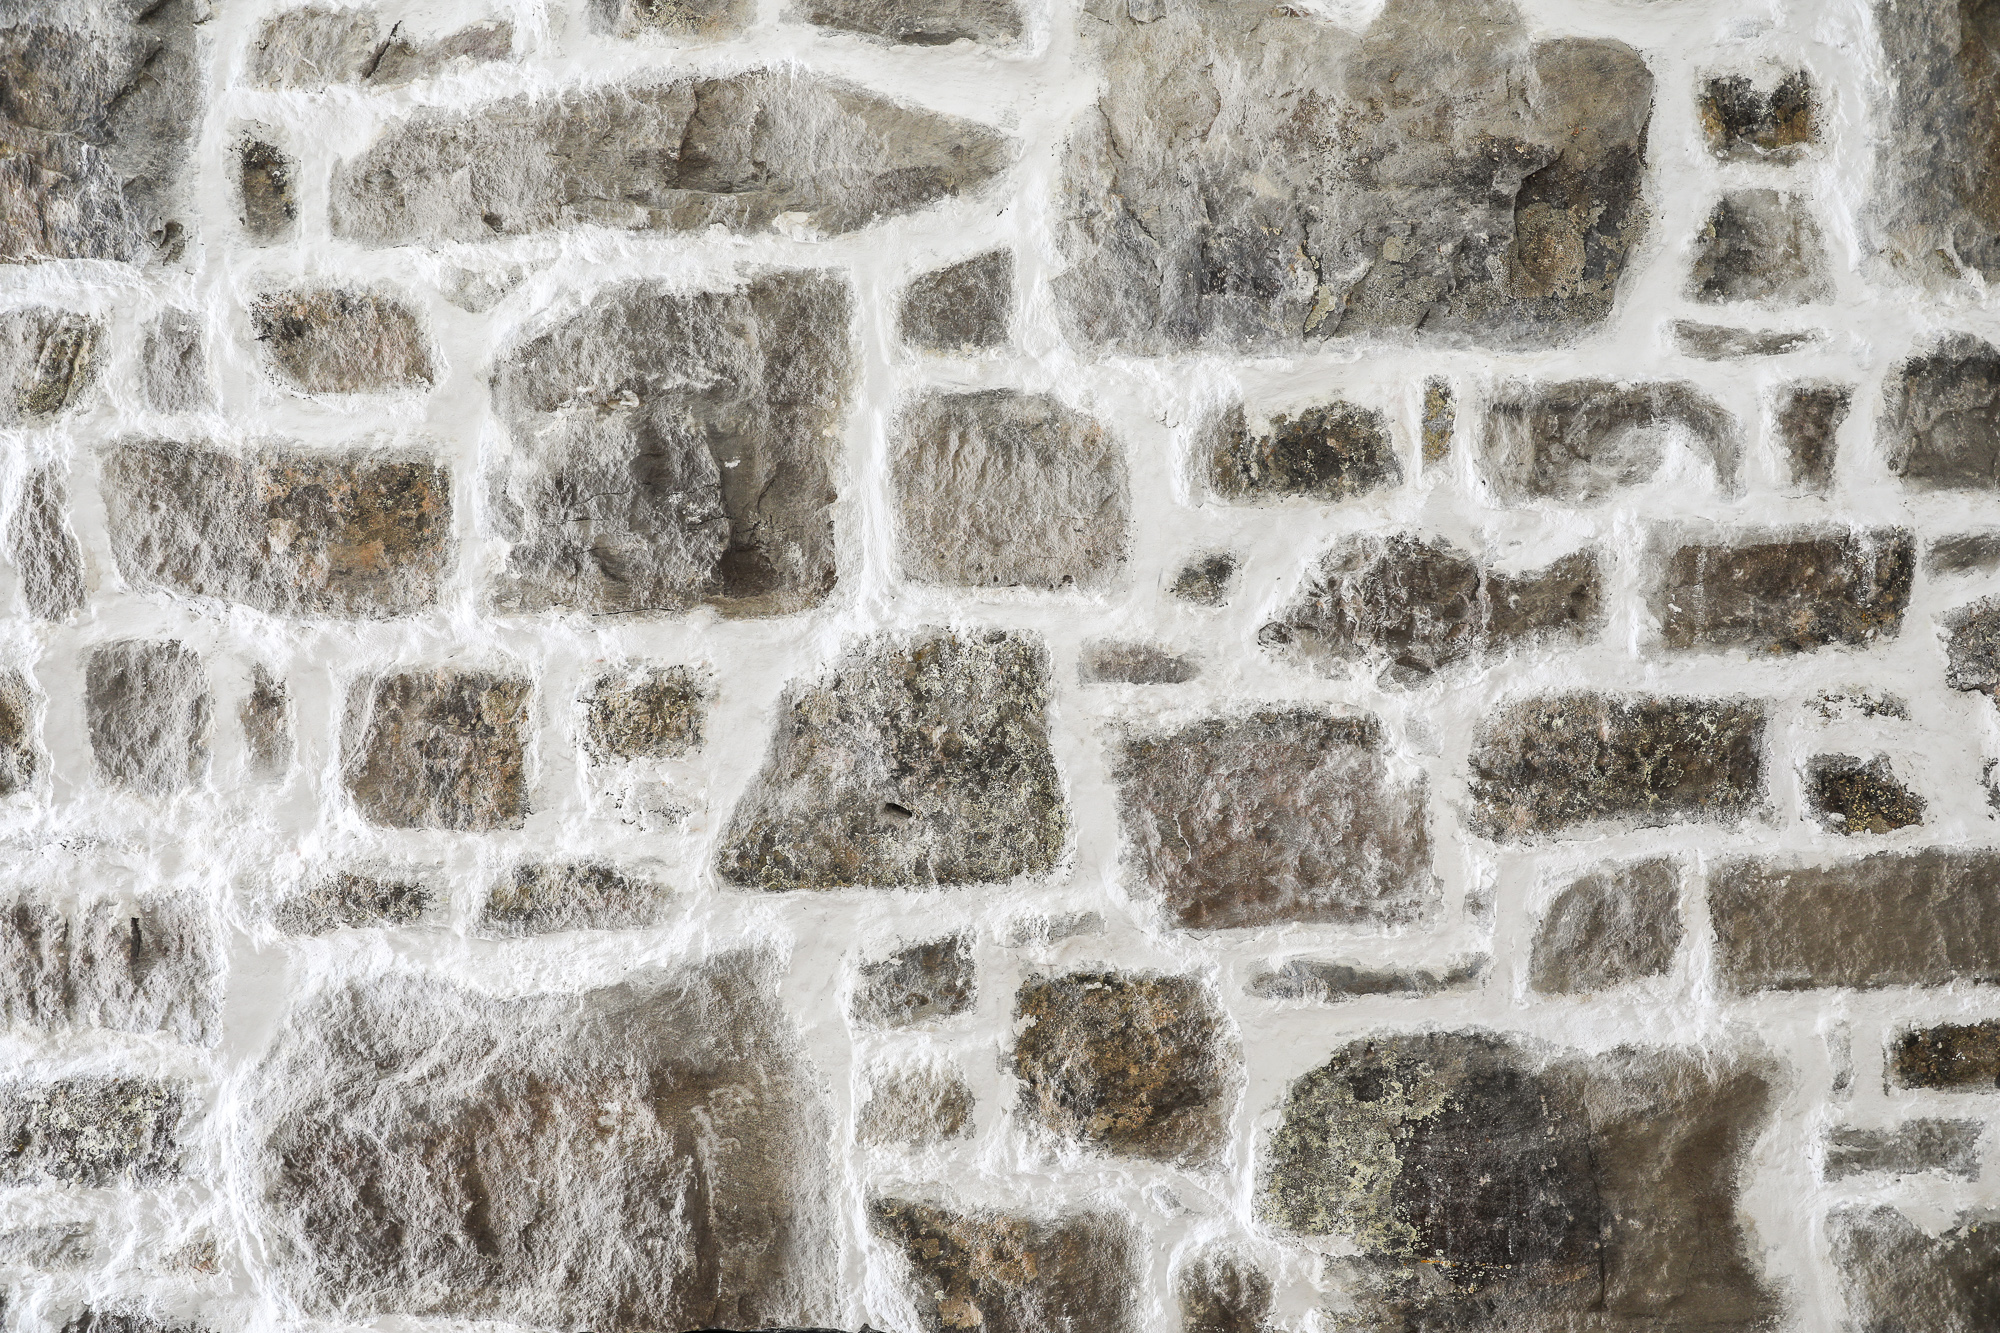
Our bedroom has undergone a lot of changes in the last six months, but I think our fireplace has gone through the most changes. We initially thought about tearing it out completely and re-doing it in a far simpler fashion, but against all odds–I’m attached to it. It’s real local Idaho stone (not a veneer) and a modern cottage seems like it should have some stone in it–yes? So I’ve been on a personal mission to make it shine. This is how it looked when we first moved in.
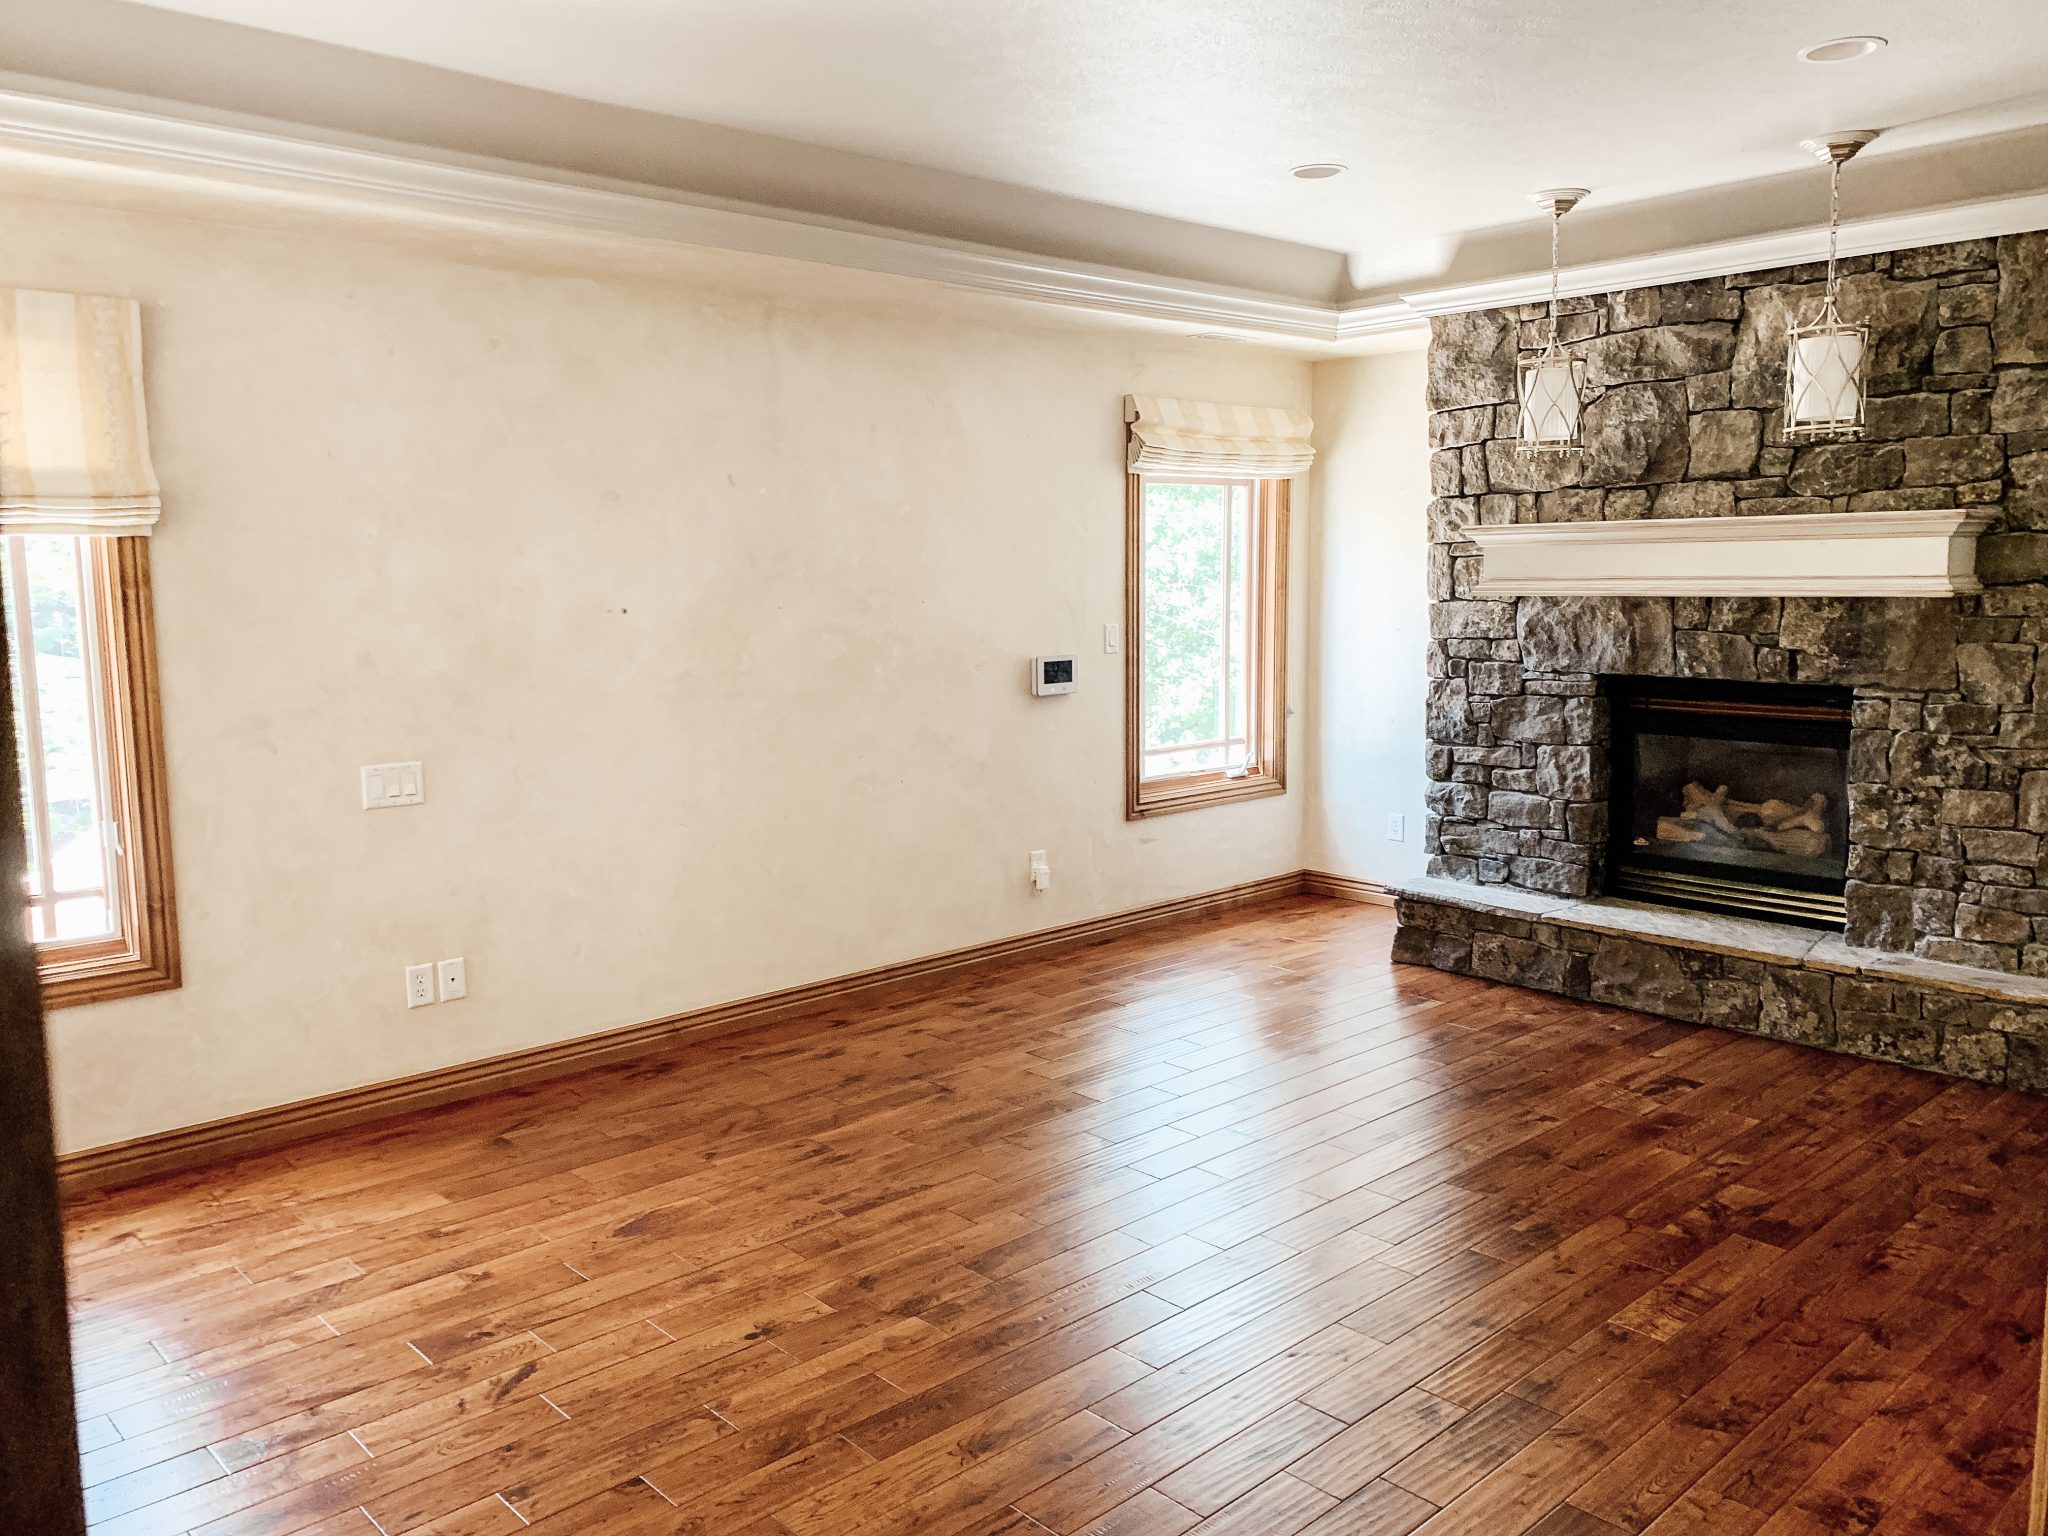
We took quick steps to simplify it by removing the mantle and the sconces right off the bat, but the real challenge came when we removed the tray ceiling in our bedroom and were left with over a foot of space between the stone and new ceiling height.
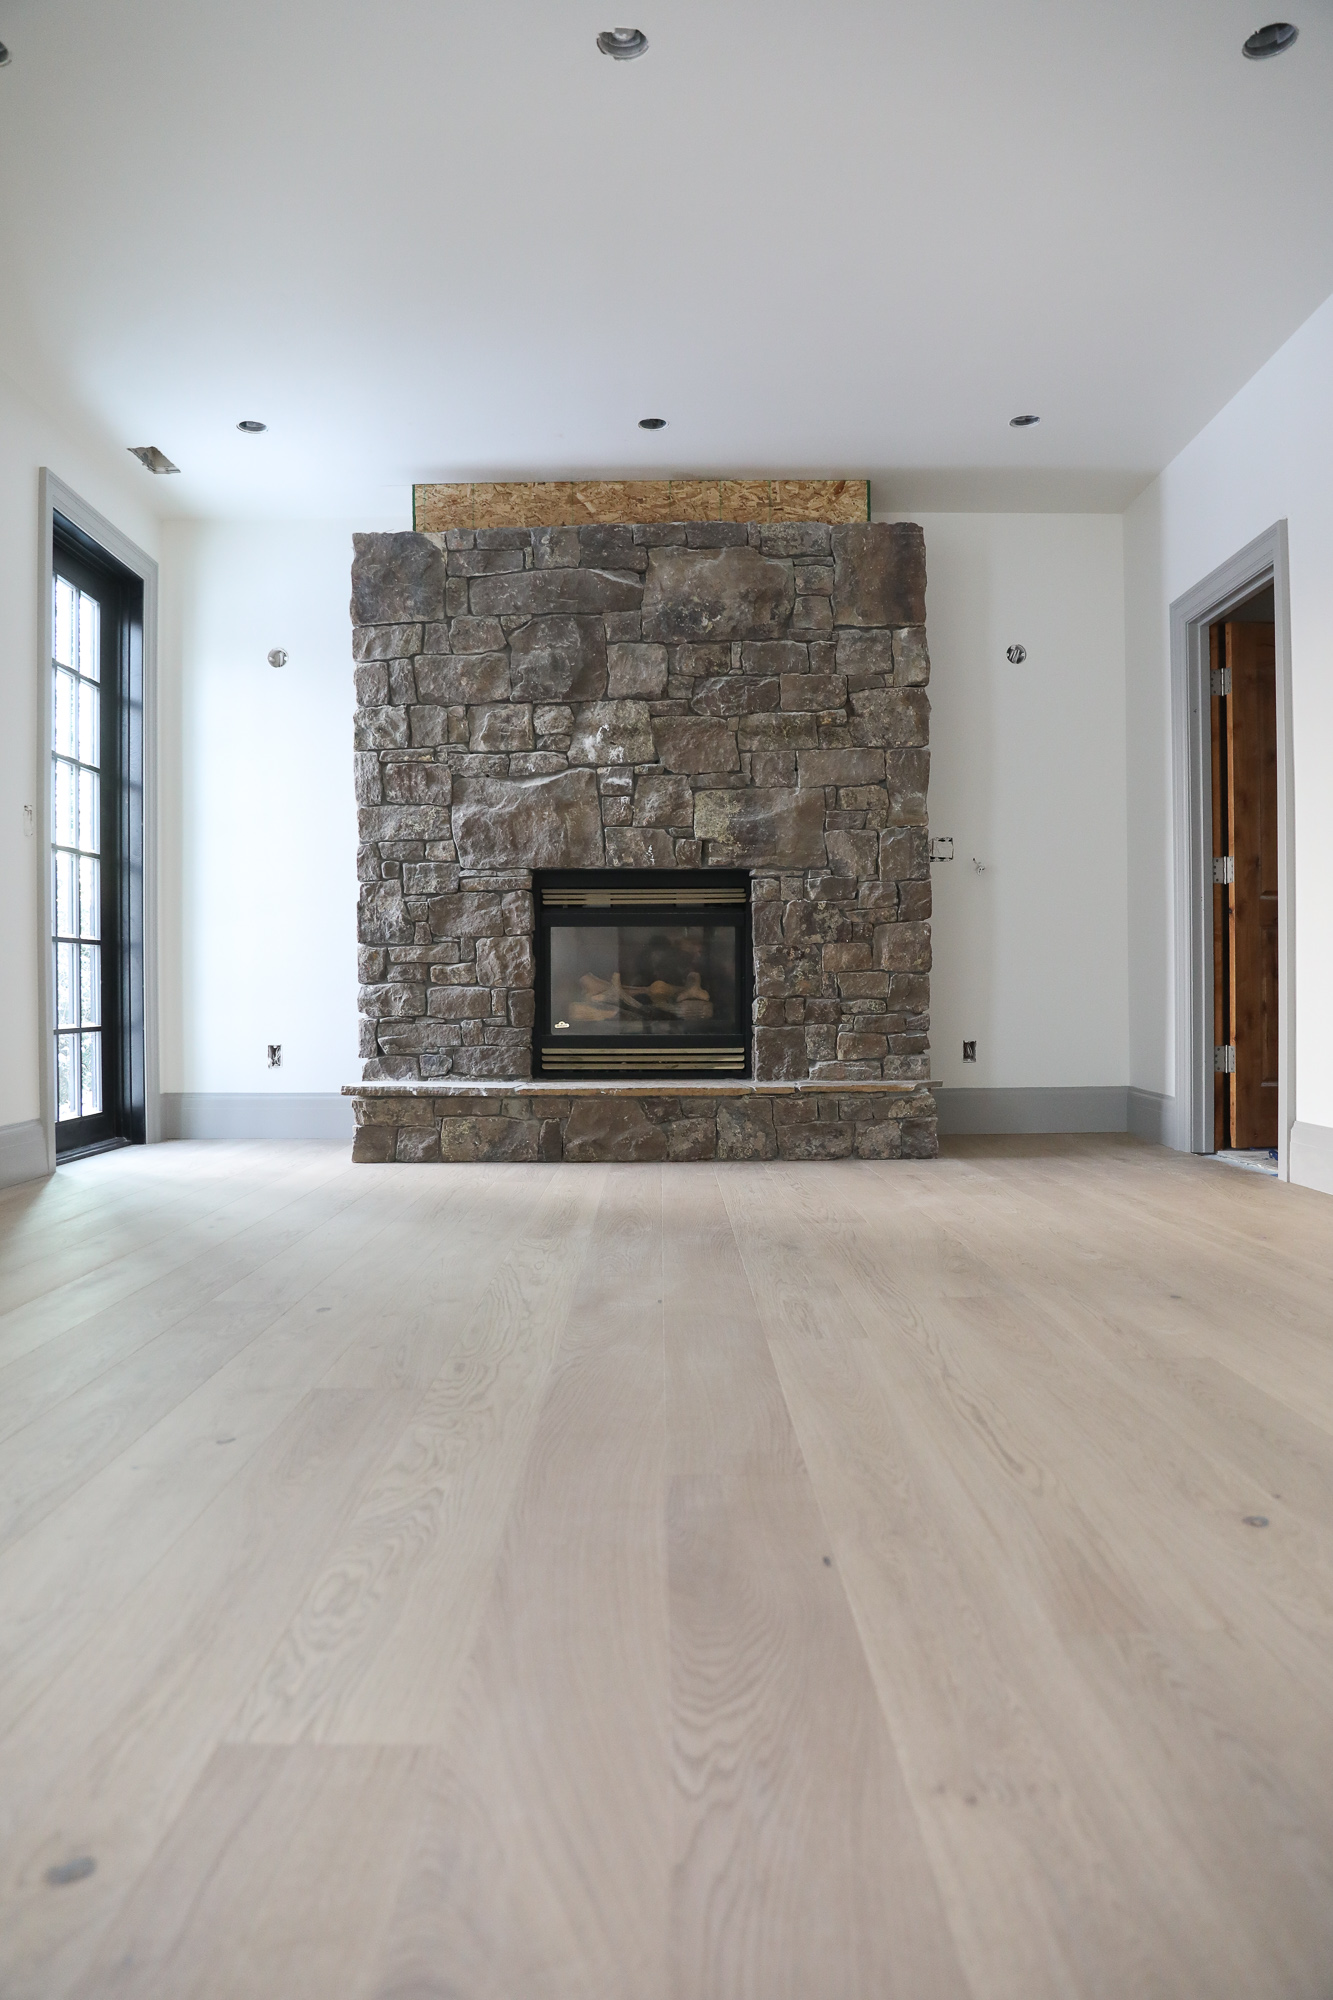
But! I planned ahead! During the demo phase of our new dining room, they removed a bunch of stone that matched our fireplace (I imagine they were put in at the same time), and we saved it to use here. A mason added the stone in under two hours and all was right in the fireplace world again…almost.
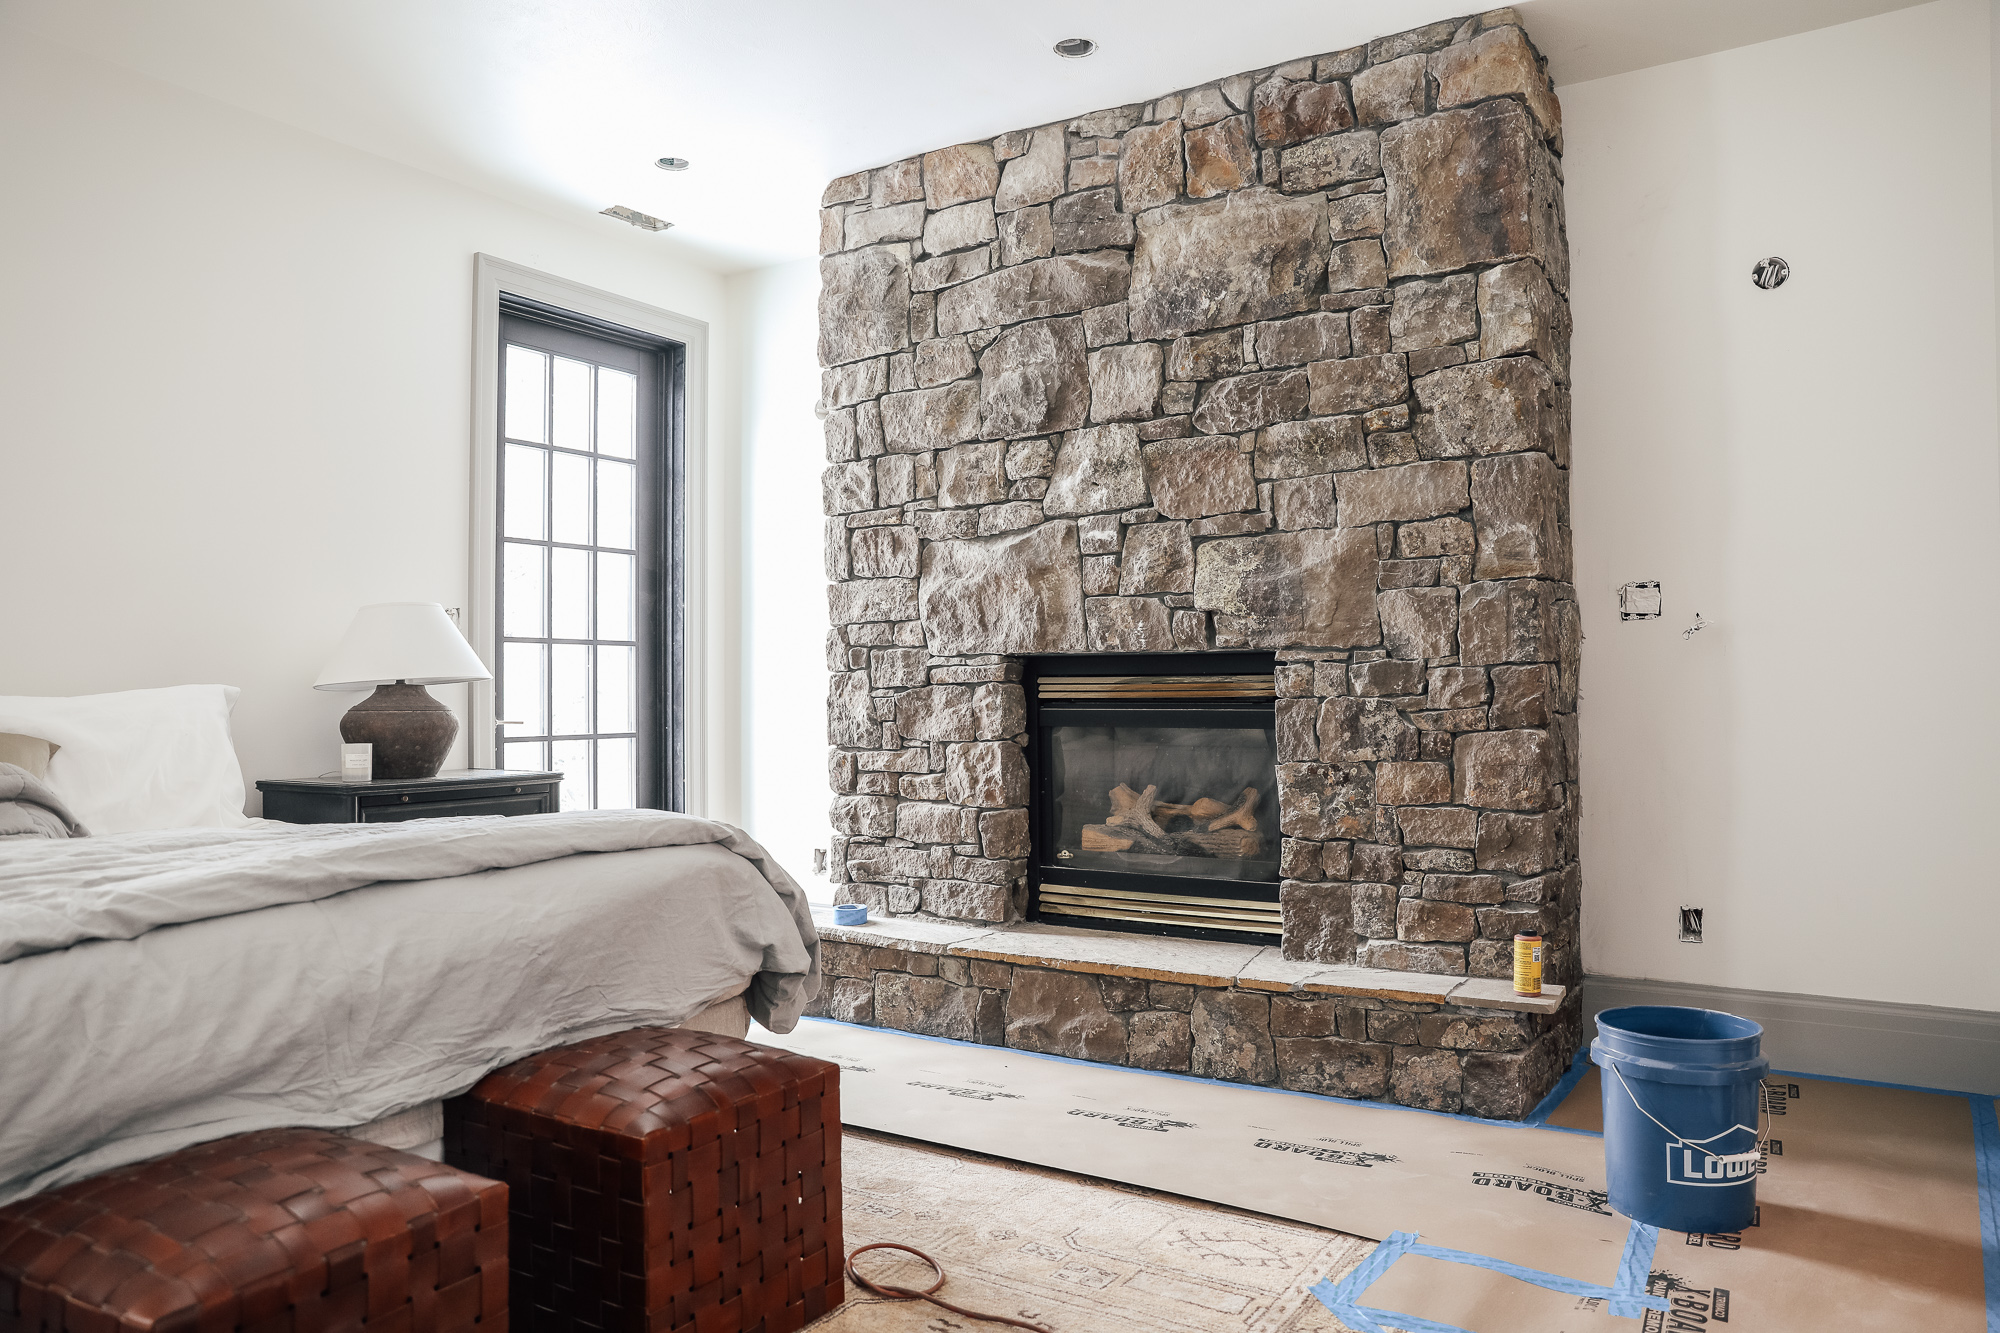
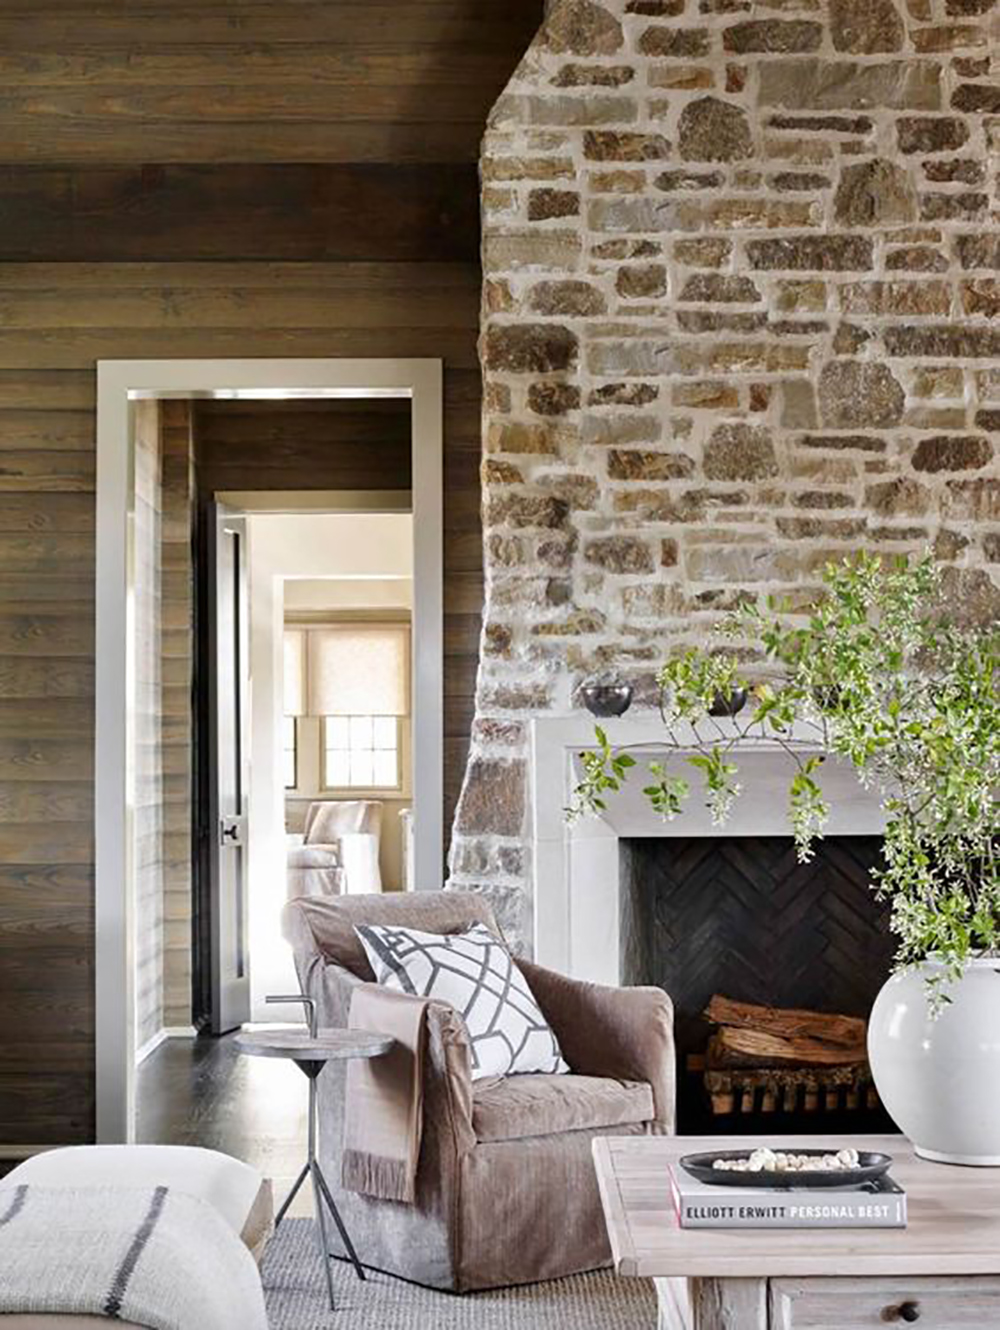
Besides the insert needing an update, I was so drawn to over-grouted stone fireplaces and had saved so many examples thinking our bedroom would be the perfect place to implement the look. The examples I had saved went from almost completely washed in mortar…
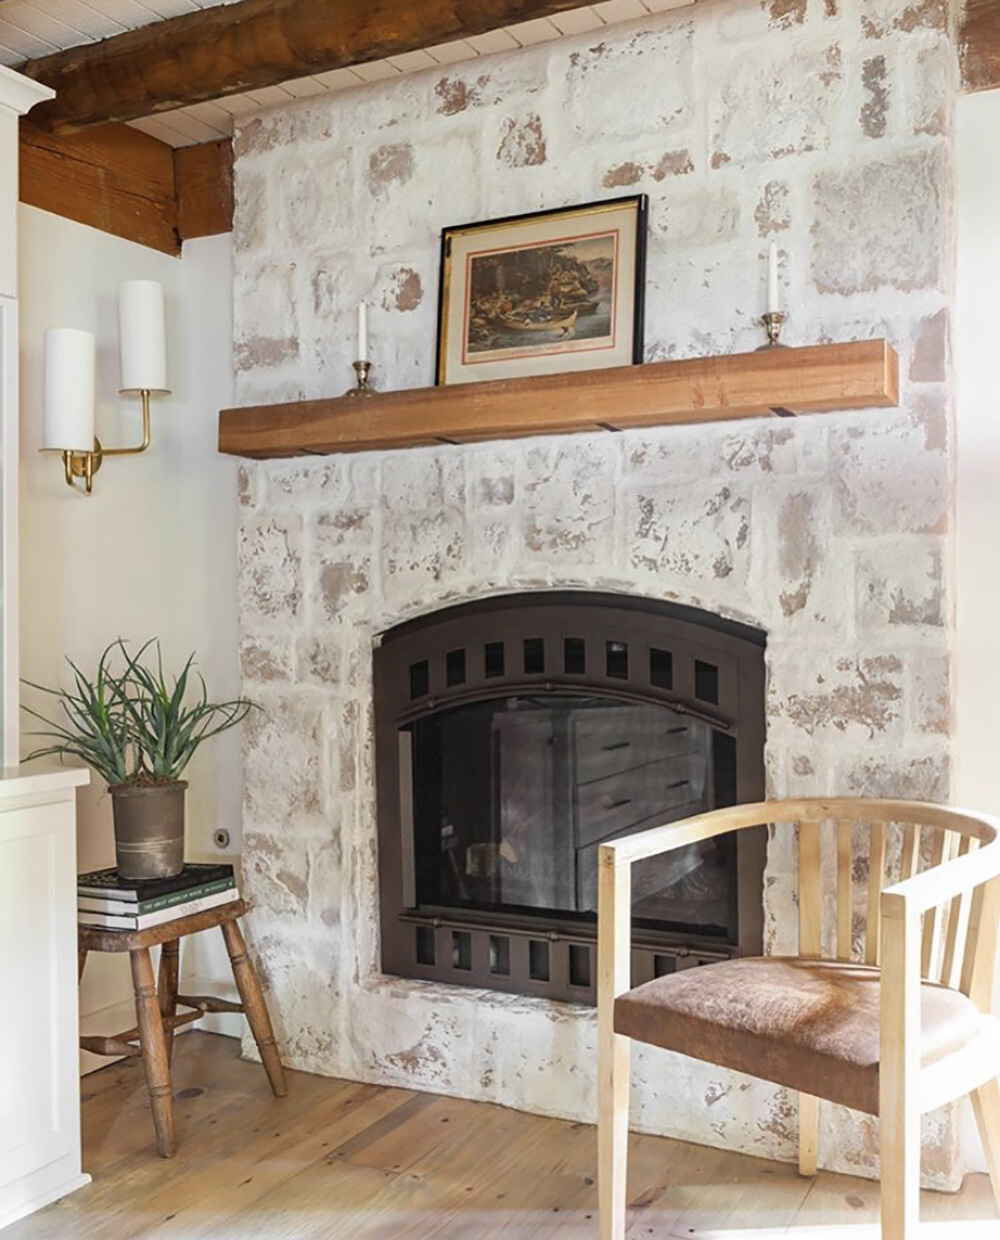
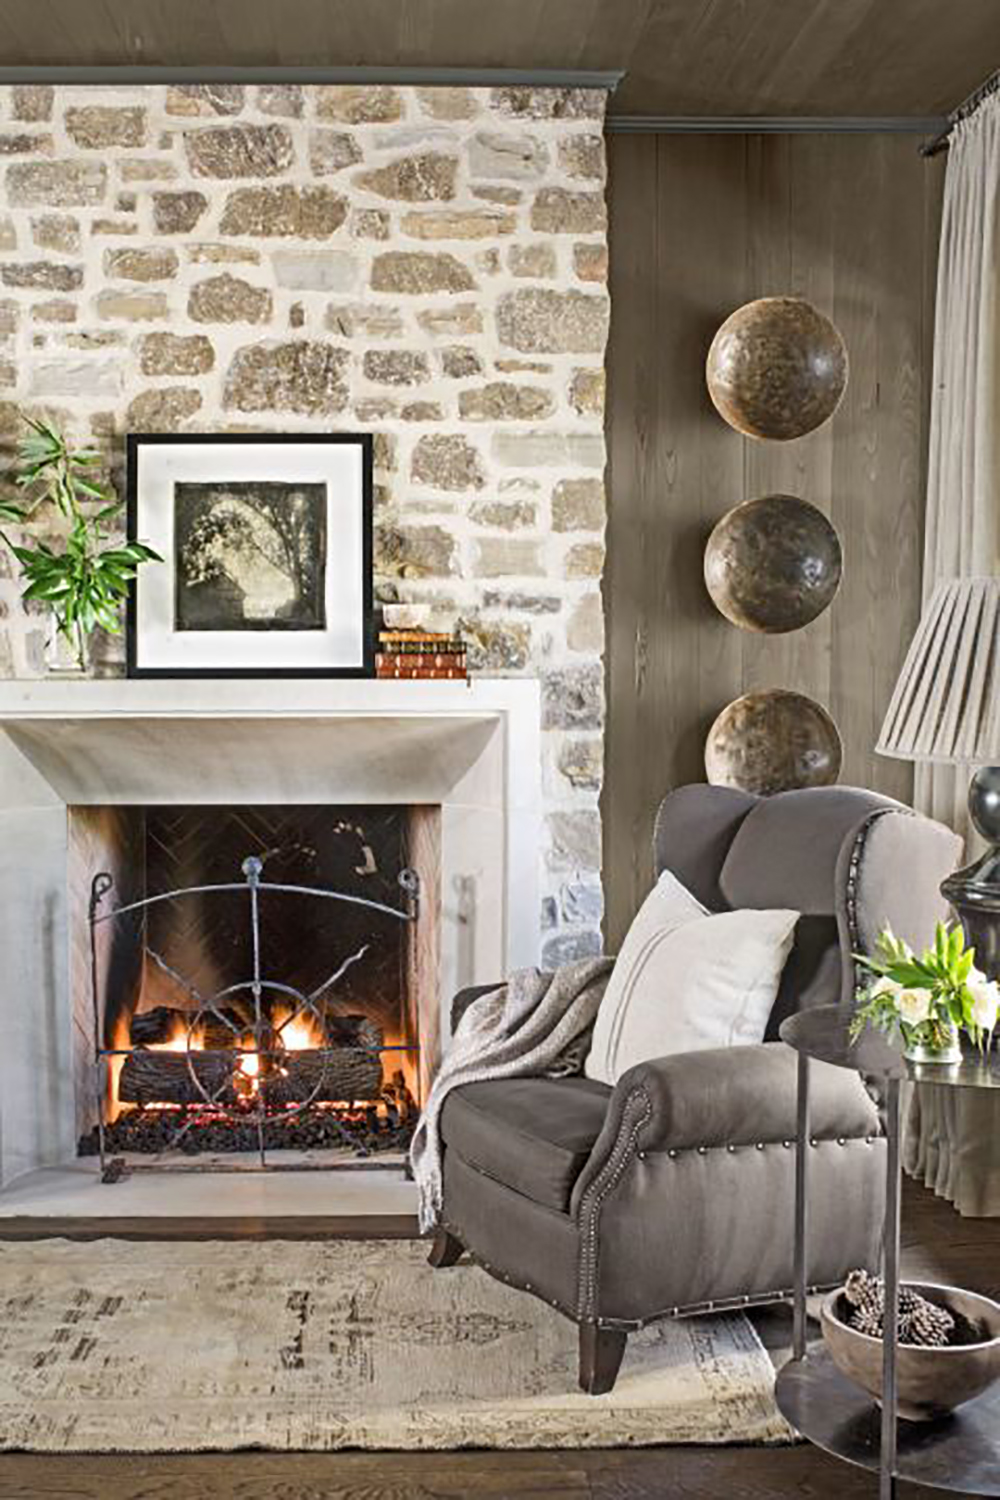
…with barely any stone showing…

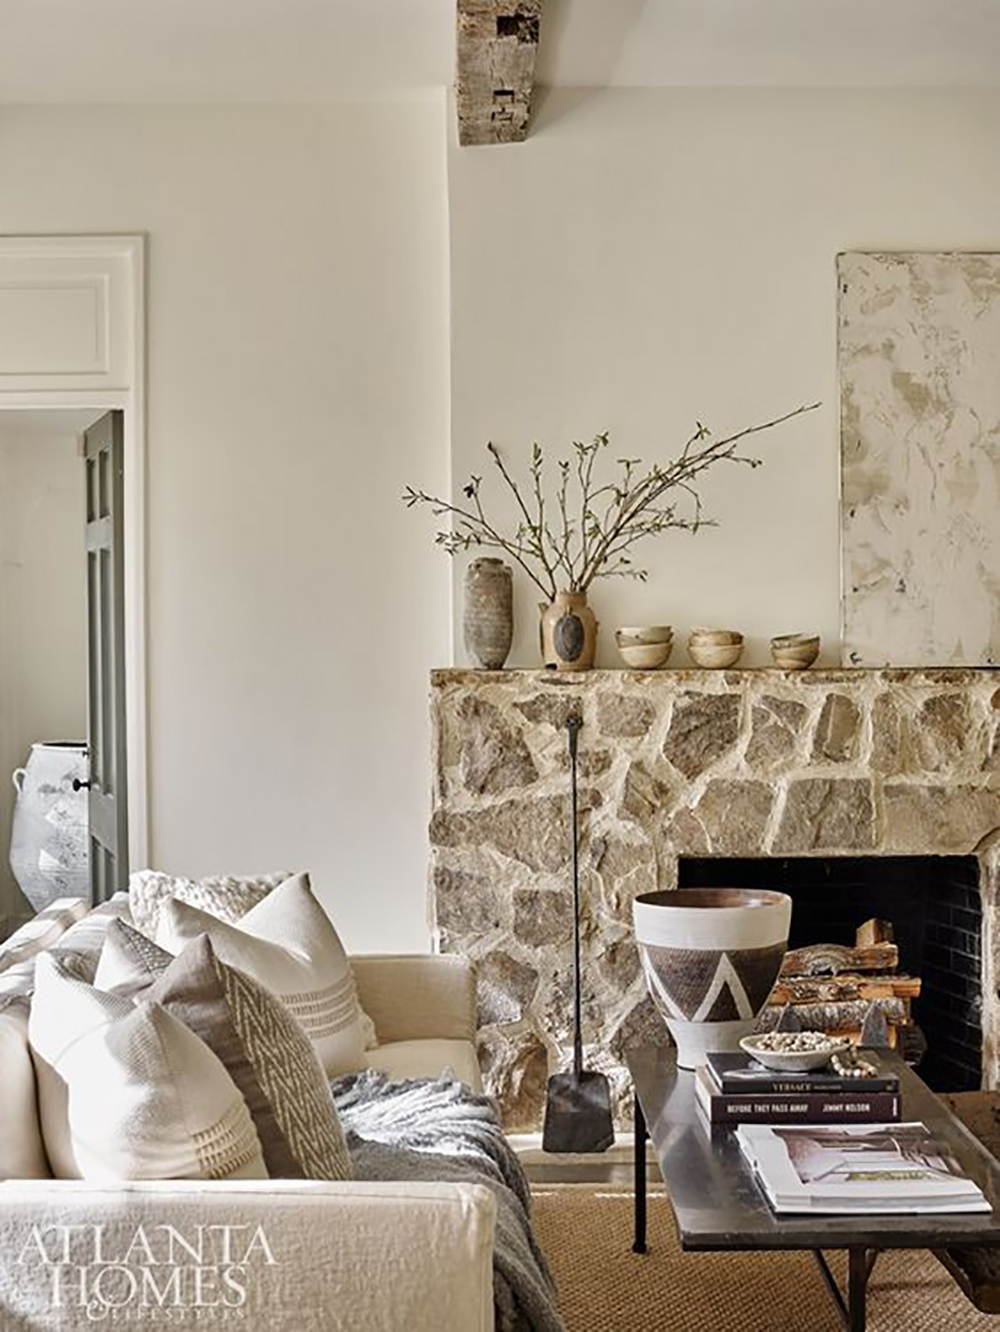
To just mortar lining all the sones.
I really fell for these because, to me (and I realize this is completely personal preference) I loved the look of the stone and the softness that the mortar brought. I wanted to see both!
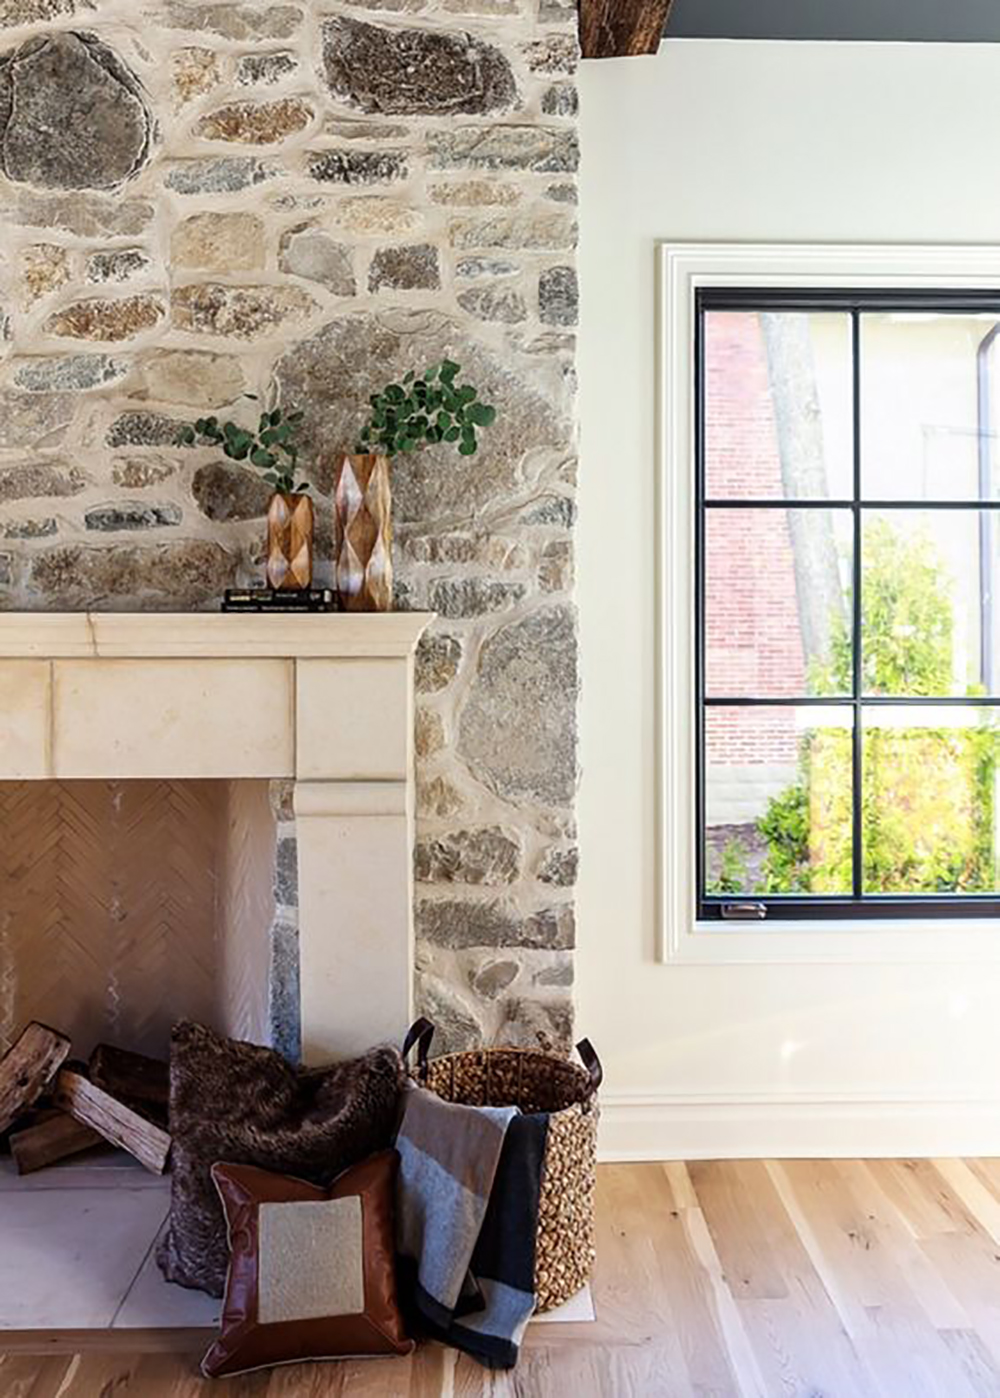

I could go on and on and on but these were all of the inspiration photos I showed Chris during my thesis on why the fireplace in our bedroom wasn’t showing its full potential. (haha). I really wanted a softer, cottage-looking, over-grouted stone fireplace and with the new white walls in our bedroom, I knew a light mortar would only add to the look.
Fortunately this is a very inexpensive DIY (we spent around $100!!, but add $99 more if you don’t have a corded drill–linked ours below). It’s even EASY. But it IS tedious and a little time consuming. I’d block out 1.5 days for this project (great for a weekend project!) because it’s not something that you can really start and stop. The mortar WILL dry and is kind of time-sensitive to get right. We spent about 14 hours from start to finish doing this project, but it wasn’t all active.
HOW TO OVER-GROUT YOUR FIREPLACE
One note: I don’t really know what the technical term for this tutorial is because we’re not using grout (the crevices in the stone are much too large for grout) we’re using mortar. But, “over-grouting” is still the term that I hear the most for this look. Definitely open to other titles.
Lowe’s had EVERYTHING we needed. It was so nice to be able to walk into the store with a short list and walk out (having only spent $108! on supplies) and immediately get started. You can do this too! Here’s what you’ll need.
Materials Needed
White Large Stone and Tile Mortar (we used 1 and 1/4 bags for our fireplace)
Mortar Piping Bag
Mortar Mixer attachment
Corded Drill
2 Buckets
Quikrete Concrete Dye (optional: we used BUFF and Charcoal)
Pointing tool (we used a shim for this part)
Stiff Craft brush
Cup of Warm Water
Grouting & Concrete Sponge
Wire Brush
Here’s how we did it!
Mixing the Mortar
1. For every 6 cups of dry mortar mix, we added 4 drops of BUFF concrete dye and 2 drop of CHARCOAL concrete dye (so it wasn’t SO stark white and blended with our wall a little better. You could add more for a darker/warmer look if you’d like!). We started by adding 3 cups of water and then kept adding more until the mix was semi-stiff (think the consistency of mashed potatoes.)

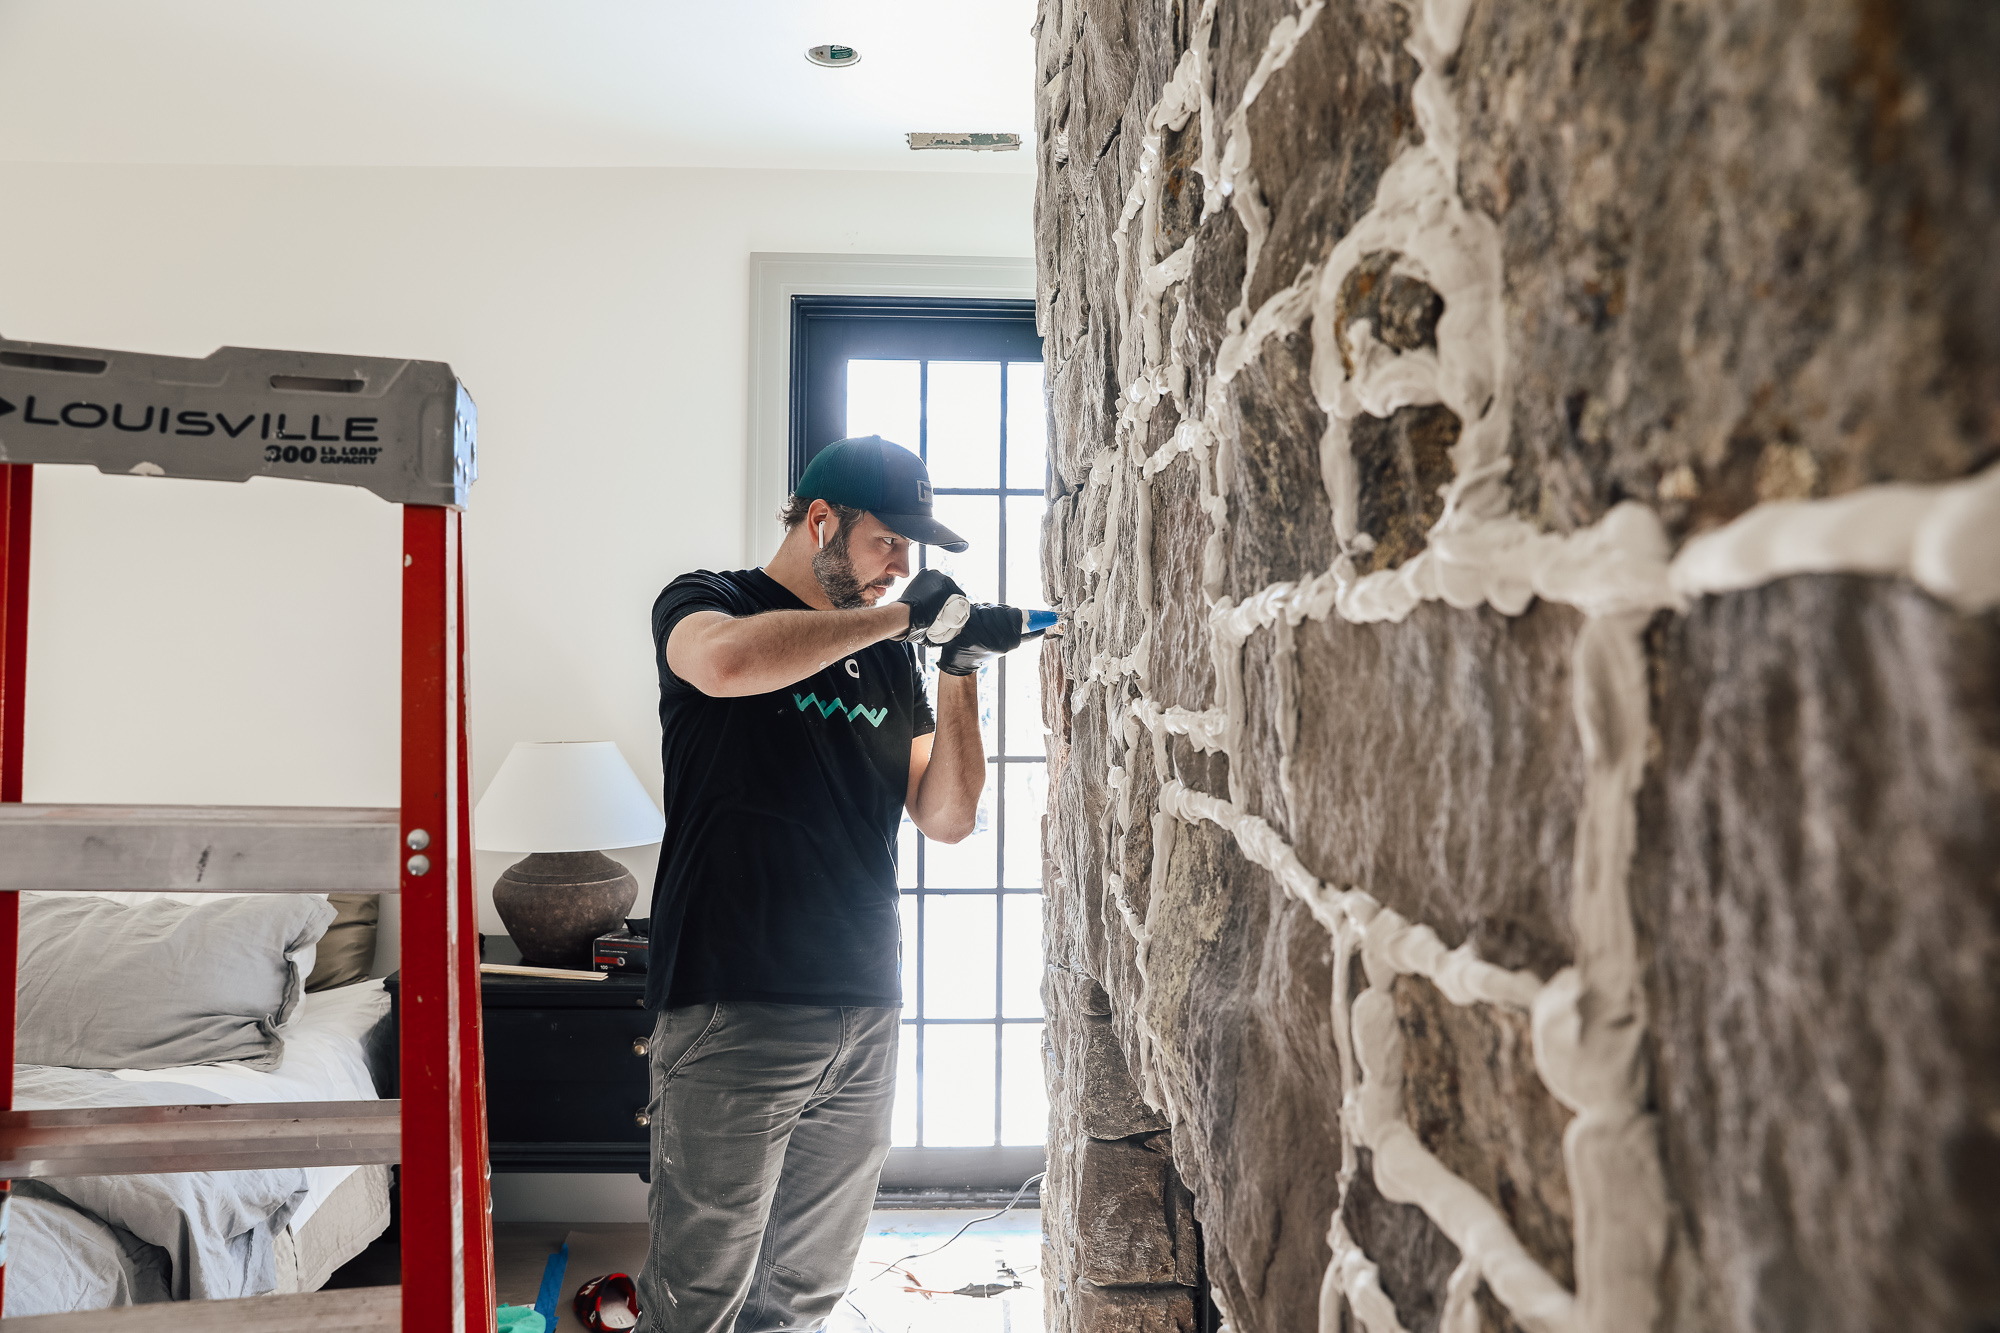
Piping the Mortar
2. Fill your piping bag 2/3 full. Twist the open end together to close it off and apply steady pressure to the back of the piping bag with one hand while guiding the tip with the other. Pipe the mortar into every crack allowing it to spill onto the front a bit. We did a trial of this and just added mortar to fill the cracks and we were not able to achieve the same look. You really have to OVER-fill it in this step.
Pointing the Stone
Right here, we took about a 2 hour break to let the mortar set just a bit. This will absolutely depend on your climate and once Chris reached the end, the first parts were ready for this step. But then we caught up and had to wait a couple more hours before continuing. In this step, we smooshed the mortar flat in place onto the front of the stone a bit. We used a shim for this part because we didn’t want the mortar to indent back into the stone, but they actually make pointing tools! You just really need something to press and work the mortar flat. If you find the mortar is scraping off, it might need a little more time to set.
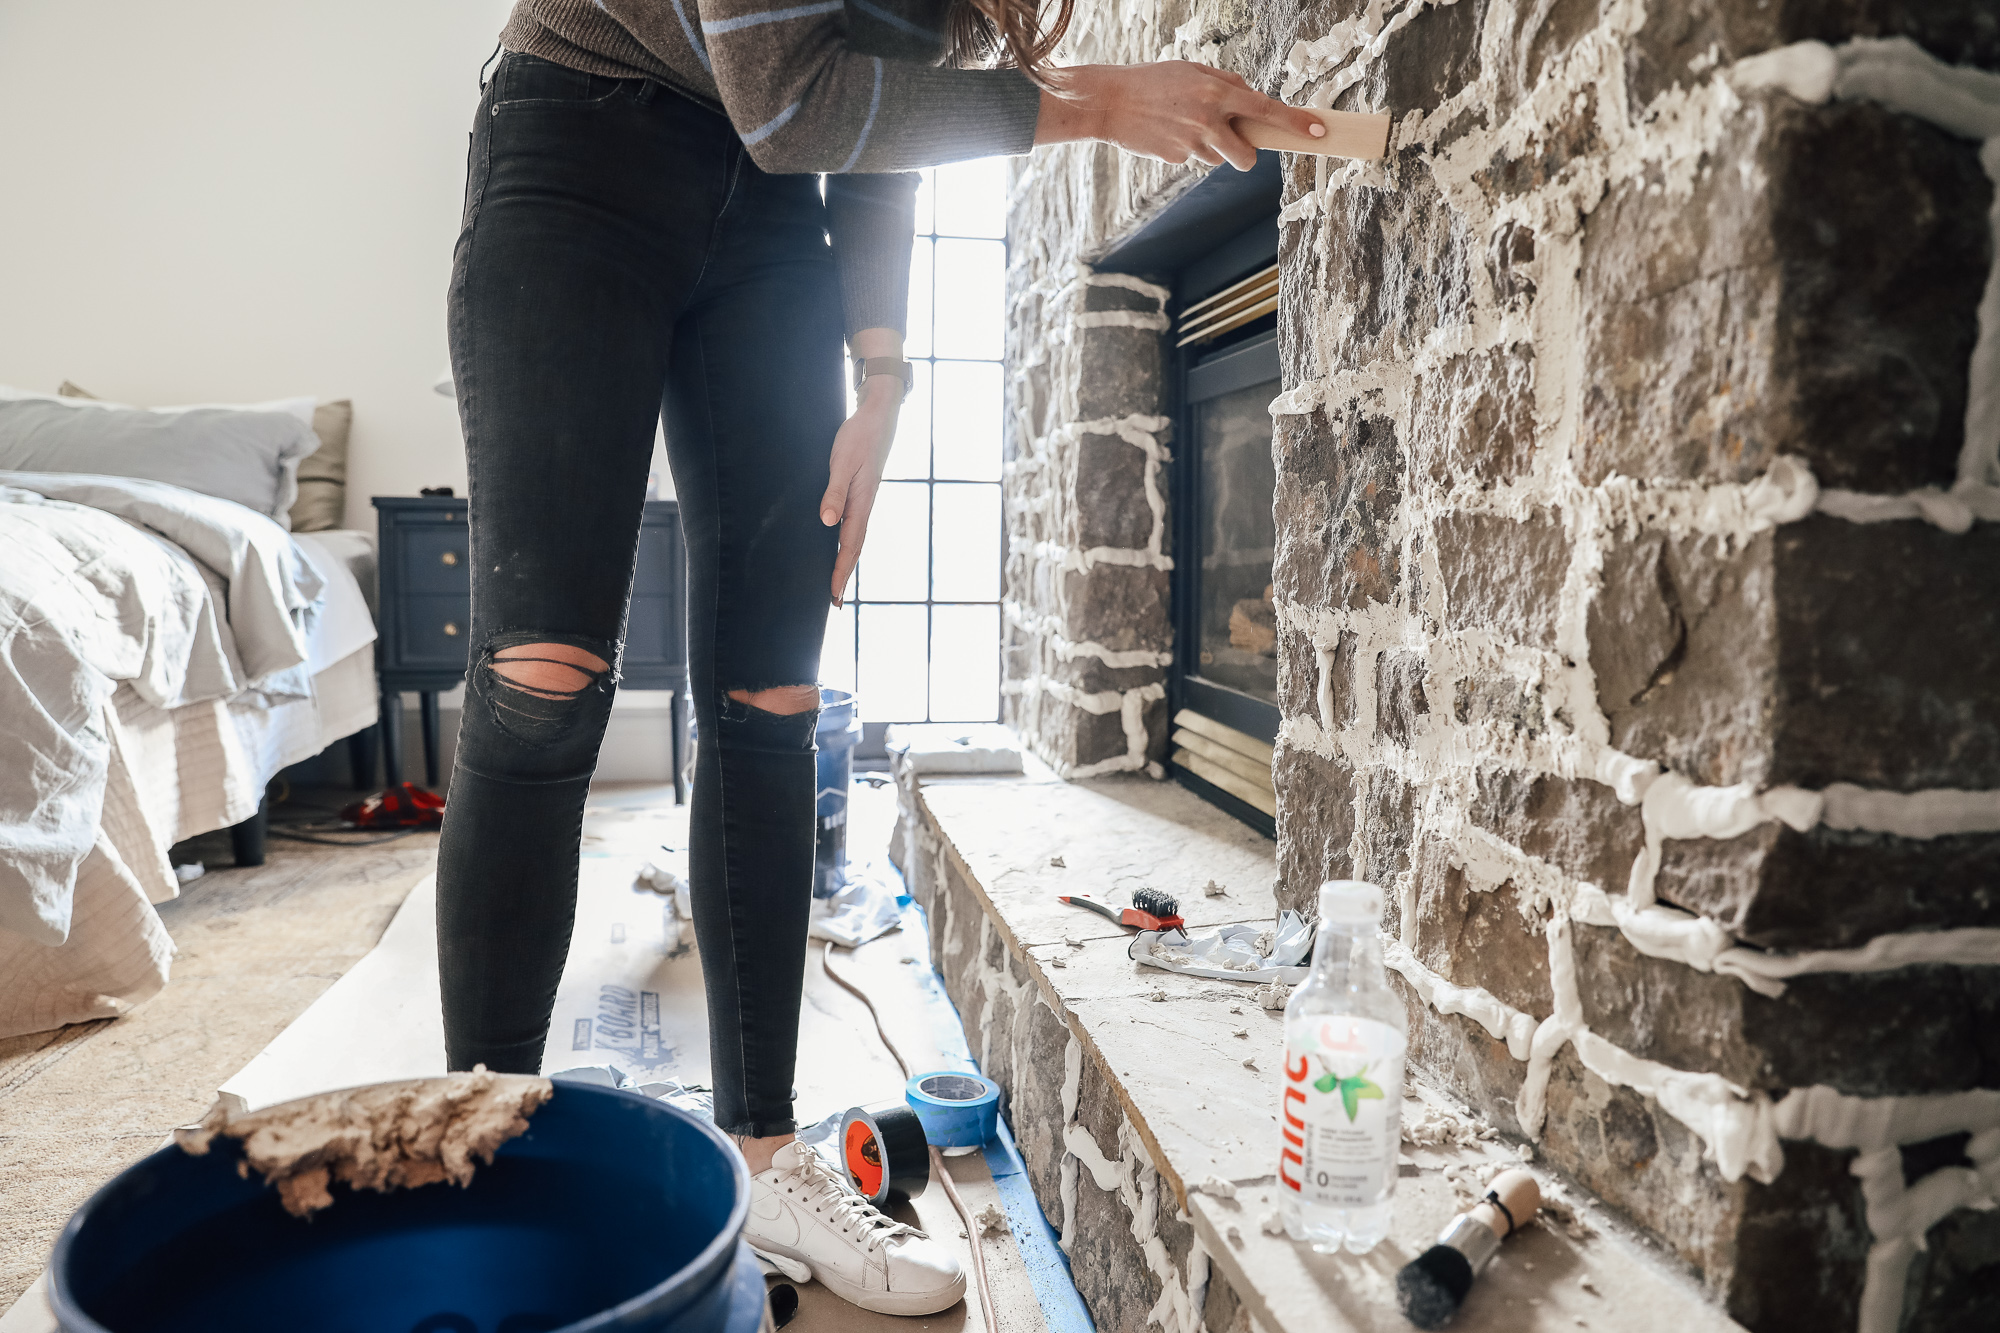
In the bottom right hand corner, you can see where we flatted out the mortar compared to the rest of it where it’s still freshly piped. This part looks a little scary, like is this going to even turn out?, but hang in there because you’re in the home stretch!

Brushing it smooth
The turning point of this project is brushing the mortar smooth. I used a stiff round craft brush for this step, dipped in warm water. You can do this immediately after the previous step (don’t wait or it may dry too hard!). If it isn’t going smooth, you can go in with a wire brush to help.
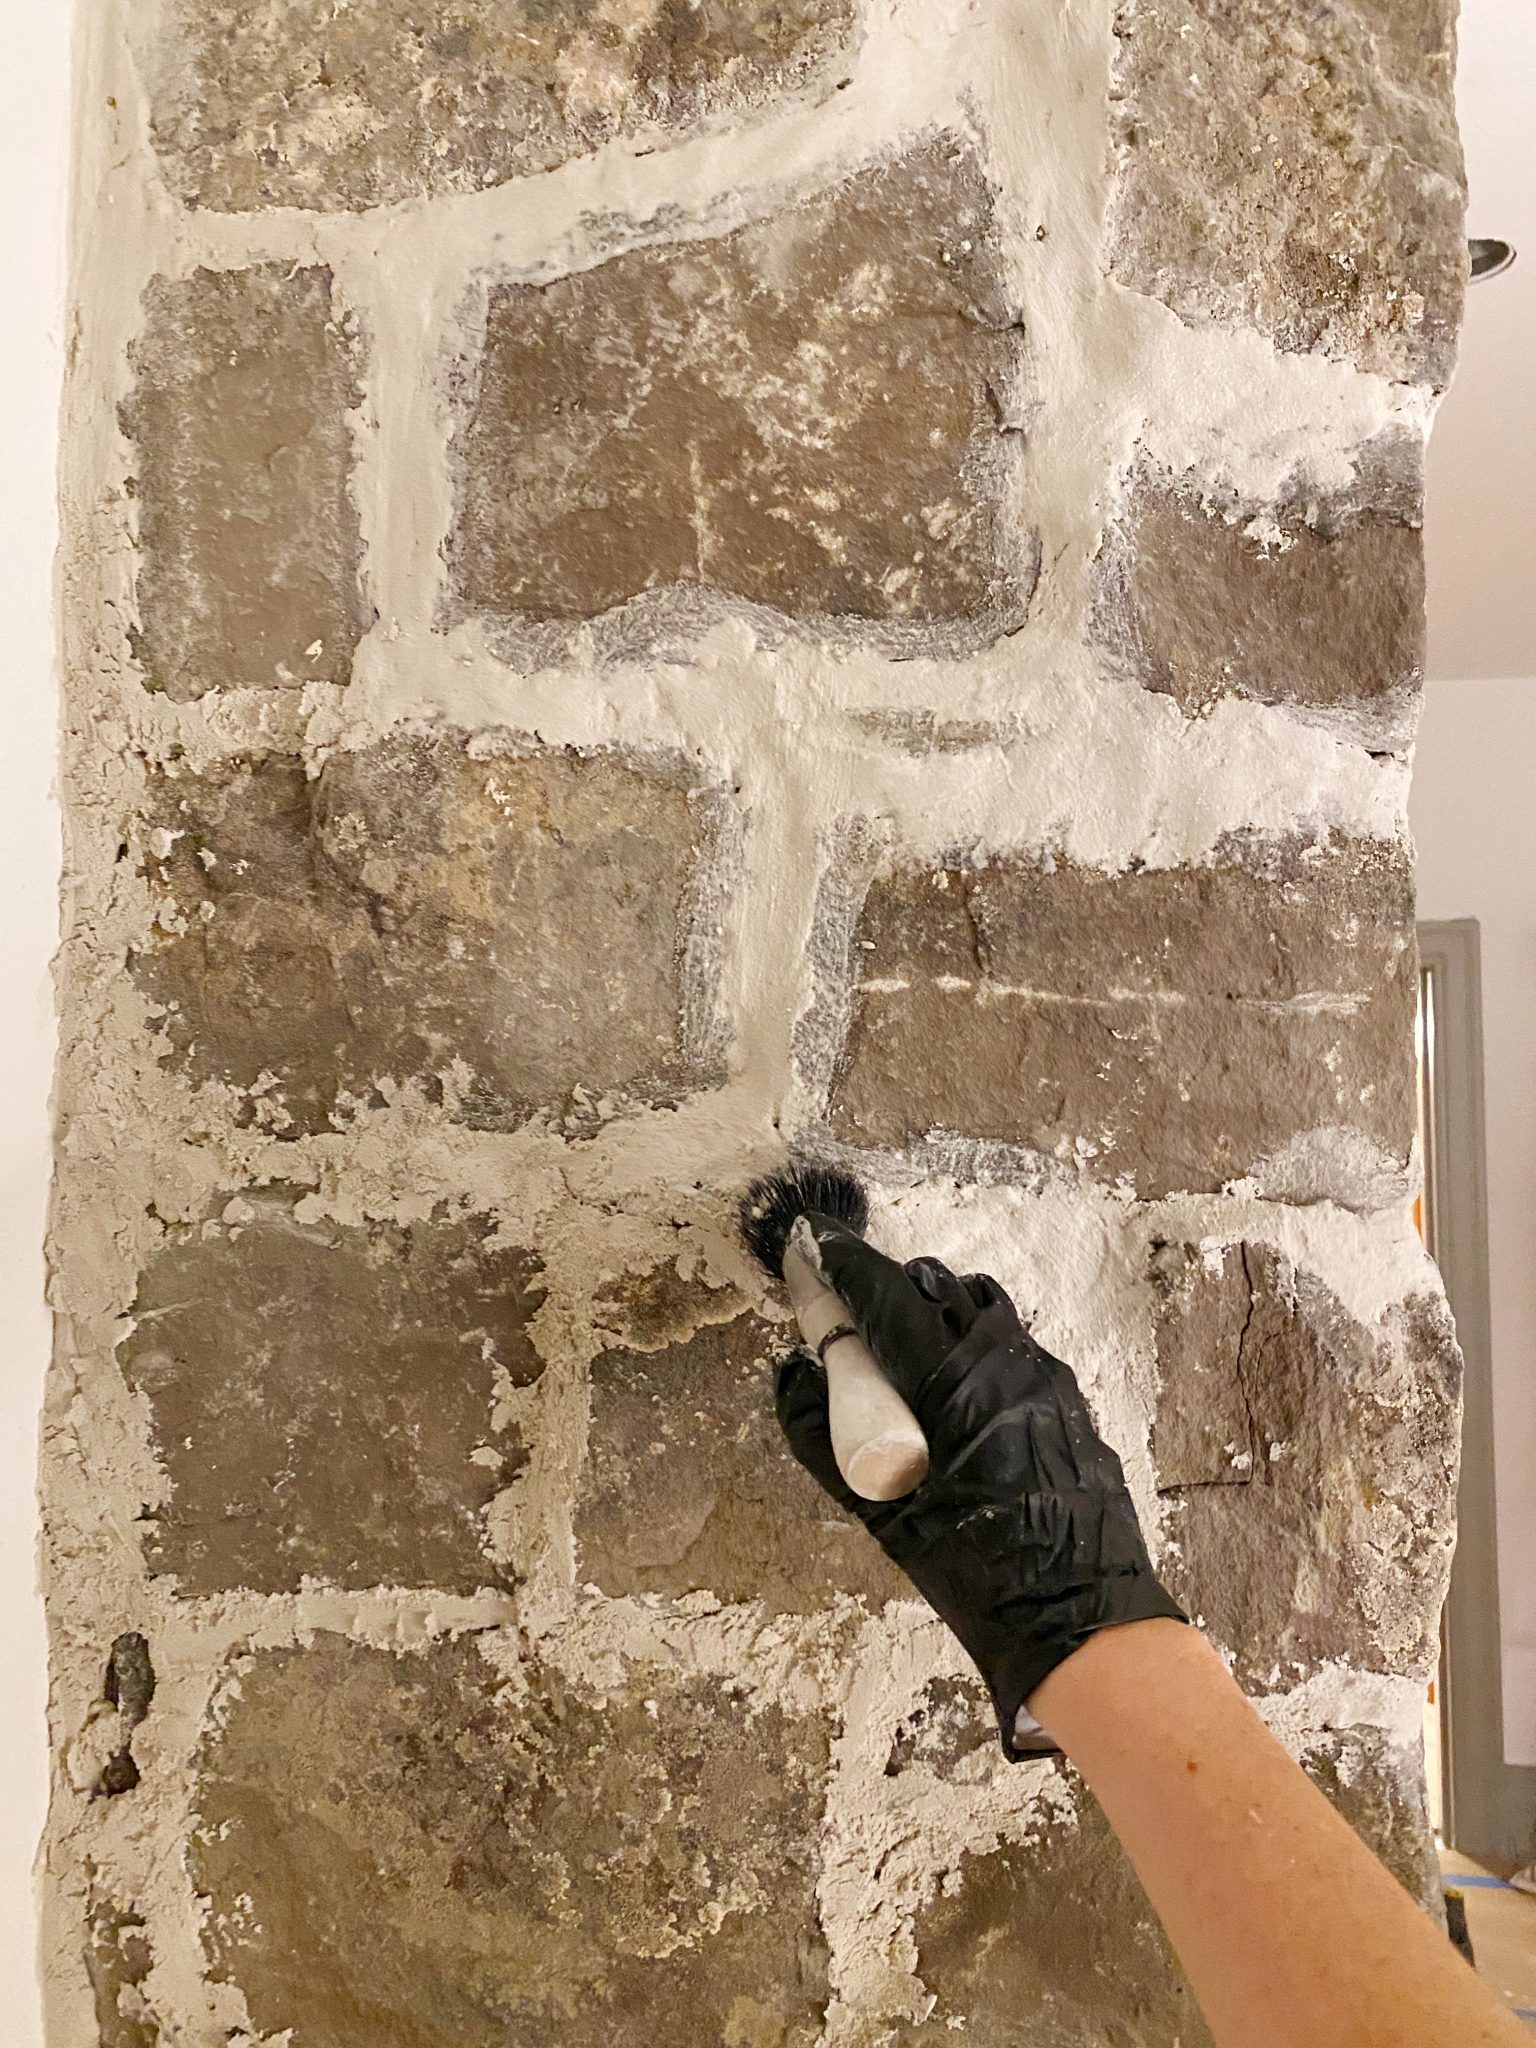
The last step is getting a scrubby sponge and water (you can add some coarse salt or sugar) and wiping off the haze that the brush strokes can add near the mortar. The finished product is absolutely charming and has so much character!
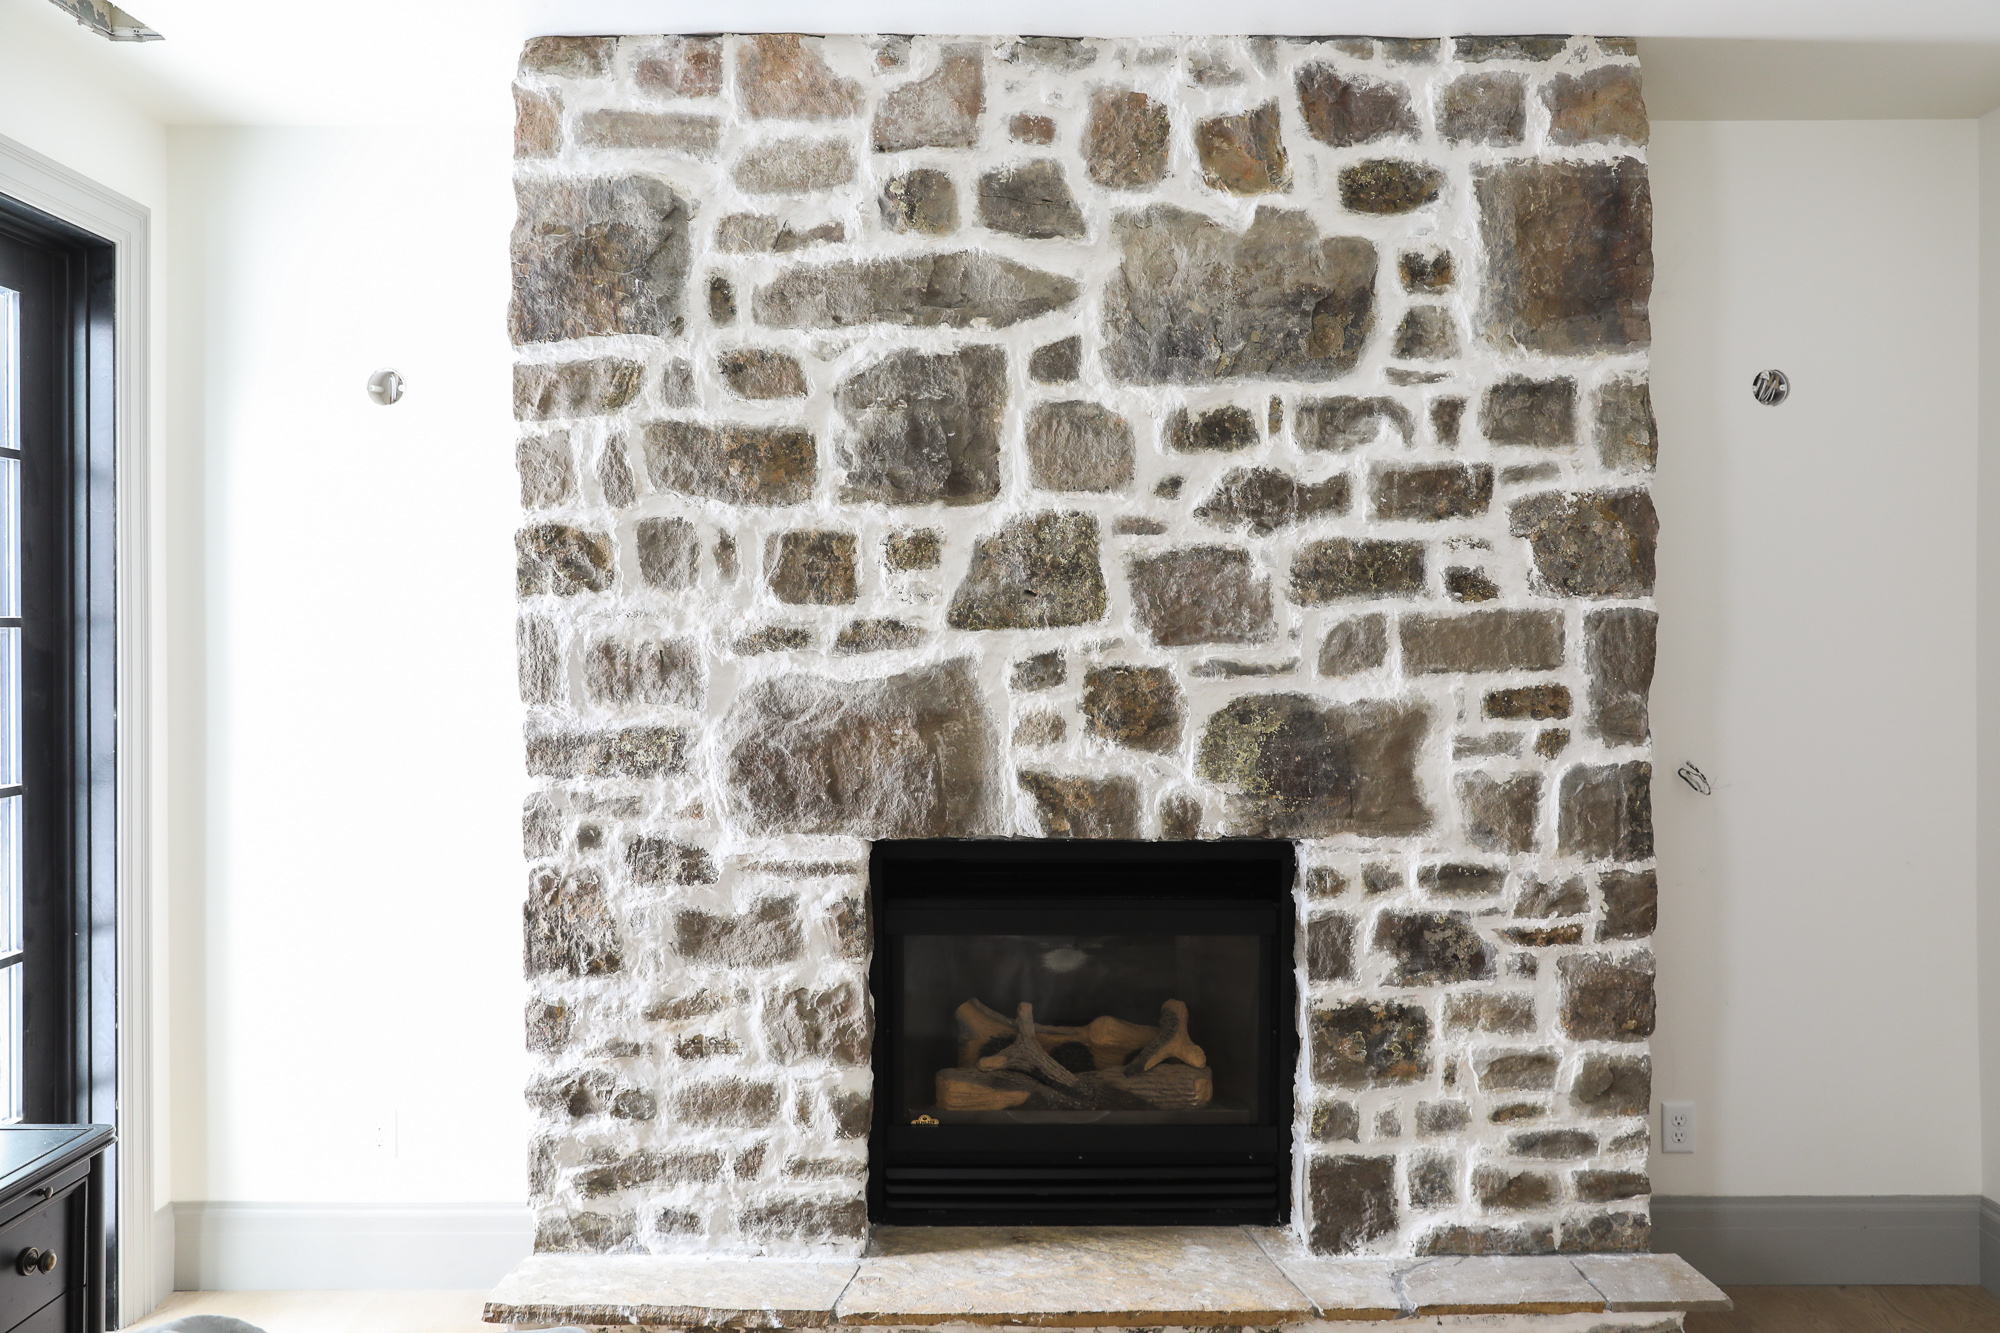
As a final step, we used this high heat spray paint to paint the fireplace vents black and WHAT A DIFFERENCE that made!!! We would love to add a concrete or limestone mantle (like our inspiration photos!) around the insert in the future, but we’re no strangers to a multi-stage makeover–clearly.
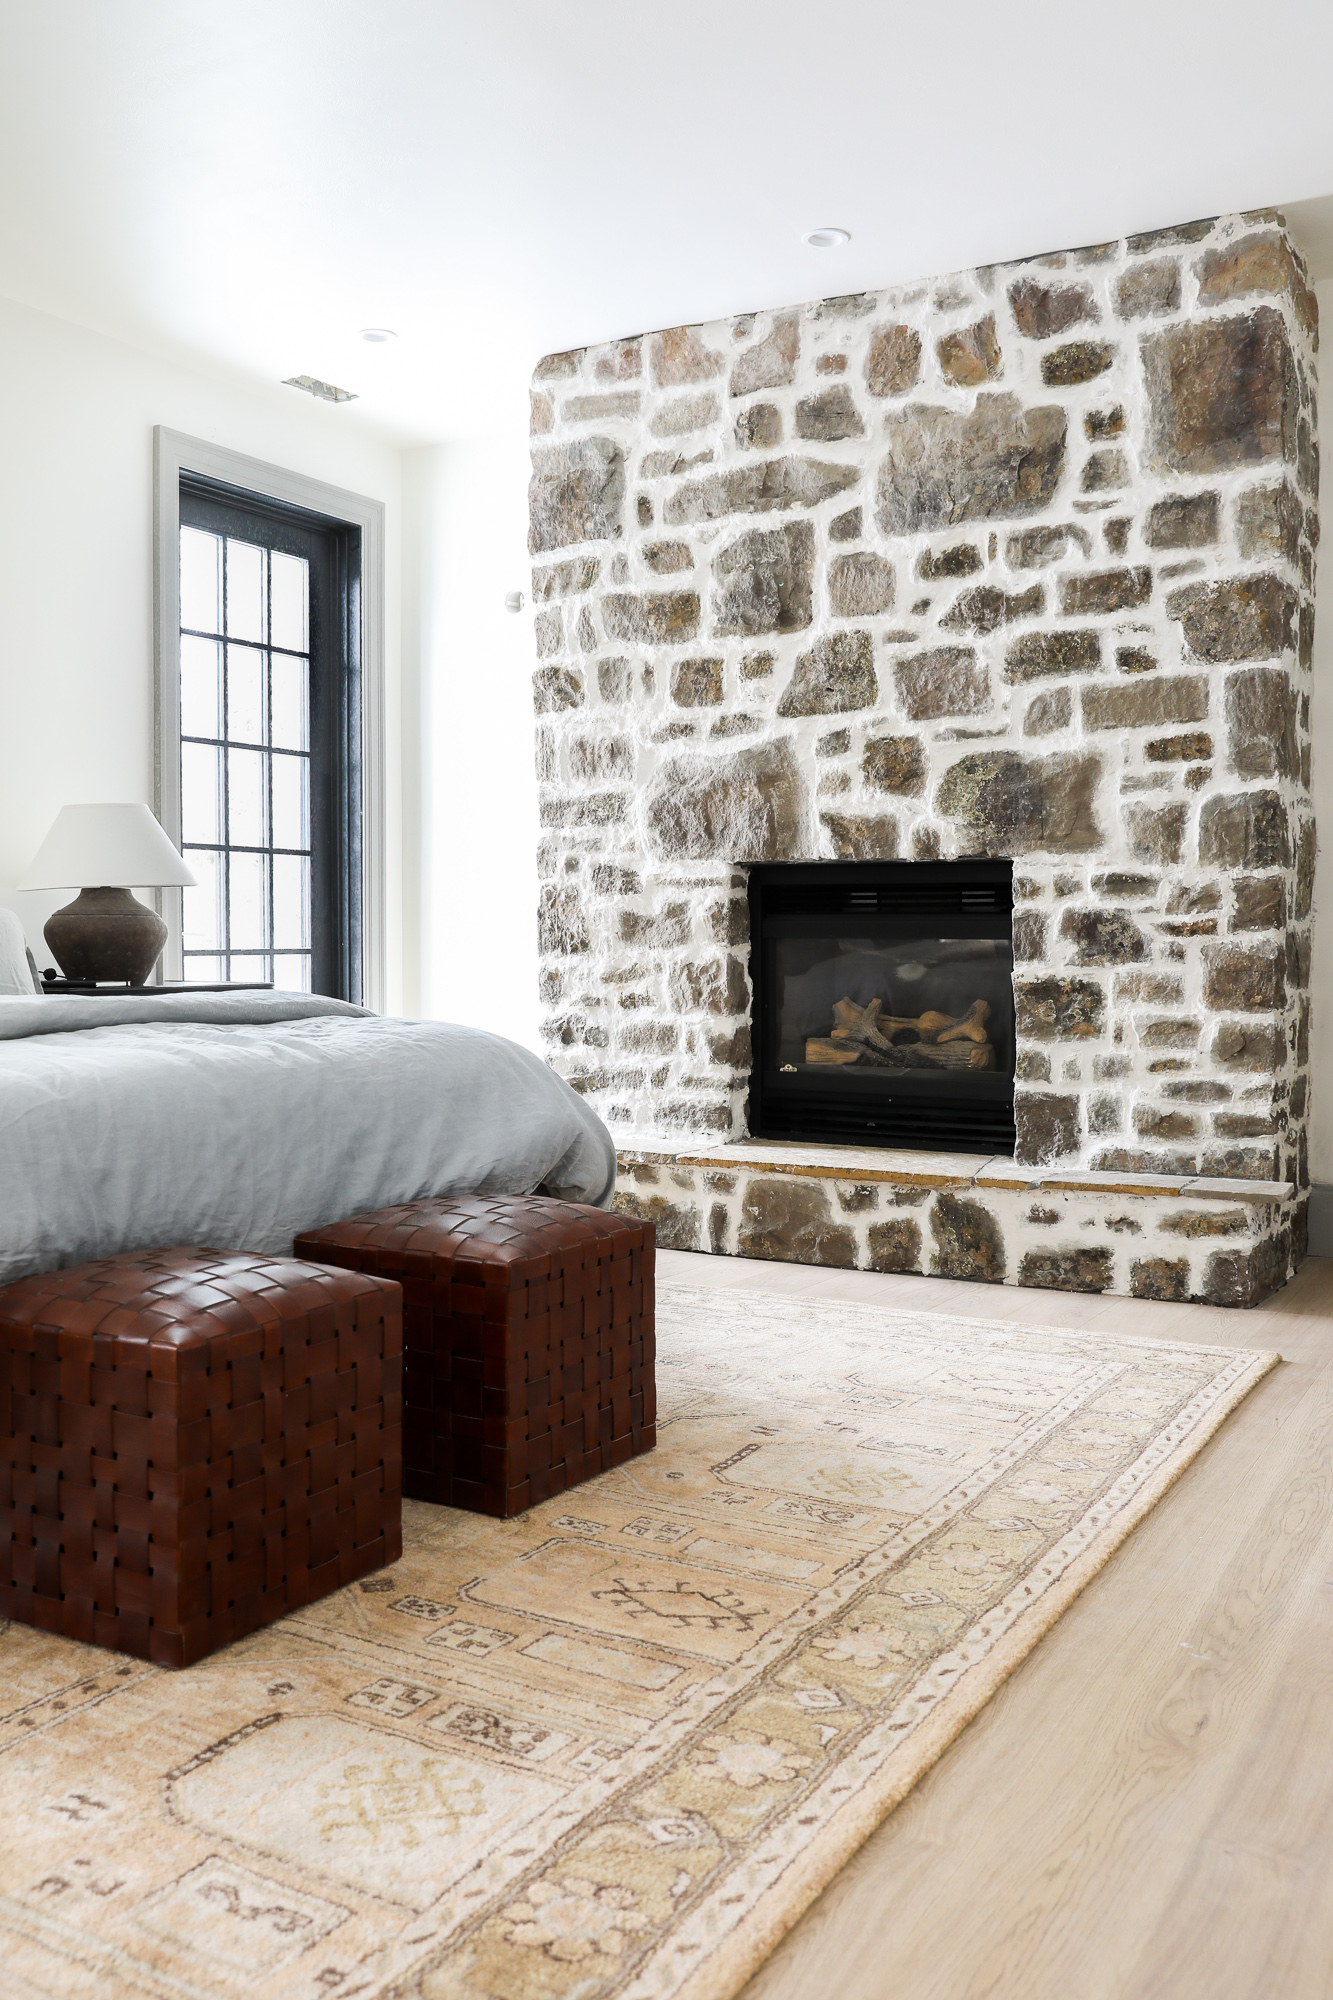
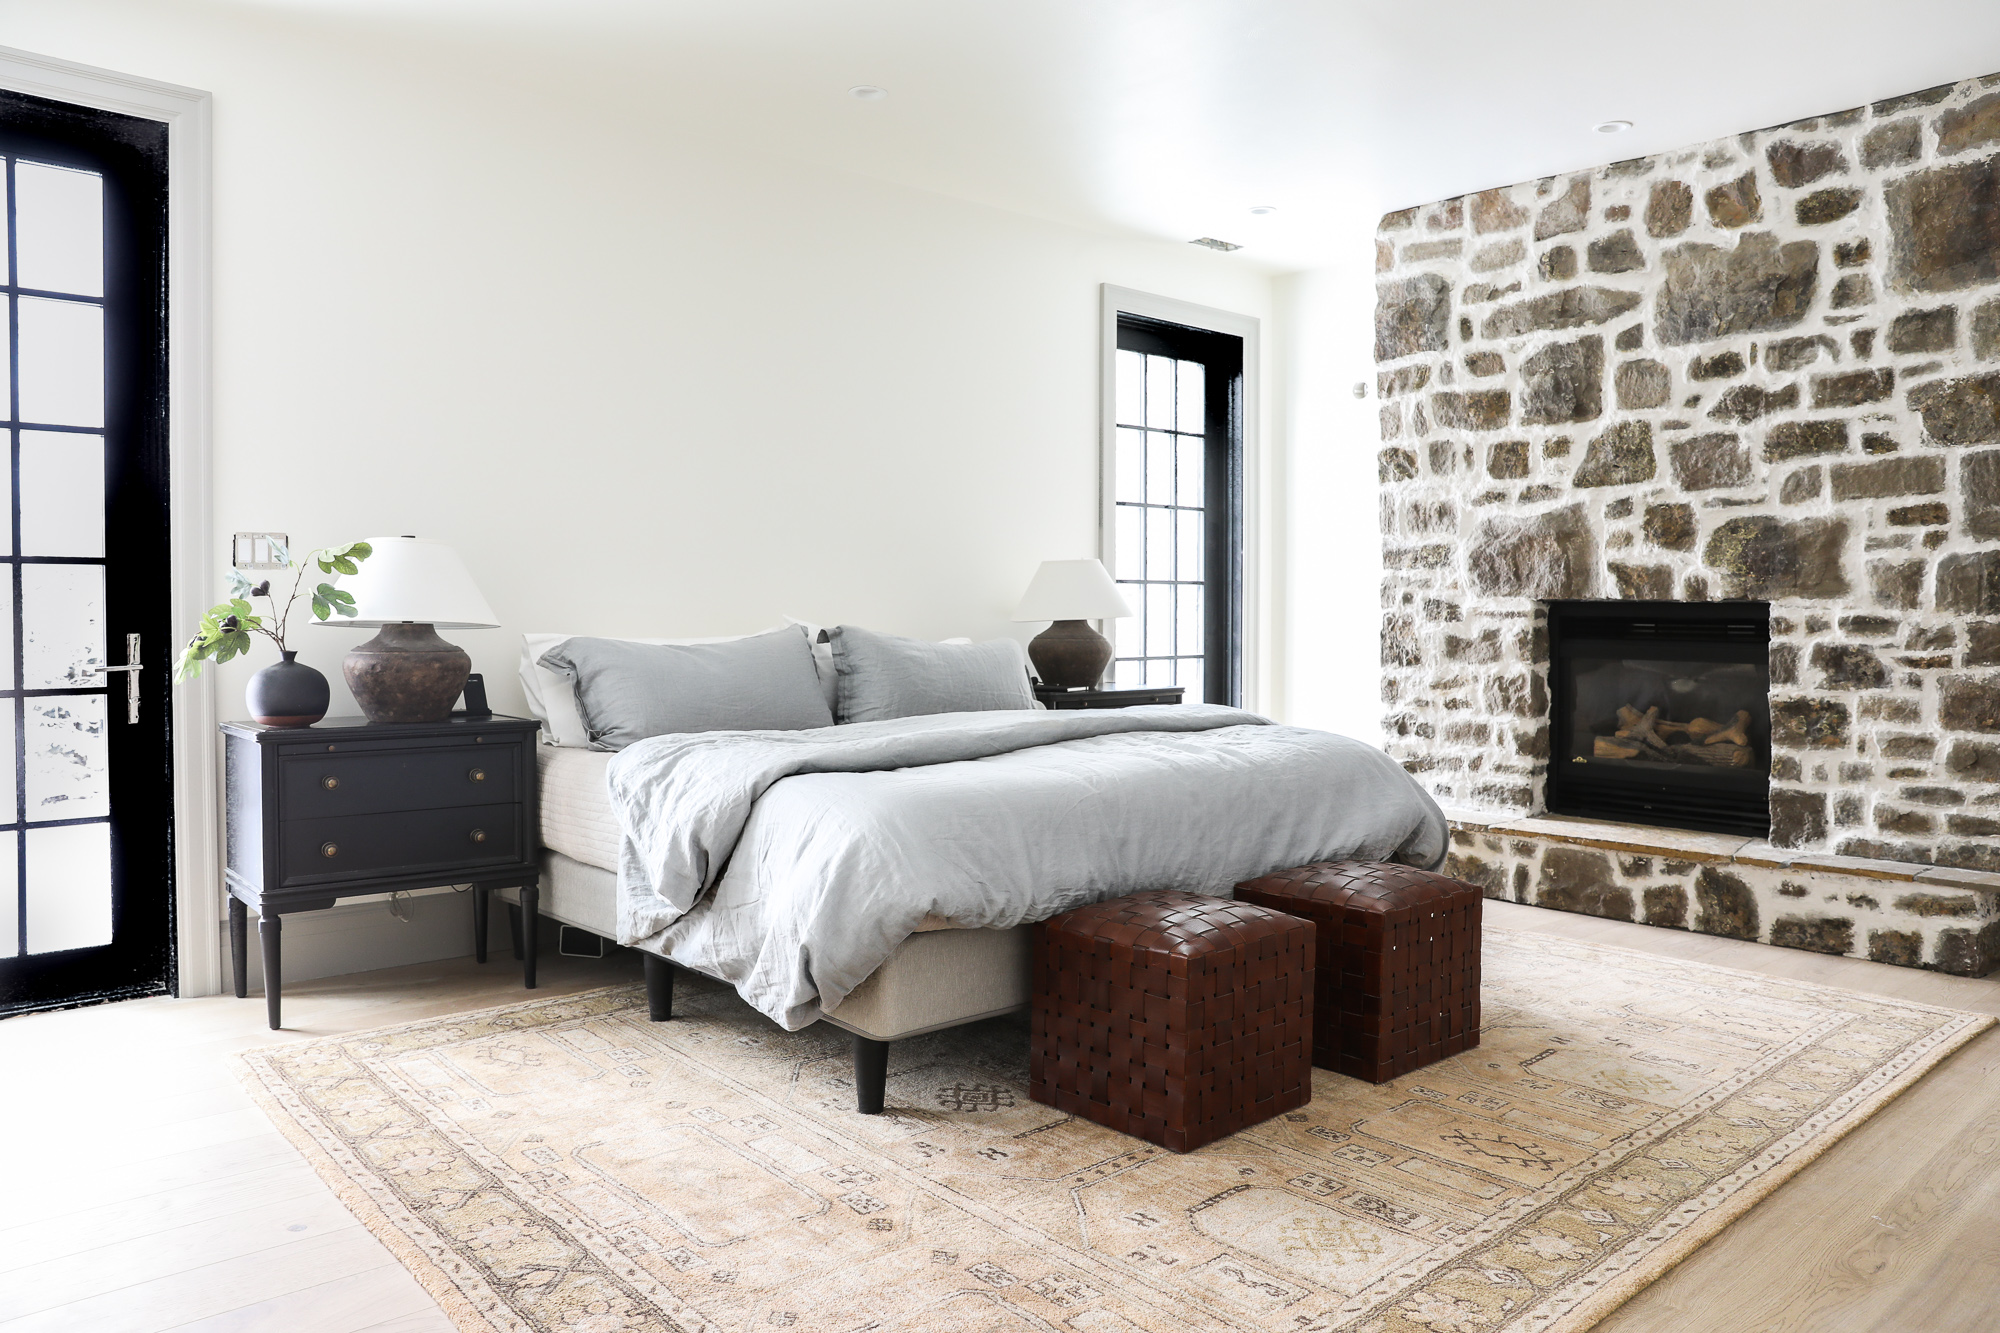
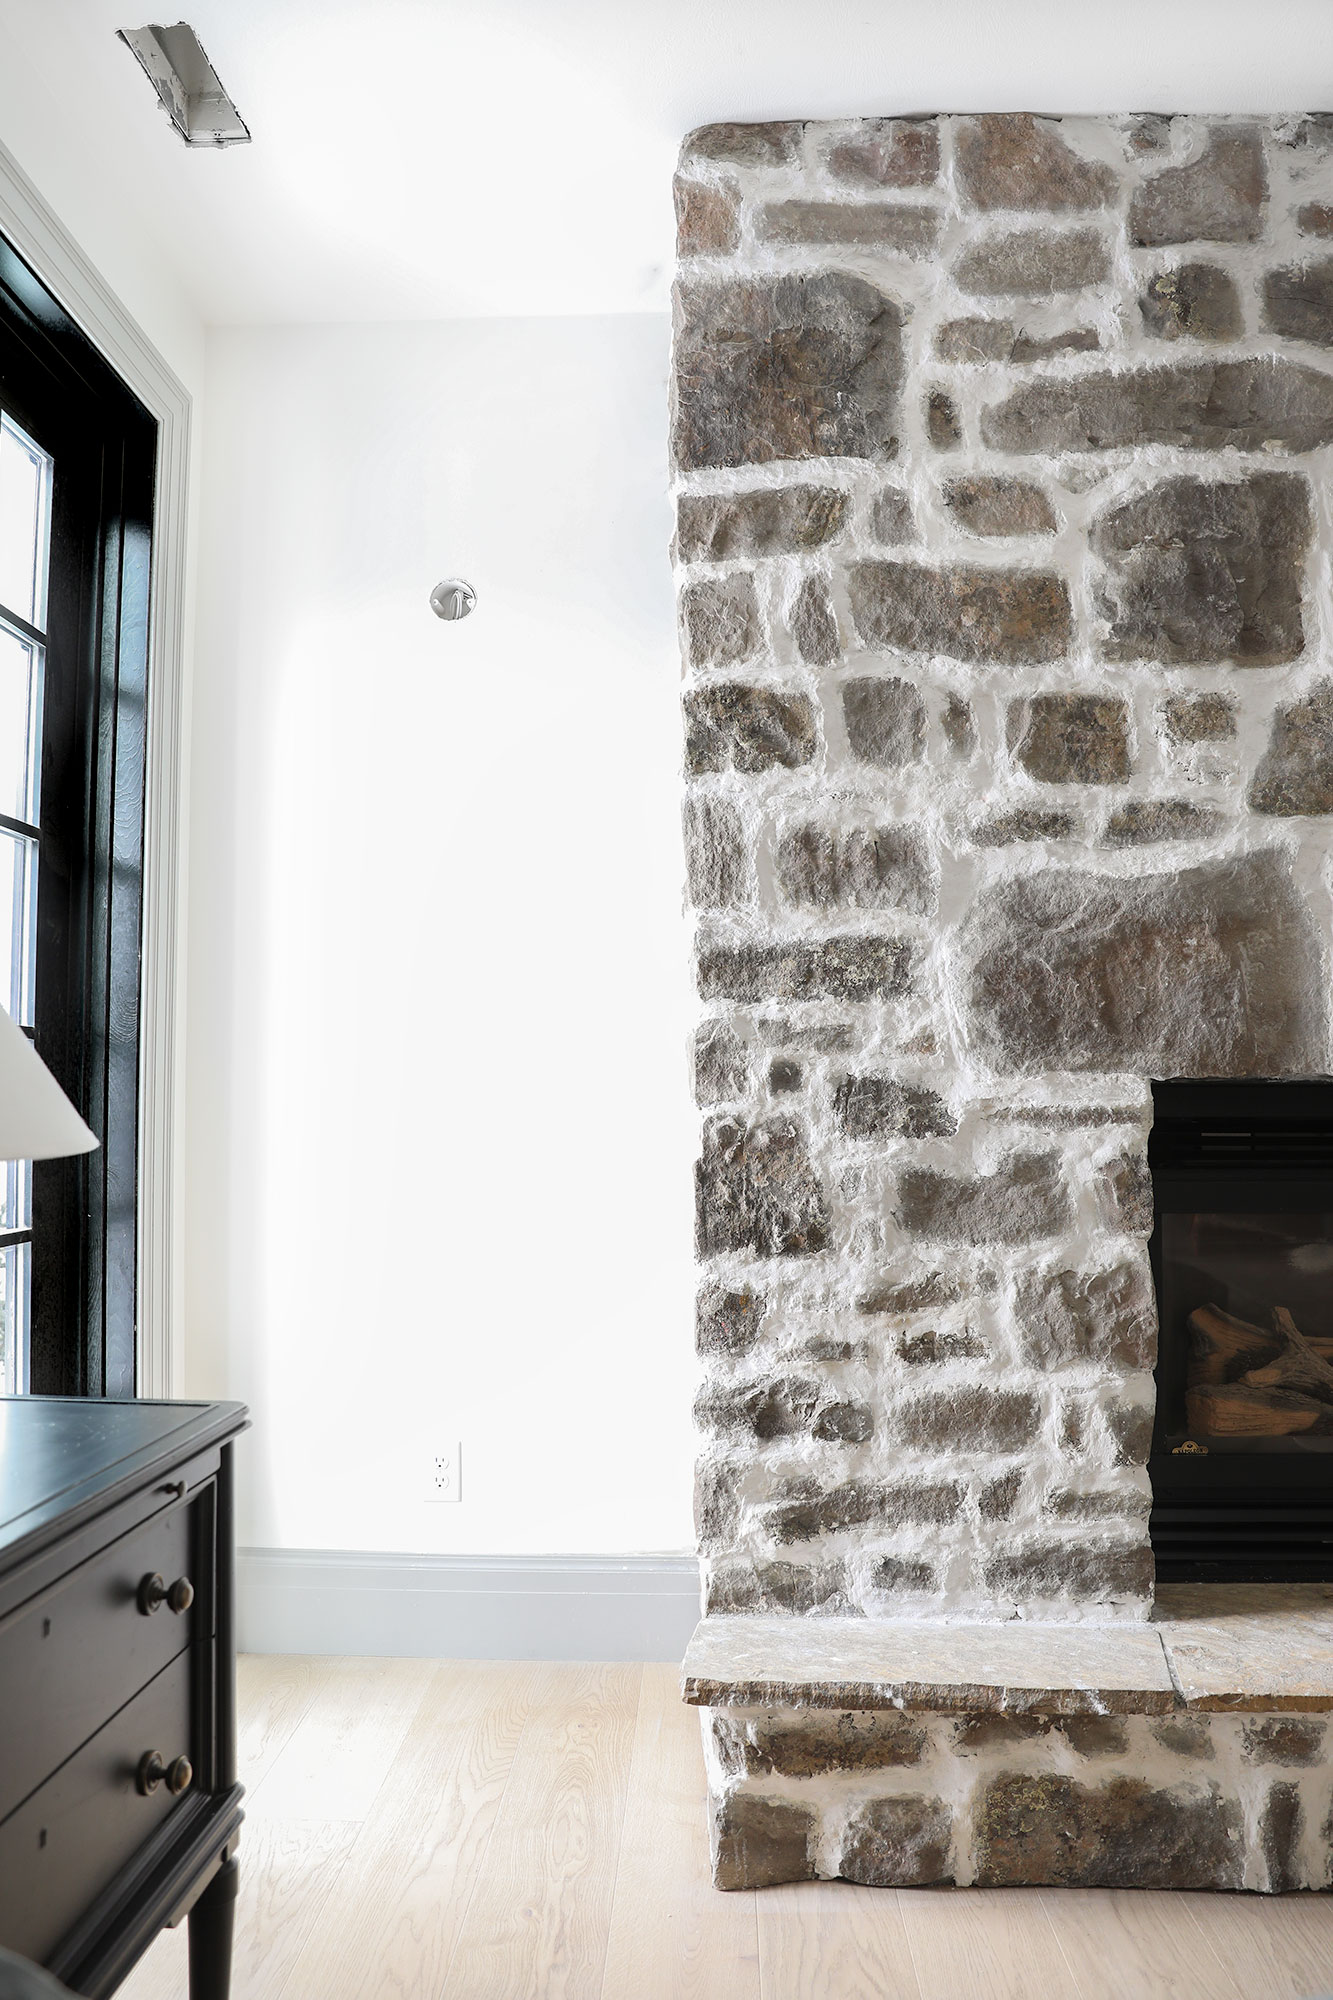
The new mortar has totally changed the entire feel of the fireplace and our bedroom! It went from heavy and over-powering to light and fresh and charming. This is one of those DIYs that might feel scary because how can you go back?! But I can’t tell you how much more we LOVE our fireplace now. And it feels so good to give it a fresh new life, too!
I can barely believe we pulled it off for $108 and it looks like a completely new fireplace. Would love to hear if you try this!
Leave a Reply
What do you think?


Semihandmade
Our wood grain Shaker cabinet fronts were designed for busy, high-traffic homes like ours. Clad with durable textured thermofoils, this line is compatible with Sektion, Akurum, Godmorgon, and Besta cabinets from IKEA. It's the perfect, practical way to add the warmth of wood to all the rooms of your home.
Collaborations
learn more

next
Loloi
We have teamed up with Loloi to create a line of rugs that are as affordable as they are beautiful. This collection houses a great mix of traditional and modern rugs, in cottage-y colorways, as well as vintage-inspired beauties that you’ll want to roll out in every room.
Collaborations
learn more

next
STUGA
We partnered with Stuga on a line of hardwood floors — The Ingrid is really livable, and the color is very neutral. It doesn’t lean warm or cool, it’s that just right in-between. We have really loved putting it everywhere in our house. It’s the best jumping-off point for design, no matter your interior style. In addition to being beautiful, Ingrid is really durable — we have three kids, and we always have a home construction project going on. Ingrid stands up to it all.
Collaborations
learn more

next
SHop all
What We're Right Now
What We're Right Now
Looking for our favorite things? A place to shop our home room by room, or just catch up on what Julia's wearing / loving right now? Browse the CLJ shop.
Loving


Portfolio


Design
Befores, afters, mood boards, plans, failures, wins. We’ve done a lot of projects, and they’re all here.
BROWSE BY CATEGORY
let's break this thing up
We have a long-standing relationship with DIY, and love rolling our sleeves up and making it happen.
Projects
Even when you don’t want to rip down a wall, you can make that space in your home better. Right now.
read more
read more
read more
02
01
03
looking for inspiration?
A reader recently asked me if I’m starting to fully embrace traditional style and whether we still consider our house to be a “modern Colonial” and why. It was a really great question and so timely — I had really just been thinking about my approach to this home and how my style has changed […]


SEARCH THE BLOG
We've been doing this since 2009 and we've posted a whopping 24145+ blog posts and counting. You might need a little help searching, huh?
looking for something?
find stuff like:
")
Can We Send You Our Love Letter?
Another way for us to stay in touch! Joining our weekly newsletter gives you access to exclusive content, never-before-seen photos, your questions answered, and our favorite DIYs. Sign up below!
Follow Along on Instagram
Welcome to our online community where we've posted home, DIY, style, renovations, and family since '09. Renovating our #cljmoderncottage in Idaho and headed for new adventures in Raleigh, NC. #cljfam #cljtransformations
@chrislovesjulia


Links
Get Around
Make yourself right at home
Portfolio
Design
Casual Friday
Projects
Lifestyle
Gift Guides
All Posts
Shop
Love where you live.
Social
RivrLinks
Links
Get Around
Make yourself right at home
Portfolio
Design
Casual Friday
Projects
Lifestyle
Gift Guides
All Posts
Shop
Love where you live.
Social
RivrLinks
I find your instructions very clear. I have been putting this off for a couple of years. My stone looks just like yours and is also real,but I only have it on the bottom part. Mine also has some smoke damage from the open fire.I am so afraid it’s going to look messy,how do you keep it from going all over the stone?I live in south east Ireland. I will be trying this for sure in a couple of months. Thank you!
This is gorgeous! I wonder if I could do this to the rock on the exterior of my house. I want to update it to look more like a cottage than the Italian rustic vibe that it has right now.
Thank you for posting this, I gave god awful jagged stone fireplace and wanted to rip it down but husband doesn’t want to! I am definitely going to try your method.
That’s really impressive. If one has time and energy then it is quite possible.
I absolutely love this! Really softens and brings in contrast to the room at the same time. I want to give this a try on my fireplace!
Question. Did you also touch the color of the stones? If so, how did you do that?
Thank you!
We didn’t
Hi! Love the transformation. I am doing my research to start my own over grouting project. Is there a reason you used cement mortar instead of lime mortar? Thanks!!!!
For some reason this page is only showing the comments and not the post any more! :(
Ad blockers have started hiding sponsored posts :(
I’m ready to take on a fireplace project and wanted to re-read this post. I’ve turned off my ad blockers and still unable to view this post. Is there another way? I’m only able to view comments.
I’ love what you do
Did you completely remove the fireplace insert? I have an ugly one as well id like to remove. I have figured out how to remove the doors, which helps improve the aesthetic, but I’d love to remove the whole insert. It seems concreted in…
I love your post. It is so user friendly. We are going to do this but I actually want to cover more of the stone, make it more white. Do you have advise on how you would do that?
Did you remove this post? I was trying to find it when I was doing my own fireplace last week (I remembered enough! Turned out great!) and it didn’t come up in search or just going page by page. Then I clicked the link from 10-months in and it shows comments only. Just a heads up if this wasn’t on purpose!
This is a sponsored post and some people with ad blockers don’t see sponsored content. I would turn off your ad blocker.
Totally in love with this look. Bravo! Do you think this could be combined with the fireplace tutorial you did in your old master bedroom to create this look when there isn’t a fireplace to begin with? Wondering how laying the stone would work etc..would you have to do stone veneer? Or would it even work to try? I’d love to hear your thoughts on the possibility. Maybe a future blog post?
I’m trying to see the fireplace I found on Pinterest
Hi!
I can’t seem to find the link to the fireplace makeover in your bedroom. I see all of the comments but there is no article coming up to show how you did it. Thanks!
Looks Great but that mortar mix in the link is claiming not intended for exterior fireplaces. Has the mortar or area around heat changed or is it probably fine.
No issues here!
J’adore ! I want the same if one day I’ll have a chance to have one ????. Your overgrooted fireplace reminds me French Riviera’s old towns. It’s so beautiful and warm!
Cheers!
Hi Julia! Thank you so much for sharing, the end result is absolutely beautiful. I wondered if you could share your opinion on using premixed mortar vs mixing yourself as you did- would premixed still work for something like this?
Do you know if you can “paint” over this with a limewash slurry? I have a stone fireplace that I would love to try this on, thanks for sharing!
I think you can!
I was looking for ideas on over-grouting and limewashing Stone fireplaces and came across your post. You guys are really talented. This looks great!
Love the nightstands. Can you source them?
They’re McGee and Co., and sold out. But we like this handsome dupe: https://rstyle.me/+gf67yeJ-oM2ZEaoCyB25VA
Would something like this work on exterior brick or stone as well? Or would you have to do something different if it’s outside and exposed to the elements? I love how this looks and would love to do this finish on some stone on my porch.
Yes! You’d probably need to seal it differently for an exterior. Let us know what you find! We’re into stony exteriors, too!
I don’t understand why my comment was deleted, so here goes again. Just a simple question… would it be possible to remove the mortar in the future, or would the whole rock structure need to be torn out? If you don’t want to answer that on this website, could you email me the answer?
Mortar isn’t really meant to go anywhere once it’s there. The labor to get it out would be just as expensive as ripping it all out and redoing it.
This is absolutely beautiful.. . Good job. The white mortar is bright (love it) and presents quite a contrast to the stone. oh my goodness- it looks good! I have read through the comments and am shocked at the criticism and advice you receive. I also read through your explanation and could not find you asking for advice or criticism. So, I went back through the pictures and tried to find something wrong with what you have done here, and I just could not find anything. It seems pretty obvious to me that you are decorating your home for your family and not those of us peeking in. Thank you for allowing us to peek in .
Hi there! New follower here. I love this idea and it turned out so beautifully. I have what appears to be a veneer rock
fireplace from the 80s. It has large gaps in between the rocks and I’ve been contemplating doing something like this to soften the dark, stark fireplace that is the focal point of our large open living area. Could this work on a veneer rock fireplace? I’m so afraid to try!
I think it could! Try a little section and see — and then come back and share your experiment. We’d love to be able to tell our readers other applications!
Wow. What a completely different look. I didn’t object to it originally but this is so much more charming. Looks much older.
Again and again you amaze me with your vision!!! If I’m being completely honest I wasn’t seeing it AT ALL, even after you posted the inspiration photo I was thinking this will be the first time I don’t like something you guys did. But, of course, I’m looking at the “after” pic and wondering why I ever doubted you.
Love the transformation. Normally I am not a big fan of stone, but this is making me reassess.
We have a fireplace surround made of large river rocks up at our mountain cabin. I’m not a big fan of it, and it would be my preference to tear it out. But after finishing a large renovation, we are big projected out.
Could over-grouting work with river rocks? What do you think?
Yes definitely! Emily Henderson did one with river rocks at her mountain house!
Can you give us a link to Emily Henderson’s site so we can see what the river rock turned out to look like?
She has a search bar on her site!
One of my favorite things you’ve done in the new house so far! What a difference. Totally hitting your Modern Cottage vibe!
Absolutely honking!!!! Gorgeous! I’m gonna absorb some of that fearlessness and put it to work around my fireplace and built ins that aren’t what I like but are huge, and the oversized built ins are part of the structure supporting the loft above. So gotta make them work for me…def requires some fearlessness!
Do you think this would work on the outside or a house?! Like the products would hold up to the elements outside?! Would love to try this to the ugly 1990s Stone on the exterior of my house!
We’re getting this question a lot! It would be BEAUTIFUL on an exterior, but we haven’t tried! Please check back in if you give it a go. We’d love to know what goes into a style like this on a larger scale.
I feel like the end result is fairly different from the last “during” video that was posted to Instagram and from the last “during” picture posted here. It looks like the “grout” lines got a little wider. I get that maybe you were saving it for a big reveal, but I think it would have been helpful to see the before/during/after the “scrubby brush” stage (granted we do see the before and after – just not the during). For people wanting to attempt this at their homes, that last step would have been nice to see in more detail so that they get an idea of the time, effort, force, etc required for that final step.
This was a brilliant idea. Well done. I feel like I could gush on and on about just what a great idea this was all around. Now… in staring at the homebunch inspiration pic, and re-reading the Emily Henderson post, I think your grout color could use some tinting. I don’t really understand color theory and typically rely on you to explain that actually. But yeah, something is slightly too matchy matchy here for me to get the real cottage vibe from it. It reads more to me as log cabin chinking (had to look up what that was called) – which I actually love and consider cozy and cottage too so maybe I don’t know what the heck I think lol. Anyway, wellllll done. No question, this was an upgrade and you just convinced thousands of people to copy this – true influence. :) I think I’m more pumped for you from a business perspective than I am for the actual project outcome ha!
Gorgeous! This definitely has more of a cottage feel, that a huge difference!
Ahhhh!!! I love it so much! It’s given me a dream I didn’t even know I had: to have a fireplace like this one day haha!!
also, it’s crazy how “stumpy” it looks in the before photo – that added ceiling height made SUCH a difference! can’t wait to see your finished room (especially with that DECK!)…your bedroom totally feels cottagey :-)
Really lovely! I have been wanting to update my fireplace (rough hewn red brick) and have been doing some research on mortar vs. whitewashing the whole brick itself. Both seem to have great results, but are each very different. Did you consider doing a limewash [on the whole thing] instead of this? Or was the thick mortar your deciding factor (rather than just a color treatment)?
We really loved the cottage feel of the thick mortar, over a limewash.
I think you will be on your way with this if you swap out the warm tones of the leather ottomans and rug and stick with the cool tones of the paint trim, stone, mortar, and duvet cover. Those warm tones are creating a visual barrier right now. Layering in the right tones and textures will help harmonize the cottage look you are after.
I really love the mix of warm and cool!
I’m curious; how easy would it be to remove that caulking/grout/mortar if, in a few years, you grow tired of it OR if a new owner didn’t care for it? Or is removing even possible?
Good question! We’re loving it and hoping to stay for a long, long time. I wonder if removing the mortar would require an entire demolition? Perhaps!
Love love love! So beautiful and warm. I love the warmth to homes and this made your bedroom a cozy space hands down!
Some of the tension that you were (some maybe still are) feeling about this fireplace could be due to the fact that there are several large stones that are at or above the firebox while most of the lower stones are quite small. This leads to subconscious uneasiness because of the visual conundrum… small stones supporting large stones. Maybe this leads to this technique which allows you to diminish the size of the larger stones by covering the edges.
Interesting!
You guys nailed it…again! I watched your stories as you did this and thought…eh, this looks weird. BUT it’s a great example of how somethings look worse before they look better. It looks SO good, and definitely hits the modern-cottage vibe you were going for! :)
I LOVE this. It’s so gorgeous and turned out so well. I have a brick fireplace. Would this be something I could do with that or would it look funny since it’s not stone?
I’ve TOTALLY seen the same thing with brick!!
I did this exact same thing to my brown brick fireplace last year and it came up a treat :)
If you want the exterior brick of your house to look like this, is there a different process to achieve it? Or one less time-consuming?
This is a jaw dropper (in a good way). I love that you creatively used what you had. Very inspirational.
Also, just a bit of general positive feedback. I love following you guys on Pinterest and seeing things you pin as you’re getting ideas, etc. and then seeing you ACTUALLY DO IT. It’s awesome! I say this as someone who pins a thousand things she never actually does, haha. Hopefully one day. :)
Gaaah! I can’t wait to see your room finished! What an awesome project.
Love the direction this is headed. And what a fun new DIY to show us. If it were me I’d consider softening the white mortar with a little gray or brown tints because it’s so stark compared to the stone but I don’t have the whole room vision like you do. Are you planning to keep the hearth stone as is? Might be interesting to look at one thick solid stone maybe something black. Can’t wait to see how this continues to evolve.
We really wanted the mortar to blend into the walls. So we dyed it to match that. But like I said in the post–this is COMPLETELY a personal preference and I hope by sharing how we were able to tint our mortar, others feel empowered to tint theirs any color they like if they try this project.
I have a question regarding dying the mortar! Were you able to get a good feel of what the dried mortar would look like or will it be hard to tell from wet mortar to dry mortar?? If I wanted to d a slightly more Greige mortar do you have any recommendations on color and amounts?? I am so scared I am going to mess mine up!!????
The wet was almost exactly how it dried in this case. Do some tests and experiment!!
Great. Thanks so much for this tutorial and for giving me the courage to give it a try in my stone fireplace. Can’t wait to send you the after photo!!! Way to go guys!!!
Thank you for this post and your tips! We have a 1977 stone fireplace that needs something and I think this is it! One or your inspo pics looks like our stone underneath-I would have never known this was doable without your post and stories!
I can’t believe how much I love it! Well done. Your vision and ability to see potential amazes me.
Thank you so much!
This screams old English Cottage to me! I love it! Makes me wonder if this technique would work on a brick fireplace from the 80s that has huge grout lines? Kudos to taking a risk!
Katie Bower did something similar on a brick fireplace if you want to see how it looks – search her blog for DIY German Shmear Fireplace.
Emily Henderson also did a German schmear on the fireplace of her mountain house (though on stone, not brick).
Amazing! Totally worth the effort!
It is so beautiful! Thank you for taking us through how to do it. I will definitely be tackling a project like this someday with my little cottage in the mountains. It’s the perfect cottage look!
Beautiful!! I agree that an updated hearth would really finish this off. I’m really looking forward to seeing the sconces you picked for over here and what bed you chose to round this all out! What a gorgeous master suite!
Looks like it came out exactly like you intended. Beautiful and Cottagey. Good job! And such an inexpensive update.
I love the way this came out!! Sorry if you shared this elsewhere, but I couldn’t find it…where are your leather poufs from?
Yes searching for this detail too… love them
I think they are McGee and Co.
Mcgee & co
It was a genius leap to look at the stone you had and envision it with thick mortar becoming cottagey! I usually have a lot of vision in fixers but not sure I’d have come up with that. This is a TOP NOTCH diy inspiration. If I was doing it in my house, I’d add more buff since the final result still looks too bright/white to my eye. Painting the mortar with brewed coffee water to stain it would tone it down too LOL. But that’s me :) Good job guys!!
It looks amazing! Props to you guys for taking risks and putting it out there for everyone and having to deal with all the stupid, negative comments. Sadly, doing what you do makes people think they have the right to weigh in on your decisions concerning YOUR HOUSE, ugh! I have learned so much from you guys!
I love the look, but every time I see the finished product I just want a little mortar washing because the stone is so dark and monochrome! All of the example photos for no mortar washing have lighter stone with greater variation in tones.
I love how the mortar really brought out some of the lighter tones in our stone, but yes, our stone is a little darker than our inspiration but we love it just the same. The spirit of this project is definitely about working with and coming to love what we had–and we do!
Beautiful!! I love how all the different sizes of stone show up now. I can’t wait to see how your new bed will pull it all together.
Love it. So glad you have such a vision for the end result even though others doubt your decisions! But your loyal followers know to trust you and that you’ll always amaze us at the end! Thanks for showing the process of everything you do. Love you guys!
So lovely! It looks beautiful!
Absolutely stunning. Great vision and execution! This DIY feels so professional!
The inspiration photos you posted are all so stunning. The concept is beautiful and creates such interest to the stone. However you guys missed the mark on this one. Your stone in contrast to the mortar is so stark. It is so far from the inspiration photos. I think by either toning down the mortar or the stone itself it would really soften what has now become a very harsh looking fireplace. I am glad you guys are happy with the final result. But it is so far from the look I think you were trying to achieve. Really spend some time looking at your photo in comparison to the others. I think there is still hope to bring this fireplace to a place where it can stand against the others and not fall flat. Good luck.
I often wonder what authority folks like you have to tell someone their work “missed the mark” so definitively. If the Marcums are happy with it, isn’t that all that matters?
Omg chill. Maybe the differences were on purpose.
I’m sorry but I agree with this.. it looks so much better than I was worried it would during the “during” and way, way better than the before, but the grout seems too bright. It may be the photos, but creamier seems more in line with your inspiration.
We used these photos as inspiration! But definitely put our own spin on it.
That’s mean and not helpful.
Yeah, I agree. The mortar is so bright to me (maybe it’s just the pictures). It doesn’t really “soften” the look of the fireplace, it just looks louder to me.
I think your opinion is valid (as anyone’s is) and maybe this isn’t your taste, and that’s ok. But telling someone they missed the mark on a project they did IN THEIR HOME in which they’ve said they are in love with, is just plain rude. How would you feel if you invited someone into your home and someone told you a feature you created and loved was just off? I know I would be a bit hurt; however, I then would remind myself that it is my home and if I love it that’s what matters. To me, this comment violates the TKN rule. Was this comment kind? No. Was it true? Maybe for you… Was it necessary? No.
Chris & Julia – I think the fireplace is stunning! Thank you for inviting us into your home and allowing us to learn from you. So many of us readers love it!
I completely agree. Learn when to keep your mouth shut. They love it, they taught their followers a new skill, and they worked with what they had…now you need to ????.
I think maybe it just looks “harsh” because there isn’t much else in the room yet?? Because the fireplace itself, I think, looks quite a bit like some of those inspiration pictures! If you imagine a headboard on that big blank wall, a mantle like she mentioned, sconces flanking the fireplace that it looks like are already wired for, etc…basically change the CONTEXT of the fireplace rather than the fireplace itself, it would feel less harsh. I quite like it.
I think this is an example of working with what you have. The stone on their fireplace is not the same stone as the inspiration photos so its not going to look exactly the same. I hear what you’re saying about the mortar and the stone being a bigger contrast than the inspiration (which has a softer, warmer stone). But if they used a different shade of mortar the whole fireplace would be a contrast against the white walls. In a situation where they could have demo’d the entire fireplace and rebuilt it, or worked with what they had, I think they did a fine job!
Lauren, what don’t you get about the phrase “personal preference”? I was just about to comment about what a great job they did with getting the tint of the mortar to match so well with the wall color. But I think there is still hope for you to realize that your opinion is just that– yours alone.
lol…they have a public “blog” and social media platform in which their entire “job” is design and home improvement. If you aren’t ready for criticism, perhaps don’t have an open platform. Criticism is normal and my comment was constructive criticism as a professional in this industry. If I walked in to someone’s home and saw this and they asked me what I thought I’d give the same constructive feedback. When you post content online you are essentially opening the door to criticism and if you can’t take it, well then this isn’t the “job” for you. I did say if they were happy with it then that is all that matters. I also simply pointed out what a shocking difference it was in my opinion compared to the inspiration photos. I felt as a professional in this industry as well that this could still be improved upon and look absolutely stunning. And closer to what the inspiration photos show. It is in my opinion a very different look than that. It was constructive criticism. Everyone is entitled to their own opinions and an open platform such as this is a way to share that. You ladies need thicker skin.
That said I haven’t seen a response from Julia or Chris on the matter so likely they have thick enough skin to handle the criticism as it isn’t the least bit personal to them.
Or they have better manners and don’t see a public forum as an excuse to be rude. Be that’s just my opinion…
Constructive criticism, even by a “ professional “ doesn’t have to be rude.
So saying someone ‘missed the mark’ after they excitedly proclaimed how happy they were about it is ok because you are ‘someone in the industry’? So many nicer ways you could have worded your comment (or just moved on). I’m sure you think you’re in the right but it’s too bad being kind over being right isn’t something you practice. They should teach that ‘in the industry’.
lol you forgot to add in a “good luck!”
Woooooow. Jackie nailed it, lol. Go ahead and defend your mean-spirited comments, Lauren. ????????????
Looks amazing! Love! Love! Love it!
So lovely!!! Your bedroom is quickly becoming my favorite room in your new home! ( lol… is that a thing? ) Please, hurry and get that new bed in there so I can see it all come together… I’m on the edge of my seat. :)
It will be here in a few weeks! Counting down!!!!!
Great job as always! Looks fantastic.
That looks so much better!!! It looks absolutely as though it belongs there, and as if it should have always looked like that. It seemed so much heavier looking before. Which, certainly is a look, but I don’t think that it was the best choice!
Hello!
Could you do this same process with a regular brick fireplace?? I love the softened look especially the stone…but if we don’t have an option to change our brick fireplace to stone…would this give a similar look ??
Thank you!!
Yes definitely
Same question here! Just wondering if we’d have to use different materials from the ones you listed for stone? For example, the mortar – the one used says stone or tile, would a brick one, specifically, be needed for brick fireplace?
I’m pretty sure you can use the same thing!!
I did this to our 150 year old limestone fireplace (the previous owners had re-grouted over the years different colors of gray ????) and after I did the white mortar over top of the gray grout mortar, I still though the white was too stark. I got Romabio Limewash in Cristallo White, a creamy, antique white) and went over the white grout joints and it softened it even more (it sounds redundant going over white with another white, but it was a game changer)! I also made the grout joints just a tad wider with the limewash and rounded out some of the sharp stone lines and it was the best decision!
That sounds so beautiful!
Ashlyn- I’d love to see a before and after of your project. It’s exactly what I have in mind for ours.
We have an old log and stone cabin that has floors that look like your fireplace. Charming? Yes. Difficult to clean and walk on? Yep! Do you think we could do this type of treatment on floors?
WOW what a change… I have to admit the beginning look in your stories had me a bit concerned but the final look is beautiful! Really makes the whole room feel much more cozy and warm. Great job!
It turned out so good, 100% cottage vibes!!
Spectacular! I’ve been anxiously awaiting this project reveal, and it hugely transforming. If I were looking at homes, I’d no longer be scared of stacked stone. I love the inspiration photos and noticed many have no fixed screen or a rubbed bronze insert, which continues the softer feel. Are you going to stick with a black insert? A chunky wooden mantle would looks so pretty too.
Now I’m eyeballing my huge brick chimney with ideas…
This looks amazing. We have this exact diy planned for the spring on our 20foot long fireplace wall! Do you have videos saved of the process from your insta stories? I’m a visual learner!
I must admit, I was VERY unsure about this project. But it looks great! Love it!
Yes heavy and over powering are words I would use to describe our living room fireplace ! It’s massive and obvs original to our mid century modern rancher but has always seemed not quite right. and then I recently realized the stones are actually concrete. So I think this might be amazing and then a limewash over the whole thing and a new modern mantle!
Thank you so much for writing up a tutorial :)
Oh my gosh, of course it looks amazing! I don’t know why the haters waste their time. Great job!
Absolutely incredible! SO beautiful!!
It turned out amazing! I’m glad you guys took a risk and did what made you happy despite what some “haters” said during the process
It looks AH-MAZING!!! Our new house has a brick fireplace that the sellers painted. Not very well, I might add. This is making me wish it was the original brick finish or stone. ???? I’ve got my work cut out for me!
Ashley this happened to us as well the previous owners painted the brick red fireplace with brick red paint. I painted it with white right away because it looked so silly, but now I just want to strip all the paint!!
I painted over my red brick white, and I was speculating what this same technique would look like using dark grout in the white brick…????
It looks so beautiful! I’m wondering if you could do this method on an exterior? I have accent stone around my front door, and I’ve always wanted to change it. I think this could be the perfect budget-friendly solution, if it would hold up outdoors.
Yes!!!
I have to admit that when i first saw the beginning on Instagram stories I wasn’t sure but I knew you guys can do no wrong and of course the end result is AMAZING!!!
Gorgeous! It’s amazing how a couple of smaller changes (trim and this fireplace) have really taken the space into “cottage” territory.
I noticed a lot of your inspiration pictures have mantles or trim around the fireplace, is that something you are thinking about adding too? Or are the clean lines of this where the “modern” part of this meets with the over grouting to make “modern cottage”?
Wow, it softens the room soooooo much. Looks beautiful!!
Gorgeous! It’s amazing how a couple of smaller changes (trim and this fireplace) have really taken the space into “cottage” territory.
I noticed a lot of your inspiration pictures have mantles or trim around the fireplace, is that something you are thinking about adding too? Or are the clean lines of this where the “modern” part of this meets with the over grouting to make “modern cottage”?
I mentioned it briefly in one of the last paragraphs, but we’d LOVE to add a concrete or limestone mantle! I’m keeping my eye out for a good deal.
I LOVE IT! It completely changed the whole feel of your bedroom! Beautiful!!
I was honestly a little skeptical about how this was going to turn out while watching the progress in your story but it looks amazing! It looked super white in the stories but looks perfect here! Nice job guys ????????????????????????
I’m so glad you decided to keep the stone – it looks SO GOOD now! So much brighter and more inviting. My parent’s house (where I grew up) has a huge stone fireplace in the living room that I’ve always loved and this really gives me that same vibe.
I’m so glad we kept it, too! I love the stone even more now
This is such an improvement! To me, it’s kind of a no brainer to try it. Even if it didn’t turn out with the over-grout, I think that the over-grout or a white wash would be an improvement over the original!
What was the corded drill for? Did I just miss that in the post about why you can’t use cordless?
Cordless drills may not have enough power to mix the mortar, or the battery might burn out faster! We just used the drill and attachment to mix the mortar.
I love this! The fireplace turned out beautifully and your room is coming together in a way that’s giving me ALL the heart eyes!!
This looks freaking amazing! It can be hard for folks to see the vision as you work through the project but I personally loved watching the process.
LOVE IT! This reminds me of the Philadelphia fieldstone houses you see in the countryside outside of Philadelphia. I think it’s one of the prettiest exterior looks and it’s amazing inside as well.
Its SOOO cozy and cottagey! I love it!!!!
Cottage fireplace 100%!!
I can’t wait to see this space with your new canopy bed, too!
Gorgeous! And the limestone mantle will truly be the icing on the cake! <3
Love it! We need to spray ours black as well. Did you remove anything to do it or did you just cover the stone and go for it? I’m so scared. Haha
The grates just popped right off!! So we removed them.
Gorgeous!!!!! This turned out amazing!
Bravo! Your vision and execution are so in harmony!
I’m usually not into stone (more of a brick lover – we have 3 exposed brick walls in our 120 year old home!) but you’ve totally converted me to loving stone now too! You’ve softened the look and it looks perfect for a cozy retreat. It’s beautiful.
Hi Night! Meet DAY!!! Amazing transformation! It makes everything so much brighter and less heavy!!! ????????