


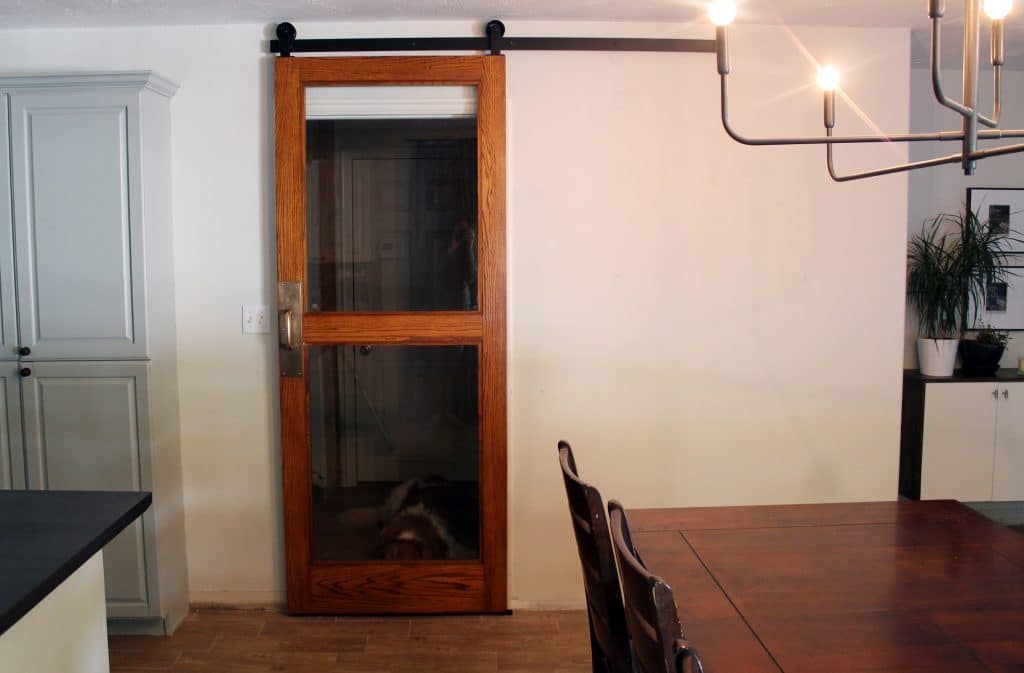
We knew after we hung our barn door in the great room, we’d want to frost the windows. The door leads to our future laundry/mud room which sounds like a potentially messy combination even if we plan to add as much storage and organization as we can. And until that point, it’s a construction zone of missing drywall, baseboards and exposed studs.
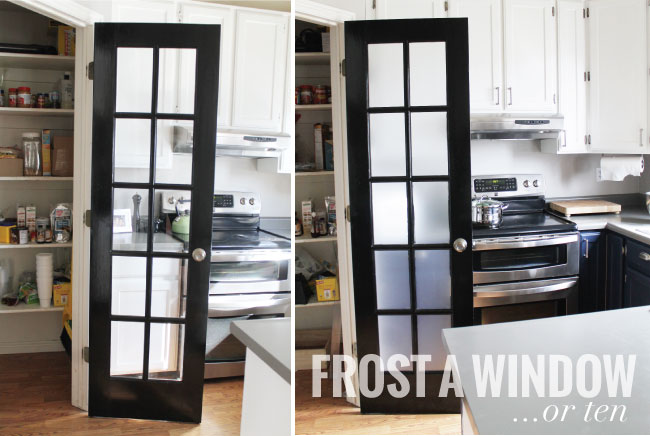
We have used frosted or “etched” window film (this one!) with great results on our last home’s pantry door.
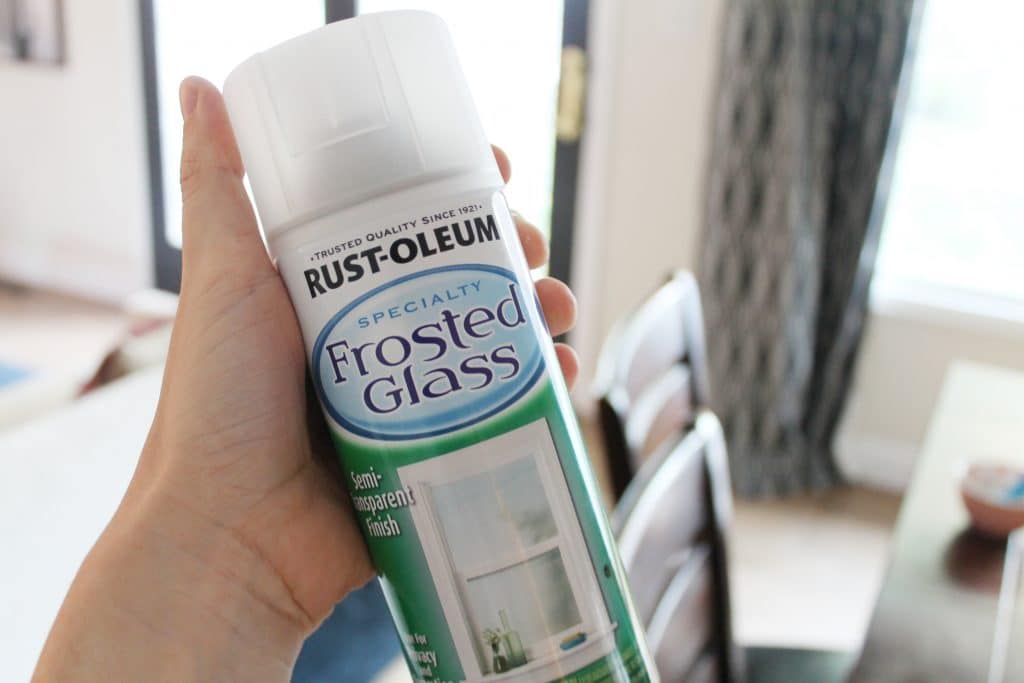
Although I liked the process and result, I felt like it was my duty to try out the other product for doing the job–frosted glass in spray form.
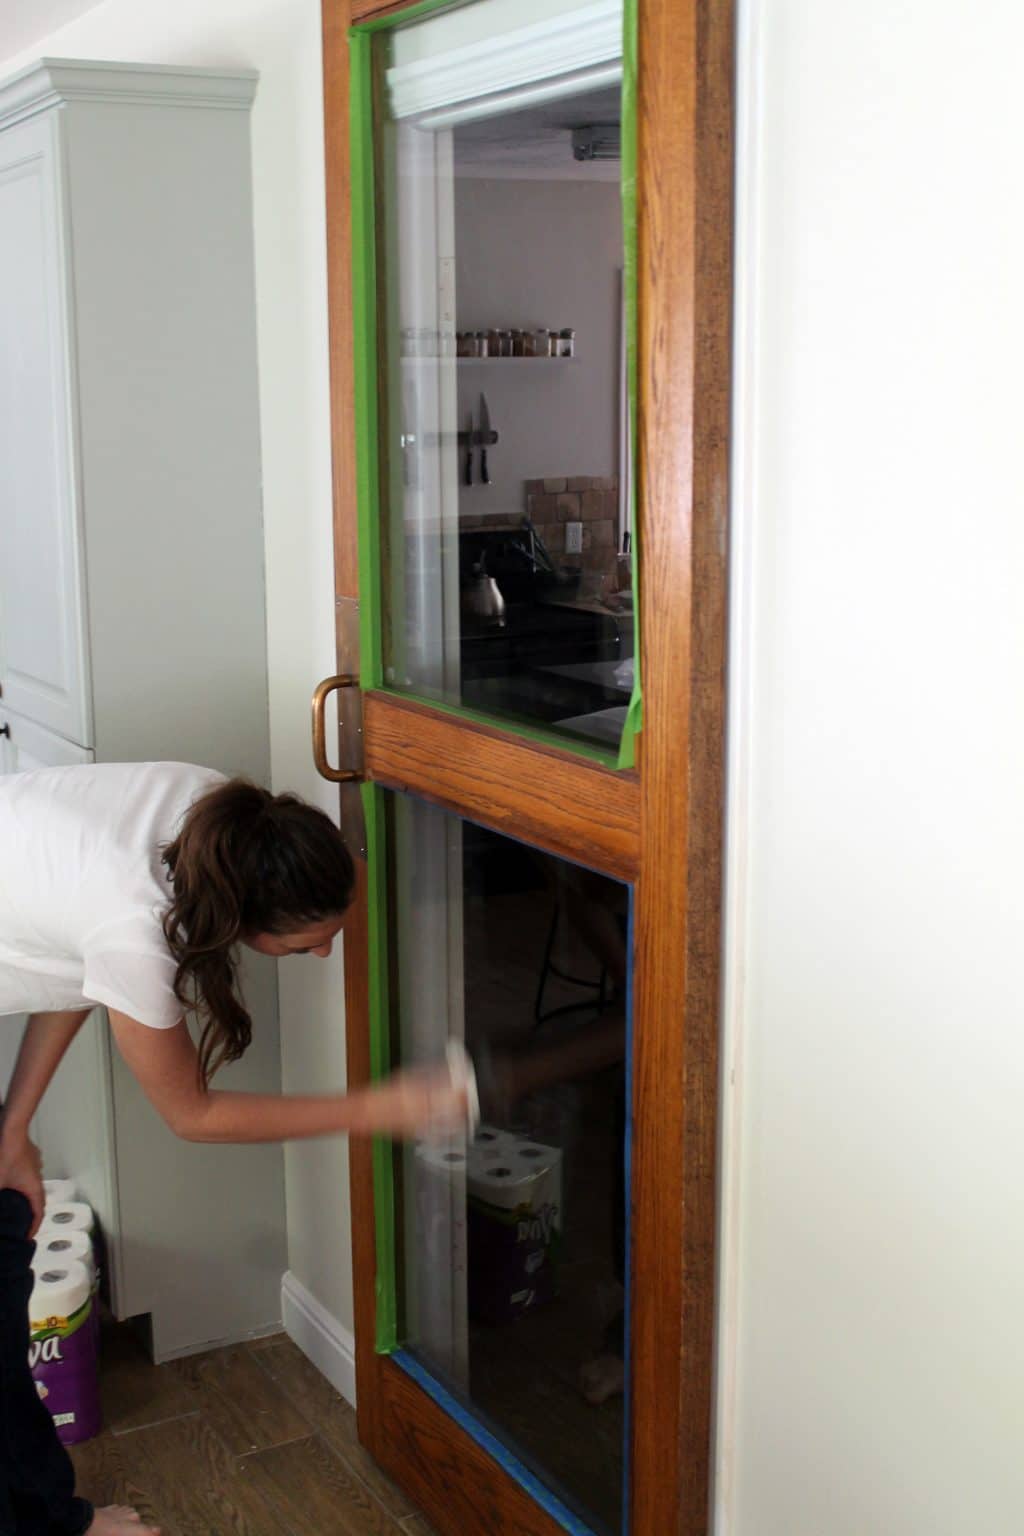
I cleaned the glass thoroughly and taped off the edges of the wood, although I will say that step is completely irrelevant. There was no frosted specs or film that showed up in any of the surrounding area. I did notice the counters and floor looked dusty, but is swept away with just a broom. So this stuff must only stick to glass, unlike spray paints.
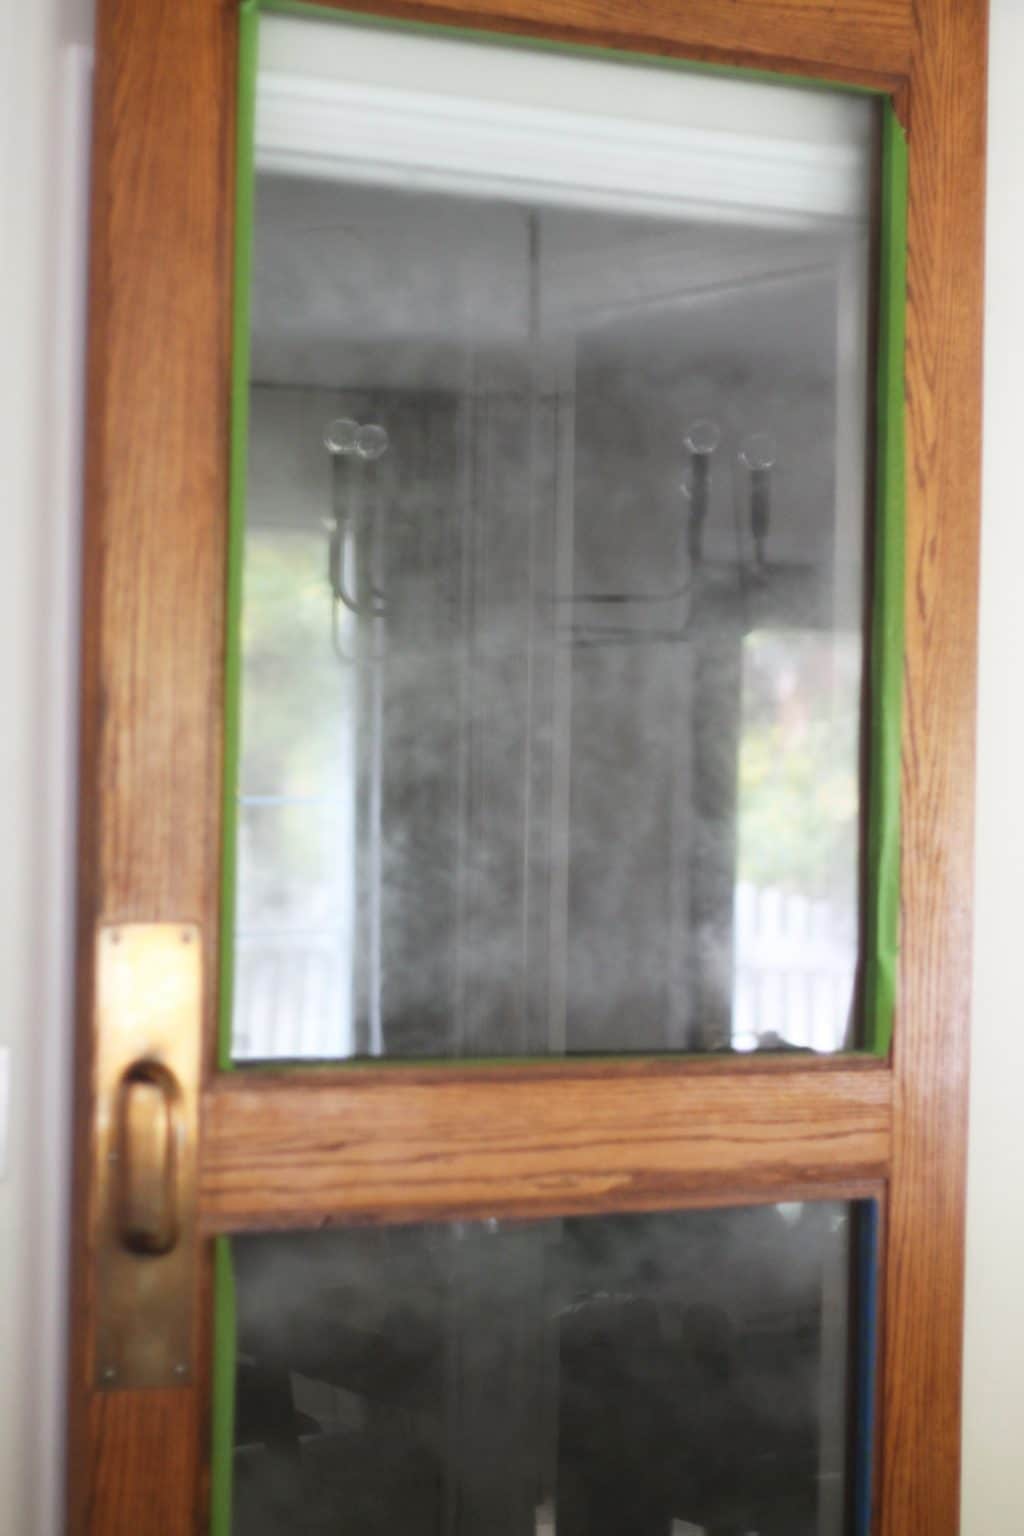
Following the directions, I sprayed even strokes slightly overlapping the lines. The above (pretty blurry, sorry!) photo was after the first coat. The can says that it doesn’t fully frost until 10 minutes but you can re-coat anytime. I layered on two more coats a couple minutes from each other and it still looked splotchy so I decided to wait the full 10 minutes–I waited 20 for good measure–to see how it set up. Please note–this stuff is pungent! It stinks. Strong! Like nail polish times 100. We had all the windows and doors open, but definitely wish we would have done this before hanging the door.
This is a photo I snapped with my phoneafter that period of time. I was really disappointed with the stubborn streakiness!
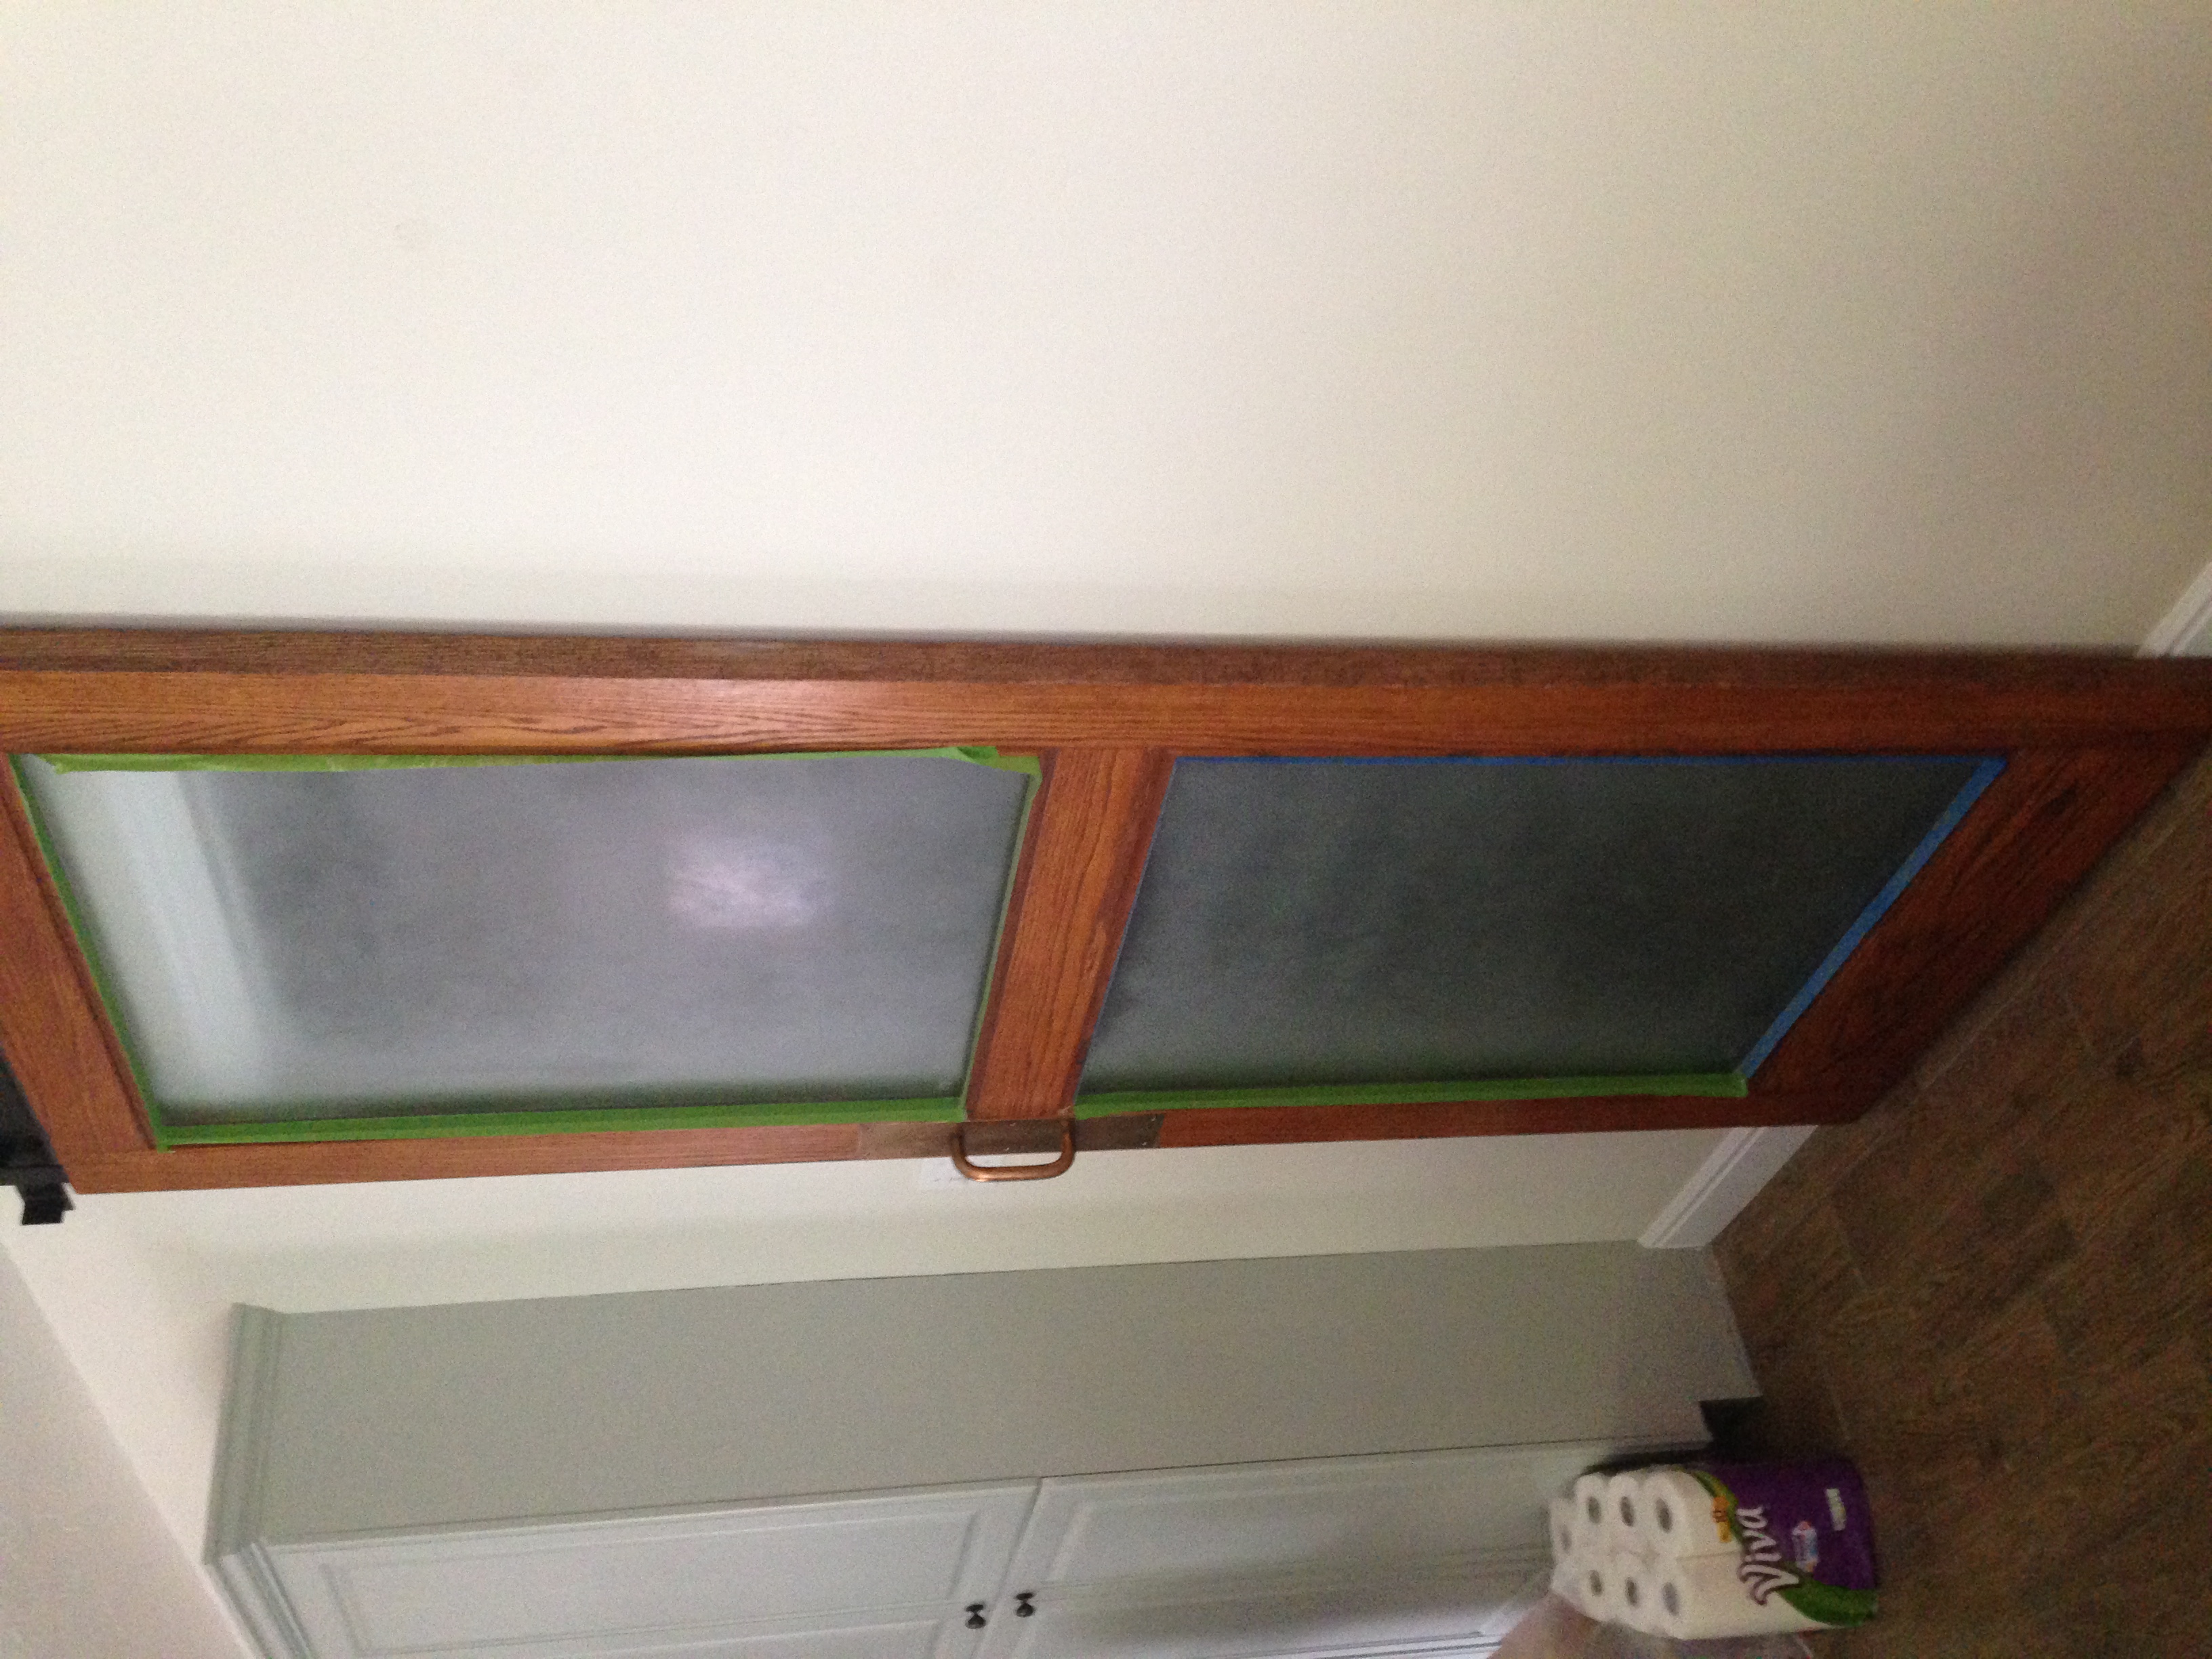
After discussing it over with Chris, we decided to do another coat since it was building coverage each time. Here’s after several coats.

There’s still a definite uneven appearance. In person it doesn’t look quite as splotchy as it does in the above photo. The camera has a way of highlighting that, but even still–such a beautiful door, I’d hate to leave with a less than perfect finish.
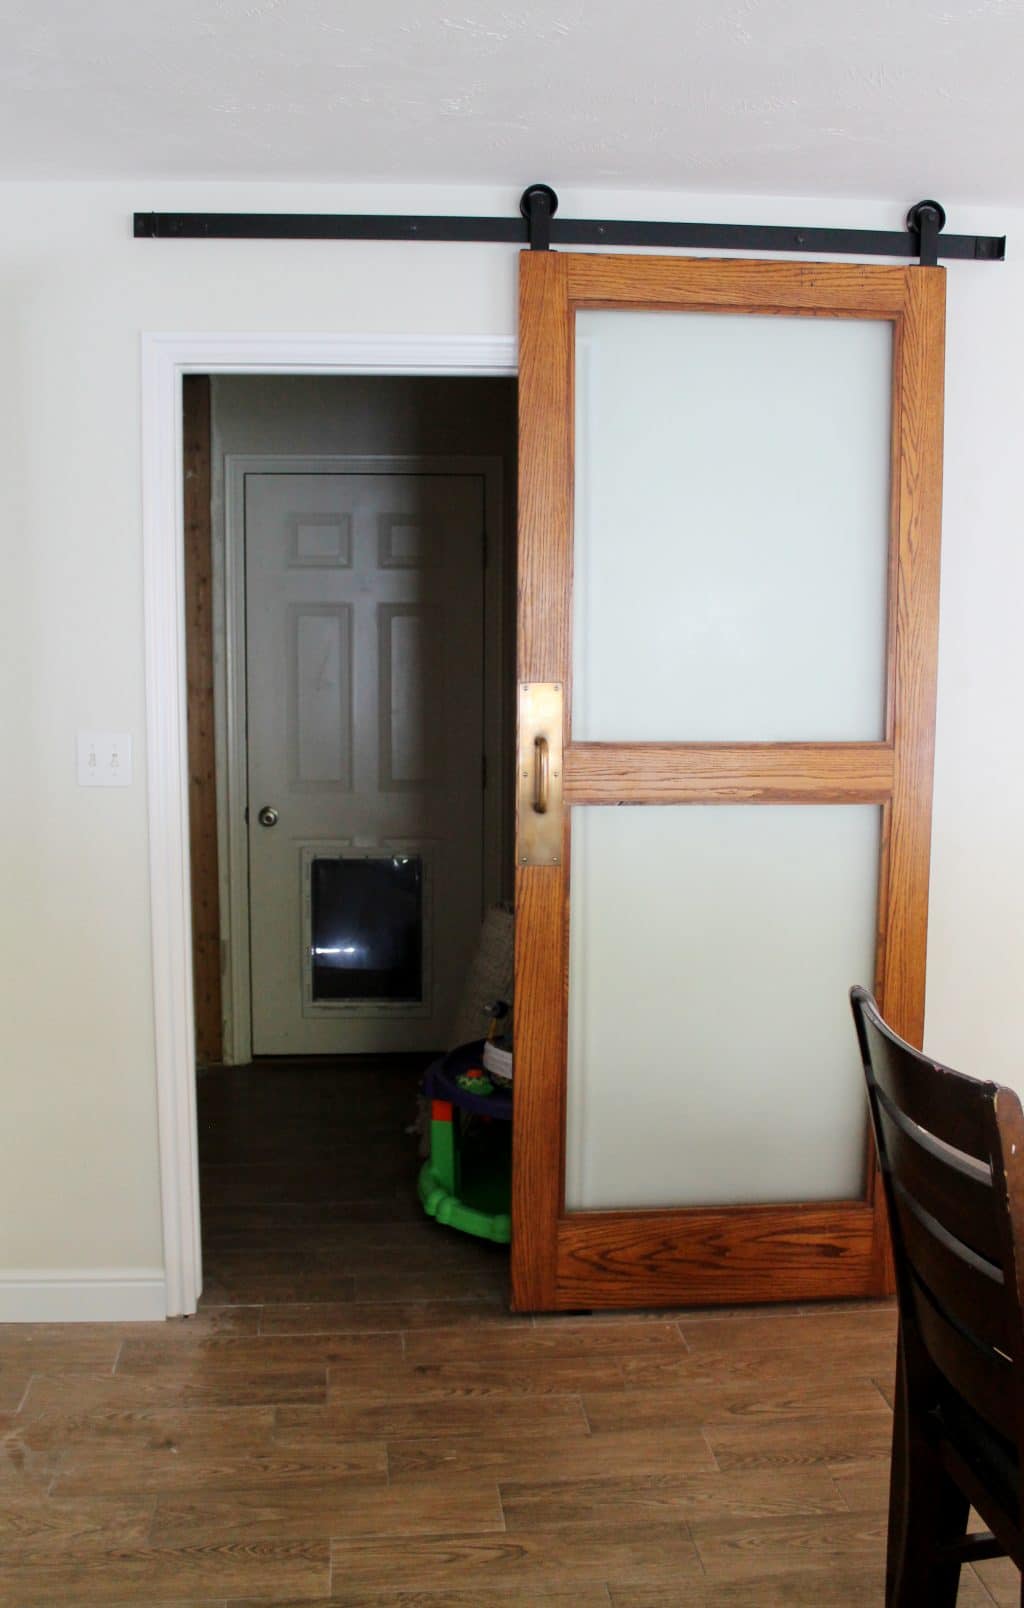
When opened, any blotches or inconsistencies are not detectable at all. I also wanted to post the above photo because in the lower left corner you can see the dust that the spray put off. It really does sweep right up.
Verdict: I would NOT use this product again. We will most likely remove it with paint thinner and use the window film we used in our last house again. I can see someone using this product for a small piece or product that you’d want to frost. Also, the price is cheaper than the window film. But, if you are looking to frost a window, and want something consistent with no smell (!!), I’d stick with the film.
Leave a Reply
What do you think?


Semihandmade
Our wood grain Shaker cabinet fronts were designed for busy, high-traffic homes like ours. Clad with durable textured thermofoils, this line is compatible with Sektion, Akurum, Godmorgon, and Besta cabinets from IKEA. It's the perfect, practical way to add the warmth of wood to all the rooms of your home.
Collaborations
learn more

next
Loloi
We have teamed up with Loloi to create a line of rugs that are as affordable as they are beautiful. This collection houses a great mix of traditional and modern rugs, in cottage-y colorways, as well as vintage-inspired beauties that you’ll want to roll out in every room.
Collaborations
learn more

next
STUGA
We partnered with Stuga on a line of hardwood floors — The Ingrid is really livable, and the color is very neutral. It doesn’t lean warm or cool, it’s that just right in-between. We have really loved putting it everywhere in our house. It’s the best jumping-off point for design, no matter your interior style. In addition to being beautiful, Ingrid is really durable — we have three kids, and we always have a home construction project going on. Ingrid stands up to it all.
Collaborations
learn more

next


SHop all
What We're Right Now
What We're Right Now
Looking for our favorite things? A place to shop our home room by room, or just catch up on what Julia's wearing / loving right now? Browse the CLJ shop.
Loving


Portfolio


Design
Befores, afters, mood boards, plans, failures, wins. We’ve done a lot of projects, and they’re all here.
BROWSE BY CATEGORY
let's break this thing up
We have a long-standing relationship with DIY, and love rolling our sleeves up and making it happen.
Projects
Even when you don’t want to rip down a wall, you can make that space in your home better. Right now.
read more
read more
read more
02
01
03
looking for inspiration?
A reader recently asked me if I’m starting to fully embrace traditional style and whether we still consider our house to be a “modern Colonial” and why. It was a really great question and so timely — I had really just been thinking about my approach to this home and how my style has changed […]


SEARCH THE BLOG
We've been doing this since 2009 and we've posted a whopping 24145+ blog posts and counting. You might need a little help searching, huh?
looking for something?
find stuff like:
")
Can We Send You Our Love Letter?
Another way for us to stay in touch! Joining our weekly newsletter gives you access to exclusive content, never-before-seen photos, your questions answered, and our favorite DIYs. Sign up below!
Follow Along on Instagram
Welcome to our online community where we've posted home, DIY, style, renovations, and family since '09. Renovating our #cljmoderncottage in Idaho and headed for new adventures in Raleigh, NC. #cljfam #cljtransformations
@chrislovesjulia


Links
Get Around
Make yourself right at home
Portfolio
Design
Casual Friday
Projects
Lifestyle
Gift Guides
All Posts
Shop
Love where you live.
Social
RivrLinks
Links
Get Around
Make yourself right at home
Portfolio
Design
Casual Friday
Projects
Lifestyle
Gift Guides
All Posts
Shop
Love where you live.
Social
RivrLinks
DO NOT ever use the spray. i followed the instructions to the tee and ended up getting massive uneven blotches across the whole glass panel
From my experience of using this product and wet-on films, this impression is very accurate. Unfortunately the past owners sanded the glass around the wooden window frames, so the film didn’t stick around the edges. But if you have very flat glass the film is definitely superior – it’s much tougher as well. However we are happy to put up with the subtle blotchyness (even after 4 coats) as it’s still a better result on our windows than the peeling film.
we have stained glass doors leading to our master and guest suites and we’re going to use the spray but sounds like the film will be better….will the film have to be cut around the lead joints to form individual panes of glass
For the best look, probably.
My husband tints windows and did the windows at Ace Hardware in Rexburg. He has piles of the frost window film left over if you need to purchase any without spending a bunch.
Also, he mentioned that taking the spray frost off with a razor blade might be a bit easier than paint thinner.
I used this product for my garage windows and was equally as disappointed. I have yet to take it off but know I need to.
I had the same thought as Abby when I saw your title. “Don’t do it!!” Because I had the same experience as you’ve had – not a hot product. Looking forward to seeing Plan B!
Hahaha…. oh man. I tried this stuff a week ago and it went blotchy as all hell. Now at least I know it wasnt just me.
I tried to “correct” it by just kinda purposely making it blotchy… hey its suppppposed to be that way…
Nope, looked terrible. I think this is much better for smaller projects or when you can remove the whole glass pane…
Even ordinary spray paint is pretty toxic in an enclosed space. The speciality Rustoleum ones are 10x worse. Is there a reason you couldn’t take that door off and spray it elsewhere? That bad smell tells you it’s a big dose of VOCs, for you, your children and your dog.
I used this on glass and had the same problem, I was able to scrape it off with a razor blade and some elbow grease! I dread paint thinner!
Why didn’t you cut off the bottom of the door and hang the door lower? Just curious.
It kind of feels like hanging curtains high to extend the height of your ceiling. Once the doorway is raised it won’t look quite so weird. Also, we hope to raise the ceiling in the great room actually. We’ve been waiting until we have all the details before we spill the word officially.
I’m currently in the middle of a similar project (on lower half of windows) and was wondering about the spray. I’m using clear Contact brand paper cut in a pattern and that’s working. Believe it or not, the clear looks frosted when applied to glass. I also got a different brand frosted film at Home Depot but plan to return it because I’m liking the pattern. I got the idea from the blog 7th House on the Left: http://7thhouseontheleft.com/2011/08/window/#.VEgUGvnF81I. A subtle pattern might look good on your beautiful door.
I had similar results when I sprayed a window near my front door. I was debating getting the film but I thought spray would be easier. It wasn’t. While it didn’t work well on the window, I did use it to frost an old glass vase. It turned out really well!
Thanks for sharing your experience. We’ve used the window film before with a good outcome, but I always wondered how the spray would turn out.
I had always wondered about the spray so this post came in handy. We were also contemplating using it on some shower glass. Now I know not to but I’m not sure what to do since our shower is larger than 36″. Have you ever used the film where you had to have a seam?
I saw the title in reader and wanted to yell “GO WITH THE FILM!!”
I used the spray on a bathroom window after removing the mini blind…It’s so blotchy and I used almost the entire can! Now it’s seems to be deteriorating with the humidity of the bathroom. Luckily the window needs to be stripped, painted and re-roped (yay for 1920’s windows), so I will have the opportunity to use the film in the next few months.
There is a window “etching” paint made by Martha Stewart, I got mine at Michaels. It doesn’t actually etch, but does give a great frosted effect. We “etched” a stencil onto a window where we wanted a little blurring/privacy. It worked perfectly. A little style via the stencil, easy coverage. I did a stencil on a mirror in a bathroom and it held up perfectly in all the steam. Just another idea. Good luck!
Nice, Katy! I feel like a surface this large (these panes are big!), it might be too small of a product. But I’d love to try it in a different application.
Is the film wide enough to cover windows that large with no seam? If so, I can’t wait to see your post about the film. Your house is looking great these days!
Thanks, Anna! Yes, the film is 36″x72″–plenty big.
Thanks for the review. Great info!
I used that stuff in one a bathroom window in a rental. I wasn’t thinking spraying it in an enclosed small room and probably lost some brain cells. Anyway, I think you can take it off using Windex, no need for paint thinner!
That’s the best news of the day. It coming off with Windex seems like another flaw of the product…although it definitely comes in handy with our situation. Haha
We had the same results with the spray on a sliding glass door. We left it because we needed it for privacy. It ended up becoming more uneven (showing scratch marks) over time. Windex and some elbow grease took care of it (along with a razor blade along the edges). The good news is it cleans up just like new. I’m Team Film now, too.
It’s always disappointing when things don’t work out, but I’m happy that you made the effort to try something new and share it with the interwebs. I doubt it would have made much of a difference, but I wonder if the blotchy/splotchiness would have been less noticeable if you had sprayed the other side of the glass (meaning, the side facing the mudroom, so you would still see the nice glossy glass surface)?
Nicole, glad you brought that up! I thought the same thing, but unfortunately from the other side (standing in the laundry room) it looks just as blotchy. Although it is shiny and blotchy. Haha. I think I’ll definitely put the film on that side though.
I’m so glad you posted about this! I have plans to frost our shower door and now I know to stay away from the spray. Thank you for taking this one for the team!