


This post is sponsored by Minwax®.
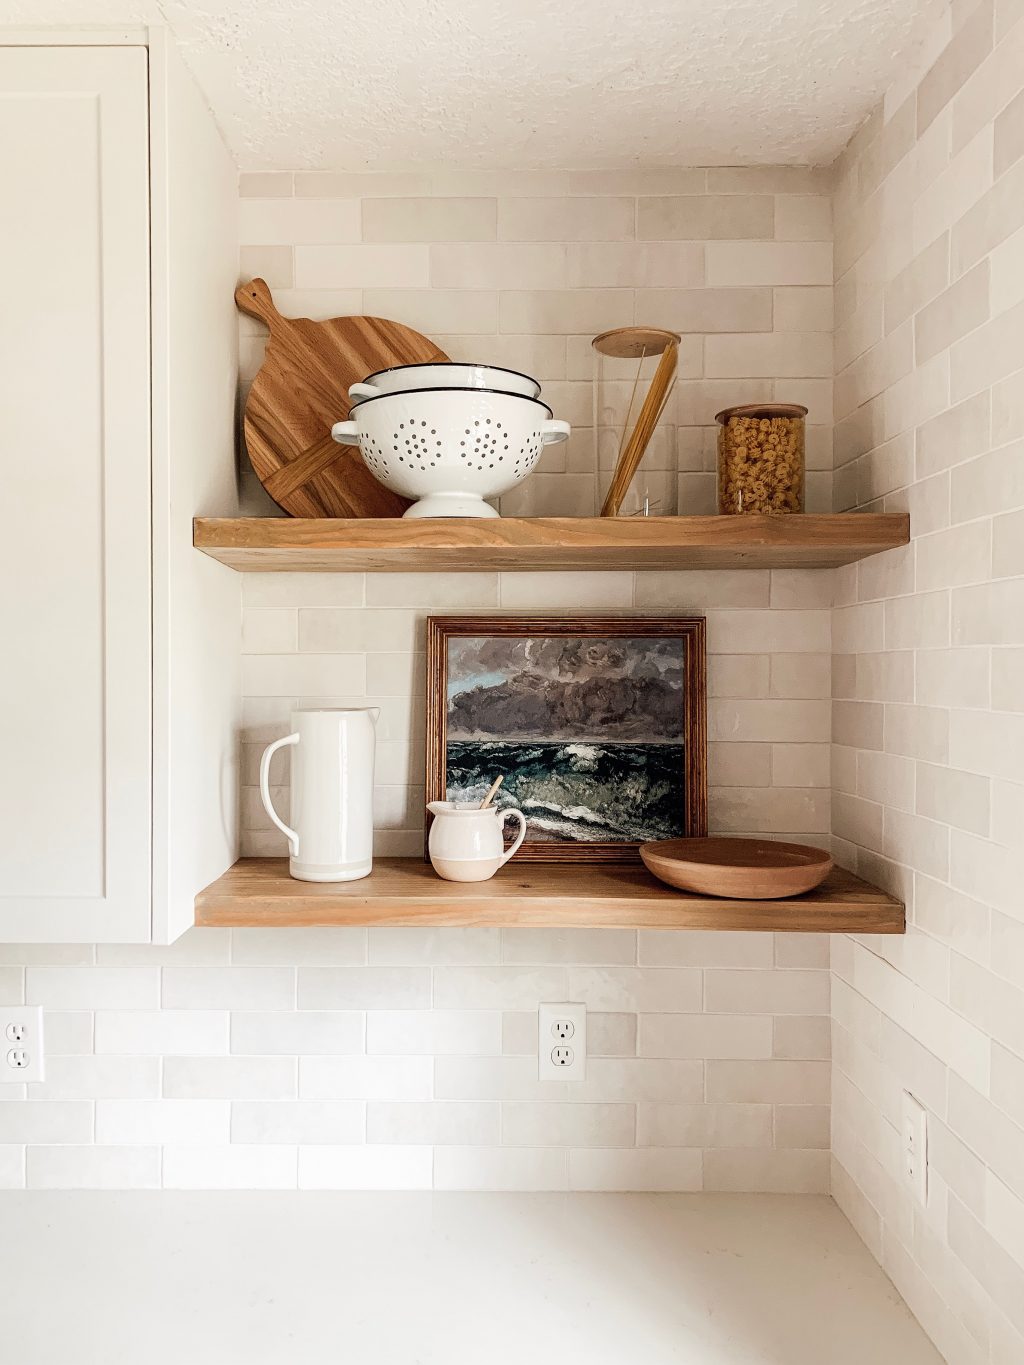
The Fullmers really wanted some open shelving in their kitchen mixed with closed upper cabinets. This is a great solution for most people who don’t necessarily want to worry about every dish looking beautiful all the time, but still want to add some decor and character to their kitchen. We DIYed these floating shelves inexpensively and they completely solved a corner problem where another cabinet wouldn’t fit perfectly and added a whole lot of warmth and beauty and we were able to stain them to tie into their wood-toned cabinets!
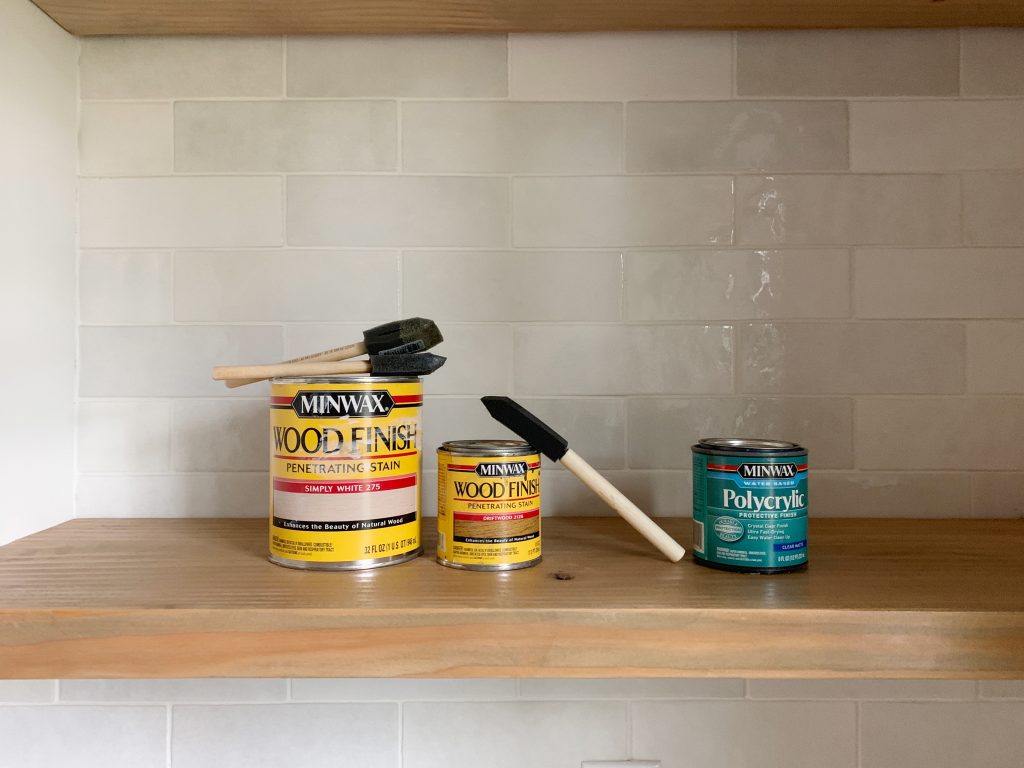
Minwax Simply White | Minwax Driftwood | Minwax Matte Finish Polycrylic
Here’s how we did it!
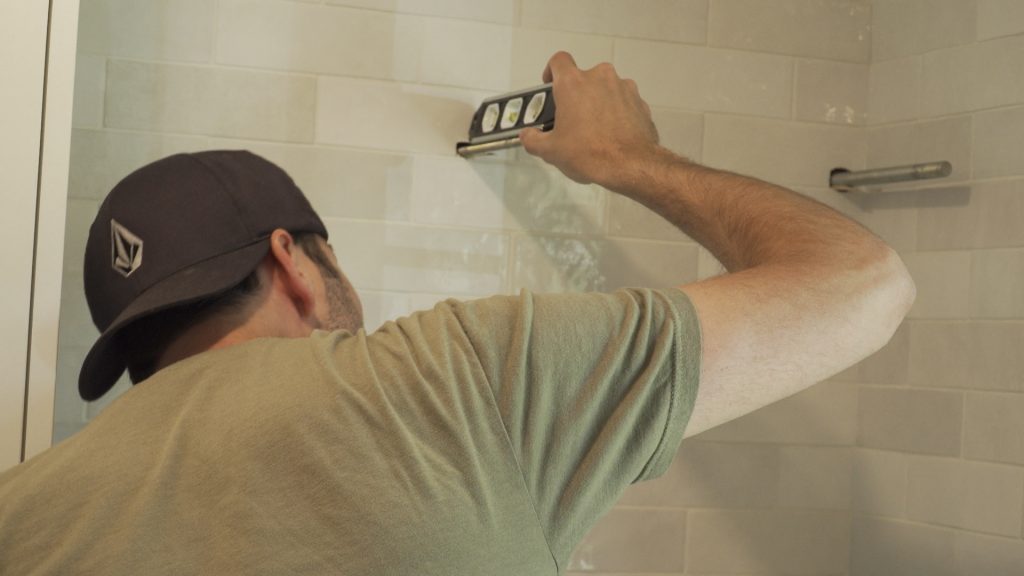
Drill Holes for Mounting Rods

Drill into the studs along the area where the shelf will be. Use a drill guide to keep the bit straight and level. If you don’t use a drill guide the rods likely won’t be even with each other and it will be difficult to get the shelves to slide on. You can wrap a piece of painter’s tape around your bit as a guide to drill about 3 inches into each stud where the shelf will sit. Use a drill bit the same size as the rods you’ve chosen. For these shelves we used 5/8 threaded rods for the edges and 1/4 threaded rods for the center.
Install Mounting Rods Into Wall
Put some epoxy glue into the holes in the wall. Not so much that it squeezes out everywhere when you put the rods in, but enough so the threads are surrounded by it. Add the rods and use small pieces of wood shim to level the rods. Allow the epoxy to cure the rods in place for the recommended time on the label (24 hours is usually safe).
Cut and Drill the Shelf Boards
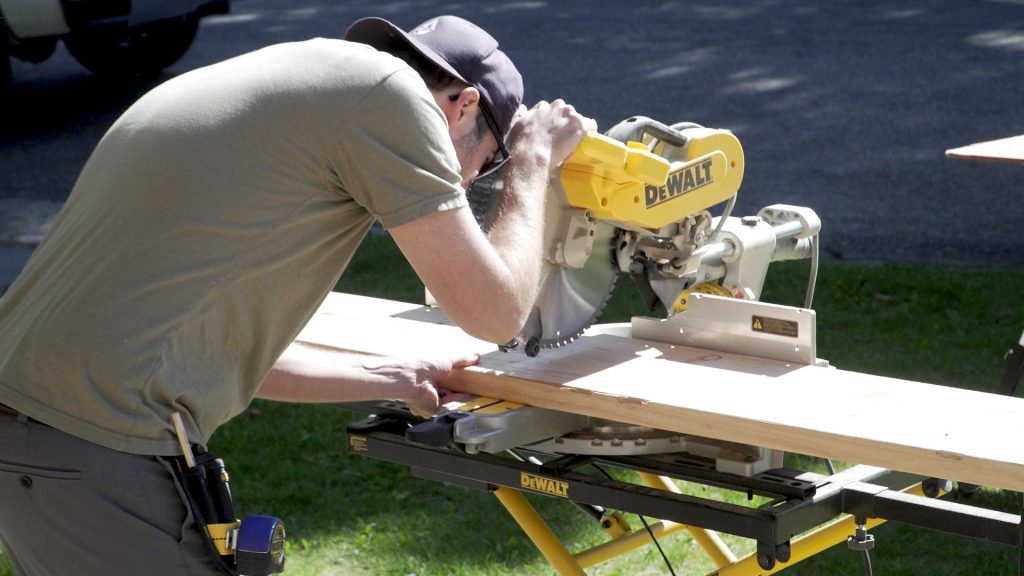
For these shelves we just used one 2×12 board cut to length. Run the shelves through the table saw to shave off the curved edges, ending with squared edges and a shelf that’s 10.75in from front edge to back.
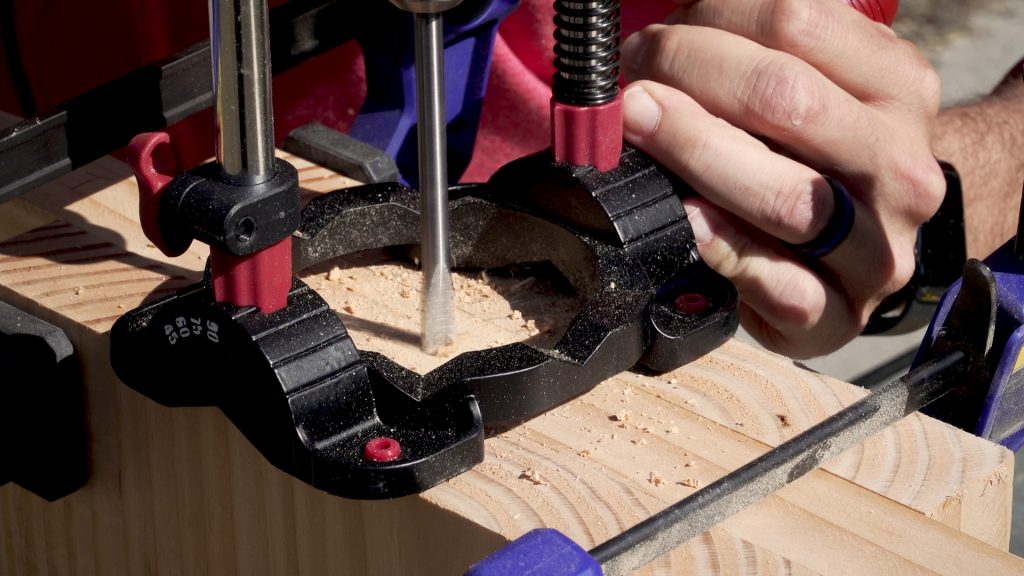
Hold the shelves against the front of the mounted rods (after they have finished curing), level the shelf, and tap on the front of the board with the palm of your hand. This will create indents on the back of the boards where the rods are, so you know where to drill. Use the drill guide to drill into the boards about 9.5 inches. You can clamp boards on either side of the shelf to widen it for the drill guide.
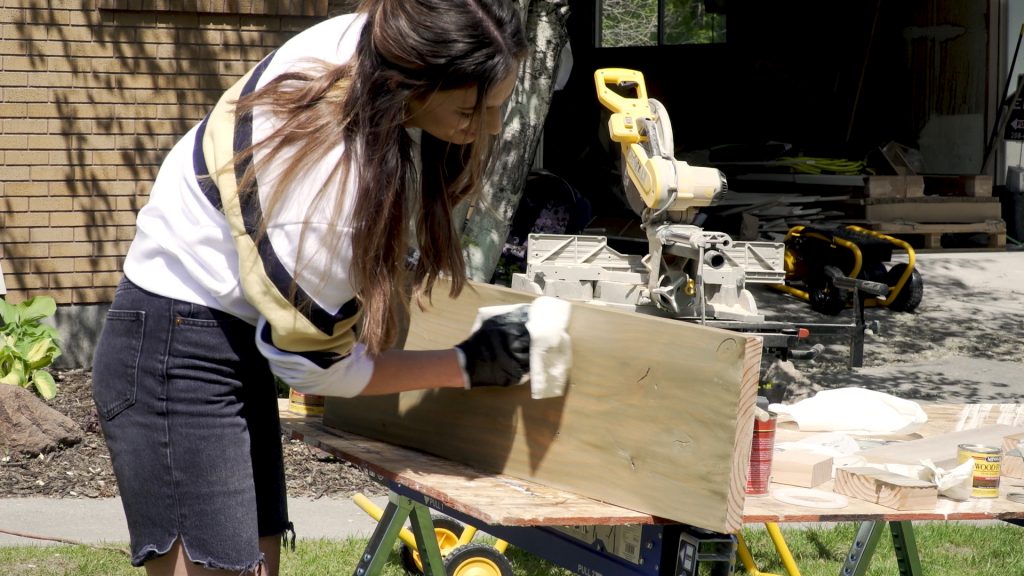
Sand and Stain the Shelf Boards
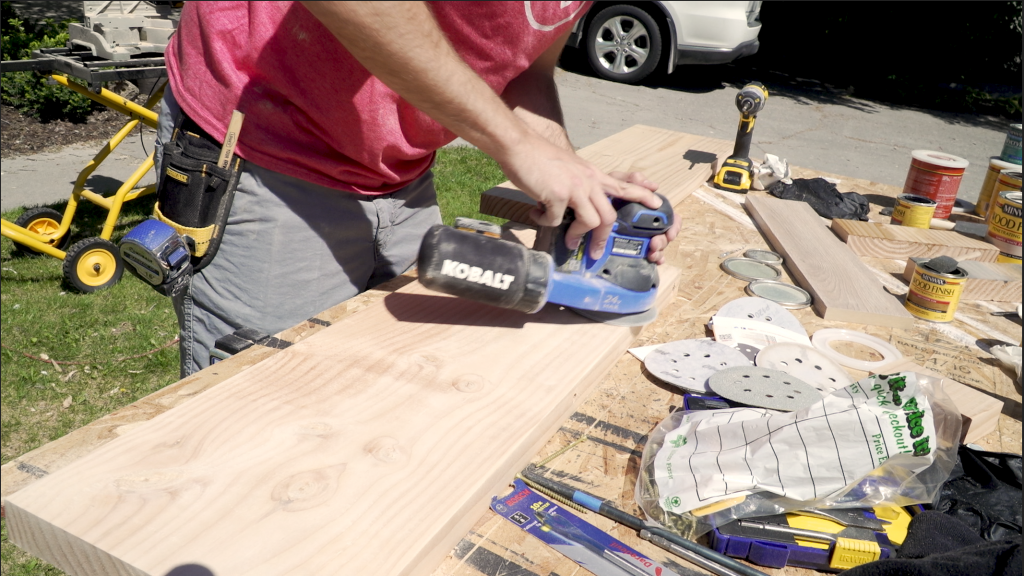
Using an orbital sander, sand the boards down smooth starting with 80 grit sandpaper, then moving to 120 and finishing with 160. Stain the shelf with your preferred color of Minwax® stain using a foam brush. Wipe off excess stain and allow to dry. Coat with Minwax Matte Finish Polycrylic and allow to dry.
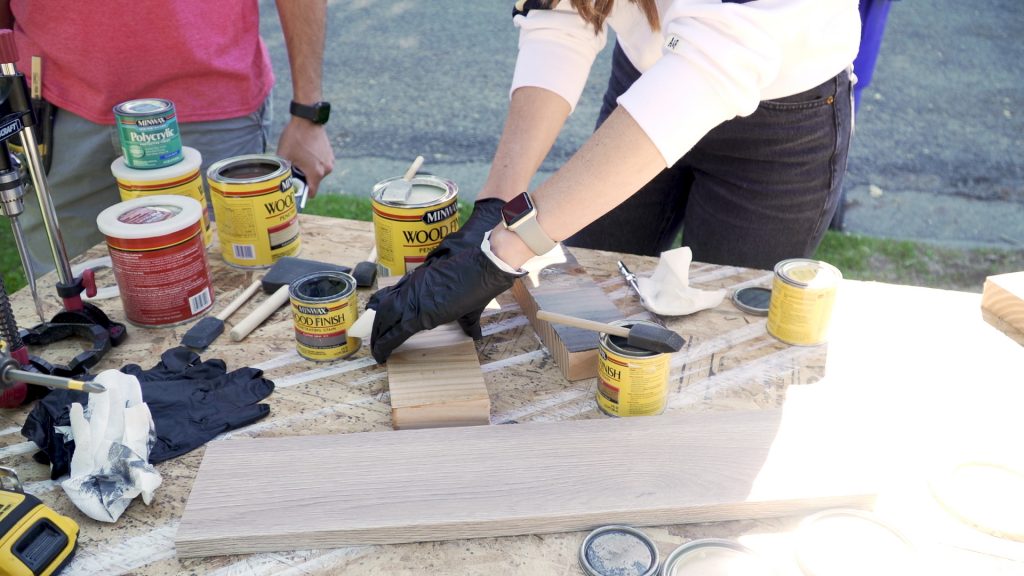
To get the right color, we recommend cutting spare scraps of your shelf wood, sanding it down the same way, and testing your colors. Keep in mind that when using multiple colors, the order in which you apply the stains will change the look. For these shelves we did a coat of Minwax Simply White, wiped it off, then added a coat of Minwax Driftwood and allowed it to dry for 15 minutes before wiping off.
Dry Fit and Mount the Shelves
Put the shelves in place to ensure they will go on properly. Be careful not to get the shelf stuck – there’s a chance the shelf will need to be tapped into place, so dry fitting should just be a loose fit to ensure the rods match up with the holes.
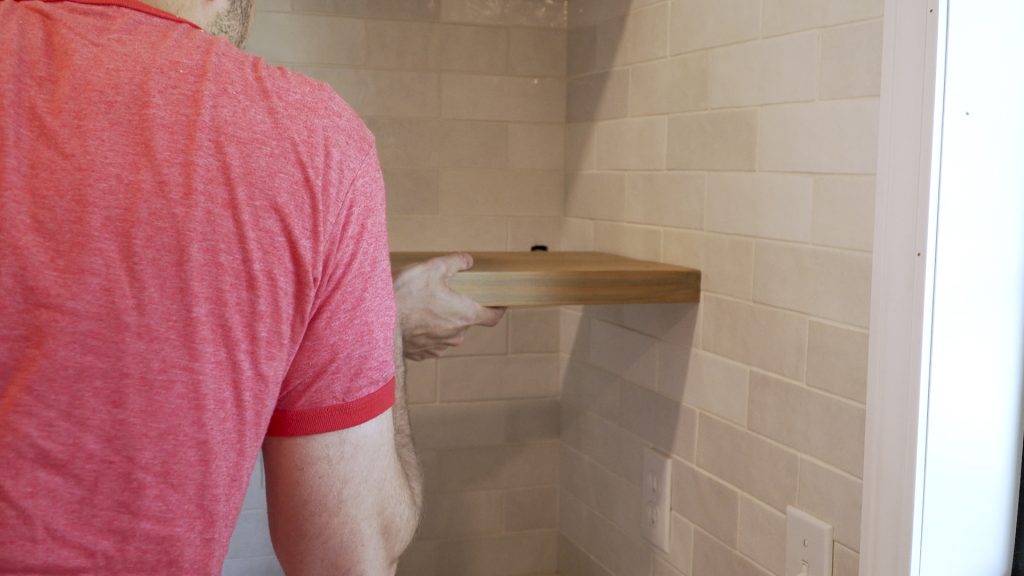
Add some of the epoxy glue into the shelf holes (again, not too much, but enough to create a firm bond) and slide the shelves in place. If tapping is necessary, place a block along the front of the shelf and tap the block with the hammer, so you don’t damage the shelf.
If you’re more of a visual person, we put together an easy-to-follow video below!
Don’t forget to allow the shelves to cure into place overnight before loading them up. And then by all means–LOAD. THEM. UP!
Stain: Minwax Simply White | Minwax Driftwood | Minwax Polycrylic Clear Matte
Cutting Board | Colander | Lidded Canisters | Pitcher | Creamer | Painting | Terracotta Bowl
Can’t wait to see your own versions of this easy DIY!! Be sure to tag us if you try it.
Leave a Reply
What do you think?


Semihandmade
Our wood grain Shaker cabinet fronts were designed for busy, high-traffic homes like ours. Clad with durable textured thermofoils, this line is compatible with Sektion, Akurum, Godmorgon, and Besta cabinets from IKEA. It's the perfect, practical way to add the warmth of wood to all the rooms of your home.
Collaborations
learn more

next
Loloi
We have teamed up with Loloi to create a line of rugs that are as affordable as they are beautiful. This collection houses a great mix of traditional and modern rugs, in cottage-y colorways, as well as vintage-inspired beauties that you’ll want to roll out in every room.
Collaborations
learn more

next
STUGA
We partnered with Stuga on a line of hardwood floors — The Ingrid is really livable, and the color is very neutral. It doesn’t lean warm or cool, it’s that just right in-between. We have really loved putting it everywhere in our house. It’s the best jumping-off point for design, no matter your interior style. In addition to being beautiful, Ingrid is really durable — we have three kids, and we always have a home construction project going on. Ingrid stands up to it all.
Collaborations
learn more

next


SHop all
What We're Right Now
What We're Right Now
Looking for our favorite things? A place to shop our home room by room, or just catch up on what Julia's wearing / loving right now? Browse the CLJ shop.
Loving


Portfolio


Design
Befores, afters, mood boards, plans, failures, wins. We’ve done a lot of projects, and they’re all here.
BROWSE BY CATEGORY
let's break this thing up
We have a long-standing relationship with DIY, and love rolling our sleeves up and making it happen.
Projects
Even when you don’t want to rip down a wall, you can make that space in your home better. Right now.
read more
read more
read more
02
01
03
looking for inspiration?
A reader recently asked me if I’m starting to fully embrace traditional style and whether we still consider our house to be a “modern Colonial” and why. It was a really great question and so timely — I had really just been thinking about my approach to this home and how my style has changed […]


SEARCH THE BLOG
We've been doing this since 2009 and we've posted a whopping 24145+ blog posts and counting. You might need a little help searching, huh?
looking for something?
find stuff like:
")
Can We Send You Our Love Letter?
Another way for us to stay in touch! Joining our weekly newsletter gives you access to exclusive content, never-before-seen photos, your questions answered, and our favorite DIYs. Sign up below!
Follow Along on Instagram
Welcome to our online community where we've posted home, DIY, style, renovations, and family since '09. Renovating our #cljmoderncottage in Idaho and headed for new adventures in Raleigh, NC. #cljfam #cljtransformations
@chrislovesjulia


Links
Get Around
Make yourself right at home
Portfolio
Design
Casual Friday
Projects
Lifestyle
Gift Guides
All Posts
Shop
Love where you live.
Social
RivrLinks
Links
Get Around
Make yourself right at home
Portfolio
Design
Casual Friday
Projects
Lifestyle
Gift Guides
All Posts
Shop
Love where you live.
Social
RivrLinks
Love your work! Didn’t know lvt wasn’t meant to be under cabinets. Just used some in my own home-never thought I would use a “fake” or laminate floor. So much easier to lay, warmer, softer, easier on old legs. Clean up is ridiculously easy! Swiffer, damp mop on occasion. Ours looks like slate. Goes well in a mid century modern with huge windows and matte marble floors. Lots of compliments-especially from men. Was white carpet-is a change!
Wonderful tutorial! How did you cut the holes in the tiles before drilling into studs?
did you use pre-stain wood conditioner for this project?
Yes we did!
Beautiful shelves!! I’m curious if you used a special type of drill bit? Also, do you think this method could be used in drywall with a special anchor ? Thanks!
If anyone wants to know where to source the rods just read almost any other comment on this post.????
Hi. I was wondering what Epoxy glue you used? Also have you done this before and does it hold up well over time?
Thanks!
Perfect timing for us! We were about to do the box-type floating shelves similar to how we did our mantle, but this is so much easier and will look cleaner.
What sort of drill bit did you use? The bit in the video doesn’t look the threaded or forstner bits we have. :P
Love this! I’m wanting to put open shelves I’m my kitchen but we have a tile backsplash to the ceiling. Any ideas on how we would be able to find the studs without ruining the tile?
You can use heavy duty anchors too!
Any suggestions on stains for maple? I’ve tried shellac but it turns orangey. Looking for something towards walnut to blend with our butcher block inlay. Our shelves are on the island ends.
You need to start with a gray stain to even out tones and then layer on top of that.
Thanks for this tutorial! I’ve been researching different methods to install floating shelves in our kitchen. Any tips for how to ensure that the bottom of the shelve lines up with the bottom of the cabinet so perfectly like in your photo? My main concern is any front/back tilt of the shelf would make them not line up at the bottom. Thank you!!!
Thanks so much for sharing! Love these and will definitely reference this as we start our kitchen reno soon.
How thick are these shelves? Exactly 2in? Also, what’s the distance between the shelves?
Do you have any recommendations on when to have two vs. three? I’m debating this right now as I’m planning our kitchen, as well as whether to have them as deep as our 12 in upper cabinets, or something slightly shallower like these. Any tips would be appreciated!
Thanks!
Love them. Do you think this stain would work on an old oak table after I sand it down?
sure!
They look great! How much space do you have between the shelves? Thx.
I believe around 12″
These are beautiful! And Great job on getting the colour to match.
Did you have to use kiln dried wood to avoid issues with warping newer wood?
Honestly THANK YOU for this! Why are floating shelves such a mystery to me haha.
Wow such great timing, were tackling shelves soon. Do you think these are sturdy enough for dishes/glasses? Ours wouldn’t have cabinets on the side, just open shelving. Thanks so much for creating such great content!
Definitely!
I love this! I want to add shelves like this in my kitchen however, there is a subway tile backsplash all the way to the ceiling. Do you have any ideas on how I can easily find the studs without ruining the tile?
You don’t necessarily have to find a stud if the tile is already done, you could use heavy duty anchors too!
I also like the kid’s room makeover on A Beautiful Mess – “Our Niece’s Bedroom Makeover”. The before versus after pics are very inspiring!
Thanks so much for sharing! They turned out so good. Can you share what type/species of wood boards you used?
These are just pine 2×12 boards from Lowe’s.
Love how this looks! I am moving into a new home in August and wish we had a spot to add shelves like this, but the cabinets take up the entire wall of the kitchen ;(
Quick question! I am planning to use this gorgeous Cloe tile for our kitchen backsplash, but the area between the bottom of the cabinets and the counter is pretty small and I worry it won’t look as amazing since there won’t be a lot of it. We have a pretty good amount of space ABOVE our kitchen cabinets leading up to the ceiling. Have you ever seen someone put the subway tile both below the cabinets AND above it to fill that ceiling space? I wonder if it would look good so thought, I need to ask CLJ on this for advice! I also wonder if it would be hard to tile a backsplash that high, any thoughts?
Oh yeah! It looks really cool. I would also consider moving your upper cabinets up higher!
How long could you make these? I have an 8 foot alcove I want to put floating shelves in.
As long as you have a rod at each support stud, I don’t see why you couldn’t make it 8ft long.
Can you tell me what that tile is? I love it!
And the shelves – so great. I’ve been thinking about putting floating shelves in our new bathroom (currently in demo mode), but nervous about drilling into tile! This makes it seem doable.
Cloe White tile!
Waiting for this kitchen reveal is giving me heart palpitations and I don’t know how much longer I will last.
Love this tutorial! We’re planning on some floating shelves in our small kitchen update and will use this guide. How to you think the Chloe tile would work with the 2000’s ever popular “cecilia” (gold with dark brown veining) granite? I was worried using this tile as a backsplash might lean to cool. Your photo here looks so warm that I think it could work! Thoughts?
I think it depends on what grout you use. We used a warm white grout so it helped lighten and warm it up. I think it would work!
Thanks for the tutorial, this is on my list of projects to do soon! Can you please link the mounting rods that you used?
Just these threaded rods from Lowe’s!
Thanks @Chris, much appreciate the quick response!
Where can we find the rods? Thanks!
Just these threaded rods from Lowe’s!
Can you link to the rods you used? I have no idea where to find anything like that. Are they specifically used for hanging floating shelves or are they typically used for another purpose? Thanks in advance!
Just these threaded rods from Lowe’s!
Do you have a source for the mounting rods?
Just these threaded rods from Lowe’s!
Love these shelves! And installation seems pretty easy :-) I was wondering if you could link ( or let me know) where you got the rods from?
We just got them from Lowe’s, found here!
This is totally off subject, my 14 year old is wanting bedroom makeover. Any bloggers that you know that have done their girls bedroom.
you can search “girls bedroom” on our blog to see the ones we’ve done!
I also really like the makeover they did for their 3rd grade niece over on A Beautiful MESS (The before pictures are like EVERYONE’s kids bedroom) – https://abeautifulmess.com/2018/12/our-nieces-bedroom-makeover.html
This post is PERFECTLY timed! Where do you buy the mounting posts?
Just these threaded rods from Lowe’s!