


My mom makes amazing rolls. It’s actually my grandmother’s recipe and they’re famous in our family. Any time we get together, those rolls are always requested. They’re buttery, fluffy, and a necessity at any of our Thanksgiving get-togethers.
Unfortunately, the recipe I’m sharing is not her recipe. No, I’m afraid that recipe belongs to the rest of my family, so it’s not mine to share. I just wanted you all to know you’re missing out. Aren’t I the best?
This recipe, like most of “my” recipes, is a hybrid of several I’ve come across, including my mom’s. The dough only has 4 ingredients and is what’s called a wet dough. I first learned about wet doughs in my baking class in college. You know those artisan loaves of bread made by the bakery in your grocery store? They can be round; long (like the baguette, for example); small; and have the signature hard, crackly crust. They use a special oven that introduces steam throughout the cooking process. It sounds counterintuitive, but the steam actually dries out the crust faster and gives it that wonderful crust.
Well, if you’re like me (and the vast majority of people on this planet), you don’t have an oven like that. Enter, the wet dough. When coupled with a pan of water in your oven, you can achieve the same effect with a surprisingly small amount of effort. I actually found a great book that talks all about wet doughs. The recipe I’m gonna share isn’t quite the same as theirs, but they’re pretty similar. That book also shares a lot of other recipes as well, so it’s worth checking out.
This will make 12 rolls, so scale as needed. Here’s what you need:
• 5 cups room temperature water
• 3 tbsp active dry yeast
• 2 1/2 tbsp salt
• 10 3/4 cups all purpose flour
Mix the water, yeast, and flour together in a bowl. Sprinkle the salt in as the dough mixes. You don’t have to knead this dough until it’s smooth. Just mix it until everything is incorporated and there aren’t any dry clumps of flour. Put the dough in a bowl, loosely cover with plastic wrap, and set in a warm place for 2 hours (basically just keep it away from drafty windows and stuff).

For the next part, you’ll need a couple more ingredients:
• 3 tbsp butter (I usually use unsalted but for this, I prefer salted)
• 1 tsp dried, crushed herbs
After the dough has rested for 2 hours, then you can start forming the dough and putting it in a pan. Melt 1.5 tablespoons of butter in your baking pan and move it around so the bottom and sides have some on them (to prevent sticking). That’s if you’re using two smaller pans, like I did. I baked 6 rolls in each. If you’re using one large pan and will cook all the rolls together, then melt 3 tablespoons of butter.
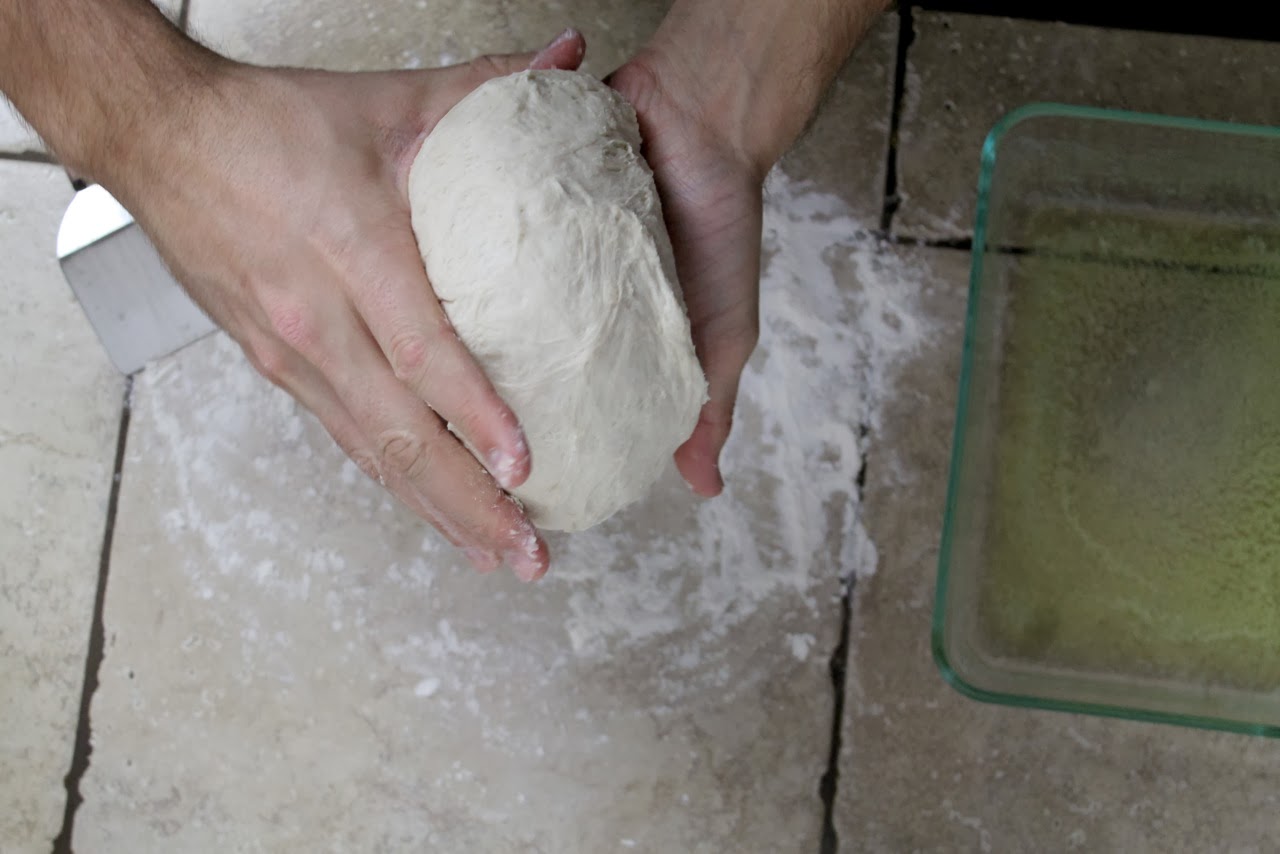
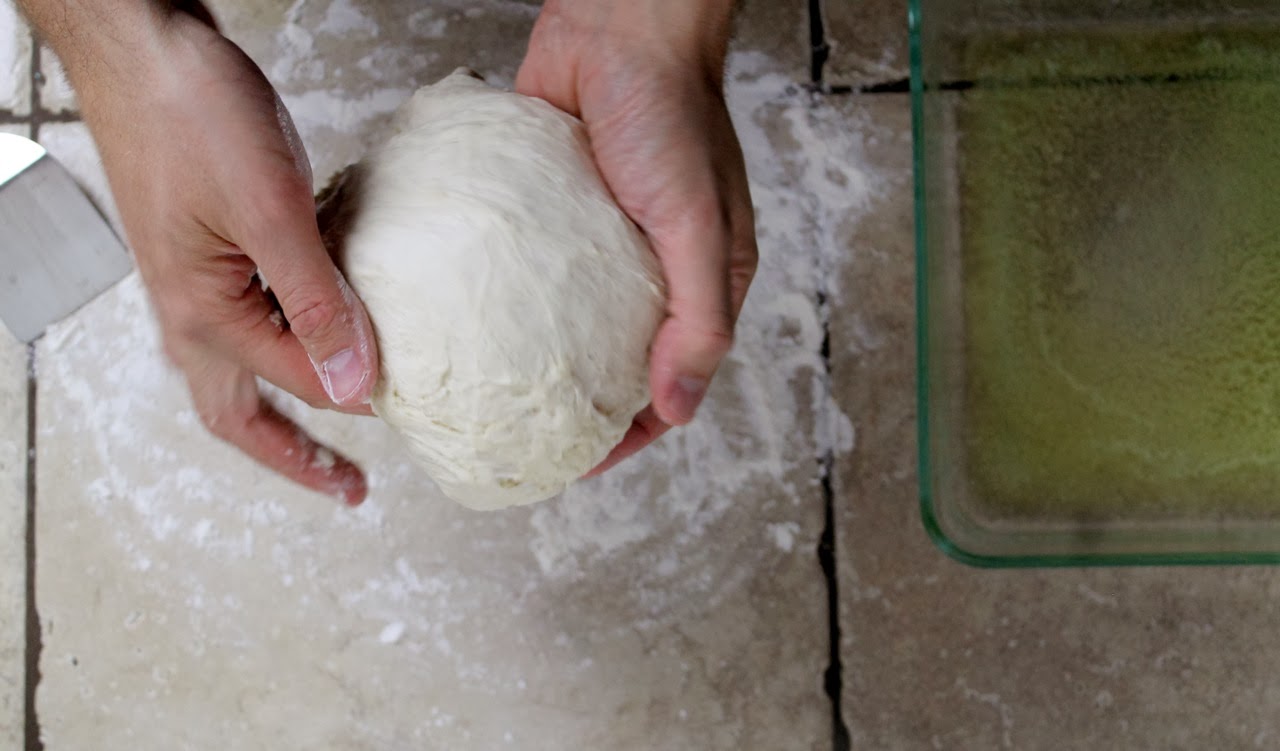
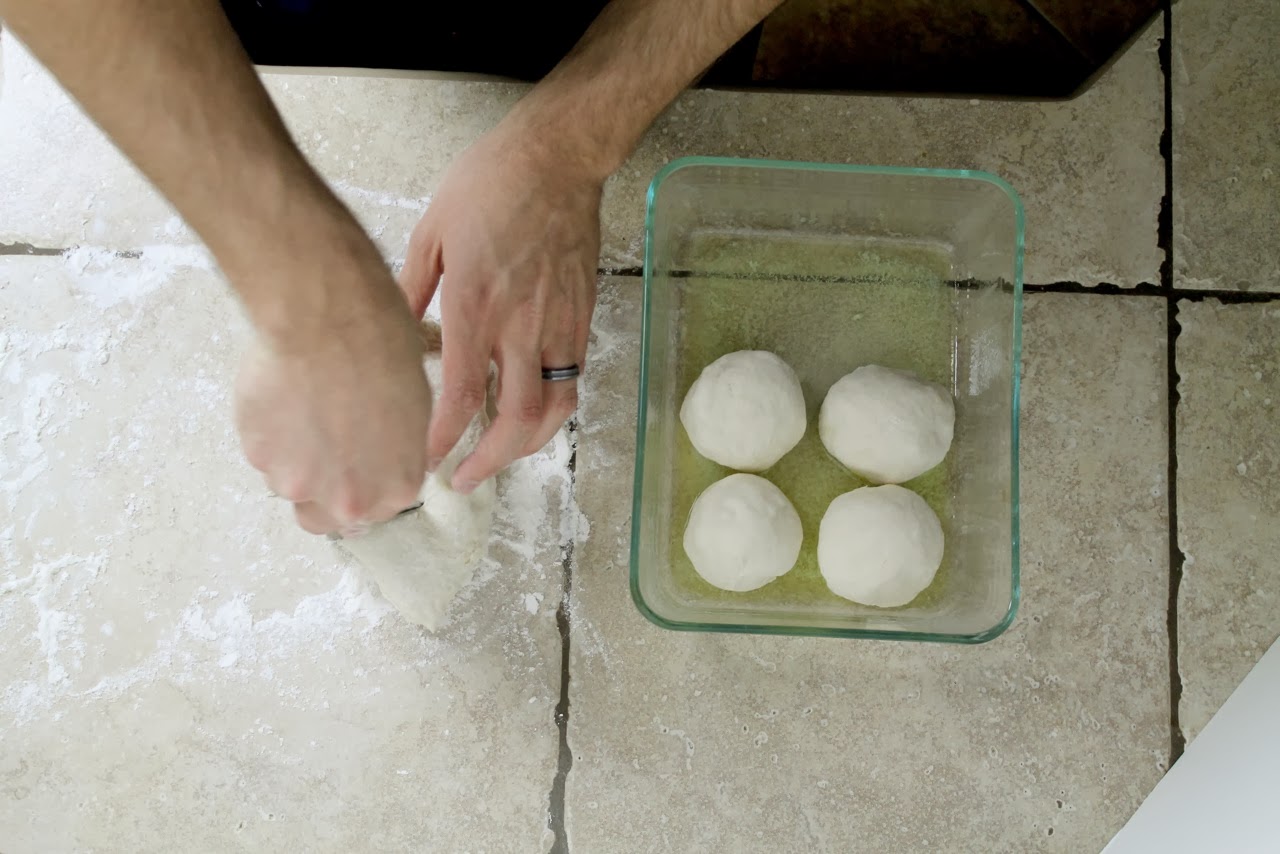
Sprinkle a little flour onto your counter and form the dough into a ball. You do this by pulling the dough from the front and tucking it in the bottom, like so:


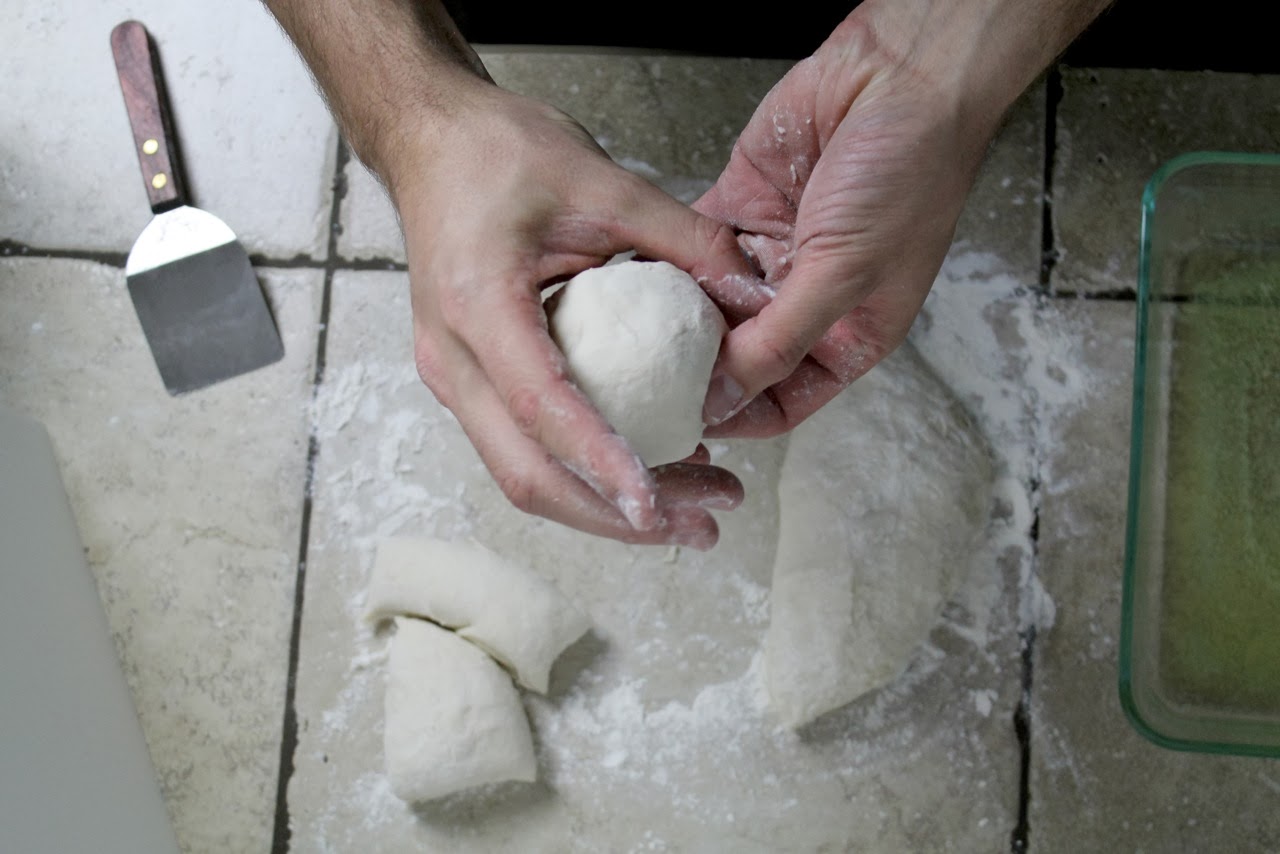
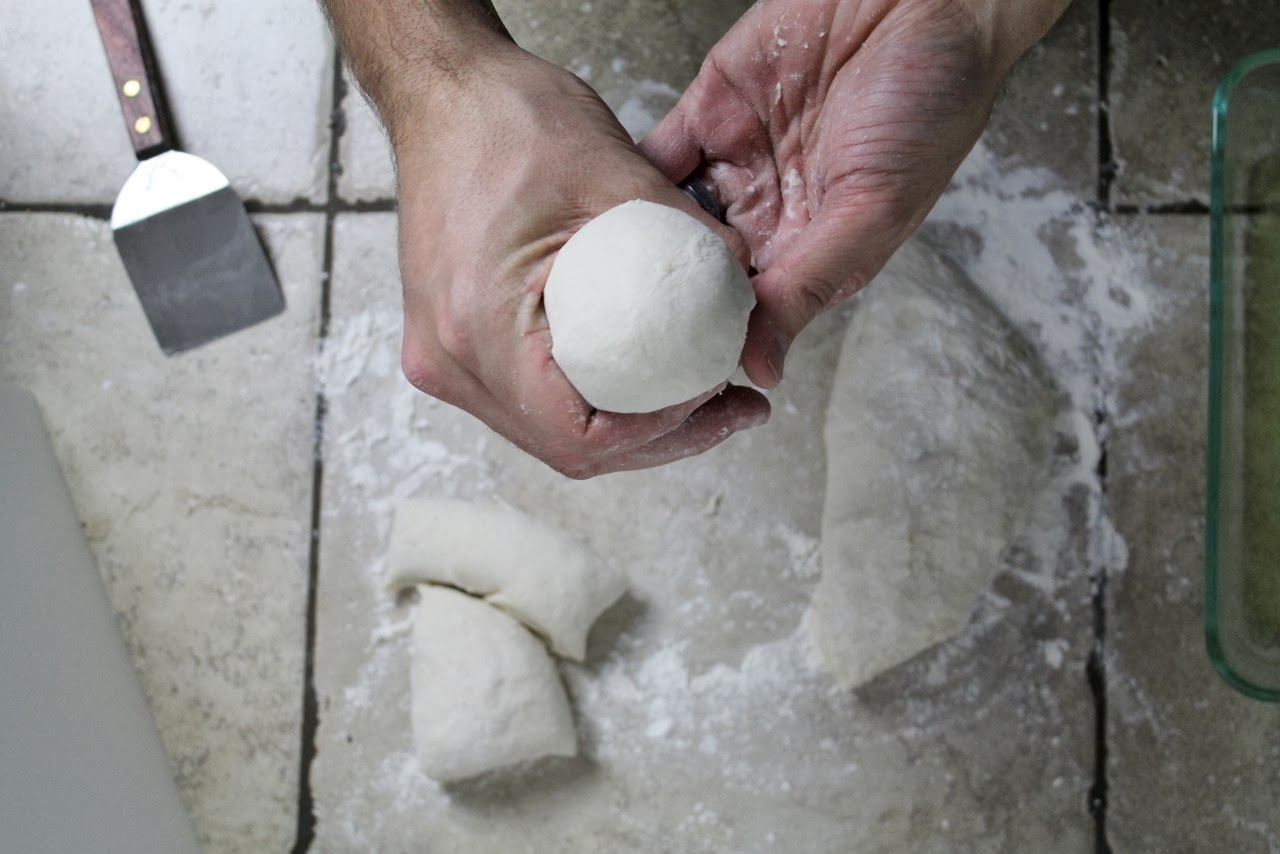
But the dough into 12 equal pieces and repeat the process with each individual piece. As you form each roll, set them into the pan on top of the butter and space them out a bit.
Using a sharp knife or kitchen shears, cut a slit in the top of the roll. Take a pastry brush and brush some of the butter in the bottom of your pan across the tops of the rolls. Doesn’t need to be a lot, just a bit. Then, sprinkle on your dried crushed herbs.


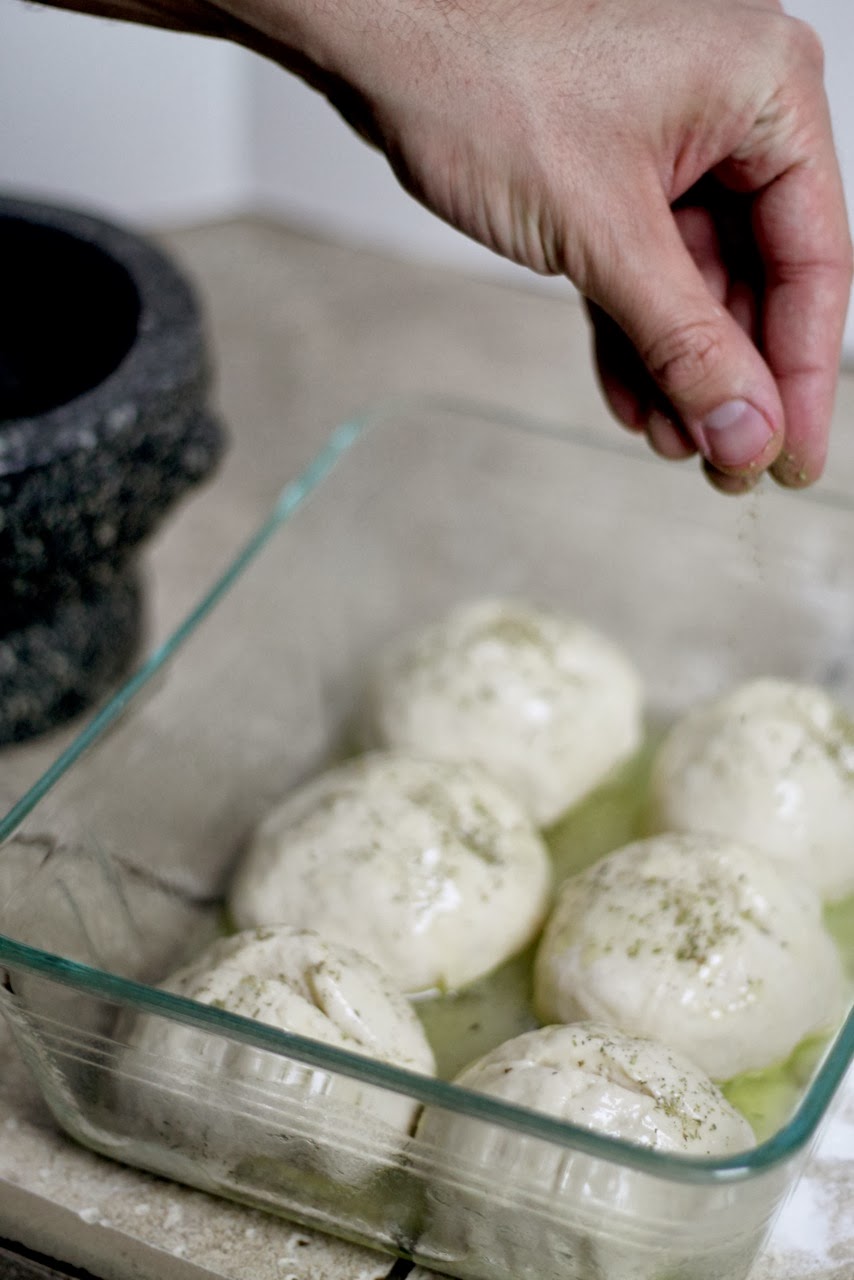
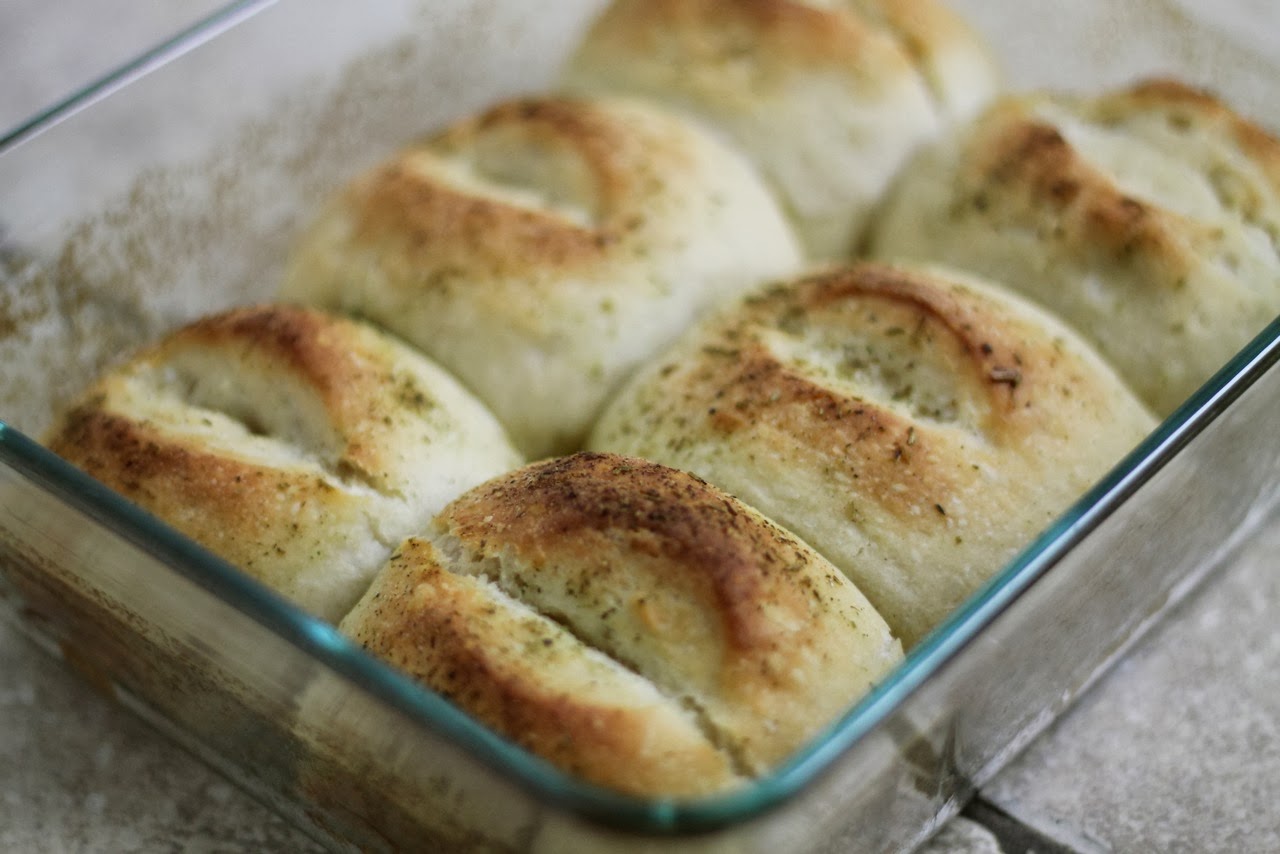
Cover the pan(s) loosely with plastic wrap and set in a warm place, again. While those are proofing (rising) again, turn your oven to 450 and set a broiler-safe pan on the bottom rack. Don’t use glass. Something metal. After about 30 minutes of resting and heating the oven, take the plastic wrap off the rolls and put them in the oven on the center rack. Pour a glass of water into the pan that’s been heating in the oven and close the door immediately. This creates steam and helps develop a good crust. The reason we use a metal pan is a glass pan could shatter upon adding the water. Not likely, but still possible, so we just avoid the possibility altogether.
Bake the rolls for about 25 minutes. Voila.
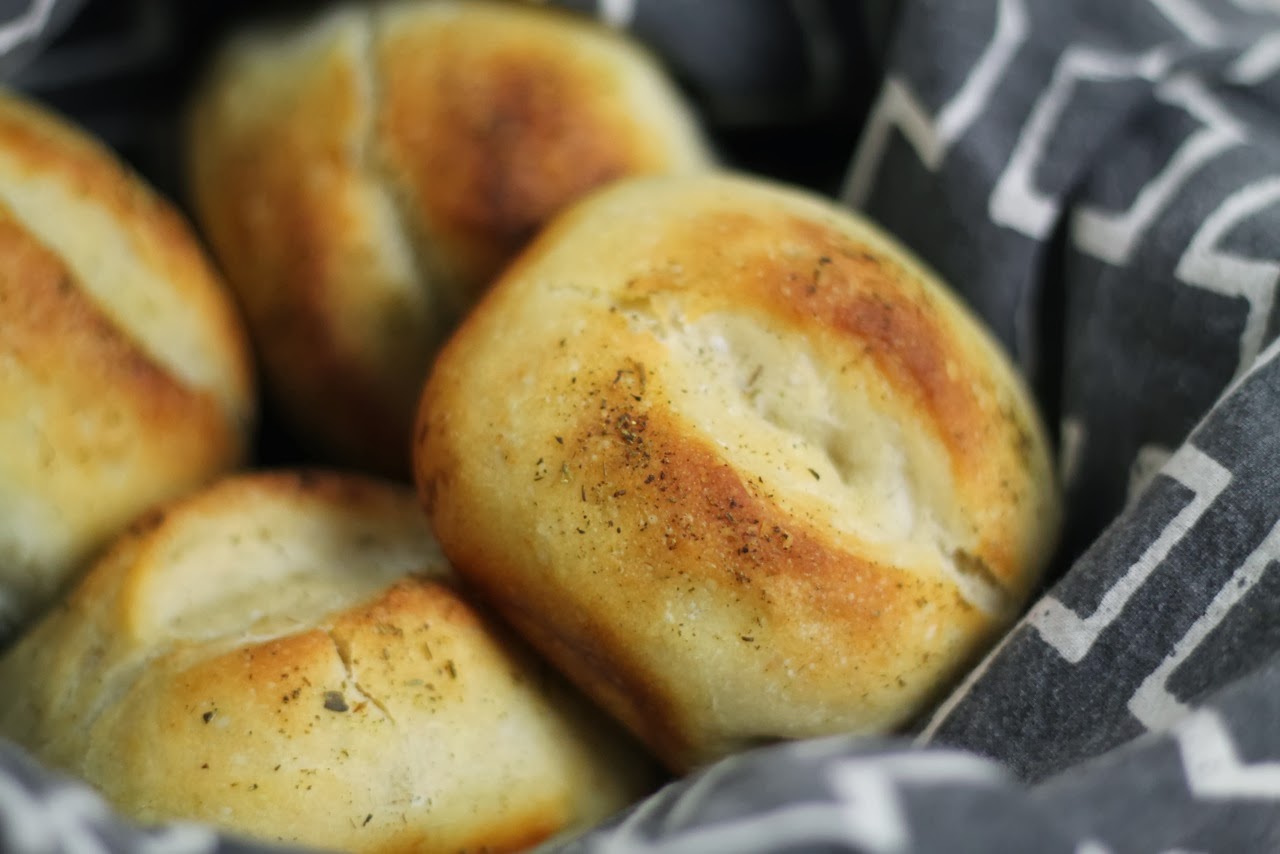
So there it is. Buttery, crusty rolls. It only takes about 10 minutes of active work, and they make very little mess. Heaven knows we could all use less mess in the kitchen on Thanksgiving.
Does your family have any special recipes? Or maybe you have something you’ve created that is now a “family thing”? I’d love to hear about it. My issues with the turkey this week set me back a day, so I’ll only be sharing 9 recipes as opposed to 10, but tomorrow’s will make up for the 1 missing. A fluffy pumpkin cheesecake. Super delicious. See ya then.
Links to all the posts in this series:
• Savory Cornbread Stuffing
• Scratch-Made Asparagus Casserole (my version of green bean casserole)
• Country-Style Herbed Mashed Potatoes
• Dijon Country Gravy Made with Turkey Drippings
• Homemade Cranberry Sauce Worth Serving
• Roasted Sweet Potatoes with Maple and Bacon Vinaigrette
• How to Roast the Perfect Turkey
• Buttery and Crusty Herb-Topped Dinner Rolls
• Light and Airy Pumpkin-Ricotta Cheesecake
• How to Make an Entire Thanksgiving Meal In One Oven
Leave a Reply
What do you think?


Semihandmade
Our wood grain Shaker cabinet fronts were designed for busy, high-traffic homes like ours. Clad with durable textured thermofoils, this line is compatible with Sektion, Akurum, Godmorgon, and Besta cabinets from IKEA. It's the perfect, practical way to add the warmth of wood to all the rooms of your home.
Collaborations
learn more

next
Loloi
We have teamed up with Loloi to create a line of rugs that are as affordable as they are beautiful. This collection houses a great mix of traditional and modern rugs, in cottage-y colorways, as well as vintage-inspired beauties that you’ll want to roll out in every room.
Collaborations
learn more

next
STUGA
We partnered with Stuga on a line of hardwood floors — The Ingrid is really livable, and the color is very neutral. It doesn’t lean warm or cool, it’s that just right in-between. We have really loved putting it everywhere in our house. It’s the best jumping-off point for design, no matter your interior style. In addition to being beautiful, Ingrid is really durable — we have three kids, and we always have a home construction project going on. Ingrid stands up to it all.
Collaborations
learn more

next


SHop all
What We're Right Now
What We're Right Now
Looking for our favorite things? A place to shop our home room by room, or just catch up on what Julia's wearing / loving right now? Browse the CLJ shop.
Loving


Portfolio


Design
Befores, afters, mood boards, plans, failures, wins. We’ve done a lot of projects, and they’re all here.
BROWSE BY CATEGORY
let's break this thing up
We have a long-standing relationship with DIY, and love rolling our sleeves up and making it happen.
Projects
Even when you don’t want to rip down a wall, you can make that space in your home better. Right now.
read more
read more
read more
02
01
03
looking for inspiration?
A reader recently asked me if I’m starting to fully embrace traditional style and whether we still consider our house to be a “modern Colonial” and why. It was a really great question and so timely — I had really just been thinking about my approach to this home and how my style has changed […]


SEARCH THE BLOG
We've been doing this since 2009 and we've posted a whopping 24145+ blog posts and counting. You might need a little help searching, huh?
looking for something?
find stuff like:
")
Can We Send You Our Love Letter?
Another way for us to stay in touch! Joining our weekly newsletter gives you access to exclusive content, never-before-seen photos, your questions answered, and our favorite DIYs. Sign up below!
Follow Along on Instagram
Welcome to our online community where we've posted home, DIY, style, renovations, and family since '09. Renovating our #cljmoderncottage in Idaho and headed for new adventures in Raleigh, NC. #cljfam #cljtransformations
@chrislovesjulia


Links
Get Around
Make yourself right at home
Portfolio
Design
Casual Friday
Projects
Lifestyle
Gift Guides
All Posts
Shop
Love where you live.
Social
RivrLinks
Links
Get Around
Make yourself right at home
Portfolio
Design
Casual Friday
Projects
Lifestyle
Gift Guides
All Posts
Shop
Love where you live.
Social
RivrLinks
i love all of your recipes! I’m hosting Thanksgiving for the first time and I’m so excited about a the cooking. That said, my brother in law is very allergic to dairy so I’m trying to make most recipes dairy free when possible. Any recommendations for a butter substitute in this recipe (I might make him a couple butter free on his own because it’s hard to imagine a roll without butter!)
Sorry Chandler, I’m just barely seeing this message. A bit late, my apologies. But for next time, since the butter is mainly for flavor, you could use some nonstick spray in the bottom and simply leave the top unbuttered. You may also try adding a pan of water in there to add some steam and develop more of a crust.
Hi Chris,
Thanks so much for taking the time to share all of your recipes! I’m looking forward to making a bunch of them on Thursday! I just want to clarify that it is 10 3/4 cups (and not 1 3/4) of flour? Thanks again!
Thanks Colleen. That’s Correct. -Chris
Does this really only make 12 rolls?
Hi Michelle! For the pictures in this post, I made a half batch, which yielded 6 rolls. But I suppose that would depend on how large you made them. I make mine a little on the larger side. You could probably get 16 out of a batch, if you divided the dough into smaller parts and let it proof longer the second time (to get more expansion out of them).
I hope this helps!
I’ve really enjoyed the recipes you’ve shared this week and really want to make some for the big day. But here’s my question… can you help me out with a “schedule” for how you would cook these things with one oven on Thanksgiving? Are there things you cook ahead and just reheat? Or do you have an order to the dishes that you actually cook the day of? I’d love any advice. Thanks!
Ah, that’s the big question right there. Out of the 9 recipes I shared, 6 of them require baking in the oven. Makes for quite the dance come Thanksgiving day. The easiest thing to do would be to pre make some of the things, like the asparagus casserole and the stuffing, and drop them off at the homes of other people who will be coming over for dinner to have them bake it. But that only works if you have local people coming over for dinner. If not, you can still do it, it’ll just take a bit of planning. Now that I think about it, I actually might write a quick post. Give me a bit and I’ll have an answer for ya in a full post, on the blog.
These look great – much like all of your recipes! What kind of crushed herbs did you use? was it a mix or did you make your own? Thanks!
Hi Christy! I used a mix of basil, parsley, oregano and rosemary. To keep it simple you could just use pre made Italian seasoning, or just choose the ones you like. I hope this helps!
This idea of posting Thanksgiving recipes…so awesome! I’m tempted to tell my mother in law I’ll take over this year! :) Thanks!
Love this series of posts!! I’d love to see more for Christmas, too!
Don’t you worry. I’m planning a Christmas Ham that will knock your socks off. :)
Homemade rolls are the best. I honestly think there’s no point to wasting time and calories on store bought rolls on Thanksgiving. Too much other yummy stuff.
Chris, you recipes always look delicious and you explain them in so much detail that anybody could do it. You remind me a little bit of Alton Brown when you explain why you need to do things, which is a good thing. Thank you for posting all these recipes on here.
Thanks Robin! I’m so glad you’re finding them useful. :)
Thanks for the recipe! Pinning!
shut up these look amazing! I’m gonna have to try this recipe.