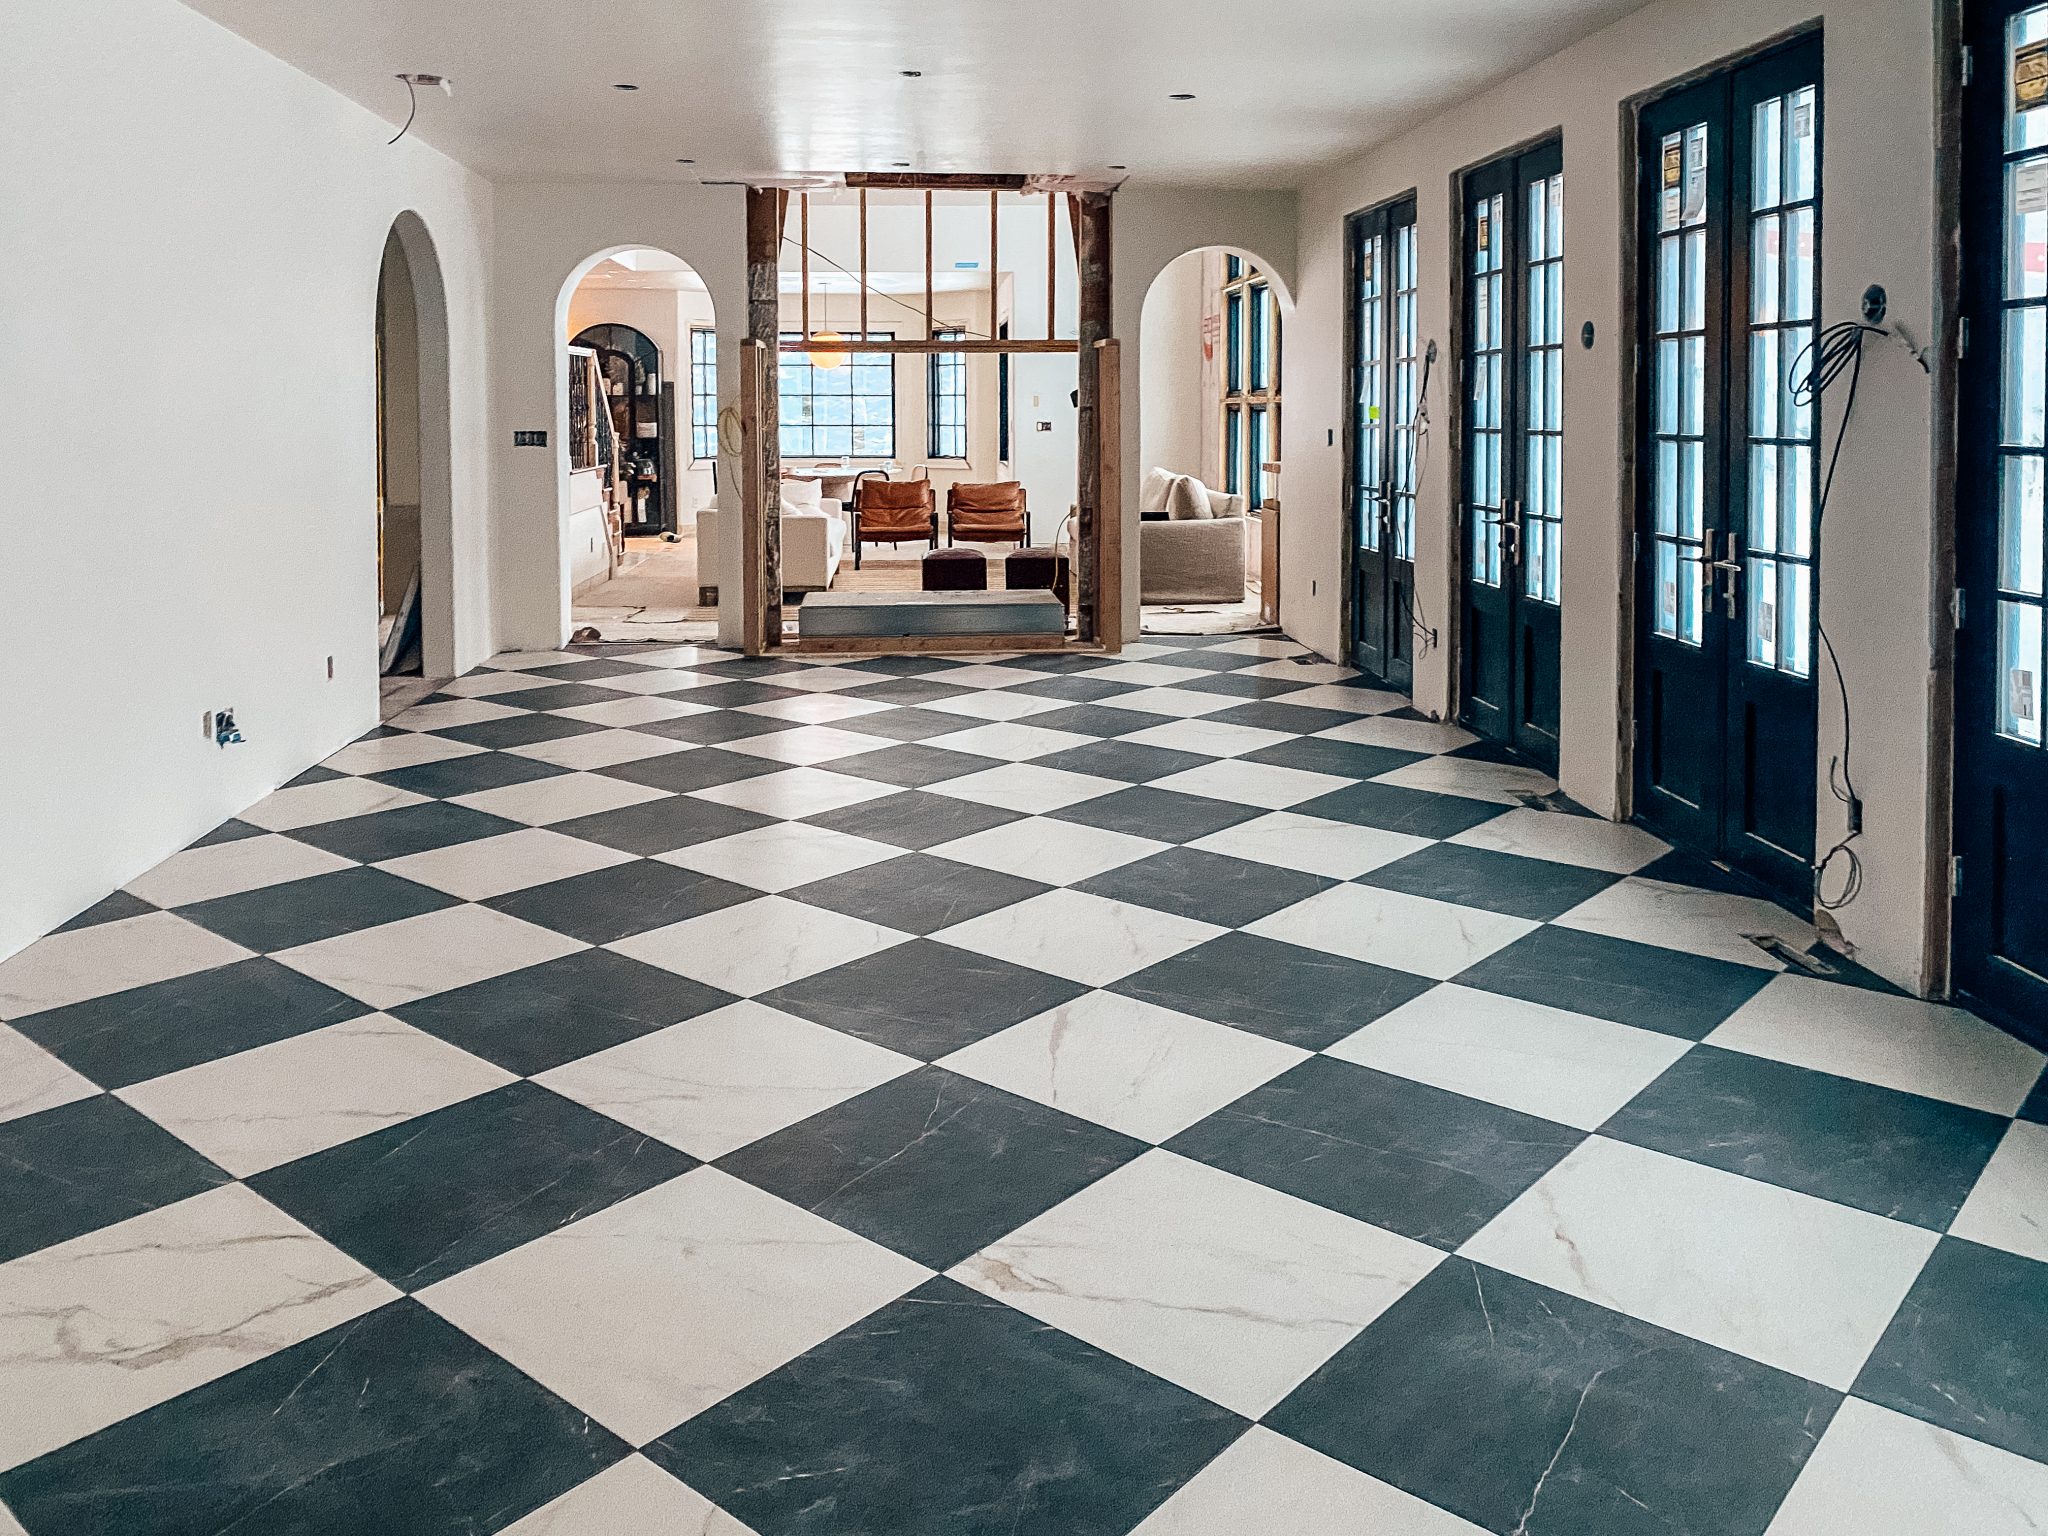
The dining room floors are done and we’re in love! We went with a checkerboard pattern on a diagonal using a more natural-looking stone (as opposed to a stark black and white), but they’re actually matte porcelain tile from Bedrosians! They are oozing with character and feel warm and bonus, are super durable. We originally introduced this idea with a slew of inspiration photos here, and it’s kind of surreal that ours are now in place.

These are the exact tiles we used from Bedrosians. This is the dark one (Nero) and this is the light one (Magnifica Calacatta Oro). I can barely believe that they are porcelain because they look SO much like the real thing.


The installation took about 3 days, plus 1 day of grouting, and we captured the whole, fascinating process in this fun video that’s a mix of time lapse and close ups and fun effects thrown in for good measure.

The last time we shared the dining room, the heated floors just got installed and self-leveling cement was poured. It cured over the weekend and they started laying the tile first thing Monday morning.

The very first thing they did is notable. They found the exact center of the room and placed the first tile there. At first I was like, hmph! interesting! But that quickly turned into awe as I realized the symmetry it created around the entire room. All the edges are identical and it makes me so happy.
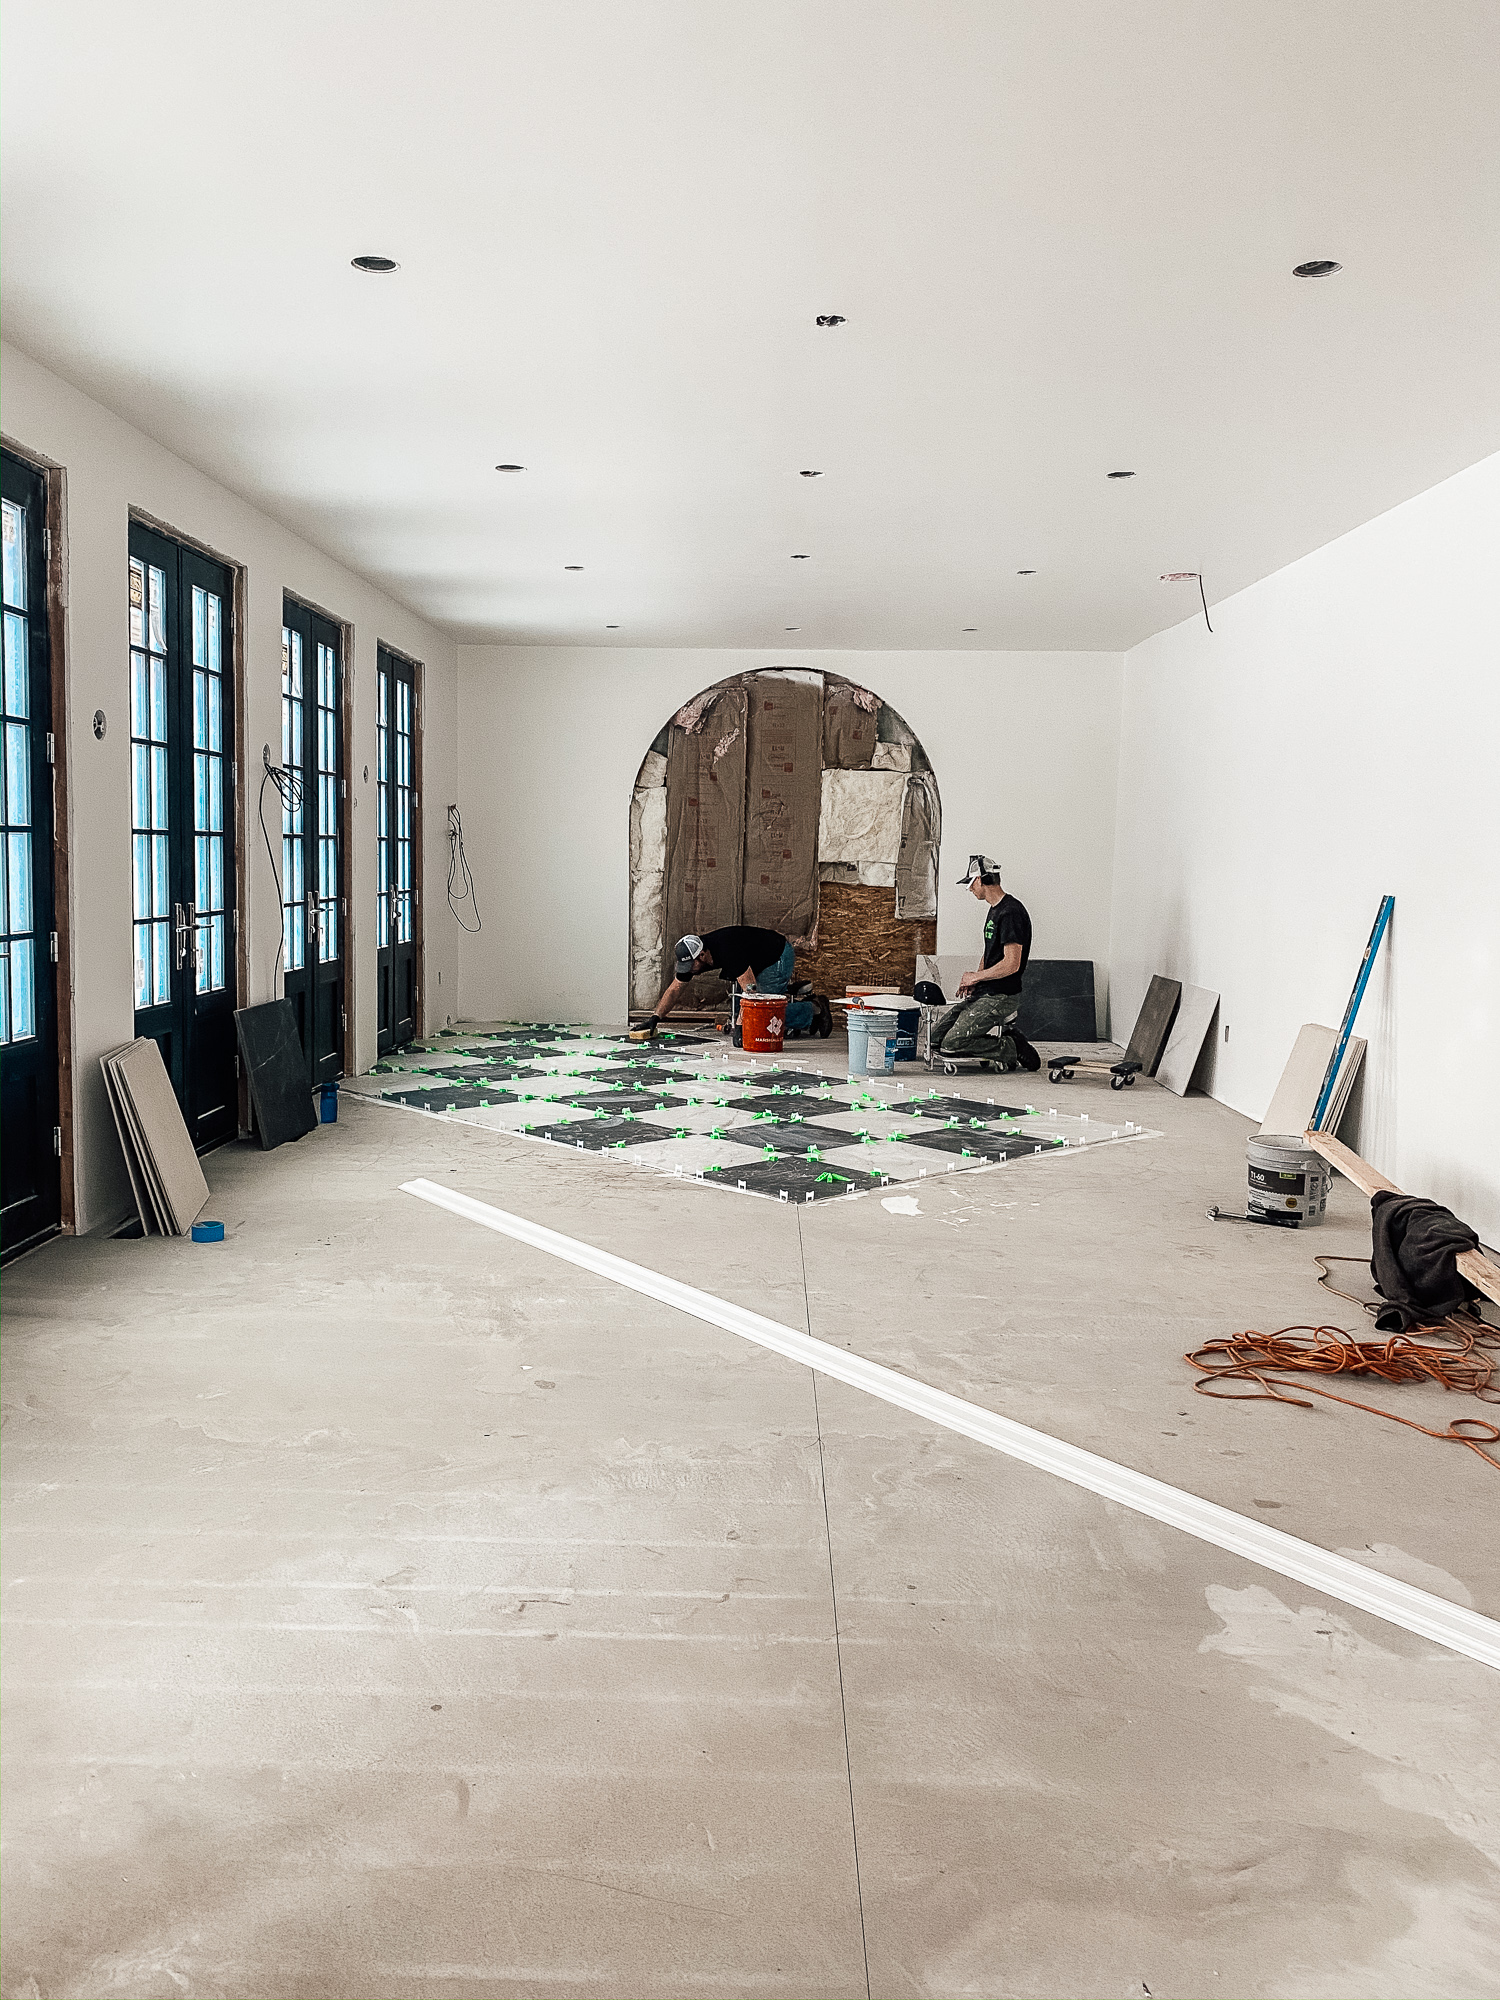
We went with 1/16″ leveling spacers (they ensure the whole floor stays level) that can get kicked off as soon as the floor sets. When they arrived the following day, they always kicked them off and started new.

I got the question a lot: Why tile only in the dining room? The funny thing is, I almost chickened out and extended our wood floors into this space, but then I remembered our reasons why. We really wanted this room to feel special and unique. This style of floors is so classic and I knew the room could take a show piece. There are also SIX doors from the outside leading into the dining room (5 french doors and 1 big arched door that will be at the end of the room) so we wanted it to be a really durable floor, too. And ultimately, it’s an entertaining space–so a beautiful, durable, classic floor that would serve as the backdrop for us, our friends and family for years to come was definitely the answer.
(Below is the room last fall so you can see the original arched door that will go back in and then below that is a progress photo from early last week)


Each tile is 24″x24″, but the lighter tile only came in a 30″ square so they cut down every one. We’ll be using the scraps elsewhere in our home. The happiest coincidence was definitely the way the black triangles hit the center of every door and wall. I asked our tile layers how they DID that. And he said, we found the center of the room, but that was luck! (I guess it wasn’t all luck–we found the center of the room when deciding where the doors went, too.)

We looked at 25 swatches of grout and picked the one that matched the darker tile perfectly. The grout lines are so small, it really disappears. The end result feels warm and classic. We’re dying to load in the furniture that’s stacked up all over the house (check out where we’re headed with that in this post), but we’re patiently waiting for the completion of the double sided fireplace and all the trim work this room is also getting.
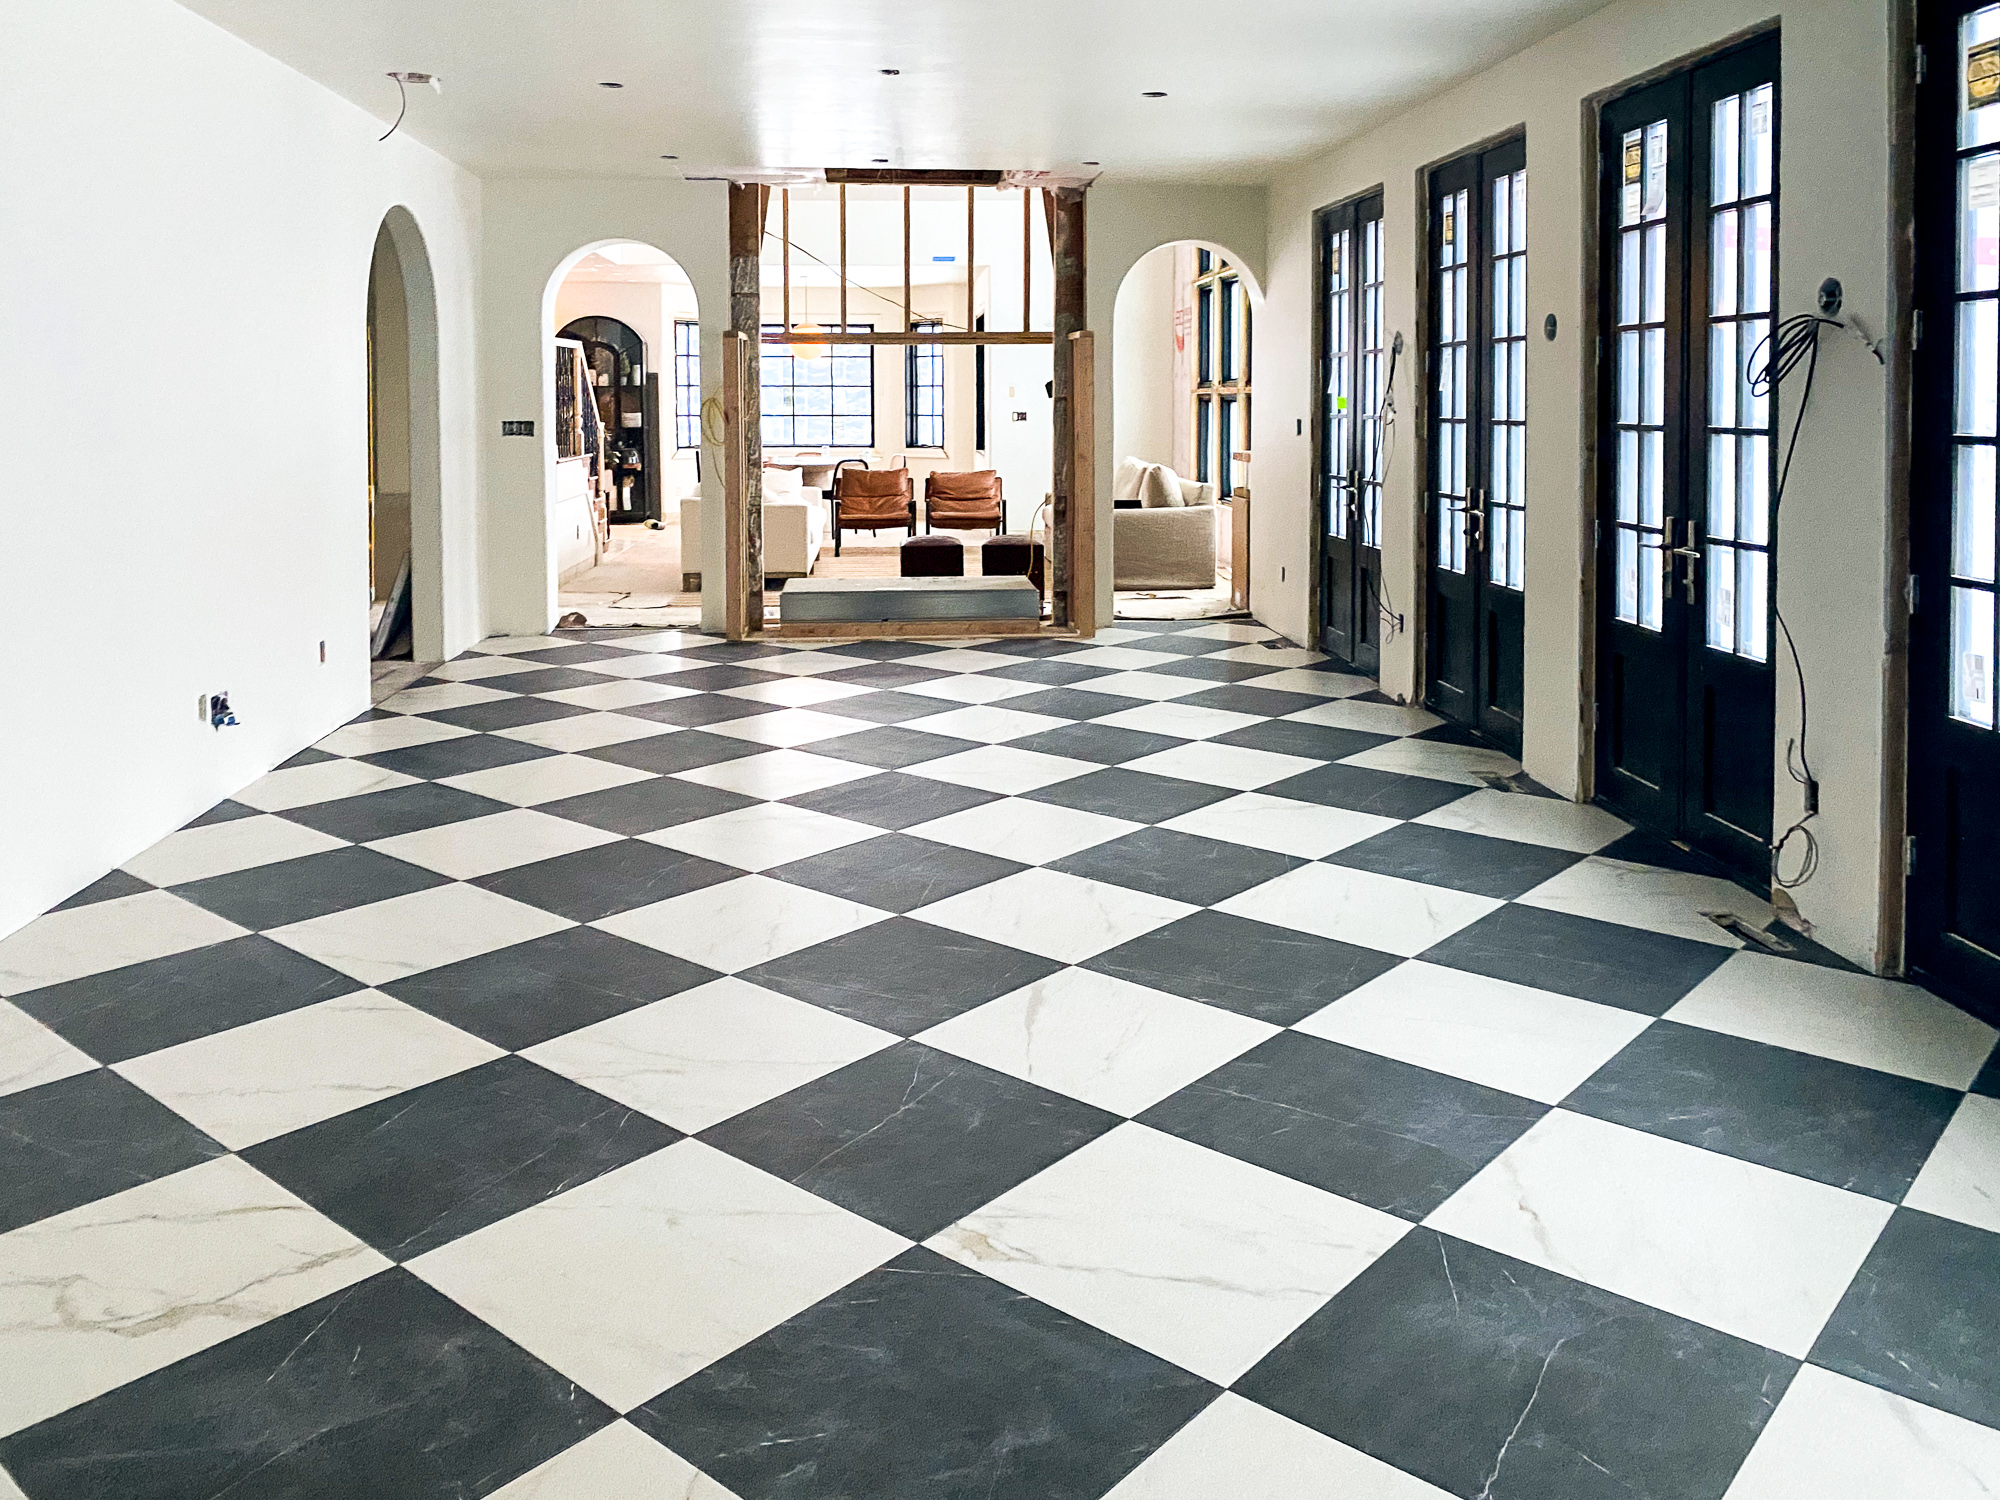

The fireplace is underway right now (should be nearly finished this week!) and I think that original arched door should be back in place sometime soon, too! This space was never a part of the house. It was an enclosed hot tub room when we bought the house, but now I can’t imagine our home without it. And yes, our first dinner party here will have formal invitations. :)


This is truly stunning! Love your style it looks so beautiful!
Do you know the color of the grout you used in the dining room?
I don’t recall specifically, but we matched the darker tile
Hi! I love your checked dining room. I’m trying to do the same but for my kitchen! Do you mind sharing with me the dimensions of the room you did the checkered tiles on? Thank you!
if one were to want to use these color combo in a kitchen what color cabinets would you go for?
OMG! This is GORGEOUS. I was just getting ready to order honed marble for our new additionwhen I came across this. WIthout a doubt just as beautiful and so much easier than marble. How were the edges when they cut down to 24×24? Did they have to do anything extra that you know of? My husband is just trying to gauge how much extra work it will take for him to mkae it all uniform.