


Last week we showed you our entry that got a little makeover, but is still very much in progress. We have baseboards to install, grout to fix, a light switch and doorbell to move, art to add above the hooks–but we’re getting there. And it really is a drastic change in a week’s time, both visually and the way it has been working for our family–wonderfully!
When we showed you the new space, there were a few concerns about the bench. Was it sturdy? Are you sure? Is it wide enough? And the one that really got us thinking, proposed that maybe the bench was not up to par with the fancy hooks we splurged on. Hmm. Sometimes you can see something isn’t working right away, sometimes it takes taking a picture and sometimes we post something here and it isn’t until you, our friends and readers, say something that we finally see it. That being said, we’re going back to the drawing board to design and make something a little more chic–maybe upholstered!–for the entry bench. Stay tuned for that.
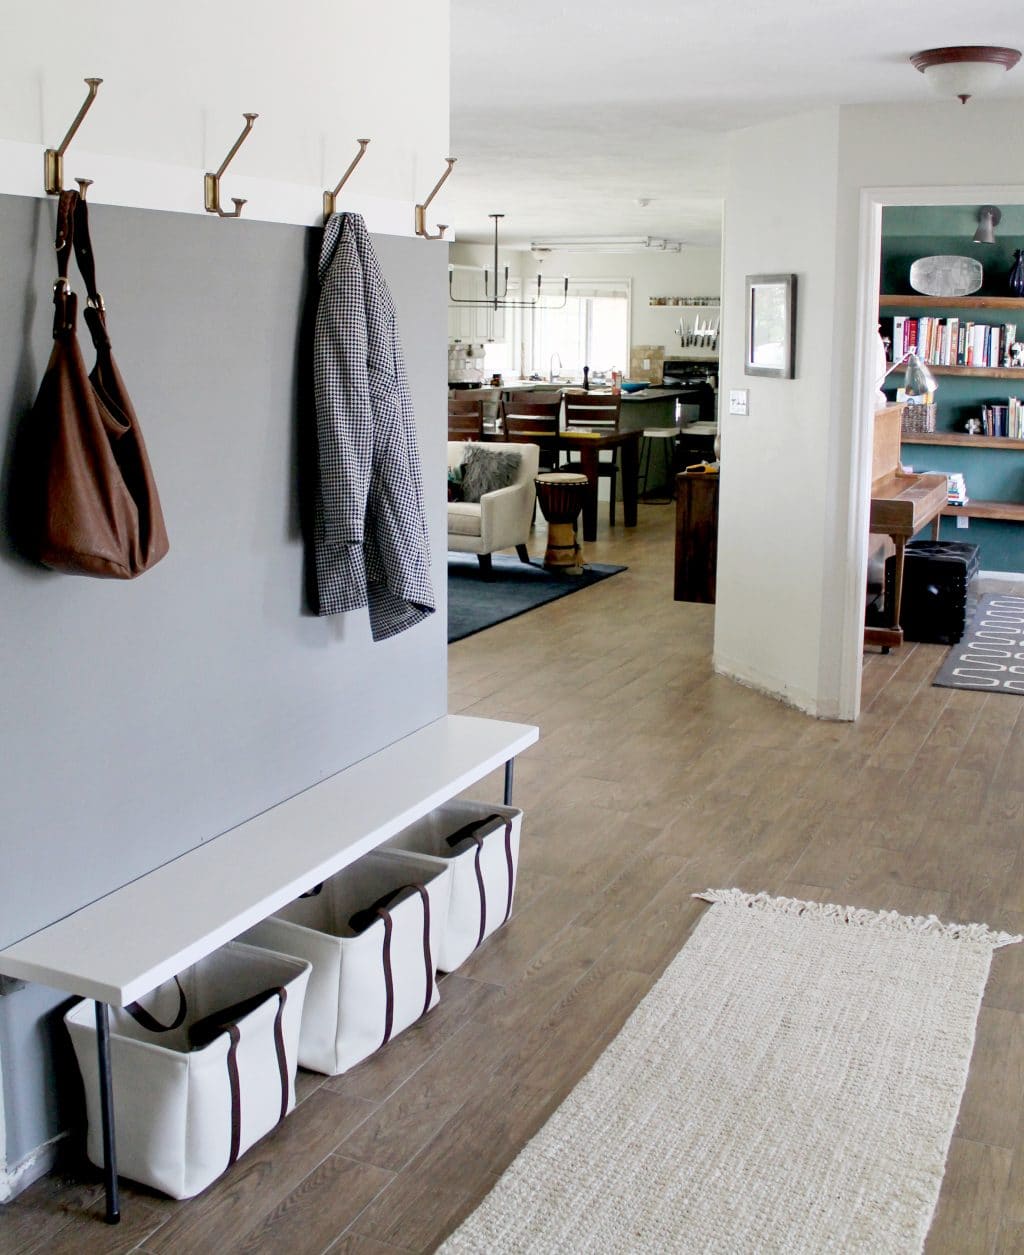
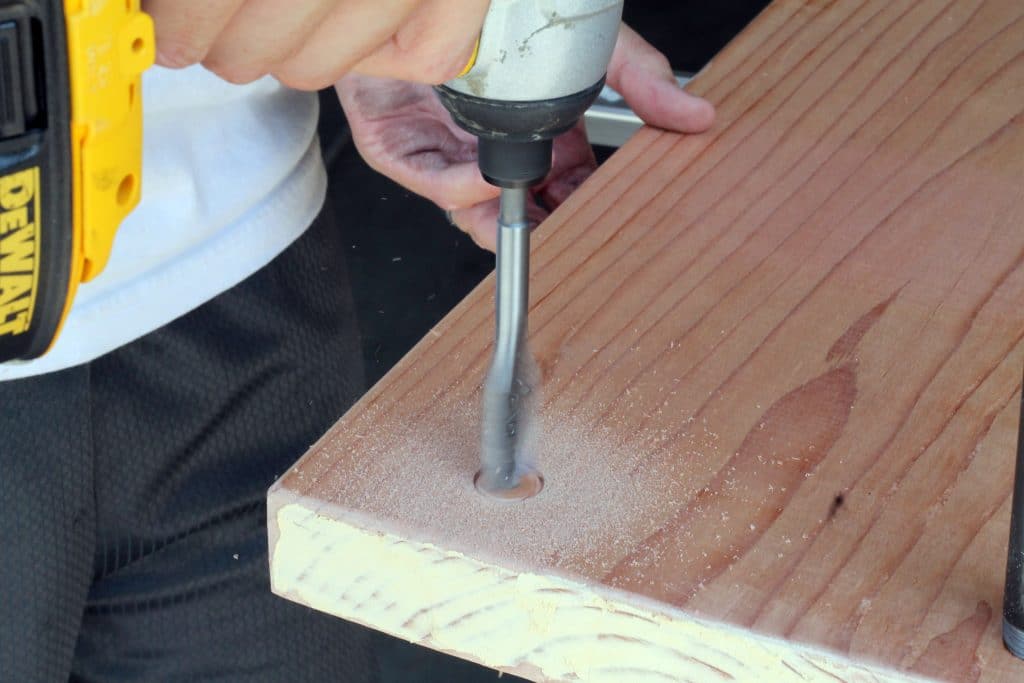
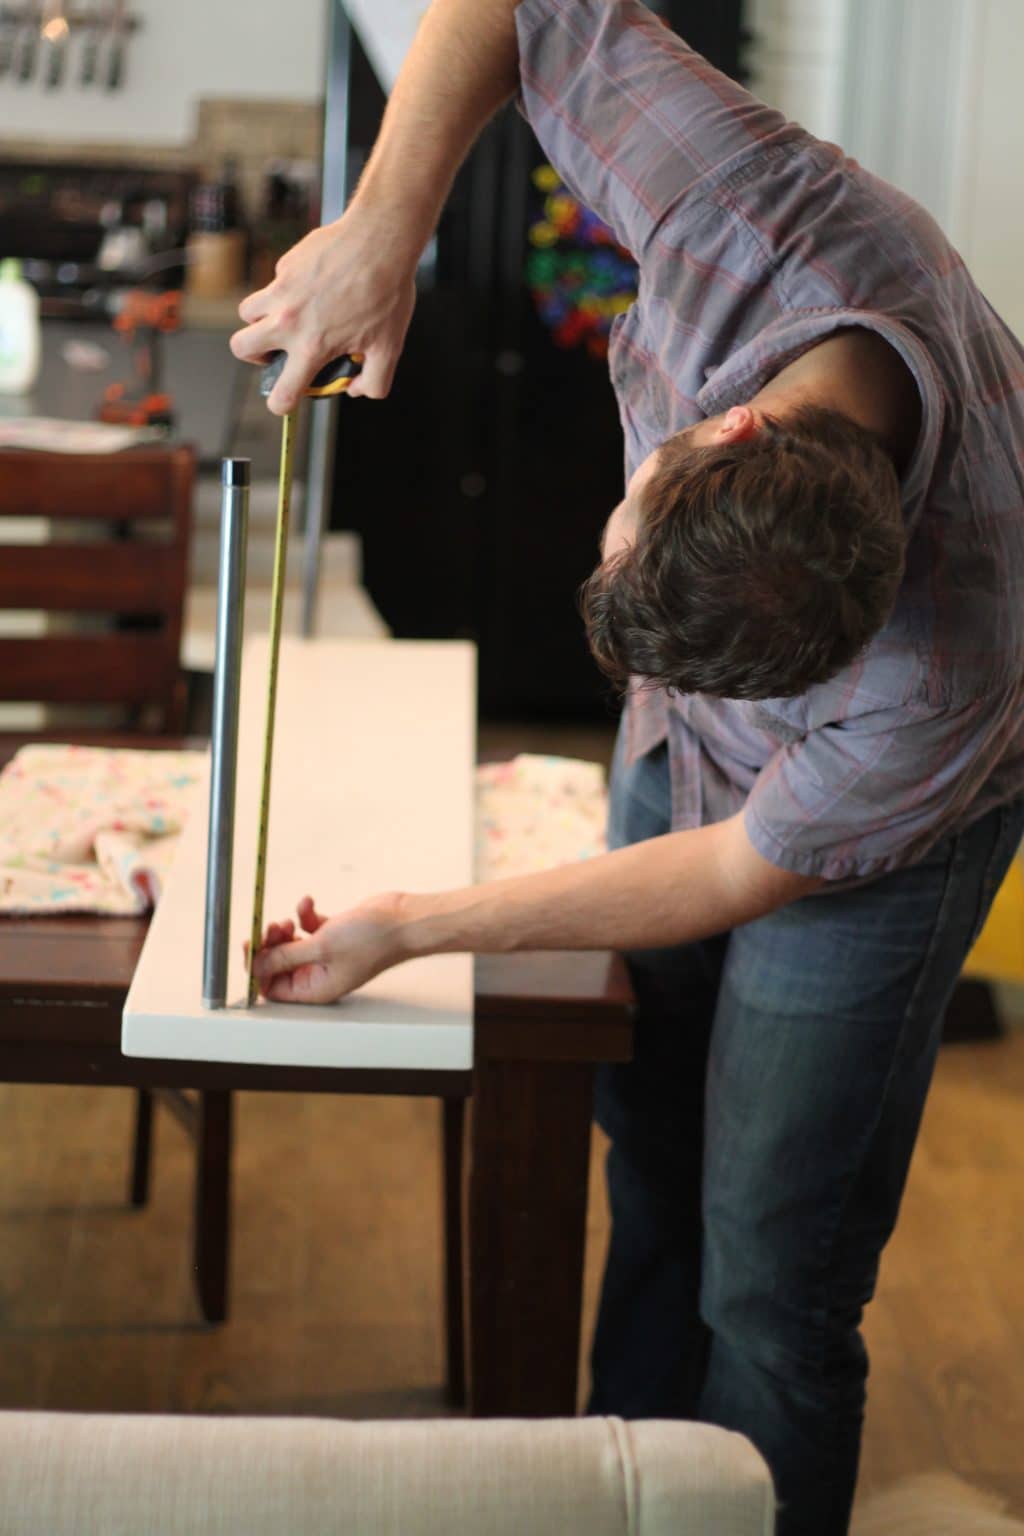
In the meantime, I did want to share with you how we made this bench because it was incredibly affordable at around just $30 to make and it’s super sturdy and slim. We went the DIY route so that we could make the bench the entire length of this wall and tall enough to be comfortable to sit on. The top is a solid piece of Redwood (2x12x69″–the length of the wall) that cost just under $20. The legs we found in the plumbing section.

They are steel and come in a lot of different sizes. We opted for the 18″ ones which are standard height of a chair which felt the most comfortable for us. With our wood and legs in tow, we went home and filled all the knots in the wood with wood filler, sanded it smooth and drilled the holes for the legs using a 3/4″ bit.
We only needed two legs because the back we attached to the studs in the wall but we’ll get there in a second.
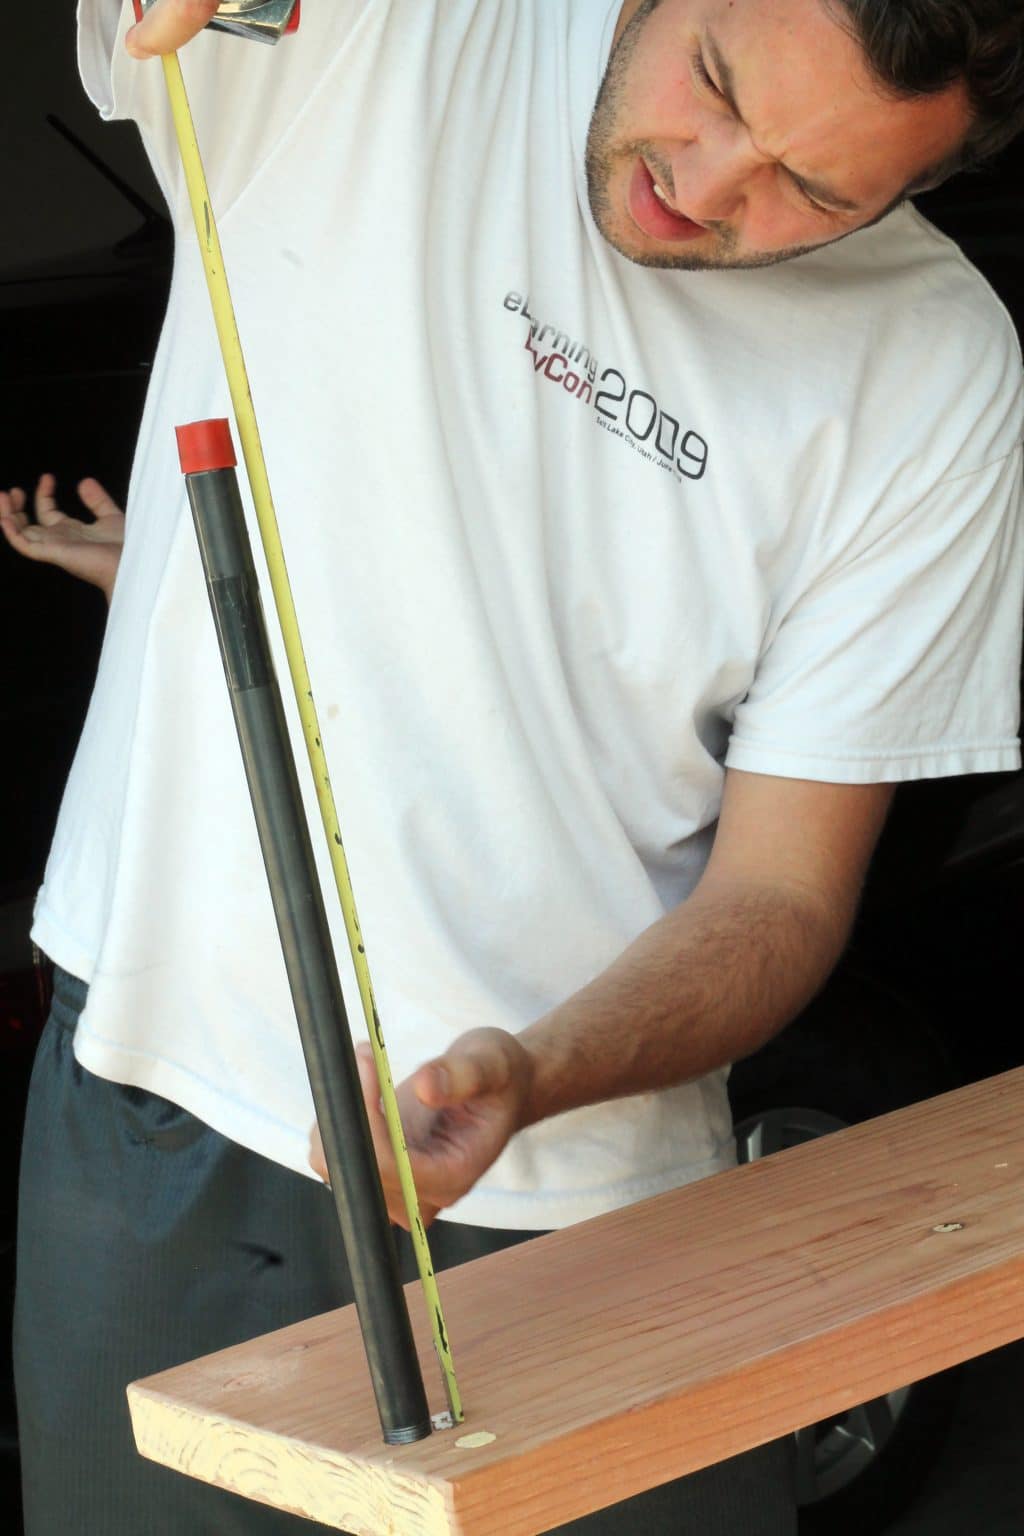
Once the legs were screwed in tightly, Chris measured the exact height (making sure both legs were the same) and got to work placing our wood for the back support into studs while I spray-painted the red caps on the legs black and primed and painted the Redwood white.

For the back support, Chris first measured the height of the legs on the wall and then found the studs so we could secure the wood to them.
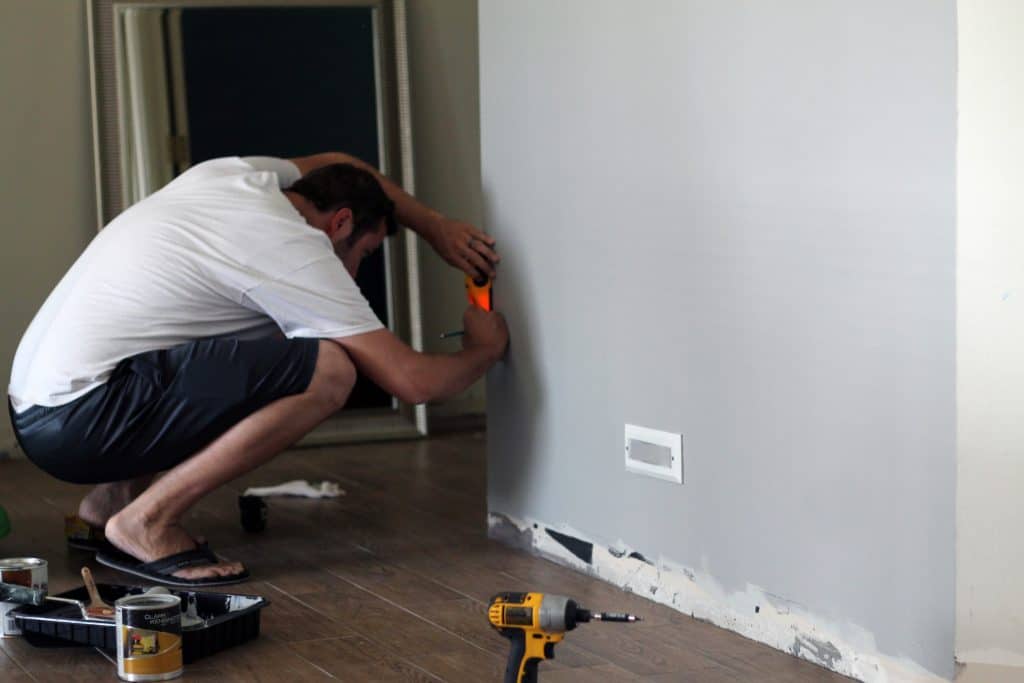
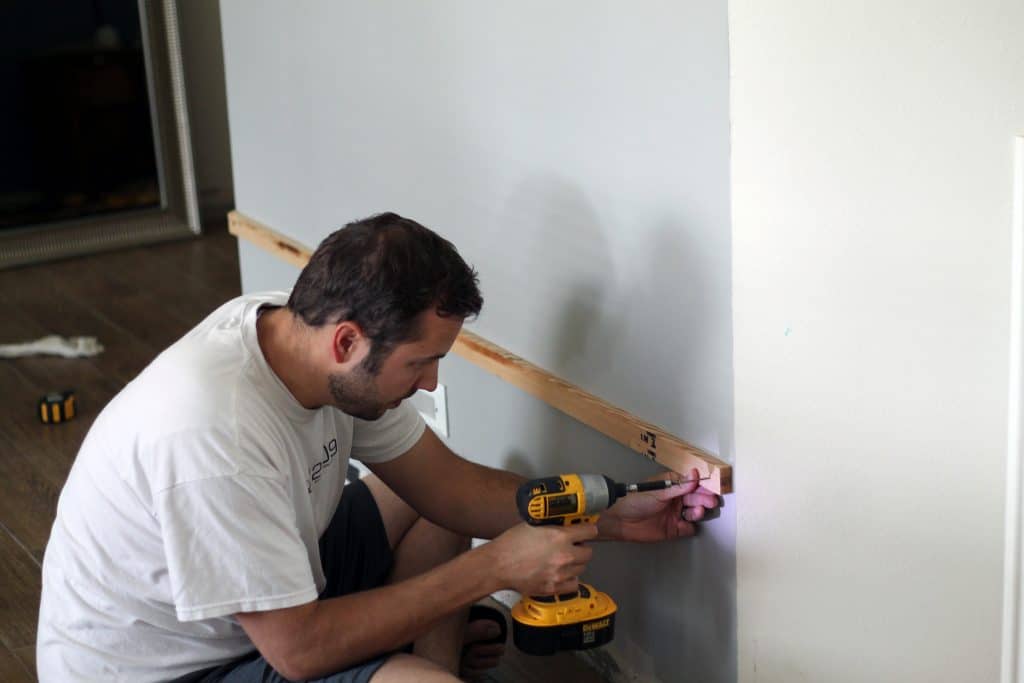
Once that was in place, I painted it the same color as the wall and Chris drilled pilot holes for our extra long screws we drove through the bottom of the board to the bench.
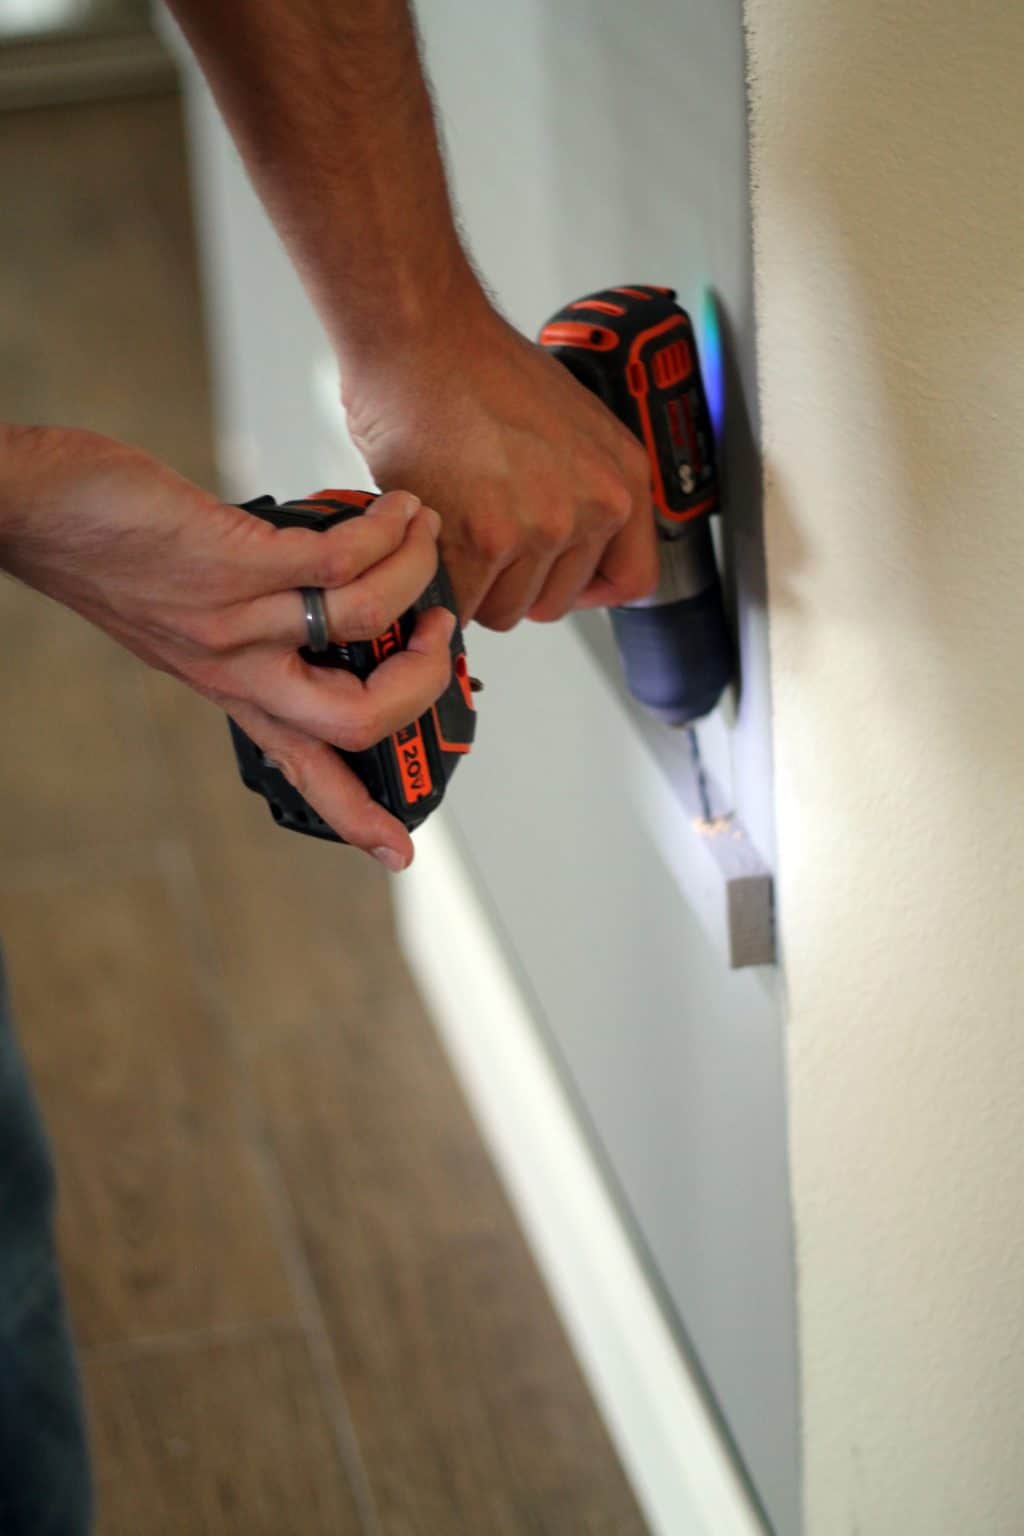
After the paint on the bench and caps had time to cure, we secured the legs back to the bench and the whole thing to the wall.

It really is a great little bench–and we love that it is the right height and the full length of the wall. Although we definitely see now it might be a little too casual for our front entry, for $30, we don’t feel too bad rewinding and trying again.
Leave a Reply
What do you think?


Semihandmade
Our wood grain Shaker cabinet fronts were designed for busy, high-traffic homes like ours. Clad with durable textured thermofoils, this line is compatible with Sektion, Akurum, Godmorgon, and Besta cabinets from IKEA. It's the perfect, practical way to add the warmth of wood to all the rooms of your home.
Collaborations
learn more

next
Loloi
We have teamed up with Loloi to create a line of rugs that are as affordable as they are beautiful. This collection houses a great mix of traditional and modern rugs, in cottage-y colorways, as well as vintage-inspired beauties that you’ll want to roll out in every room.
Collaborations
learn more

next
STUGA
We partnered with Stuga on a line of hardwood floors — The Ingrid is really livable, and the color is very neutral. It doesn’t lean warm or cool, it’s that just right in-between. We have really loved putting it everywhere in our house. It’s the best jumping-off point for design, no matter your interior style. In addition to being beautiful, Ingrid is really durable — we have three kids, and we always have a home construction project going on. Ingrid stands up to it all.
Collaborations
learn more

next


SHop all
What We're Right Now
What We're Right Now
Looking for our favorite things? A place to shop our home room by room, or just catch up on what Julia's wearing / loving right now? Browse the CLJ shop.
Loving


Portfolio


Design
Befores, afters, mood boards, plans, failures, wins. We’ve done a lot of projects, and they’re all here.
BROWSE BY CATEGORY
let's break this thing up
We have a long-standing relationship with DIY, and love rolling our sleeves up and making it happen.
Projects
Even when you don’t want to rip down a wall, you can make that space in your home better. Right now.
read more
read more
read more
02
01
03
looking for inspiration?
A reader recently asked me if I’m starting to fully embrace traditional style and whether we still consider our house to be a “modern Colonial” and why. It was a really great question and so timely — I had really just been thinking about my approach to this home and how my style has changed […]


SEARCH THE BLOG
We've been doing this since 2009 and we've posted a whopping 24145+ blog posts and counting. You might need a little help searching, huh?
looking for something?
find stuff like:
")
Can We Send You Our Love Letter?
Another way for us to stay in touch! Joining our weekly newsletter gives you access to exclusive content, never-before-seen photos, your questions answered, and our favorite DIYs. Sign up below!
Follow Along on Instagram
Welcome to our online community where we've posted home, DIY, style, renovations, and family since '09. Renovating our #cljmoderncottage in Idaho and headed for new adventures in Raleigh, NC. #cljfam #cljtransformations
@chrislovesjulia


Links
Get Around
Make yourself right at home
Portfolio
Design
Casual Friday
Projects
Lifestyle
Gift Guides
All Posts
Shop
Love where you live.
Social
RivrLinks
Links
Get Around
Make yourself right at home
Portfolio
Design
Casual Friday
Projects
Lifestyle
Gift Guides
All Posts
Shop
Love where you live.
Social
RivrLinks
Did you get that duvet yet?? I love it for myself too but I’m wondering how it feels/quality.
I love the overall look, the hooks are mwahhh! Soooo, I liked the bench until you said maybe it’s too small, too narrow… It may be cost prohibitive but what if you replaced the legs on the bench you had there before with something in the brass color. And then, make a slip covered top in a super fun fabric that uou can change with seasons or just because. Not sure if it would slide around on the leather though. Wouldn’t it be great if you could make some fabric on spoon flower from one of your paintings…swoon!
I like everything about it, but it looks too shallow. It’s the bins. If they didn’t stick out beyond the bench, the proportions probably would look fine. I agree that painting the legs to match the hooks would probably look great
But either deeper bench, or different bins.
When I saw your bench and your rug, and read you were rethinking the new bench, this bench came to mind from homemade-modern.com. It is awesome and has your style written all over it and wouldn’t be too far of a departure from what you have, but it definitely ties in more with the traditional modern vibe you like. Plus, a deeper wood stain would tie in nicely with your shelves in the piano room. I can’t attach a picture for some reason, but check out the link. It has the feel of an upholstered bench in a more modern way. Anyway, good luck on your barn door!
http://homemade-modern.com/ep28-wood-wool-bench/
I totally thought of the same bench from Homemade Modern! I actually didn’t mind the bench as-is until you posted this, Julia. I can see what you’re going for though :) excited to see the evolution!
i actually think the bench is a great starting point. maybe wood legs…upholstered cushion on top? but, i have a feeling you have something new and amazing planned!
I don’t know that I would want it as an entry bench, but it is very cute and sleek and seems like it would be perfect to go under a window and put plants on. The picture windows in our living room are only about 2 feet off the floor and so I didn’t know what to do with that wall, furniture-wise, and instead did nothing. But now I have an idea. Bench + Herb Garden + African Violets = Happy Mel. So thanks for the bench plans!
Well I seem to be one of the few but I LOVE the whole thing, bench included. I’m actually planning a similar setup. I do think a seat cushion would look good as well but don’t think it’s needed.
Whoa this post is exactly why I like your blog so much – I feel like no one ever genuinely admits it when they’ve done something a bit ‘meh’ and want to redo it better (and can take feedback without coming across as defensive or condescending). Kudos to you for being proud of the first try, explaining it with detail, but still going back to the drawing board.
I can’t wait to see what you come up with! Thrifty Decor Chick DIY’ed a bench/mudroom you might want to check out too…
Thanks again for sharing all of this – you’re one of my favorite blogs out there these days!
Best,
Jackie
Love what you’re thinking with blue velvet – that would look amazing with the nearby rug you have (which is so beautiful, did I mention how much I love your taste ;) ?)
http://thriftydecorchick.blogspot.com/2014/03/no-sew-bench-cushion.html
I actually don’t love that it doesn’t fit the length of the entire bench – but I love the finished look of the cushion itself and the fact that it doesn’t require a lot of sewing expertise or costly custom upholstering. Read as: something I could do.
This is her final post on how she constructed her bench itself in case you’re curious:
http://thriftydecorchick.blogspot.com/2014/01/mud-room-bench-done.html
Best,
Jackie
You’re so nice. Thank you!
I like the bench! I think it looks good, a bit of an industrial feel.
I actually really like the hard lines of the bench and wouldn’t go upholstered if I were you, but I do think it needs to be a little bit deeper. I think the 12″ is what is looking too small/dyish. I would keep everything the same except make it deeper, although I’m not sure how to do that securely.
Deeper definitely. And we’re thinking of doing an upholstered cushion on top of the bench instead of covering the whole thing with upholstery. Similar to the bench in the background of this photo from Emily Henderson http://stylebyemilyhenderson.com/wp-content/uploads/2014/08/IMG_4345.jpg
Katie-
If you figure out how to make it deeper PLEASE share! I am wanting to do one of these in our living room since we dont have an entry way and the scale with 12 inches would look super weird I think:
http://houseofbennetts.com/2014/04/14/livingroomofficegym/
Basically where the wood stool is by the door in the progress picture.
We have a plan we hope to implement in the next week or so. We are wrapping up our barn door this week, so after that. :)
Thanks! Now I’ll know what to look for.
You say you got the legs in the plumbing section. What are they, exactly? I’m hoping to find something just like this, but much longer, for a behind-the-sofa table we’re making.
Hmm. You can kind of see in the photo. I just know it was in the plumbing aisle. They had silver and black in a ton of different sizes.
They’re black iron pipe – it’s used for natural gas and is found with the galvanized steel pipe. Usually the black is a bit cheaper but make sure you clean it because it usually has some nasty residue on it. You can build all sorts of things with it but usually those red caps come off and you would put metal fittings on it (found in the same area, you just have to make sure your fittings are the same diameter as the pipe).
Thanks for chiming in, Heidi! And yes, I had to use Goo Gone and then soap and water to clean the pipes. Very grimy indeed.
I love this! I don’t think we could ever make a bench (lacking the tools) but I am seriously on the LOOK OUT to refinish one or a super discounted bench.
What about painting the legs of the bench- maybe gold/brass to play off the hooks?
I love that idea! Definitely something I wouldn’t mind doing for the new bench.