


Leave a Reply
What do you think?


Semihandmade
Our wood grain Shaker cabinet fronts were designed for busy, high-traffic homes like ours. Clad with durable textured thermofoils, this line is compatible with Sektion, Akurum, Godmorgon, and Besta cabinets from IKEA. It's the perfect, practical way to add the warmth of wood to all the rooms of your home.
Collaborations
learn more

next
Loloi
We have teamed up with Loloi to create a line of rugs that are as affordable as they are beautiful. This collection houses a great mix of traditional and modern rugs, in cottage-y colorways, as well as vintage-inspired beauties that you’ll want to roll out in every room.
Collaborations
learn more

next
STUGA
We partnered with Stuga on a line of hardwood floors — The Ingrid is really livable, and the color is very neutral. It doesn’t lean warm or cool, it’s that just right in-between. We have really loved putting it everywhere in our house. It’s the best jumping-off point for design, no matter your interior style. In addition to being beautiful, Ingrid is really durable — we have three kids, and we always have a home construction project going on. Ingrid stands up to it all.
Collaborations
learn more

next
SHop all
What We're Right Now
What We're Right Now
Looking for our favorite things? A place to shop our home room by room, or just catch up on what Julia's wearing / loving right now? Browse the CLJ shop.
Loving


Portfolio


Design
Befores, afters, mood boards, plans, failures, wins. We’ve done a lot of projects, and they’re all here.
BROWSE BY CATEGORY
let's break this thing up
We have a long-standing relationship with DIY, and love rolling our sleeves up and making it happen.
Projects
Even when you don’t want to rip down a wall, you can make that space in your home better. Right now.
read more
read more
read more
02
01
03
looking for inspiration?
A reader recently asked me if I’m starting to fully embrace traditional style and whether we still consider our house to be a “modern Colonial” and why. It was a really great question and so timely — I had really just been thinking about my approach to this home and how my style has changed […]


SEARCH THE BLOG
We've been doing this since 2009 and we've posted a whopping 24145+ blog posts and counting. You might need a little help searching, huh?
looking for something?
find stuff like:
")
Can We Send You Our Love Letter?
Another way for us to stay in touch! Joining our weekly newsletter gives you access to exclusive content, never-before-seen photos, your questions answered, and our favorite DIYs. Sign up below!
Follow Along on Instagram
Welcome to our online community where we've posted home, DIY, style, renovations, and family since '09. Renovating our #cljmoderncottage in Idaho and headed for new adventures in Raleigh, NC. #cljfam #cljtransformations
@chrislovesjulia


Links
Get Around
Make yourself right at home
Portfolio
Design
Casual Friday
Projects
Lifestyle
Gift Guides
All Posts
Shop
Love where you live.
Social
RivrLinks
Links
Get Around
Make yourself right at home
Portfolio
Design
Casual Friday
Projects
Lifestyle
Gift Guides
All Posts
Shop
Love where you live.
Social
RivrLinks
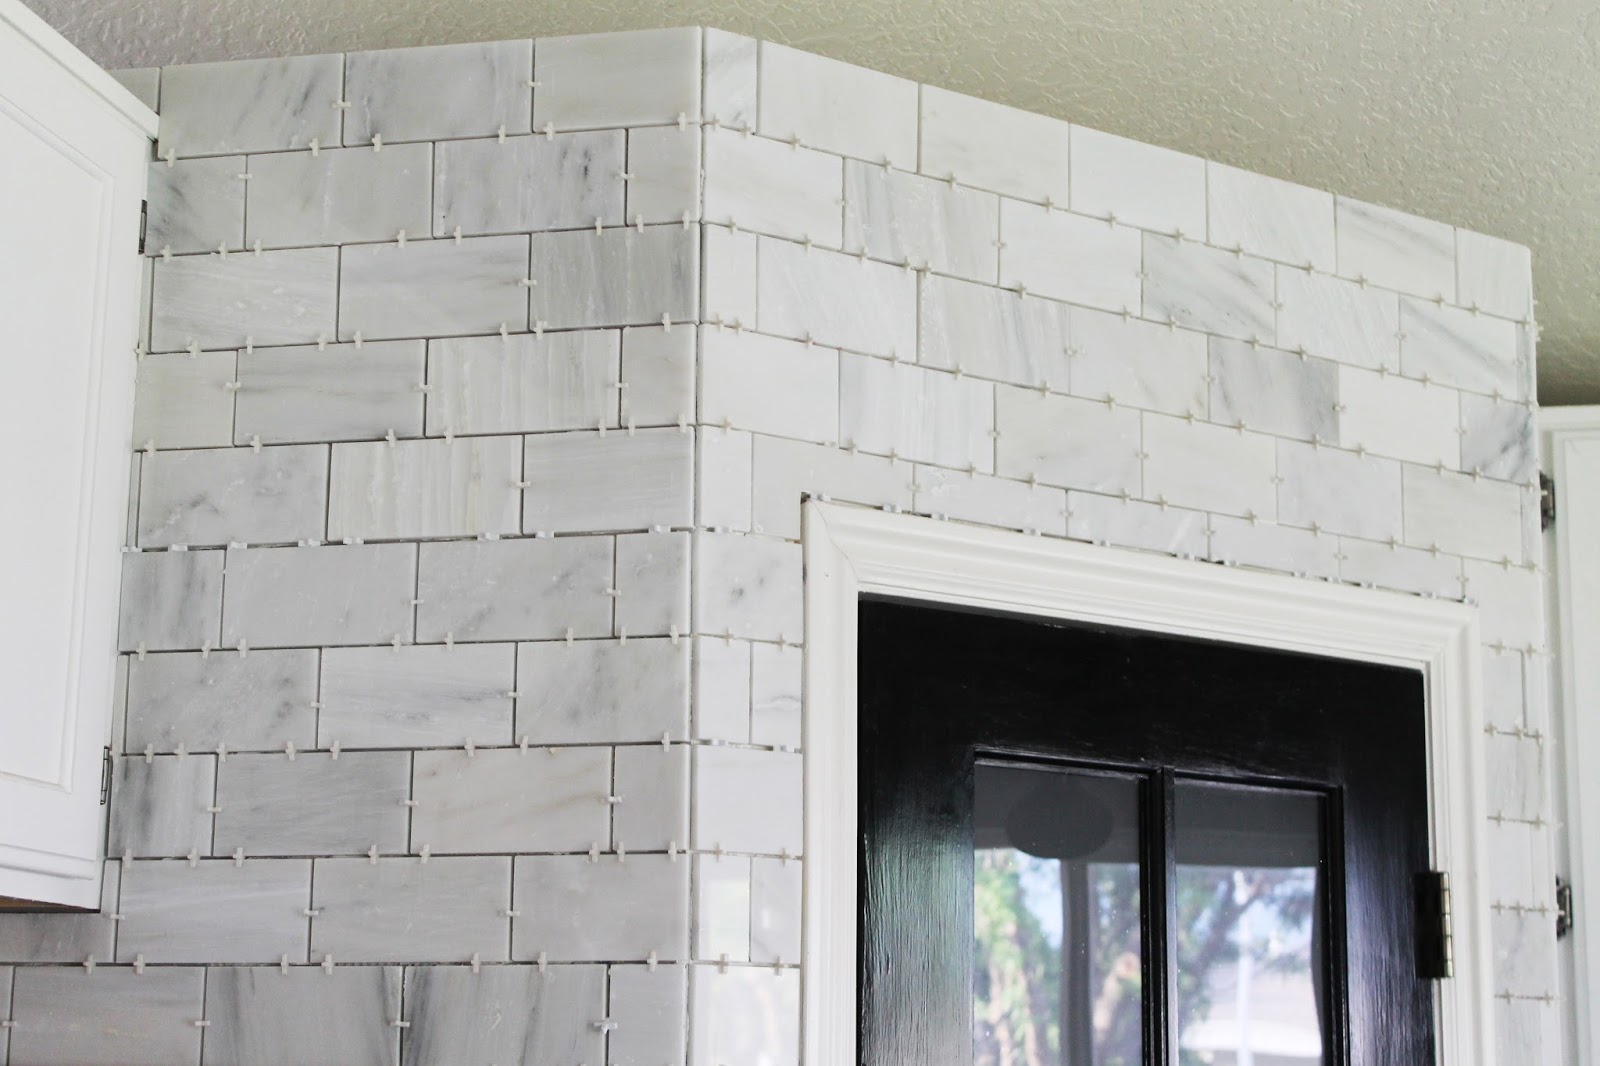
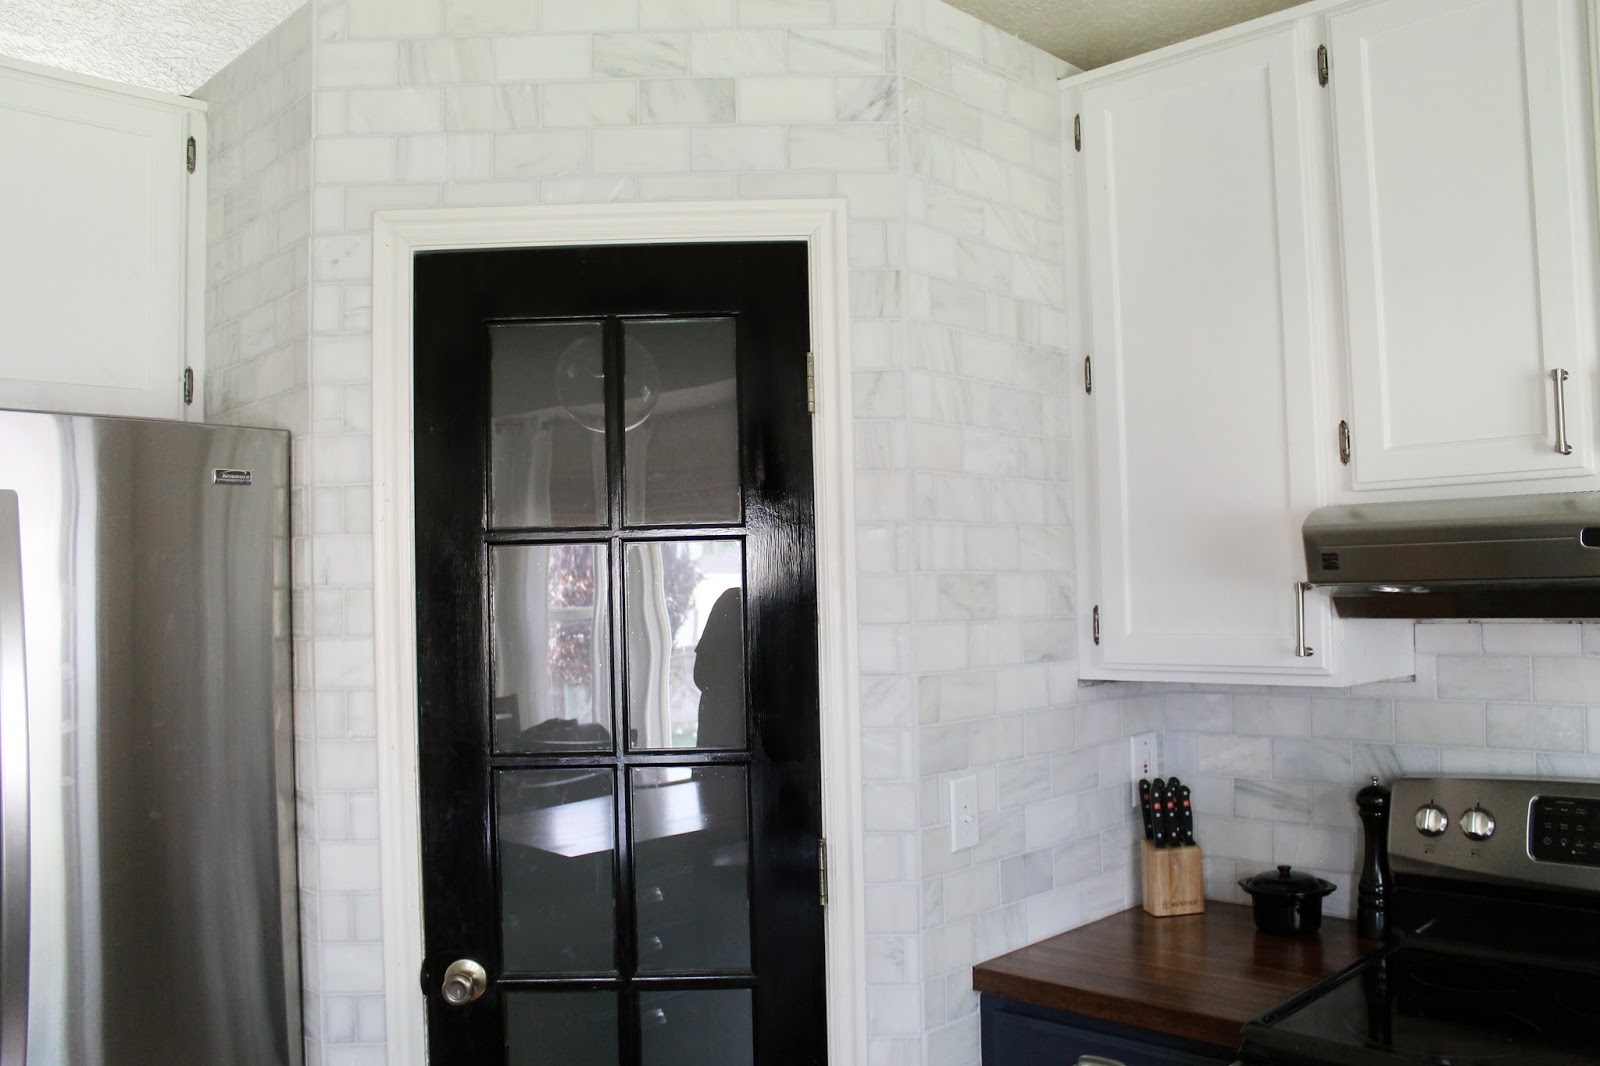
Why did you not miter the corners on each side fo the door? Just wondering.
[…] CARRARA MARBLE: via Chrislovesjulia […]
[…] That Hampton Carrara Marble Backsplash Done zo Chris Loves Julia source […]
[…] That Hampton Carrara Marble Backsplash Done zo Chris Loves Julia source […]
such a lovely blog
Custom Essays
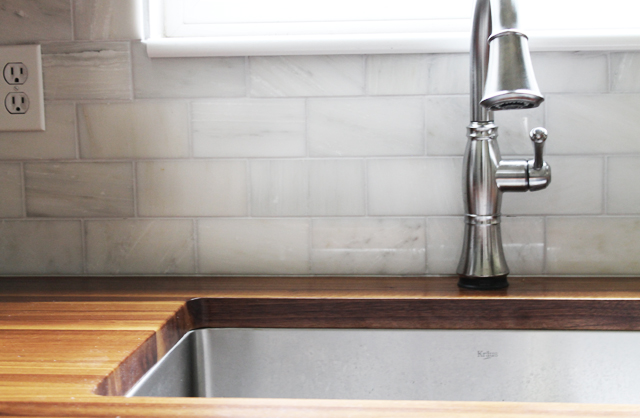
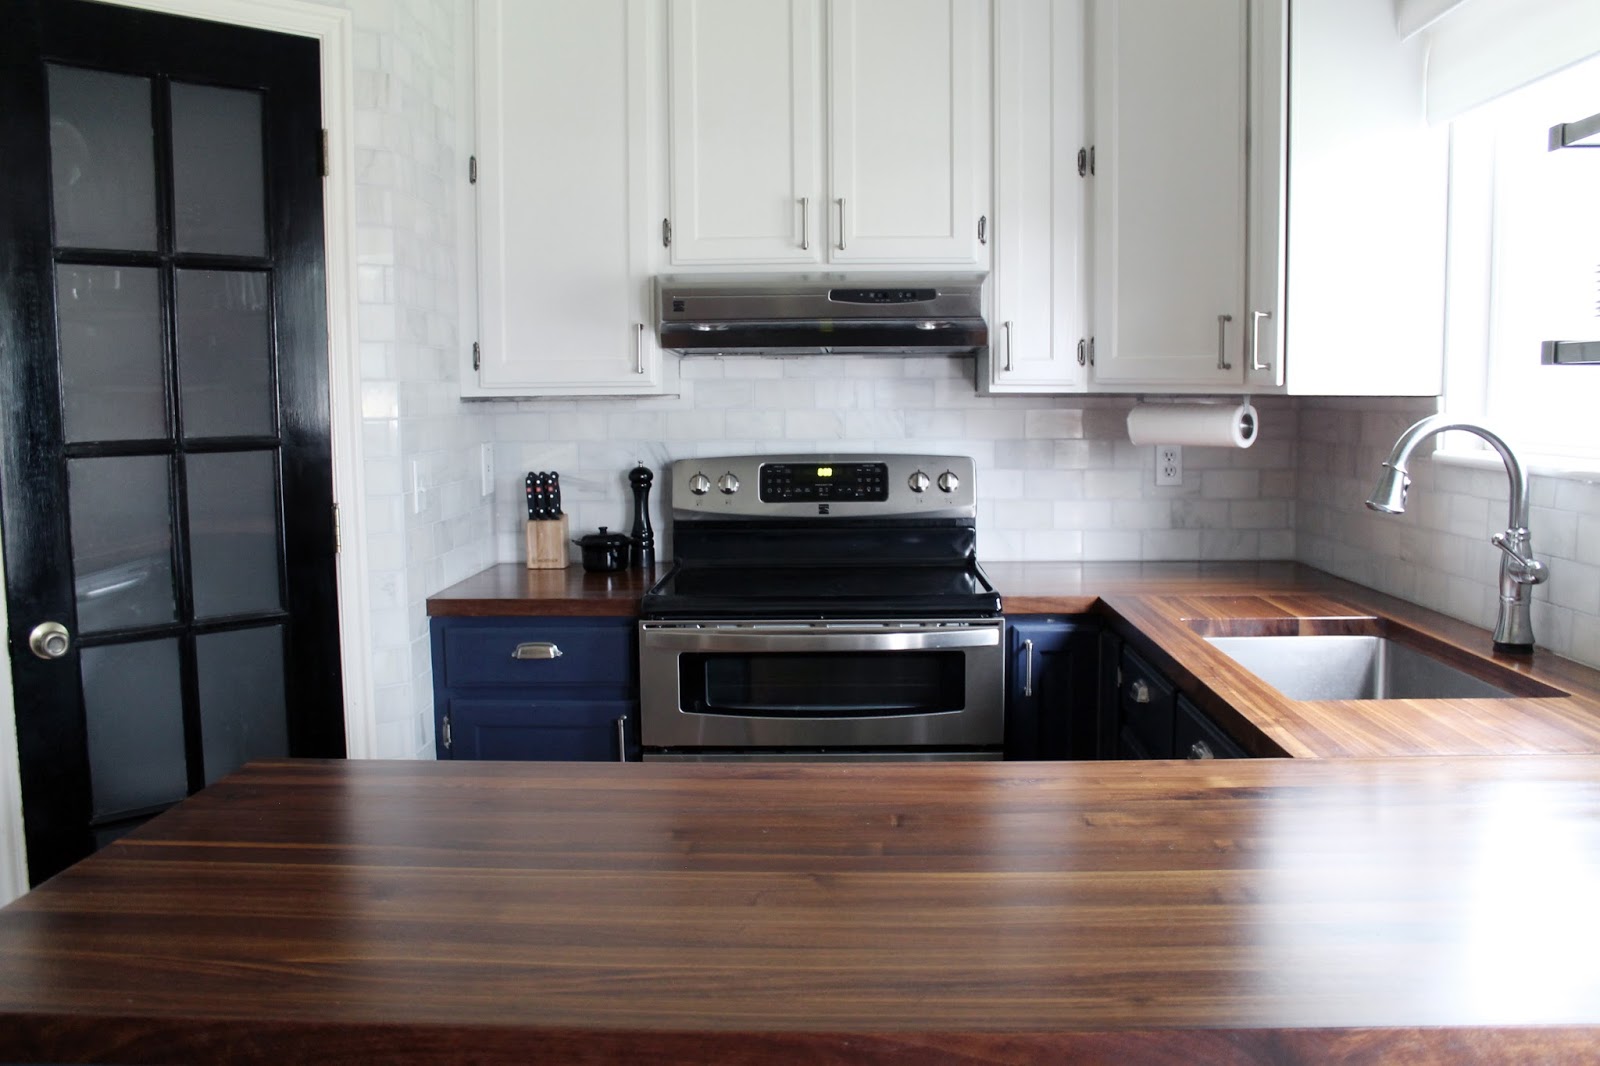
This is the best tile. Better than the gray of gray Carrara that seems to be sold everywhere these days, I have been looking over a lot of blogs. This looks very similar to this blog: http://www.prettyhandygirl.com/2013/09/tile-backsplash.html There is even a video of the installation process. The tile looks identical – but the price was just $7.00SF.
This comment has been removed by the author.
I love your blog. This is a cool site and I wanted to post a little note to tell you, good job! Best wishes!!! CARRARA MARBLE MOSAIC
Nice to read your post. Nicely described. Keep sharing such a useful and informative post. Many thanks for sharing.
Carrara marble
We’re in the process of doing backsplash on our own kitchen. We LOVE yours so much we just ordered Hampton Carrara for our own back splash!! We’ve been stuck on what to do with the backsplash and this looks so perfect for what we have going on! So excited! Thanks for sharing your beautiful kitchen!
It’s so beautiful! I love everything about it! My boyfriend and I bought a similar navy blue paint for a kitchen island DIY project! I hope it looks as lovely as this.
OBSESSED!! Will you consider doing this again in your new kitchen?
absolutely stunning!!
This looks really good. Inspiring.
Yummy. Just yummy.
That looks absolutely gorgeous! I love love love that tile!
Looks so great! While I don’t love the physical task of grouting, I really love the look once it’s done. It is just so smooth and lovely – nice work!
Beautiful!
Looks awesome guys! Congrats on all the new changes and new house!
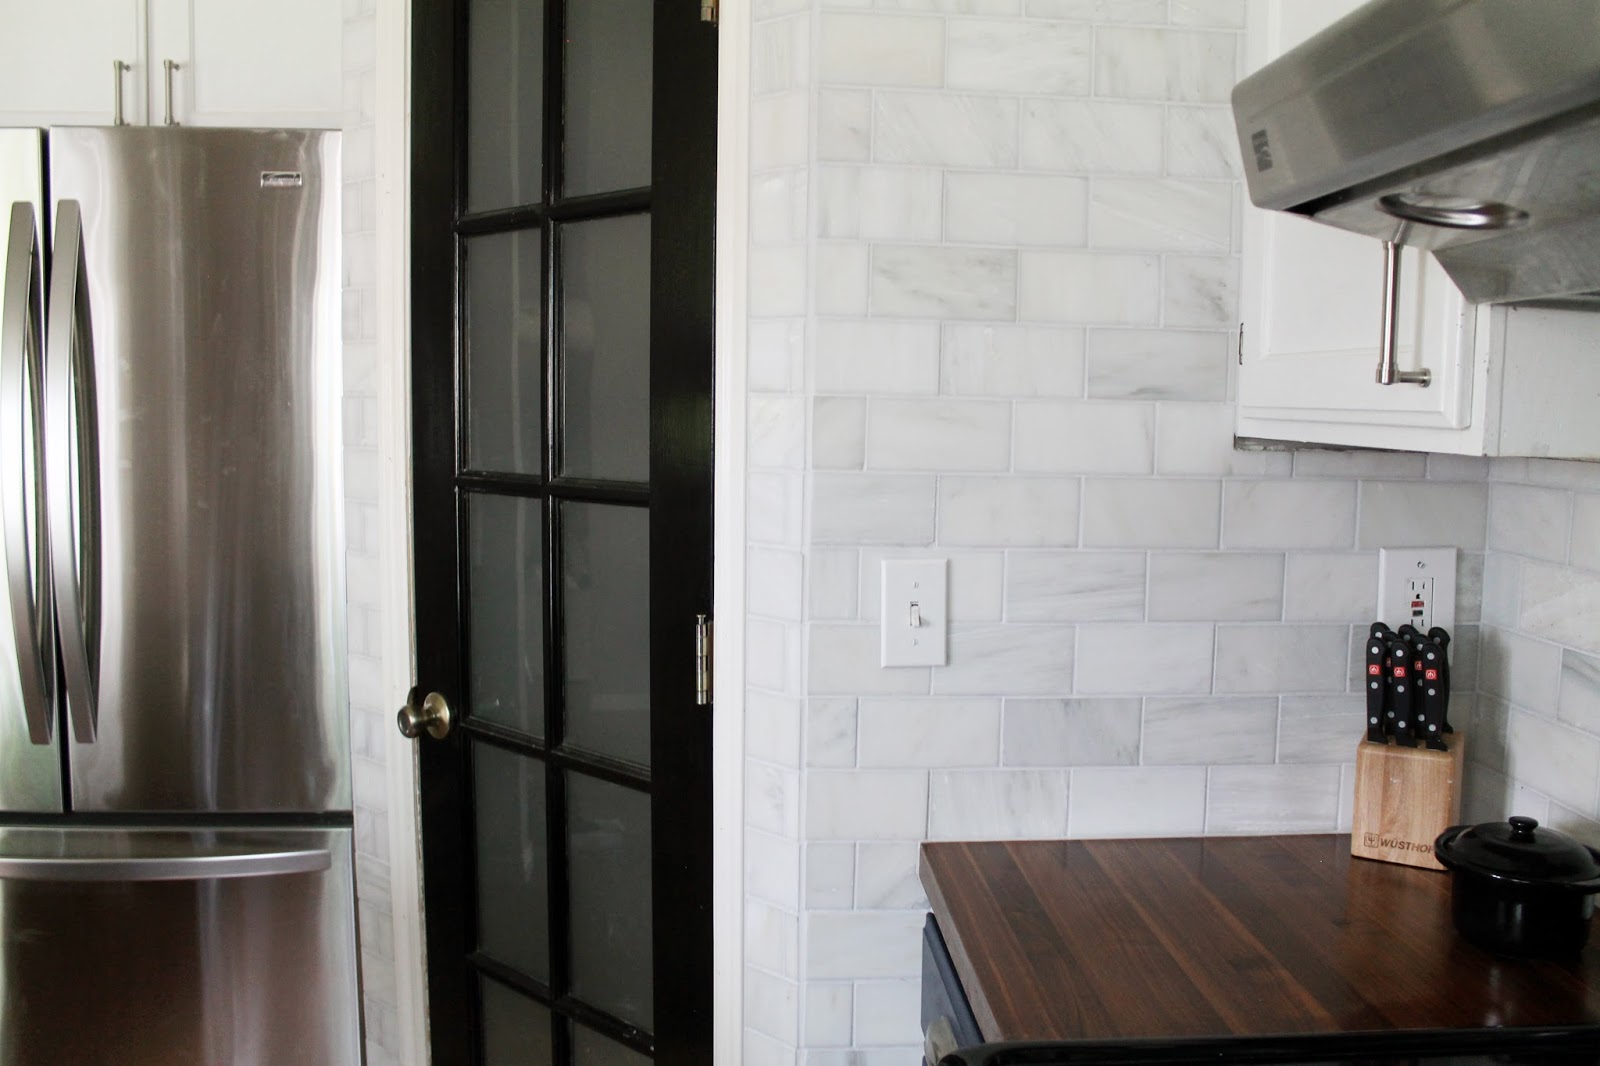
wow. just wow. Did you guys have to use extenders for the outlets or no? I’m ordering a sample of the tile right now. I need a backsplash and have been WAITING to see the final result. It looks amazing.
Yay! Thanks, Mary. We did use spacers in our outlets.
Sooooo….I want this done to every wall in my house. Beautiful!
I want to go to there.
Beautiful tile! Brilliant job, guys.
Stunning!
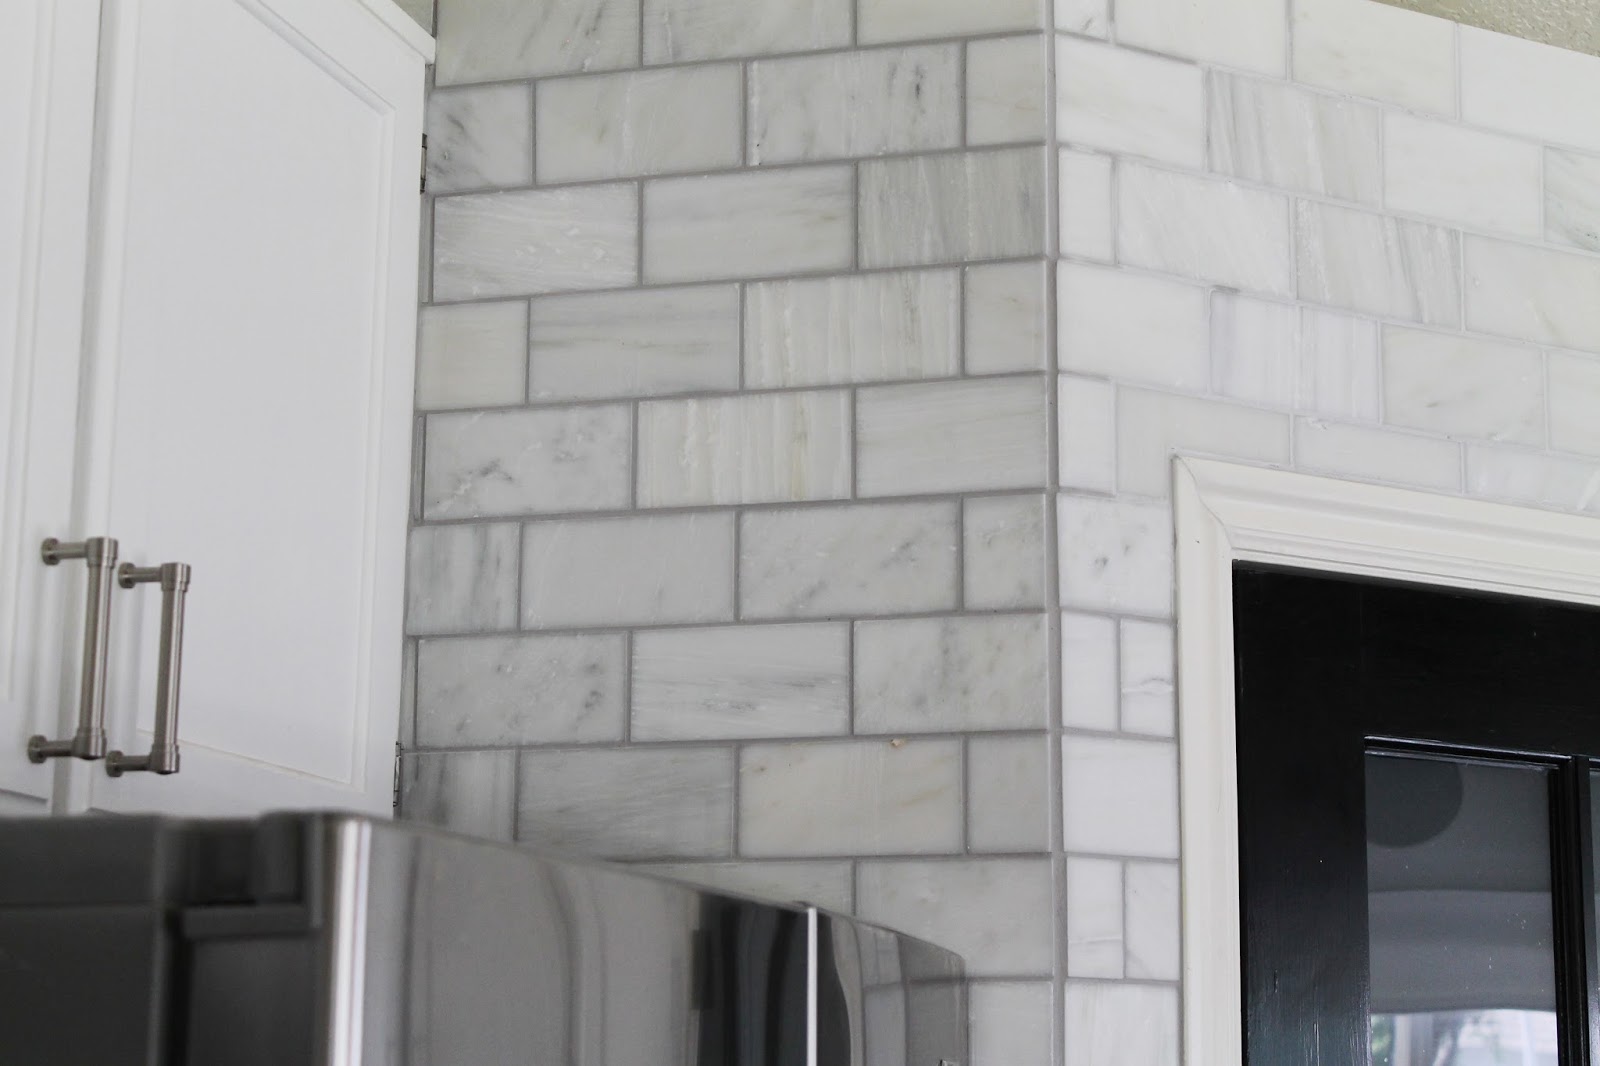
Looks great! Did you cut the tiles to make a finished, even edge on the side of the frig or did you leave the tiles staggered?
Thanks! The tiles are staggered behind the fridge.
Oh wow….so dreamy and perfect.
oh mercy sakes…..i’m drooooooling. Seriously.
First things first… I LOVE the tile. I just want to pet it… is that weird?!? But, I know you are busy selling/buying houses, packing, and Chris has a new job. But, when you all can breath again, will Chris be back to food blogging? I have to say, I miss it in the mix with the home posts. Just so you know, you have at least one person who is missing the food posts, and is back to cooking boring dishes. COME BACK CHRIS!! :)
Worry not. I’ll be back in full force once things settle down a bit. :)
It looks lovely, Julia!! I had the same grout fear when we did our bathroom, and it dried so much lighter. Lesson learned for sure! (http://thesweetestdigs.com/2012/05/01/project-bathroom-the-reveal/)
Good luck with the packing and moving. Just think about all of those fun projects waiting for you at the new pad!
xo, gemma
Yes! We can’t wait! What to do first, what to do first?!
Yum!! Gorgeous! Remember when you said you guys were going to hire out the backsplash?! I’m pretty sure you said that…But you did it!! And it looks gorgeous, awesome job! And every next tiling job gets easier. :) And ditto on researching grout line widths and grout colors lol!! We did 1/8th for our kitchen backsplash remodel and 1/16th on the sunroom floor and the tub surround. I love the 1/16th for easy cleaning, but I think the 1/8th looks cleaner (tile edges are farther apart so is much easier to keep looking orderly) and since backsplashes don’t require tons of cleaning I think it’s the BEST width :) Maybe as you are doing the huge house transition you could do a post that’s before/after for all the rooms in this house ? I did it for the house we just left, mostly for myself to be able to scroll back and encourage myself with eye candy for future projects :)
Hahaha, good idea. I had a whole house before and after scheduled for later this week!
your kitchen is to die for, seriously!! I love the tile- I would usually go for the plain white subway tile but i LOVE this!!
We almost did plain white, Jessica! The marble was just too good to pass up for this kitchen.
That looks absolutely amazing! I can’t imagine leaving behind such a gorgeous kitchen, but I’m sure you’ll do something equally dreamy in the next house.
The finishes of this kitchen are terribly hard to leave, but our new kitchen has more space and you’re right, the wheels are already churning with what to do.