


Now, a few sick days and several stubborn concrete nails later, it looks like this:

Chris and I finished framing this wall last night. Now, Chris helped build his parents’ home, so he knew what he was doing. I, on the other hand, should of kept track of how many times I said, “I don’t understand. I just can’t visualize this.” Fortunately, I make a pretty good assistant and can follow directions, so when Chris told me, “Hold this here and don’t let it move.” I did it and we eventually got things done.
Of course, there were a few hiccups along the way. We tried two different types of diamond-tipped concrete nails and both kinds bent 9 times out of 10 while we were trying to secure our treated lumber (treated lumber isn’t always necessary against concrete, but since we have had water issues before we didn’t want to take any chances) to the concrete subfloor. Chris was getting so frustrated. Finally, around day 2, he returned the nails to Home Depot and picked up a Ramset.

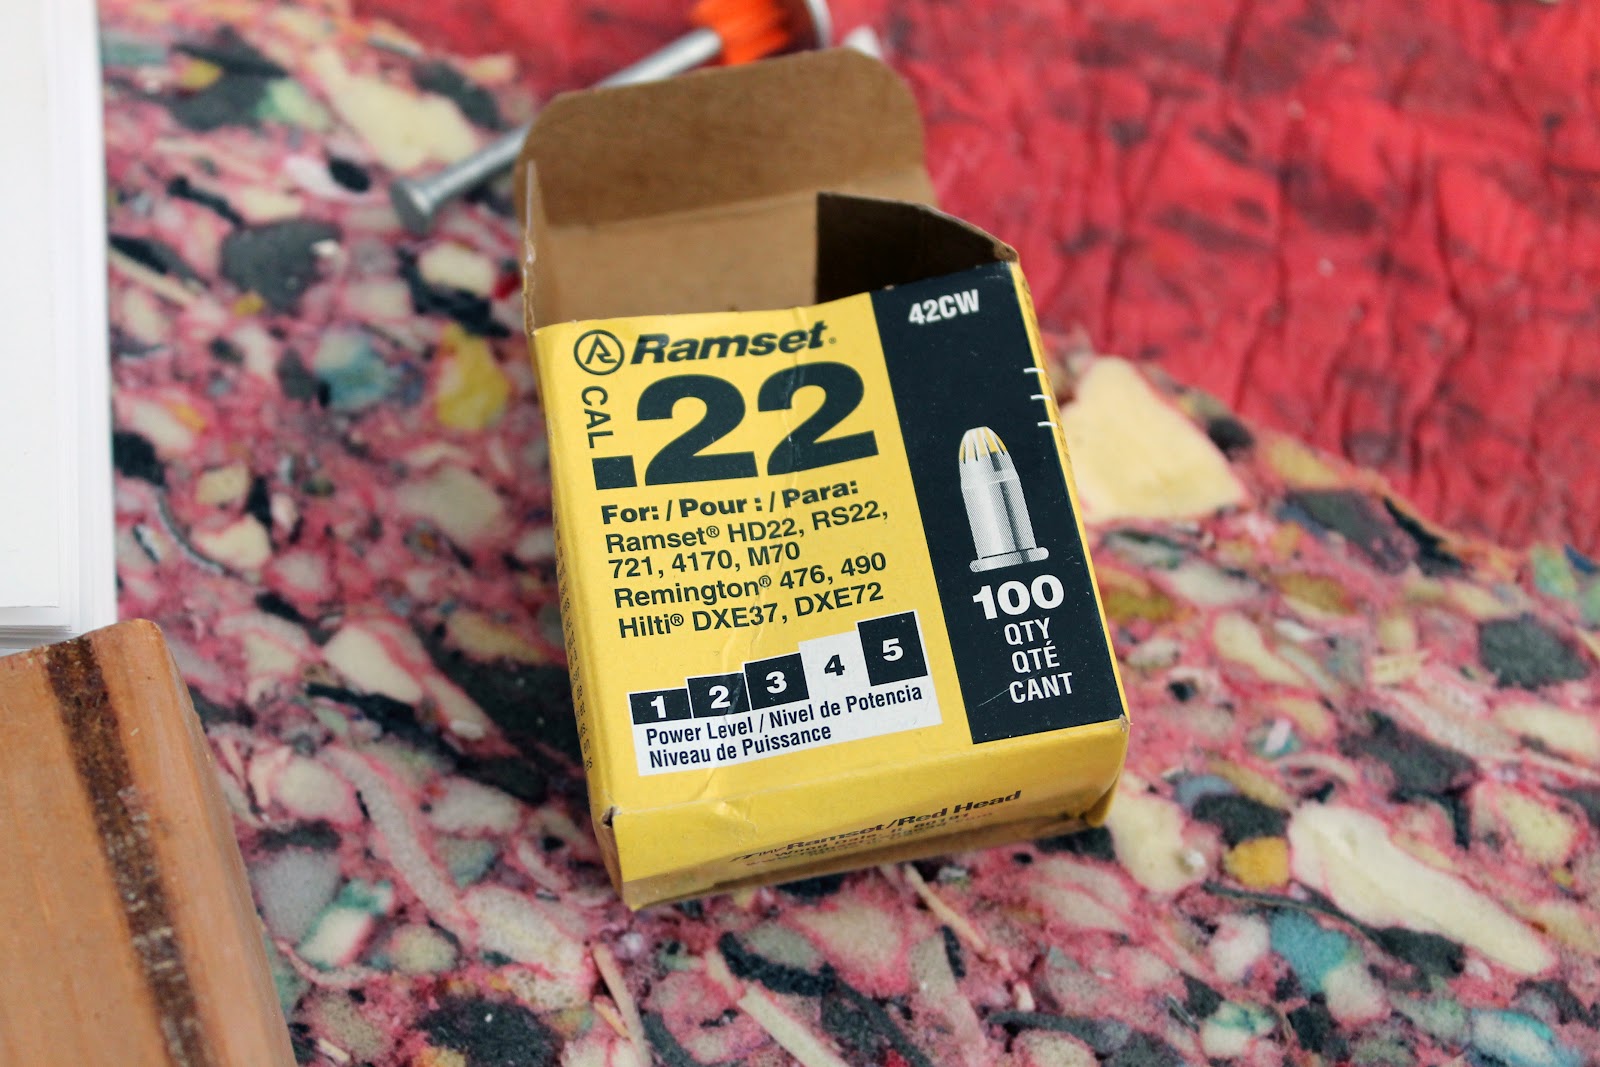
I never could get the name right. Remax. Ramsack. Either way, it is basically a hammer gun. And with one hit, it shot the nail right through the wood and into the concrete. It was such a lifesaver project saver. Caution: You are gonna wanna plug your ears. It really is as loud as a gunshot.

But the results are quick and efficient.

The other hiccup happened when we realized our foundation and subfloor weren’t exactly level. Surprise. Surprise. Since we are putting bookcases on top of these frames all the way to the ceiling, we needed things to be as level as possible so that we wouldn’t have a lot of uneven spaces once we got to the ceiling. The two lower platforms were especially unleveled, so before we secured the plywood on top, we shimmed it until things were even.

Chris planned and built the whole thing from a couple of drawings. We are no Ana Whites, so there isn’t a source list coming, just these simple drawings that map out the end product (and a couple Greta scribbles):


Is it strong enough to hold a bunch of bookcases? Oh yeah. Last night after we finished, we both jumped around on the platforms to make sure these babies weren’t going anywhere. Solid.

Another money-saving perk about this project: We were able to use almost all of the wood that was framing this half wall before. So this project, although a little bit time consuming, only cost us a total of $45. $15 went to the treated lumber and plywood and $30 for the Ramset. Tonight we need to put back the insulation and get all the drywalling done, too. Another thing, I will know a whole lot more about after tonight.


Leave a Reply
What do you think?


Semihandmade
Our wood grain Shaker cabinet fronts were designed for busy, high-traffic homes like ours. Clad with durable textured thermofoils, this line is compatible with Sektion, Akurum, Godmorgon, and Besta cabinets from IKEA. It's the perfect, practical way to add the warmth of wood to all the rooms of your home.
Collaborations
learn more

next
Loloi
We have teamed up with Loloi to create a line of rugs that are as affordable as they are beautiful. This collection houses a great mix of traditional and modern rugs, in cottage-y colorways, as well as vintage-inspired beauties that you’ll want to roll out in every room.
Collaborations
learn more

next
STUGA
We partnered with Stuga on a line of hardwood floors — The Ingrid is really livable, and the color is very neutral. It doesn’t lean warm or cool, it’s that just right in-between. We have really loved putting it everywhere in our house. It’s the best jumping-off point for design, no matter your interior style. In addition to being beautiful, Ingrid is really durable — we have three kids, and we always have a home construction project going on. Ingrid stands up to it all.
Collaborations
learn more

next


SHop all
What We're Right Now
What We're Right Now
Looking for our favorite things? A place to shop our home room by room, or just catch up on what Julia's wearing / loving right now? Browse the CLJ shop.
Loving


Portfolio


Design
Befores, afters, mood boards, plans, failures, wins. We’ve done a lot of projects, and they’re all here.
BROWSE BY CATEGORY
let's break this thing up
We have a long-standing relationship with DIY, and love rolling our sleeves up and making it happen.
Projects
Even when you don’t want to rip down a wall, you can make that space in your home better. Right now.
read more
read more
read more
02
01
03
looking for inspiration?
A reader recently asked me if I’m starting to fully embrace traditional style and whether we still consider our house to be a “modern Colonial” and why. It was a really great question and so timely — I had really just been thinking about my approach to this home and how my style has changed […]


SEARCH THE BLOG
We've been doing this since 2009 and we've posted a whopping 24145+ blog posts and counting. You might need a little help searching, huh?
looking for something?
find stuff like:
")
Can We Send You Our Love Letter?
Another way for us to stay in touch! Joining our weekly newsletter gives you access to exclusive content, never-before-seen photos, your questions answered, and our favorite DIYs. Sign up below!
Follow Along on Instagram
Welcome to our online community where we've posted home, DIY, style, renovations, and family since '09. Renovating our #cljmoderncottage in Idaho and headed for new adventures in Raleigh, NC. #cljfam #cljtransformations
@chrislovesjulia


Links
Get Around
Make yourself right at home
Portfolio
Design
Casual Friday
Projects
Lifestyle
Gift Guides
All Posts
Shop
Love where you live.
Social
RivrLinks
Links
Get Around
Make yourself right at home
Portfolio
Design
Casual Friday
Projects
Lifestyle
Gift Guides
All Posts
Shop
Love where you live.
Social
RivrLinks
You guys are so quick at projects. And Chris is SUCH a model. I can’t believe how quickly this room is transforming. When we buy a house, I’m hiring you two to do everything. I’ll pay in food!
IKEAAAAAAA!!!!!!! (so jeal right now!)
what a cool project! I can TOTALLY see the plan now. It is going to look beautiful! I cant wait to get cool tools like that when we have a house. Ry JUST got a drill. and we have only used it once-on baby safety locks! hahaha so we definitely need to up our coolness when it comes to tools!
Congrats on first phase done! er 2nd if you include demo right?? When I read your blog I’m amazed at how much you both know about construction. How do I ask, like was Chris into…that? Building? You mentioned he helped build a house? It’s amazing you just can draw a plan, and know what wood to buy, what tools to get. I know guys are handy, but you are getting to know your stuff Jules!