Projects

A DIY Shiplapped Built-In Entertainment Center

March 9, 2016

We believe we should all love where we live.

We’re a couple of homebodies, working to uncover the home our home wants to be. And we’re so happy to have you here. 

Portfolio

Projects

Design

We're Chris + Julia

read more

What we're                   right now

Loving

browse the shop

Befores, afters, mood boards, plans, failures, wins. We’ve done a lot of projects, and they’re all here. 

We have a long-standing relationship with DIY, and love rolling our sleeves up and making it happen. 

Even when you don’t want to rip down a wall, you can make that space in your home better. Right now.

browse all

browse all

browse all

02

01

03

Popular Posts

1.

2.

3.

Top Categories

Before we start any project, Chris and I sit down and go through all the details and, I guess you could say, negotiate back and forth until we both feel comfortable with the plan; That it’s something that fits into our style, budget, our family-friendly vision for our home, and that it’s something we can actually execute ourselves. The entertainment center for the family room took a lot of careful planning sessions, but Chris totally nailed the execution of this and we’re so excited to share it with you today.

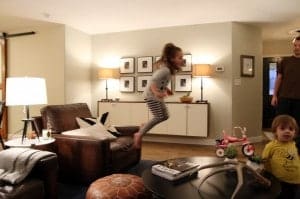
Sidenote: We’ve decided to stop calling it “the playroom.” It used to be a playroom. It was 100% for the kids – we’d send them down there to play and didn’t really worry about what was going on down there too much. But, with the addition of a “theater” area and big sectional, this space now has something for every member of the family. So, we’re calling it the family room now and we’ll start tagging photos on social media with #cljfamilyroom to reflect that.

Back to the built-ins. We are constantly inspired when doing our projects, but very rarely do we want an exact replica in our home. We’ll tweak it and make it our own. But, goodness!, when I stumbled across these built-ins from Studio McGee, I just wanted to cut and paste them right into our basement.

A DIY Shiplapped Built-In Entertainment Center | Chris Loves JuliaThe family room had the perfect wall for something like this, and Chris and I both agreed it was exactly what we wanted. And then we had to have the discussion on how to execute it.

There are a lot of things to consider with something like this, but the first is sound. If you’re setting up a theater area in a room, how will the sound from movies and such carry into surrounding spaces? Here’s where we wanted to build ours:

A DIY Shiplapped Built-In Entertainment Center | Chris Loves Julia

On that far wall to the right. On the other side of that wall? Greta’s room. Womp. Wommppp. Chris had his heart set on a “sick surround sound system” but, what’s the fun in that if you just have to keep it turned down all the way because your 6 year old is in bed? We looked into some sound proofing techniques and figured out a couple things we could do to lessen the transfer of sound through the wall. First, and the top recommendation we read was to build a wall that sits out from the original wall.

Even with the extra wall, Chris still wanted to do something else for the noise and landed on Mass Loaded Vinyl, or “MLV”. It’s essentially a roll of super thick vinyl that doesn’t capture sound waves, but lessens its ability to pass through a wall when applied to the outside of it.

A DIY Shiplapped Built-In Entertainment Center | Chris Loves Julia

We’re under no delusion this will make it completely quiet in Greta’s room, but after some initial tests there was a noticeable difference in the amount of sound that transferred between the spaces. So we’re calling that a win. Then Chris took over the building plans. Take it away, Chris!:

It took me about an hour to nail down the plans. First, a sketch of the structure, along with where we wanted each receptacle:

A DIY Shiplapped Built-In Entertainment Center | Chris Loves Julia

This sketch is part of my process. It’s not even as good as the original inspiration picture, but just the act of mentally visualizing something and transferring it onto paper helps me think through what it would take to build it, and then I can create a better plan with measurements:

A DIY Shiplapped Built-In Entertainment Center | Chris Loves Julia

The built-in is essentially 3 sections: 2 equal-sized book shelves flanking 1 large, recessed center area with cabinets and an area for a TV. We planned to use our fauxdenza cabinetry for the center area (we’ll show that in a future post), so we knew that section had to be 90 inches, the length of the credenza. We made it 90 1/4 inches, to ensure it wasn’t too tight a squeeze once we put them in. The total width of the wall is 155 1/4, so we subtracted 90.25 from 155.25, which gave us 65 inches of space remaining. Divide by two, that makes the ending width of each of the shelf sections 32.5 inches.

Now, with these plans, it was time to make a shopping list. Our project sponsor, Lowe’s, had everything we needed including:

MATERIALS

38 2x4s
12 sheets 1/4″ plywood
3 8 ft lengths of crown molding
Coax cables
HDMI Cable
CAT6 cable
Speaker wire
Brad Nailer – srsly, I love this little nail gun
Air Compressor
1 1/2″ brad nails
Primer
Paint
Wagner Flexio 590 Paint Sprayer
Junction Boxes
Table Saw
Caulk
2.5 in Screws
Spackle
Sandpaper
1/8″ Spacers

I also had to keep in mind that we were going to be paneling the outside with 1/4″ plywood planks, which would add 1/2″ to each wall. So if the center part needs to be 90.25 inches when all is said and done, that means the frame I build needs to leave 91.25″ of space in the center. The 1/2 inch of paneling, once added to each side, would bring it down to the perfect 90.25″.

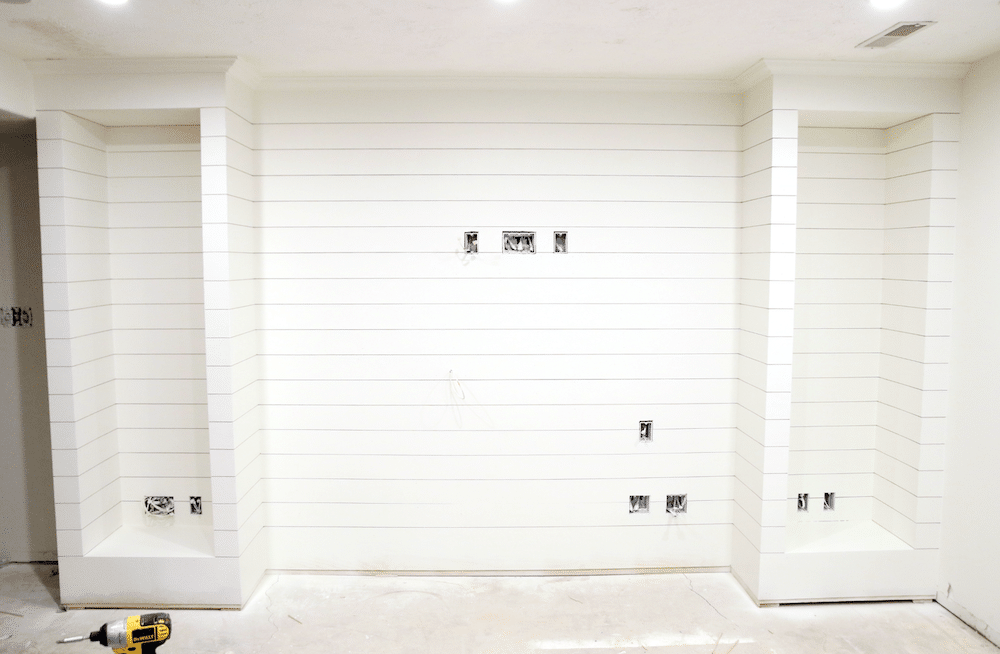
So, plans in hand, MLV in place, I built the back wall in two sections (boards I had weren’t long enough for the space), set them up, leveled and secured them. I secured them into the concrete using a Ramset (essentially a 22 pistol that shoots nails, but instead of a trigger mine has a button on the end you hit with a hammer – thinking about getting one for each of the girls as stocking stuffers next Christmas because of how safe it sounds when I describe it) and screwed them into the floor joists that were in the ceiling directly above. From there, I built four 16 inch walls to act as the frames for the book shelves, secured them in place similarly, and screwed everything together. Solid as a rock.

A DIY Shiplapped Built-In Entertainment Center | Chris Loves Julia

Oh, also, electrical. There were two power outlets on this wall already, and we’re making it so there are 4. So before doing any of this, I prepped the outlets so that I could tie directly into them, with the wires still housed inside an outlet box so we don’t just have bare wires kicking around inside a wall. Safety first.

Next, I framed out the top and bottoms of the shelf sections, and added junction boxes where they’d need to go. I built this whole frame very strategically, knowing that I would later be putting paneling on here. Everywhere there would be an edge to a piece of paneling, there needed to be a board to nail into.

A DIY Shiplapped Built-In Entertainment Center | Chris Loves Julia

You’ll notice with the junction boxes, some of them I added extra 2x4s in between. The reason for this is to avoid the possibility of electrical interference with the data lines. Data lines in this instance include speaker wire, HDMI cables, coaxial cable, and ethernet. All of which were run through this wall. Keeping those data lines at a distance from electrical junction boxes, as well as making sure data lines only run perpendicular and not parallel to electrical lines, lessens the possibility of interference. You also want to make sure your wires are secured to your frame with cable clips, so they don’t sit against the MLV and rattle on the wall. And try to secure them far enough back so that when you are nailing in the paneling, you don’t accidentally shoot a nail into a cable.

A DIY Shiplapped Built-In Entertainment Center | Chris Loves Julia

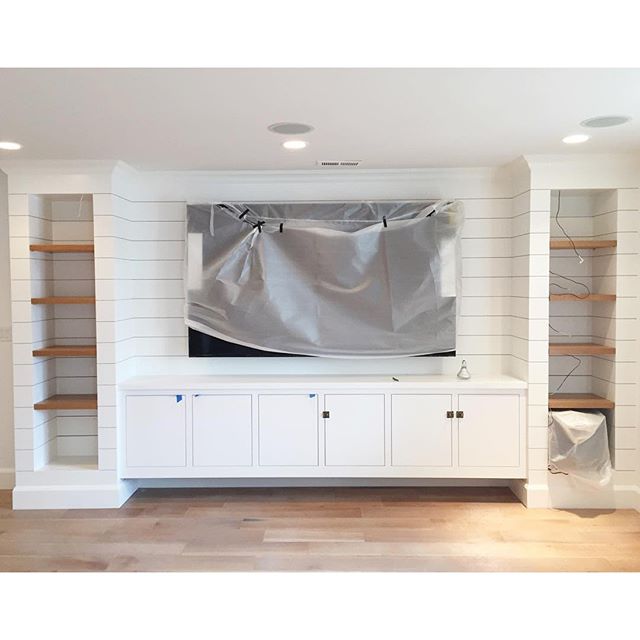
With all that done, time to cover. We first put down a layer of 1/4 inch plywood, with 3/4 inch MDF on the bottoms and tops of the shelf sections:

A DIY Shiplapped Built-In Entertainment Center | Chris Loves Julia

After caulking all of the seams (they would still end up being visible through the paneling), we then cut 6, 4×8 sheets of higher grade, 1/4 plywood (really smooth stuff) into 4 5/8″ strips using the table saw. These are our “shiplap” pieces. I took a day off of work, thinking I’d get the paneling on in the morning and paint it all in the afternoon. Ha. HA! It ended up taking around 11 hours to do all that paneling. Because of slight bends in the 2x4s, I had to measure every individual piece and miter the edges to fit exactly in the space that the piece was going into. Using 1/8″ tile spacers we got them all evenly spaced for a clean, modern look and secured them into place with a brad nailer. And although the paneling took a bit longer to miter, it was time well spent. Mitered edges made all the difference in the end product – straight, smooth edges that fit together seamlessly. It was a long day, but it turned out awesome:

A DIY Shiplapped Built-In Entertainment Center | Chris Loves Julia

It never ceases to amaze me how Chris can figure almost anything out. The built-ins of my dreams! The last step was more caulking and patching all the holes from the finish nailer and sanding. Then we rolled on a coat of primer (I like the Zero-VOC Zinsser) and finally paint. We opted to use our paint sprayer (the Wagner Flexio 590) for the smoothest finish.

A DIY Shiplapped Built-In Entertainment Center | Chris Loves Julia

We color-matched Benjamin Moore’s Simply White to Lowe’s Valspar Reserve paint and primer in one–our favorite paint of all time. It’s the perfect thickness with amazing coverage. It only took one coat! We’re smitten with the results and are anxious to get the credenza pieces and shelves in place. We’ll have a post about that really soon! We also got word our carpet should arrive in our store by the end of the week, which means this room is about to take shape quick. (And those baseboards have to be done, like yesterday.)

Although shiplap is kind of everywhere right now, I love this modern, clean-lined adaption of it. Almost like pin-stripes! I don’t think it will ever go out of style.

NSI_Lowes_logo_no_tagline


Special thanks to Lowe’s for providing the materials and tools necessary to complete this project and execute our vision. Thanks for supporting our sponsors who allow us to make this house our own. 

Leave a Reply

Your email address will not be published. Required fields are marked *

This site uses Akismet to reduce spam. Learn how your comment data is processed.

What do you think?

  1. Melissa says:

    This is beautiful! Would you want to come and build this for me in my house? :)

  2. Jana says:

    Would you guys do this for me in my basement! I’m not far from you I live in Rexburg.

  3. Vivi says:

    I just wanted to thank you SO much for sharing not only your finished design but how you got there. We are attempting this and seeing all your measurements is so helpful!!!!

  4. Jenn says:

    I miraculously stumbled upon this while drawing/planning the exact same thing for a console table I’m going to float in the center- where your IKEA one is. Anyhow, when you framed out the top and bottom for the shelves, how did you attach the 2x4s? Pocket screws?( It doesn’t look like they‘re nailed into the backsides of the 2x4s used for the walls.)

    I know it’s been years since this post. Hoping you see this!

  5. voula says:

    hi! two questions; why the need to frame out the whole back? could just the shelves have been framed and mdf paneled, to avoid taking up extra space?

  6. Brooke says:

    Hi Chris and Julia,
    Love this built in so much. I was wondering what the height of your Ikea Cabinets are? I see they are 90″ wide but wondered about the height?

    Thanks!

  7. Kyle Leishman says:

    what actual cabinets did you use and can you post a final, final photo of your project

  8. Patrick says:

    Hello- did you put anything in/over the spaces between the “shiplap” pieces when painting? Or did you just roll and spray over everything?
    We are using your idea and almost to the paint stage!
    Thank you!!

  9. Dawn says:

    Could you tell us which IKEA cabinets you used?

  10. Ian says:

    Did you rip down the width of the 2×4’s? Maybe just the pics but they look more narrow than the stock width. Thanks!

  11. KD says:

    How did you get the corners of the ship lap to look so perfect? Are they angle cut or filled with caulk? Or a different technique? Thanks!!!

  12. Chloe says:

    I hope you’ll see this comment even if this post was ages ago…. thanks so much for including the colour you colour-matched to. Did you use an eggshell, satin, or semi-gloss finish?? We have orange oak built-in that I’d like to paint white but I’m lost as to what finish to use. Thanks so much!!

  13. Alicia says:

    Hi there! Love how this turned out. Would you mind telling me how deep the shelves are and what type of wood you used? We are in the process of designing a similar space for our remodel and I am asking my husband to build shelves that are about 18″ deep. Unsure of how difficult it will be to find wood at this depth or if we’ll need to custom build them somehow. Any insight you can provide would be greatly appreciated!

  14. Brad says:

    How did you mitre the corners ? I’ve searched online everywhere and found nothing :(

  15. Steve says:

    The four stud walls you framed in on the sides, what are the dimension of those? I see you stated the shelves were about 12inches and I cant find anywhere that states the depth of the four stud walls before installing boards.

  16. Bethany says:

    Is there a similar Ikea cabinet that you would recommend? Thanks!

  17. Sherry says:

    looks amazing, what serie of Ikea cabinet is it?

  18. Paige says:

    This may be in the text somewhere, but I couldn’t find it. In this post, the doors to the credenza are inset, but in the final post, they are flush. Did you swap out the doors? Can you walk me through the story there? I’d love to know :) We’re looking at the same unit, so I’m interested in anything you’re willing to share.

  19. Becky says:

    Hi! Can you please tell me what size your tv is? We are trying to replicate this, and I suspect our tv (57 inches wide) is smaller than what I see in this picture. Do you think having 16.5 inches of space on either side of the tv will look too blank?

    • Chris says:

      Our TV is 70 inches, and it has about 12 inches on either side. The good thing about the shiplap is it helps fill in the empty space, but too much of it could still feel empty. Another consideration is how far away from the TV you will be sitting. The further away, the smaller the TV will feel.

      In short, it’s hard to know if 57 will look too small because that depends on a lot of visual factors, but I say give it a try. Just make sure you get a good TV mount that allows you to go up in sizes, just in case you find it is too small and decide to upgrade.

  20. Clarissa says:

    I love it! My husband and I are dealing with the same thing regarding the surround sound. I want it pretty and he wants these massive speaker towers. :( What kind of speakers do you have? we are in the planning stages and I am trying to figure out another alternative to avoid those front speakers that flank either side of the TV.

  21. brooke bertelle says:

    Gorgeous! How much did this project cost to do?

  22. Jon says:

    Did you cut the edges of the shiplap at a 45 degree angle?

  23. heather says:

    How deep are the bookcases?

  24. susan says:

    We are going to copy this for our family room- I love it! Could you tell me what depth the shelves and cabinets are? Also, did you have problems with the plywood splintering when cutting it for the shiplap? our carpenter has suggested using MDF instead but I am not sure if we should do that.

  25. Lindsey says:

    Lovely! Just a note, it’s technically not shiplap. Shiplap is like tongue and grove in that it fits together. Yours is planked or paneled. Doesn’t take away from the wonderful work you did on it!

  26. This looks amazing!

    I’m about to embark on a similar project and have been researching what wood to use, so your post came at a great time. Could you please clarify what wood you used for the shiplap strips? I believe your Lowe’s link above (“12 sheets 1/4″ plywood”) is for the first layer. What is the “4×8 sheets of higher grade, 1/4 plywood” you mention? Thanks so much!

    • Chris says:

      Hi Marti – I couldn’t find the wood we used on Lowe’s website, but we did buy it at Lowe’s. Unfortunately I no longer have the receipt that listed all the products, but it was next to the birch plywood and was more red in color – sorry i can’t be more specific! But using birch would work as well, so long as you use a good primer before painting.

  27. Evelina says:

    I have been following along your progress on Snapchat and the final result is A.MA.ZING! Once again, you guys killed it. Can’t wait to see the rest of the room come together!
    Xo, Evelina @ Fortunate House

  28. Meggan S. says:

    I am floored with how amazing this is! I’ve been wanting built ins in my house, but they seemed so scary! Seeing what you guys did though, gives me hope we can come up with a plan too! :) Seriously, you guys are my favorite.

  29. Annie says:

    Julia –

    Would you consider including what the costs/totals would be if you had paid for it for those of us following along who might want to consider a project like this? It’s kind of burdensome to have to click the links and do the math. Thank you.

  30. This is just so good. You killed it! I’ll be thinking of you finishing your baseboards if you think of me doing the same. (Ugh, baseboards!)

  31. Kristin says:

    That looks awesome! I am hoping to do a Studio McGee inspired fireplace like that… she used cement board to make sure it was fireproof!

  32. susan says:

    I was just positive the initial picture was of your family room. It definitely has a “you” vibe to it. Great job on the build.

  33. This is looking so polished already and it’s not even done yet! I’m curious to find out how the soundproofing works out. In our old apartment, we had our entertainment center set up on the wall that connected to our toddler’s bedroom, but the wall was made of concrete so I think that helped things. Looking forward to seeing more of what you do here!

  34. Lovey says:

    Looks awesome! Sound is a problem with little kids! Is there anything you guys did to her bedroom door to dampen sound there? We have hollow core doors just wondering if it’s worth it to upgrade those or anything else you could do there?

    • Julia says:

      We haven’t done anything with her door, although we’re not opposed to it if need be. Although her door is quite a ways down the hall so I’m not sure it will be an issue. We’ll be sure to update you if we find it is!

  35. Wow! I’m impressed with all of the very thoughtful planning and details that went into it! Our daughter’s bedroom shares a wall with our living room, and for the most part we try to be conscious of the TV volume and how loud we talk, but she also has just gotten used to it for the most part. Also, she adopted Buddy the Hamster, who runs in his little wheel at night so a certain amount of noise is becoming normal. It is a challenge, though, I know!

    http://danielleandco.com/blog/2016/5-tools-to-get-your-watercolor-on

  36. Monica says:

    This is crazy good! Can’t wait to see the rest!

  37. Britt says:

    Wow! Seriously that is beyond impressive, and is going to be amazing finished. Way to go Chris!

  38. Kari says:

    Wow. In a world of wonky DIY, this is next level. I can’t wait to see what comes next!

all the latest

We believe we should all love where we live.

We’re a couple of homebodies, working to uncover the home our home wants to be. And we’re so happy to have you here. 

HI! We're Chris + Julia

read more

Load More

Reader Faves

SHop all

What We're                     Right Now

What We're                 Right Now

Looking for our favorite things? A place to shop our home room by room, or just catch up on what Julia's wearing / loving right now? Browse the CLJ shop. 

Loving

looking for inspiration? 

A reader recently asked me if I’m starting to fully embrace traditional style and whether we still consider our house to be a “modern Colonial” and why. It was a really great question and so timely — I had really just been thinking about my approach to this home and how my style has changed […]

Can We Send You Our Love Letter?

Another way for us to stay in touch! Joining our weekly newsletter gives you access to exclusive content, never-before-seen photos, your questions answered, and our favorite DIYs. Sign up below!

Follow Along on Instagram

Welcome to our online community where we've posted home, DIY, style, renovations, and family since '09. Renovating our #cljmoderncottage in Idaho and headed for new adventures in Raleigh, NC. #cljfam #cljtransformations

@chrislovesjulia