
Hey-yo, all of this multi-colored trim is gone:


The real difference between yesterday and today was finding the right paint color to paint the trim. We wanted it to be as close as possible to really achieve a built-in look and as you may know, “Ikea White” is a toughy to match. The first time, I struck out and so I re-gathered all my very-close-to-Ikea-white paint samples to try again.

The first time I used Glidden’s Crisp Linen White (top row, far right) and it was a smidge too bright. This time I used Glidden’s Parchment White (second from the right on top) and it was just about perfect. As you can see, all of these are very, very close matches–I was straining my eyes. In the end, a quart of Parchment White in a satin finish was the ticket.

Onto painting! Now, I never ever tape off my edges–it is so time consuming and I have found with the right brush (I love this one the most) I can easily trim out a room with no issues–last night, since I knew I would probably be doing multiple coats I picked up some painter’s tape in hopes of making the task as swift as possible.
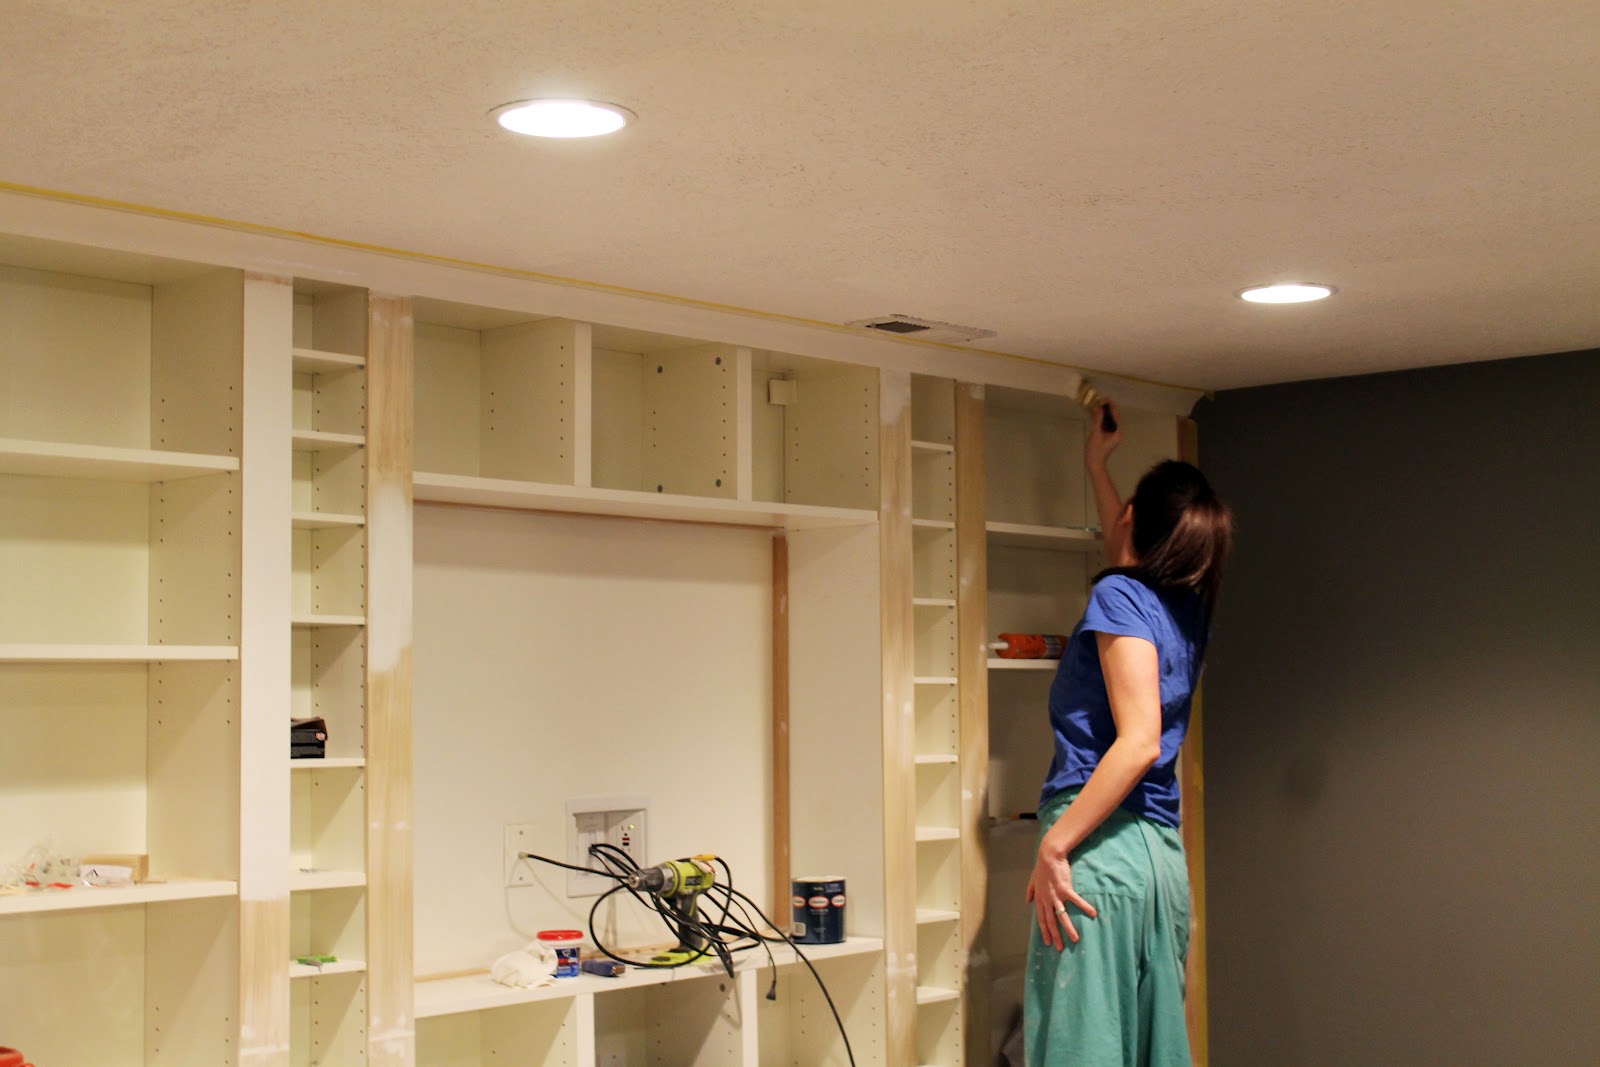
I went with Delicate Surface Frog tape–it’s yellow and relatively new, I think–which is reserved for freshly painted walls. Even though it has been more than 24 hours since we painted our walls and ceiling, I didn’t want to risk pulling any paint off and having to touch up. Well, it’s safe to say I wasted $6 and the 25 minutes it took to tape everything off:

Not only is there a little bit of bleeding, but it also pulled the paint off the wall. So, so disappointed. You live, you learn I guess. Anyone else have issues like this? Besides the few touch-ups in my future, we are so happy with the way the built-ins turned out.

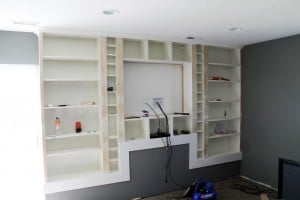
This weekend, we’ll be finishing up the small built-in on the left side of the doors, finally mount our television in the center (yes, inquiring readers, that space where all the wires are coming out is where the TV goes) and then I can start decorating these bad boys which I know we’re all anxious to see.
I am still gathering up lots of things for the shelves. The idea of styling 7 bookshelves is a little daunting and a lot exciting and since we’re nearing our $4000 budget for the entire room, I am having to get more creative as well. Speaking of budget, here’s how the the built-ins break down (this includes the bookcase on the left not pictured):
7 bookcases from Ikea: $309 plus tax
Trim for the faces of bookcases, edges and large boards to frame out television area: $62.40
Paint: $24.48…although if I got it right the first time it would only be $12.24
Crown Molding: Free, thanks to So Simple Crown (normally $53)
Frog Tape: $6…what a waste.
Misc (screws, shims, and all the little things I might be forgetting): $20 conservatively
Total: $421.88 Well spent, right?!
Missed part of the built-ins process? Check out Part 1 and Part 2.
See how they look styled here.


Thanks. I would be lying if I said we weren’t patting ourselves on the backs last night. :)
Yes, we used Martha Stewart’s Zinc color matched to Glidden in a flat finish. Could the flat finish be the reason the tape took it off?
Thanks Jessie!
Ahh! I know. I am just WAITING for the call. :)
you guys are amazing julia! i looove these built ins! can’t wait to see the finished product with all your stuff on the shelves!