A little over a week ago, I got a stencil in the mail from
Royal Design Studio. I was anxious to give it a try. Chris was… …. …apprehensive. You may remember (if you don’t check out
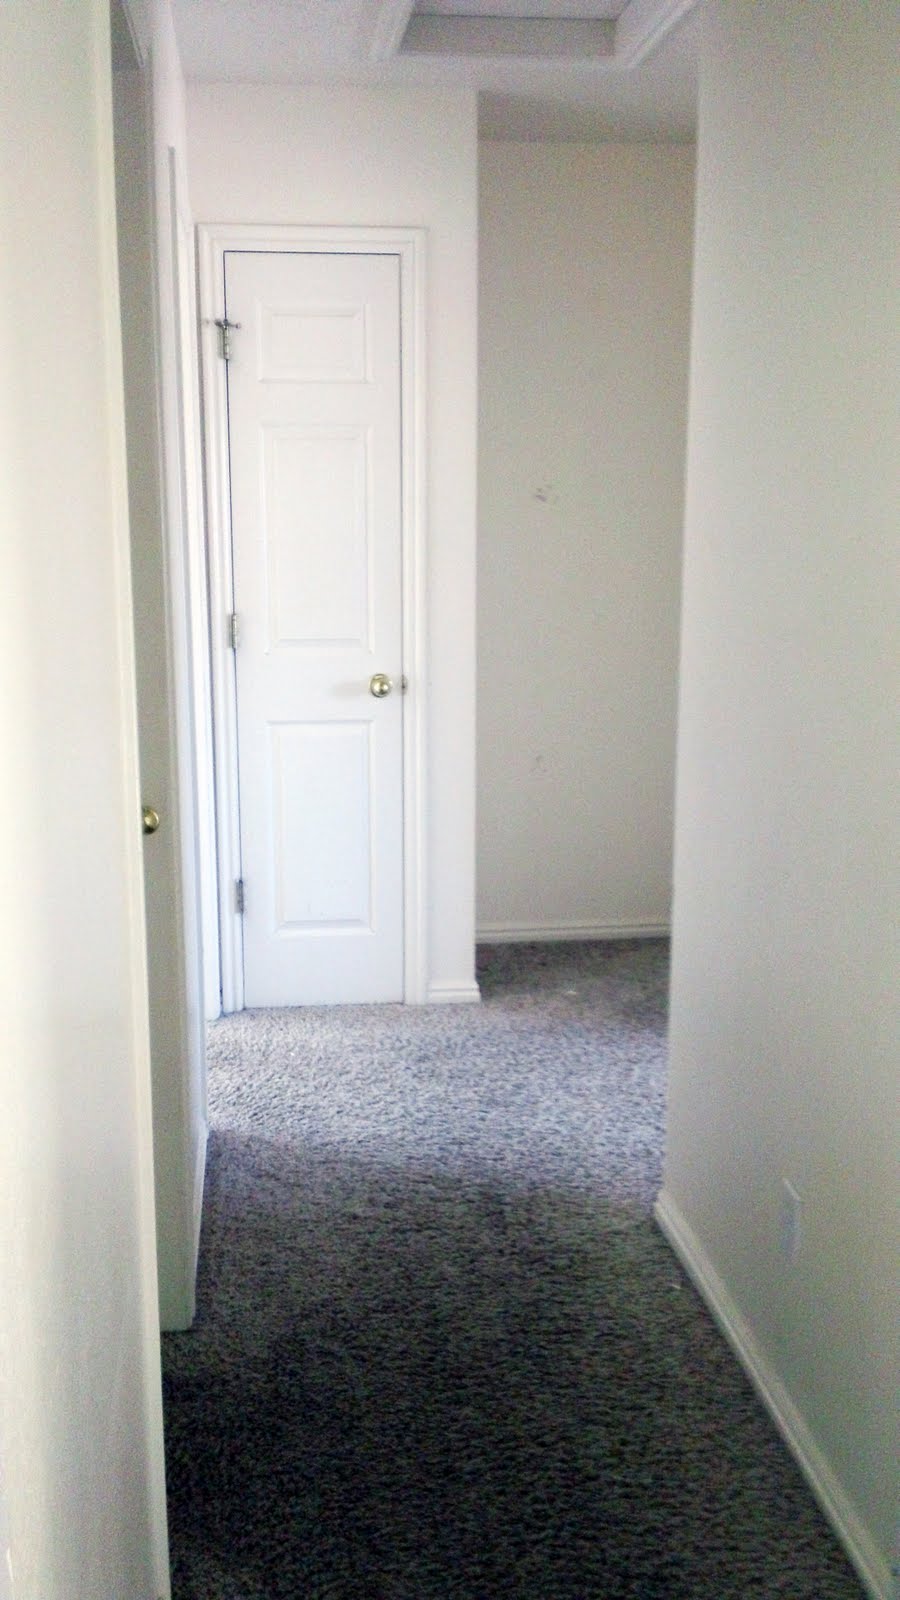
the house tour) that all of the bedrooms and bathrooms have stenciling around the ceiling and some of the baseboards. It’s tacky and completely early 90s. Now imagine the horror when I told Chris that I wanted to stencil our bedroom. He didn’t go for it. But after seeing the stencil, I didn’t feel like it was a good fit for our room either. So, we agreed on the hallway. Last week, I showed you my prep work–painting the upstairs hallway the same warm gray (Ben Moore’s Cape Hatteras Sand) as the rest of our main floor.

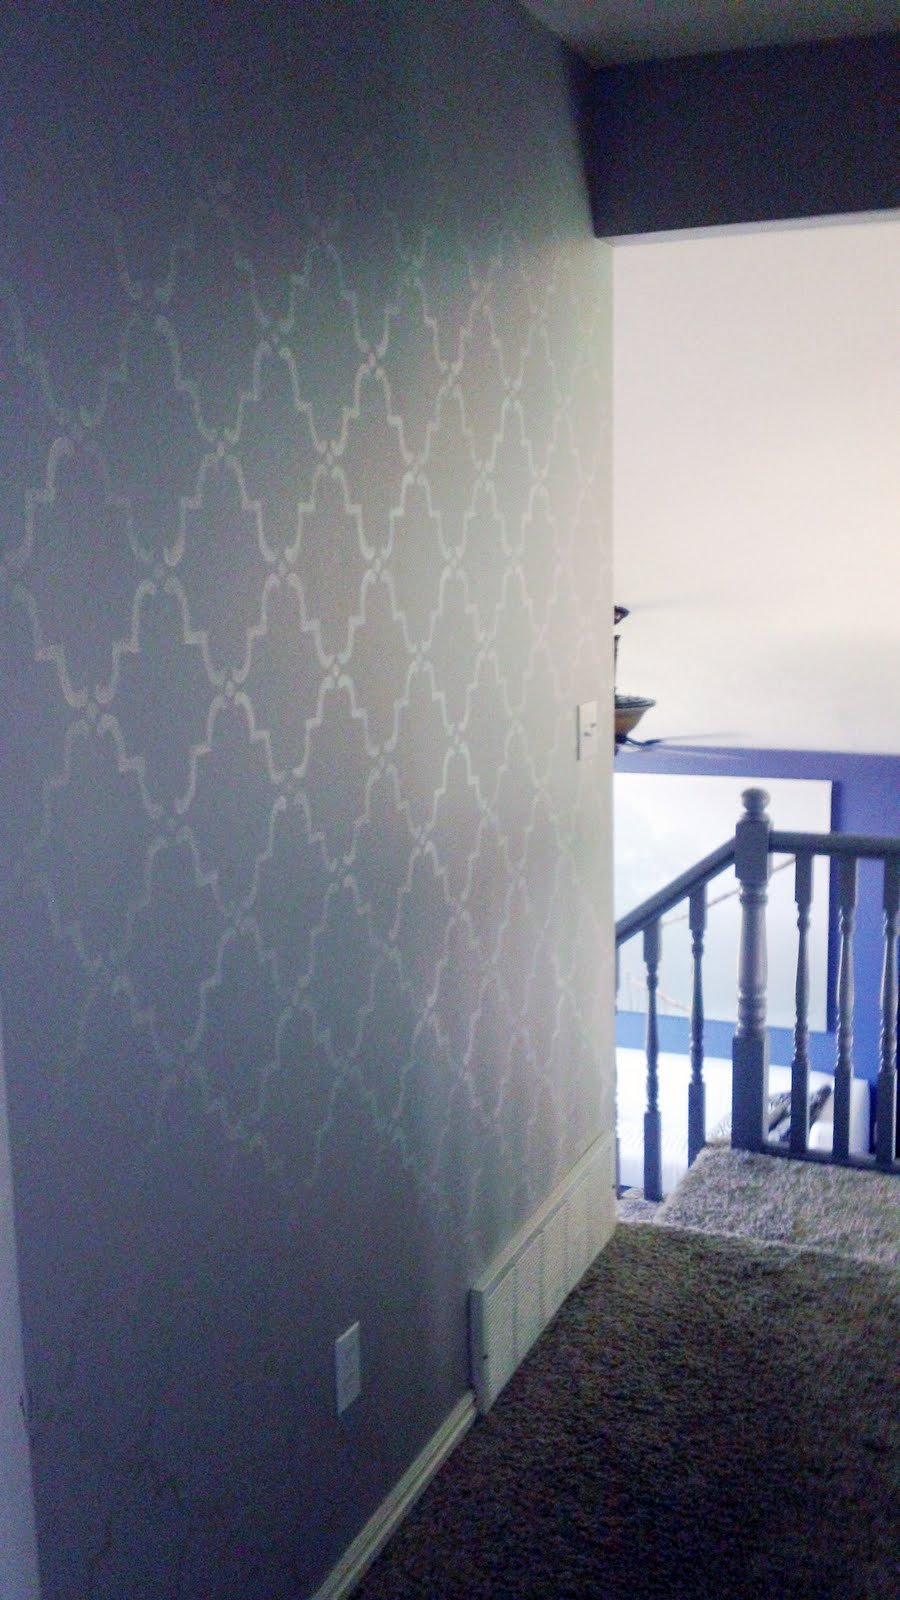
It’s faint, huh? Our hallway is pretty narrow and I didn’t want anything to be too busy, so I used a shimmery acrylic paint that’s translucent to create interest and a lost-and-found effect. Meaning, at some angles the stencil disappears completely, but when the light is hitting the wall just right, it almost looks like wallpaper. Really low maintenance wallpaper that you can change whenever you want.
Within the first hour, I realized that I probably picked the hardest thing to stencil–A hallway with lots of doors and small spaces. I understood why people stencil one flat wall in their bedroom, or even a rug or a curtain panel. Not me. *Sigh* I settled in for the long haul–about 3 days total–to get it done. And you know what? We love it. Yes, apprehensive, anti-stencil Chris likes it, too. So all of the time really paid off. To be clear, it wasn’t hard–just time consuming. So, I guess my biggest tip if you plan on tackling a stenciling project of your own would be to take. your. time.

You want your corners to line up. You don’t want messy lines. You want to be proud of your work, don’t you? So, take your time. A couple nice things about the stencils from Royal Design Studio are they are made from mylar so they hold up and are wipeable and reusable. Also, they come with little triangles in each corner to make it easy to line-up your stencil perfectly each time…which I always kinda wondered how that worked. Now we ALL know.

Each time you place your stencil on the wall, you line it up with the triangles from the previous placement and trace the two new ones. It made things easy and less confusing….even if it sounds confusing, it totally wasn’t. I still used a small level every other or every third placement to make sure I was keeping things straight. With a 50 cent foam brush, FolkArt metallic acrylic paint in Champagne (the same paint I used for my painting in the dining room), Scotch Blue painter’s tape (I like the delicate surface one) and my handy level, I was in business.
Because the paint made only a slight shimmer on the wall when the light was shining on it, there were times I had trouble seeing where I had already painted, but the faint effect is what I was going for and I wouldn’t change a thing. Here’s the view from Greta’s room.
And one last angle that really demonstrates the magical lost and found effect:
And that sums up how our hallway went from plain before to slightly-exciting-unexpected-surprise-in-the-hall after:
Psst. Although Royal Design Studio provided me with the stencil, they did not pay me to write a positive review. This is all me. Promise.


I am now not positive where you are getting your information, however great topic.
I must spend a while learning more or figuring out
more. Thanks for excellent information I used to be looking for this info for my mission.
My homepage; http://Thefatlossshangout.Blogspot.com/2013/05/fat-loss-factor-guaranteed-success.html
Nonsteroidal anti-inflammatory drugs are the most popular colors used because it attracts and grabs the attention, stimulates appetites and
naturally attracts the human eye. As a result, during the
quarter U.
my web page Student Loans for People with Bad Credit
You won’t be disappointed. I’d love to see pictures if/when you get around to it!
It is very very lovely! I am actually tempted to use the same pattern on my accent wall (in case at some point we will paint it grey). Love it!
So amazing! I just love what a stencil like that can do to transform a space!